
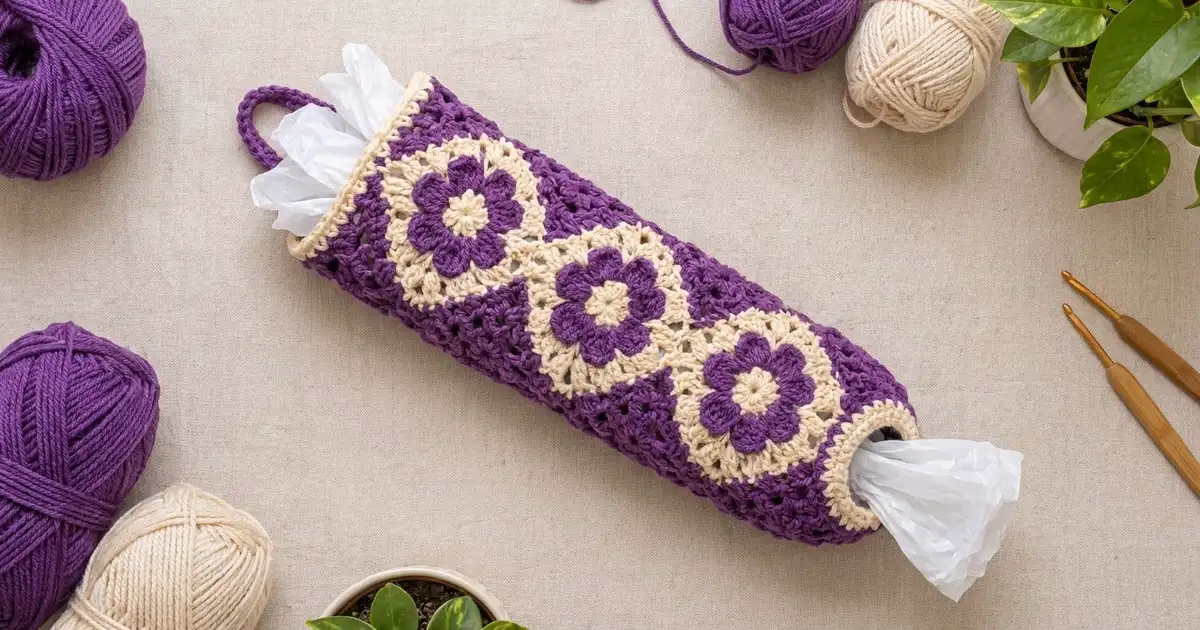
This hanging bag holder is a long purple tube with a stack of cream-framed flowers running down the front. Each flower has a cream center and eight purple petals, and sits inside a cream diamond frame. Solid purple fills the corners around each diamond. The top has a cream rim and a purple hanging strap. The bottom narrows to a small round opening with a cream edge, so you can pull grocery bags out one at a time.
The colors are deep violet and warm cream. It looks like a classic granny-square piece but is tidy enough for a modern kitchen or laundry room. The pattern uses US crochet terms throughout.
The finished holder measures 12 in (30.5 cm) around, which is 6 in (15.2 cm) wide when flat. It is about 20.5 in (52.1 cm) long from top rim to bottom opening, not counting the strap.
Construction is simple. You make six identical 6 in (15.2 cm) squares and join them in a grid 2 squares wide and 3 squares tall. Then you seam the long edge into a tube. Next you work a top band and a shaped bottom band in rounds, and you finish by adding the strap.
Finished Size and Construction
- Finished size: 12 in (30.5 cm) around, about 3.8 in (9.7 cm) across the tube, 20.5 in (52.1 cm) long
- Skill level: Easy-intermediate
- Terminology: US crochet terms
- Yarn weight: Worsted weight (#4)
- Hook: 5.0 mm (H-8)
- Number of pieces: 6 squares, joined into 1 tube
- Layout: 2 squares around × 3 squares tall
- Piece size: 6 in × 6 in (15.2 cm × 15.2 cm), blocked
- Size before borders: 12 in × 18 in (30.5 cm × 45.7 cm) flat panel, then a 12 in (30.5 cm) tube
- Border depth: top band about 1 in (2.5 cm); bottom band about 1.5 in (3.8 cm), shaped inward
Materials
Pick a smooth worsted-weight cotton or cotton blend. Cotton holds its shape when the holder is stuffed with bags and does not stretch much. Acrylic also works, but it will sag a little more over time.
- Color A, Cream: 50 g, about 85 m
- Color B, Purple: 100 g, about 170 m
Tools:
- 5.0 mm (H-8) crochet hook
- Tapestry needle
- Scissors
- 4 locking stitch markers
- Tape measure
- Blocking mats and rust-proof pins
These amounts include about 20% extra to allow for gauge differences and swatching.
Abbreviations (US Terms)
- ch – chain
- sl st – slip stitch
- sc – single crochet
- hdc – half double crochet
- dc – double crochet
- tr – treble crochet
- sc2tog – single crochet 2 together
- st(s) – stitch(es)
- sp – space
- RS / WS – right side / wrong side
Special stitch – sc2tog: Insert hook in next st, yarn over, pull up a loop. Insert hook in following st, yarn over, pull up a loop. Yarn over and pull through all 3 loops on hook. This decreases by one stitch.
Throughout the pattern, a beginning ch 3 counts as a dc and a beginning ch 4 counts as a tr.
Gauge and Checkpoints
Gauge: 14 dc and 8 rows = 4 in (10.2 cm) in dc. In sc, about 3.8 sts per inch (2.5 cm).
Make one complete square before you make the rest, and measure it at each stage:
- After Round 1: the center is about 1.25 in (3.2 cm) across
- After Round 2: the flower is about 3 in (7.6 cm) across
- After Round 4: the cream square is about 3.5 in (8.9 cm) per side
- After Round 6: the square is about 5 in (12.7 cm) per side
- After Round 7: the square is 6 in (15.2 cm) per side after a light block
If your square is bigger than 6 in (15.2 cm), go down half a hook size. If it is smaller, go up half a hook size. Being off by 0.5 in (1.3 cm) per square adds up to 1 in (2.5 cm) around the tube and 1.5 in (3.8 cm) in length, so fix it now.
The Flower Diamond Square
Make 6. Work every round with the RS facing, and do not turn.
Round 1 (Color A, Cream)
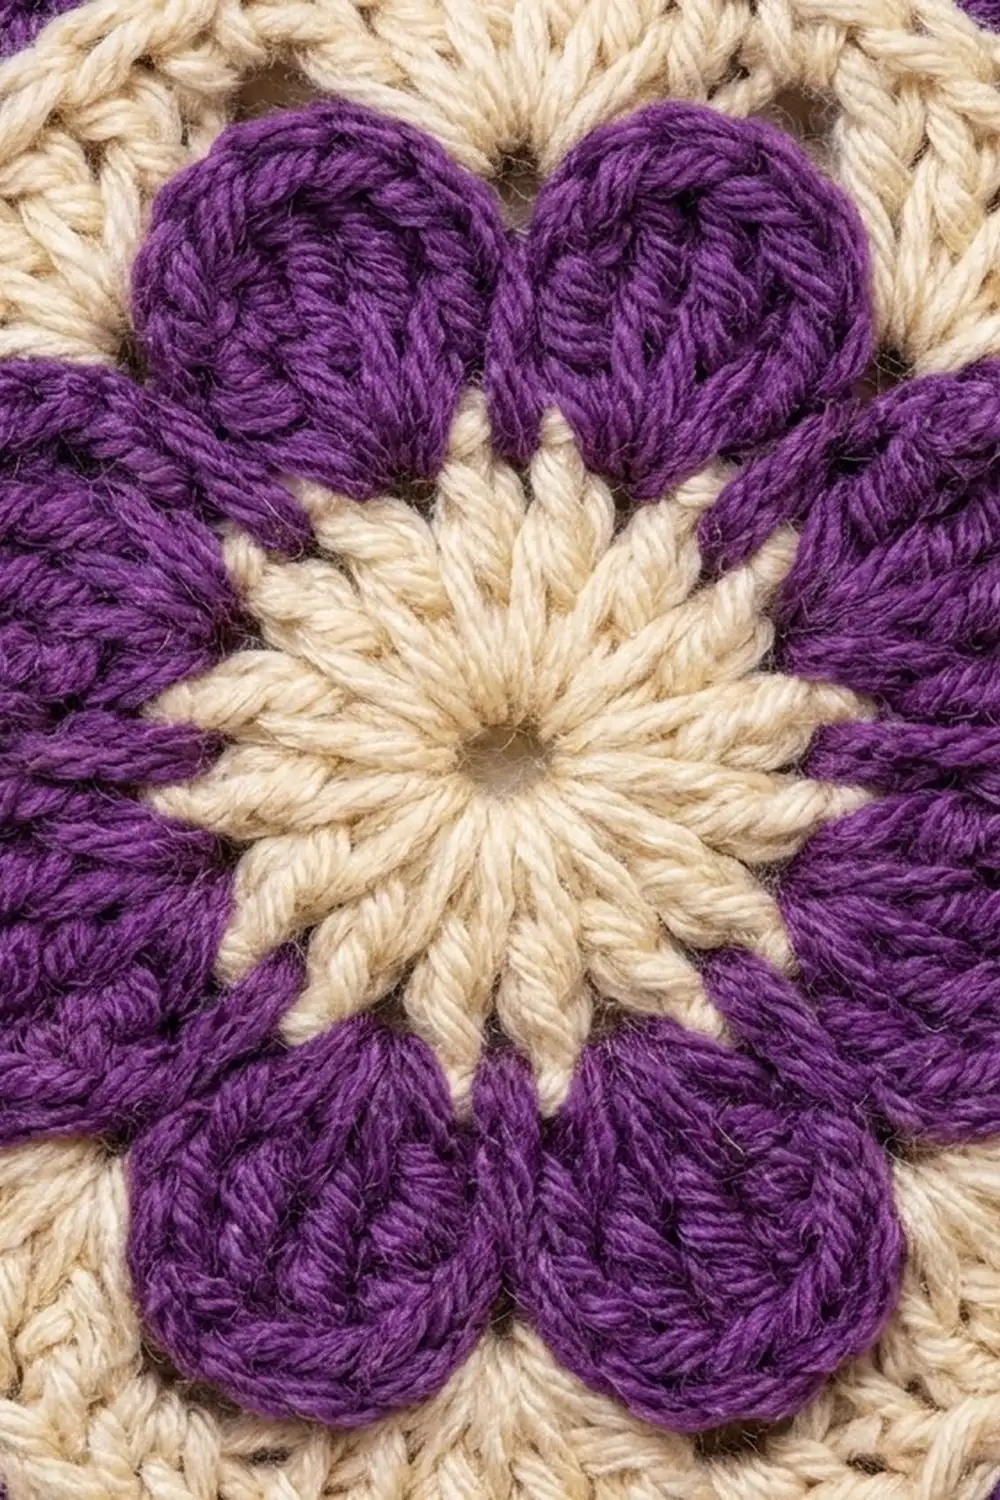
Make a magic ring. Ch 3, then work 15 dc in the ring. Pull the ring closed and sl st in top of beginning ch-3. (16 dc)
Fasten off A.
Round 2 (Color B, Purple) – Petals
Join B with a sl st in any st. Ch 1.
Sc in next st, 5 dc in next st. Repeat from * 7 more times. Sl st in first sc. (8 petals: 8 sc + 40 dc = 48 sts)
Fasten off B. The sc between the petals are the anchor points for the next round.
Round 3 (Color A, Cream) – Frame Base
Join A with a sc in any sc between petals. Ch 4, holding the chain behind the next petal. Sc in next sc between petals, ch 4 behind the next petal. Repeat from * 6 more times. Sl st in first sc. (8 sc, 8 ch-4 sps)
The chains sit behind the petals, so the flower stays raised in front.
Round 4 (Color A, Cream) – Cream Square
Sl st in first ch-4 sp. Ch 3, then work (dc, ch 2, 2 dc) in the same sp for the first corner. Work 5 dc in next ch-4 sp for a side.
(2 dc, ch 2, 2 dc) in next ch-4 sp, 5 dc in next ch-4 sp. Repeat from * 2 more times. Sl st in top of beginning ch-3. (36 dc, 4 ch-2 corner sps)
Each side now has 9 dc between corner spaces: 2 + 5 + 2. The middle stitch of each side is the 3rd dc of the 5-dc group. Place a marker in each of those 4 middle stitches.
Fasten off A. This cream square becomes the diamond frame.
Round 5 (Color B, Purple) – Turning the Square
This round moves the corners. The marked middle stitches become the new corners, and the old cream corners become the middles of the new sides. This is what turns the cream square into a diamond.
Join B with a sl st in any marked st. Ch 4, then work (tr, ch 2, 2 tr) in the same st.
Dc in next st, hdc in next st, sc in next 2 sts, sc in ch-2 corner sp, sc in next 2 sts, hdc in next st, dc in next st, (2 tr, ch 2, 2 tr) in next marked st. Repeat from * 3 more times, ending the last repeat after the final dc. Sl st in top of beginning ch-4. (52 sts, 4 ch-2 sps)
Check: each side has 13 sts between ch-2 spaces: 2 tr, dc, hdc, 2 sc, sc, 2 sc, hdc, dc, 2 tr. 13 × 4 = 52.
Round 6 (Color B, Purple) – Corner Fill
Sl st in next tr and in the ch-2 sp. Ch 4, then work (tr, ch 2, 2 tr) in the same sp.
Tr in next 2 tr, dc in next dc, hdc in next hdc, sc in next 5 sc, hdc in next hdc, dc in next dc, tr in next 2 tr, (2 tr, ch 2, 2 tr) in next ch-2 sp. Repeat from * 3 more times, ending the last repeat after the final 2 tr. Sl st in top of beginning ch-4. (68 sts, 4 ch-2 sps)
Check: each side has 17 sts between ch-2 spaces: 13 sts worked 1-per-existing-stitch + 4 added corner tr (2 at each end). 17 × 4 = 68.
The tall stitches stack up at the corners and the short stitches stay at the diamond points, so the purple fills out the corners.
Round 7 (Color B, Purple) – Squaring Round
Sl st in next tr and in the ch-2 sp. Ch 3, then work (dc, ch 2, 2 dc) in the same sp.
Dc in each of next 17 sts, (2 dc, ch 2, 2 dc) in next ch-2 sp. Repeat from * 2 more times, then dc in each of next 17 sts. Sl st in top of beginning ch-3. (84 dc, 4 ch-2 sps)
Check: each side has 21 dc between ch-2 spaces: 17 dc worked 1-per-existing-stitch + 4 added corner dc (2 at each end). 21 × 4 = 84.
Fasten off and weave in all ends.
Per-side count for joining and borders: 1 corner sp + 21 dc + 1 corner sp = 23 working points per side. In this pattern, “23 per side” always includes the corner space at each end.
Make All Pieces
Make 6 identical squares:
- Color A, Cream: Rounds 1, 3, and 4 of each square
- Color B, Purple: Rounds 2, 5, 6, and 7 of each square
Lightly block all 6 squares to 6 in × 6 in (15.2 cm × 15.2 cm) before joining.
Layout grid (RS facing, flat panel before seaming):
+-------+-------+
|   1   |   2   |   Row 1 (top)
+-------+-------+
|   3   |   4   |   Row 2
+-------+-------+
|   5   |   6   |   Row 3 (bottom)
+-------+-------+
 Column    Column
 1 (front) 2 (back)
Turn every square so the cream diamond points face up, down, left, and right. The diamond points will then meet across each seam, like the stacked diamonds on the finished holder.
Joining
Method: Use a sl st join through the back loops with Color B, worked on the RS. This gives a flat seam with a thin purple ridge.
Stitch-to-stitch logic: Lay two squares edge to edge with the RS facing up. Join B in the matching corner spaces and sl st through both of them. Then sl st through the back loops of each of the 21 pairs of dc, and finish with a sl st through the last pair of corner spaces. That makes 23 sl sts per square edge, one for each working point.
- Columns: Join square 1 to square 3, then square 3 to square 5 in one continuous seam. (69 sl sts: 3 × 23) Repeat for squares 2, 4, and 6.
- Panel: Join column 1 to column 2 along one long edge. (69 sl sts)
- Tube: Fold the panel with the RS out and join the remaining long edges. (69 sl sts)
Tension: Keep the sl sts as loose as your other stitches. If the seam puckers, use a hook one size larger for the joining only.
Checkpoint: The tube should measure 12 in (30.5 cm) around and 18 in (45.7 cm) long. Laid flat, it should be 6 in (15.2 cm) wide.
Borders: Top Band, Bottom Band, and Strap
Border gauge: 23 sc = 6 in (15.2 cm), about 3.8 sc per inch (2.5 cm).
Starting count: Each band starts with 2 squares × 23 working points = 46 sc. Do not add extra stitches at the seams. At a seam, the corner space of each neighboring square gets its own sc, and those 2 sc are already counted in the 23 per square.
Join every round with a sl st in the first st.
Top Band
Round 1 (B): Join B at a seam on the top edge. Ch 1, sc in each dc and 1 sc in each corner sp. (46 sc: 23 + 23)
Round 2 (B): Ch 2 (does not count), hdc in each st. (46 hdc) Fasten off B.
Rounds 3–4 (A): Join A. Ch 1, sc in each st. (46 sc each round) Fasten off A.
The top band is about 1 in (2.5 cm) deep.
Why the math works: 46 sc ÷ 3.8 sc per inch is about 12.1 in, which matches the 12 in (30.5 cm) tube. The band stays straight without ruffling or pulling in.
Bottom Band
Work along the bottom edges of squares 5 and 6.
Round 1 (B): Join B at a seam. Ch 1, sc in each dc and 1 sc in each corner sp. (46 sc: 23 + 23)
Round 2 (B): Ch 1, sc in next 21 sts, sc2tog. Repeat from * once more. (44 sc)
Round 3 (B): Ch 1, sc in next 9 sts, sc2tog. Repeat from * 3 more times. (40 sc)
Round 4 (B): Ch 1, sc in next 3 sts, sc2tog. Repeat from * 7 more times. (32 sc)
Round 5 (B): Ch 1, sc in next 2 sts, sc2tog. Repeat from * 7 more times. (24 sc) Fasten off B.
Rounds 6–7 (A): Join A. Ch 1, sc in each st. (24 sc each round) Fasten off A.
The opening is about 6.3 in (16.0 cm) around, or about 2 in (5.1 cm) across. It holds the bags in but still lets you pull one out easily.
Why the math works: Each decrease round divides evenly: 46 = 2 × 23, 44 = 4 × 11, 40 = 8 × 5, and 32 = 8 × 4.
Hanging Strap
On the last top-band round, count the stitch above the column 1 seam as st 1. Join B in st 1. Ch 30, then sl st in st 24, which is directly opposite. Turn. Sc in each ch across, then sl st in st 1. (30 sc)
Turn and work a second row of 30 sc for strength, then sl st in st 24. Fasten off. The strap is about 8 in (20.3 cm) long.
Final Blocking
- Weave in any remaining ends along a seam of the same color.
- Soak the holder in cool water for 10 minutes, then roll it in a towel and press out the water. Do not wring.
- Roll a dry towel into a tube about 3.8 in (9.7 cm) across and slide it inside.
- Lay the holder flat with a diamond column facing up. Pat it to 6 in (15.2 cm) wide, with the body 18 in (45.7 cm) long between the bands.
- Pin the diamond points in a straight line down the center.
- Shape the bottom band into a neat circle and let the strap lie flat.
- Let it dry completely, then turn it over and check the back column.
Final Quality-Control Checklist
- All 6 squares measure 6 in (15.2 cm) per side
- Round 7 of each square has 84 dc and 4 ch-2 corner sps
- Diamond points meet across every horizontal seam
- All three long seams have 69 sl sts and lie flat
- Top band has 46 sts in every round
- Bottom band ends with 24 sc
- Tube measures 12 in (30.5 cm) around and about 20.5 in (52.1 cm) long
- Strap is centered and firmly attached on both sides
- No loose ends show on the RS
Troubleshooting
Petals cup forward. Round 2 is too tight. Loosen the 5-dc groups or go up half a hook size for that round.
Cream square has rounded corners. Keep each (2 dc, ch 2, 2 dc) group in one ch-4 sp, and pin the corners sharply when blocking.
Finished square curls at the corners. The tr in Rounds 5 and 6 are too short. Pull each one up to full height.
Diamonds look crooked. A square was rotated before joining. Check that every marked Round 4 stitch sits at a corner of the square.
Top band ruffles. Stitches were added at the seams. Recount to 46.
Bottom opening is too loose. Work Rounds 6–7 of the bottom band with a hook half a size smaller.
Care
Hand wash in cool water and lay flat to dry, reshaping the tube over a rolled towel. Avoid the dryer, which can shrink cotton and distort the squares.
Final Notes
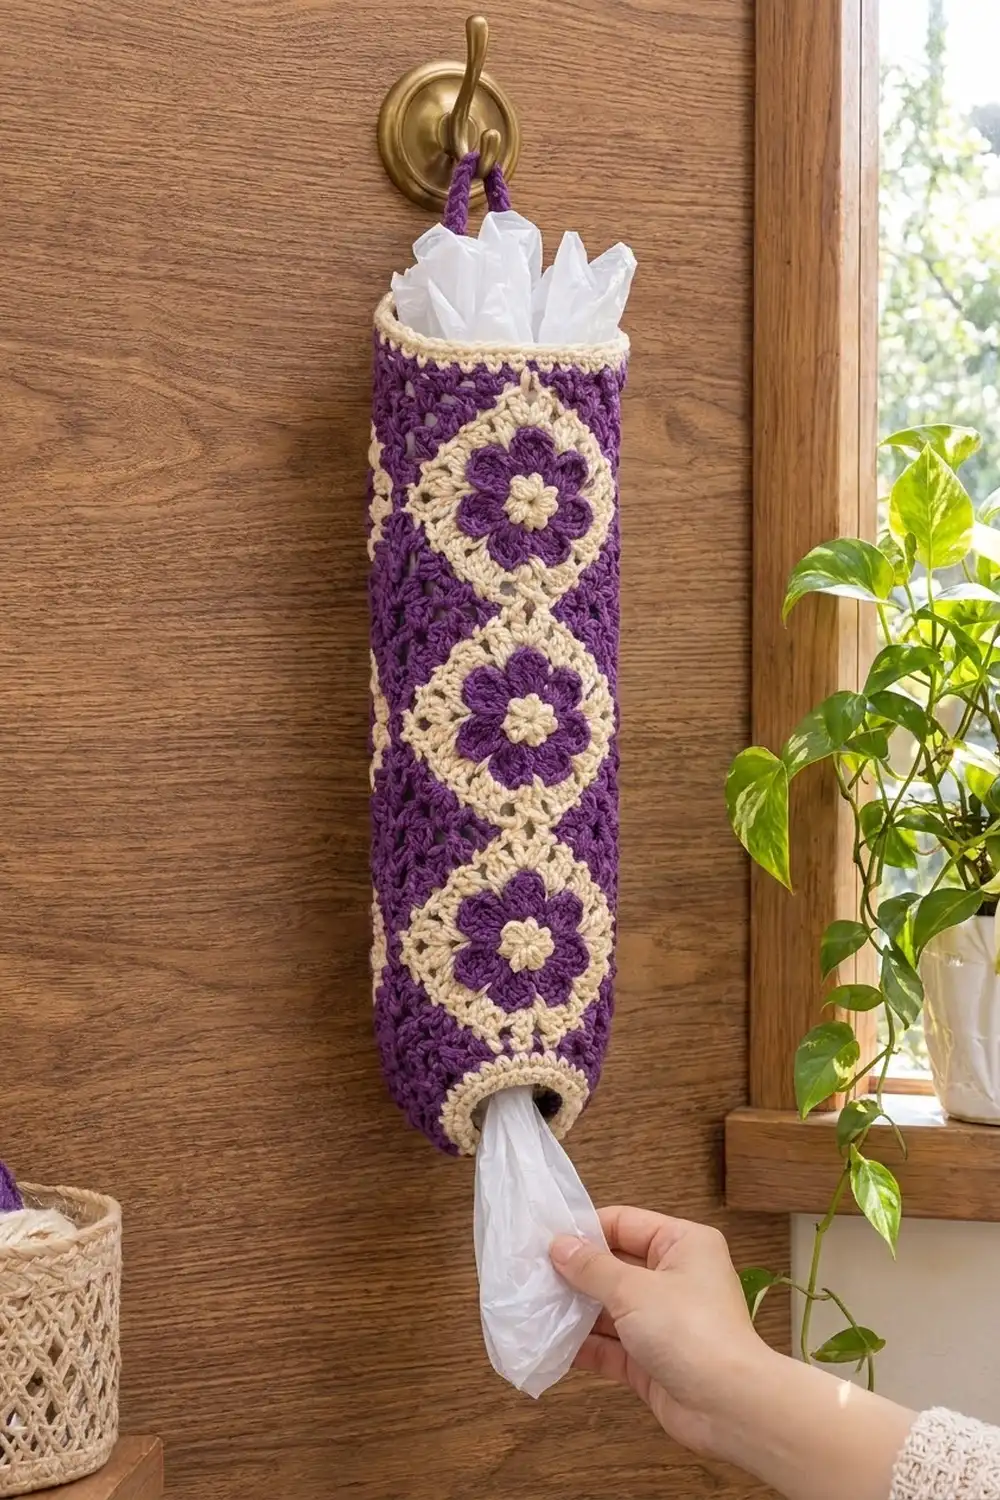
Every measurement in this holder comes from the 6 in (15.2 cm) square with 21 dc per side, or 23 working points including corners. Two squares around give 46 sts and 12 in (30.5 cm). Three squares tall give 18 in (45.7 cm). The top and bottom bands bring the length to about 20.5 in (52.1 cm). The bottom decreases take 46 sts down to 24 for a 2 in (5.1 cm) opening. Get the first square right and the rest will follow.
Happy crocheting!