

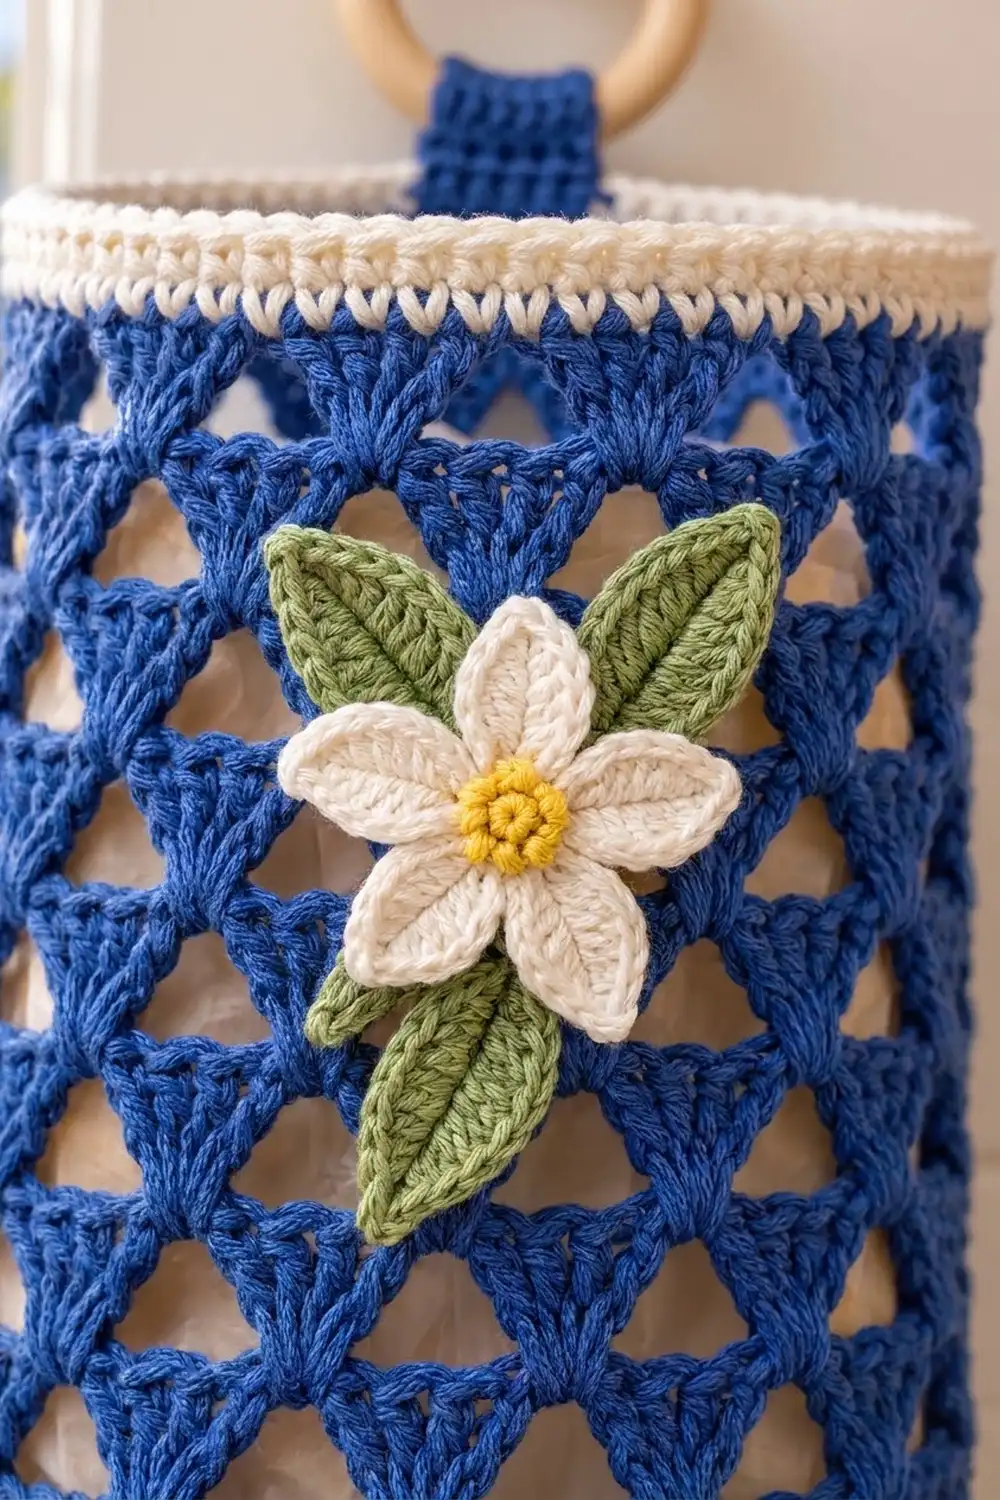
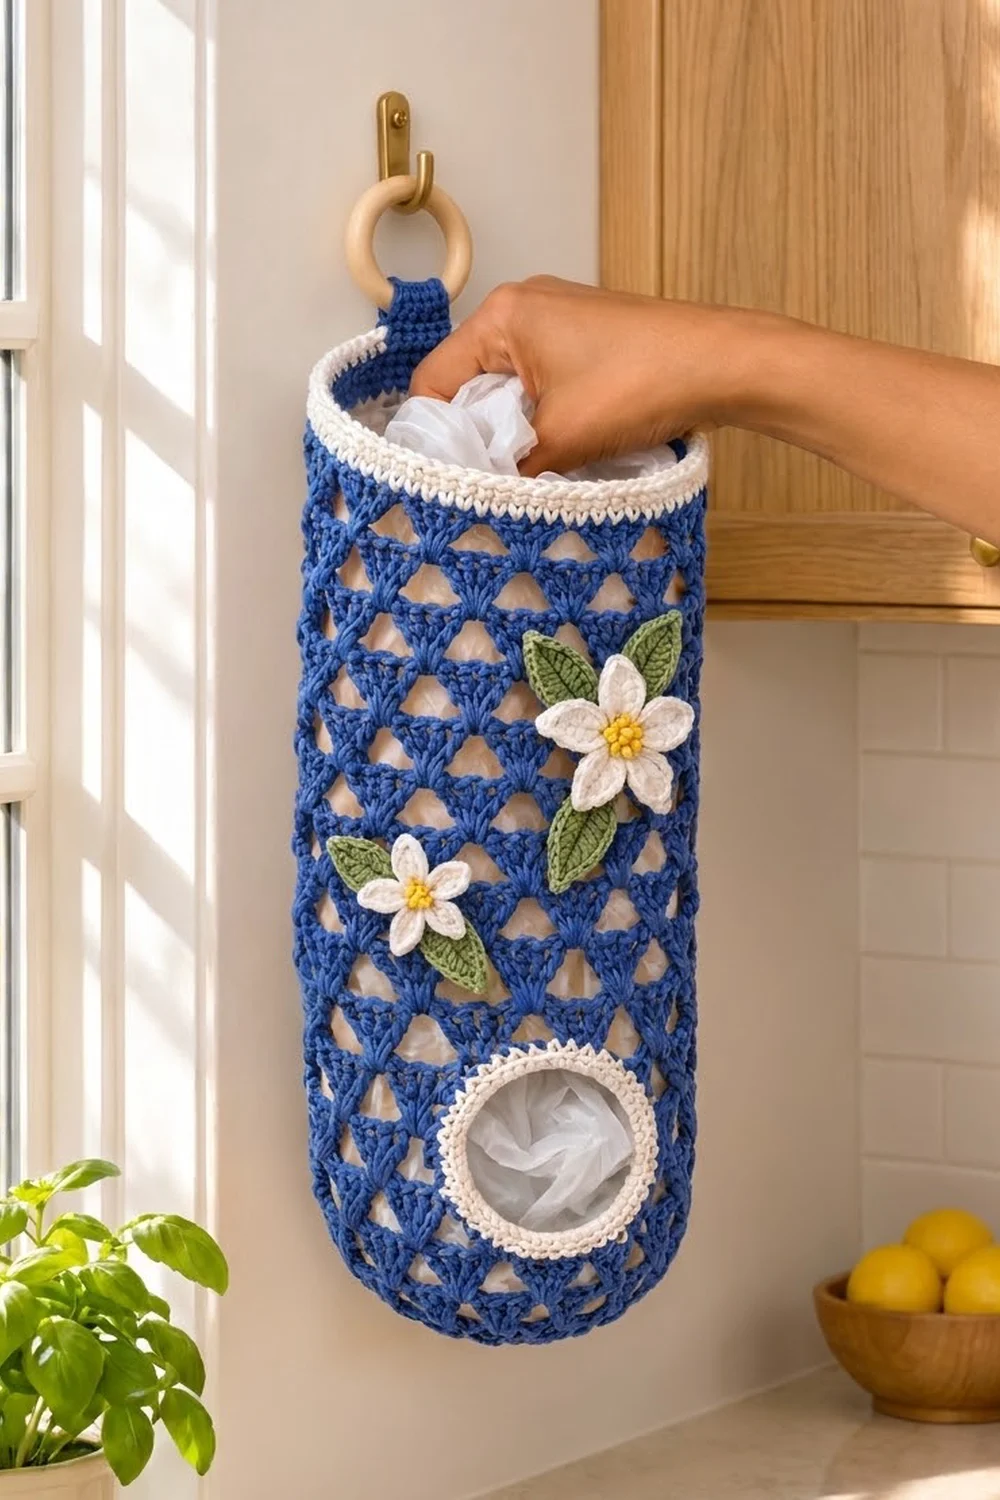
This bag holder turns a pile of grocery bags into something you won’t mind seeing on the kitchen wall. It’s a long royal blue tube in an open fan lattice, so the triangular holes show the bags inside. A crisp cream rim finishes the top. Near the bottom there’s a round cream-edged opening, so you can pull out one bag at a time.
Two cream flowers with yellow centers and sage-green leaves add a cottage-kitchen touch. The palette is fresh and simple: royal blue, cream, yellow, and green. A wooden ring at the top hangs on any hook.
This pattern uses US crochet terms. The finished holder is 16 in (40.6 cm) tall and 15 in (38.1 cm) around, which is about 4.75 in (12.1 cm) across when filled.
You work the body bottom-up in joined rounds, starting with a rounded base. Four short rows leave a gap for the dispensing opening, and a chain bridge closes the tube again above it. You then add the rim, edge the opening, make the tab and appliqués, and sew everything on.
Finished Size and Construction
- Finished size: 16 in (40.6 cm) tall × 15 in (38.1 cm) circumference
- Diameter when filled: about 4.75 in (12.1 cm)
- Skill level: Easy-intermediate
- Terminology: US
- Yarn weight: Worsted (#4) cotton
- Hooks: 5.0 mm (H-8) for the body and tab; 4.0 mm (G-6) for the appliqués
- Number of pieces: 1 tubular body, plus 1 tab, 2 flowers, and 4 leaves sewn on
- Layout: Single vertical tube, opening at the lower front, flowers on the upper front
- Body size before rim: 15 in (38.1 cm) tall
- Rim depth: 1 in (2.5 cm)
- Opening: about 2.5 in (6.4 cm) clear diameter after edging
Materials
Use a smooth worsted-weight cotton. Cotton holds its shape, doesn’t stretch out under the weight of the bags, and washes well. Avoid fuzzy or very stretchy acrylics, because they blur the lattice.
The weights below assume cotton at about 109 m per 70.9 g (1.54 m per gram):
- Royal blue (A): 150 g, about 231 m
- Cream (B): 30 g, about 46 m
- Yellow (C): 5 g, about 8 m
- Sage green (D): 10 g, about 15 m
Tools:
– 5.0 mm (H-8) and 4.0 mm (G-6) crochet hooks
– Wooden ring, 2 in (5.1 cm) across
– Tapestry needle
– 2 locking stitch markers
– Scissors and a tape measure
– A spray bottle and a 4.75 in (12.1 cm) cylinder for blocking (a rolled towel works)
All quantities include a margin of about 15% for swatching and seaming.
Abbreviations (US Terms)
- ch: chain
- sl st: slip stitch
- sc: single crochet
- hdc: half double crochet
- dc: double crochet
- tr: treble crochet
- sc2tog: single crochet 2 together
- rev sc: reverse single crochet (crab stitch)
- MR: magic ring
- sp: space
- st(s): stitch(es)
- RS / WS: right side / wrong side
Special stitches
- Fan: 5 dc in the same space.
- Rev sc: Working from left to right (if you’re right-handed), insert the hook in the next stitch to the right, yarn over, pull up a loop, yarn over, and draw through both loops.
Gauge and Checkpoints
With the 5.0 mm hook in the lattice pattern:
- Width: 1 fan repeat = 1.5 in (3.8 cm) wide.
- Height: 2 rounds (1 fan round + 1 mesh round) = 1.25 in (3.2 cm) tall.
- Single crochet: 4 sc and 4 rounds = 1 in (2.5 cm).
Test first: Work Rounds 1–6 of the base, then check your size.
- After Round 1: about 1.5 in (3.8 cm) across.
- After Round 3: about 3 in (7.6 cm) across.
- After Round 5: about 4.5 in (11.4 cm) across, laid flat.
- After Round 6: the circumference should be close to 15 in (38.1 cm), and the edges should start to cup upward.
If it’s too big: go down 0.5 mm. If it’s too small: go up 0.5 mm. Don’t change the stitch counts. All of the math below depends on 10 repeats.
Base (Color A, 5.0 mm Hook)
Round 1: MR, ch 3 (counts as dc), 19 dc in ring, sl st to top of ch-3. (20 dc)
Round 2: Ch 1, sc in the same st, ch 3, skip next st, sc in next st, ch 3, skip next st; repeat from * 8 more times, sl st to first sc. (10 sc, 10 ch-3 loops)
Round 3: Sl st into first loop, ch 3 (counts as dc), 2 dc in the same loop, 3 dc in each remaining loop, sl st to top of ch-3. (30 dc, 10 three-dc fans)
Round 4: Ch 1, sc in center dc of first fan, ch 4, sc in center dc of next fan, ch 4; repeat around, sl st to first sc. (10 sc, 10 ch-4 loops)
Round 5: Sl st into first loop, ch 3 (counts as dc), 4 dc in the same loop, Fan in each remaining loop, sl st to top of ch-3. (50 dc, 10 Fans)
Round 6 (mesh): Ch 1, sc in center (3rd) dc of first Fan, ch 5, sc in center dc of next Fan, ch 5; repeat around, sl st to first sc. (10 sc, 10 ch-5 loops)
Number the loops 1–10, starting from the join. Place a marker in loop 9 and another in loop 10. These two loops form the bottom edge of the opening, so turn the work so they face front.
Dispensing Opening (Rows 7–10)
Rows 7–10 are worked back and forth. Loops 9 and 10 are never worked into, which leaves the gap for the opening.
Row 7 (RS): Sl st into loop 1, ch 3 (counts as dc), 4 dc in loop 1, Fan in loops 2–8. Turn. (40 dc, 8 Fans)
Row 8 (WS): Ch 1, sc in first dc, ch 2, sc in center dc of first Fan, ch 5, sc in center dc of next Fan; repeat 6 more times, ch 2, sc in top of turning ch. Turn. (10 sc, 7 ch-5 loops, 2 ch-2 edge spaces)
Row 9 (RS): Ch 3 (counts as dc), 2 dc in ch-2 sp, Fan in each of the next 7 ch-5 loops, 2 dc in last ch-2 sp, dc in last sc. Turn. (41 dc: 3 + 35 + 3)
Row 10 (WS): Ch 1, sc in first dc, ch 5, sc in center dc of next full Fan; repeat 6 more times, ch 5, sc in top of turning ch. (9 sc, 8 ch-5 loops)
Bridge: Don’t turn. Ch 11, then sl st to the first sc of Row 10 on the other side of the gap. The tube is closed again.
Round 11 (fan): Sl st into the next loop, ch 3 (counts as dc), 4 dc in the same loop, then work a Fan in each of the remaining 7 loops. Over the bridge: skip 2 ch, Fan in next ch, skip 5 ch, Fan in next ch, skip last 2 ch (2 + 1 + 5 + 1 + 2 = 11 ch). Sl st to top of ch-3. (50 dc, 10 Fans)
Checkpoint: The tube is about 6.25 in (15.9 cm) tall from the bottom tip. The gap measures about 3 in (7.6 cm) wide by 2.5 in (6.4 cm) tall.
Body (Rounds 12–25)
Mesh rounds (Rounds 12, 14, 16, 18, 20, 22, 24): Ch 1, sc in center dc of first Fan, ch 5, sc in center dc of next Fan, ch 5; repeat around, sl st to first sc. (10 sc, 10 ch-5 loops)
Fan rounds (Rounds 13, 15, 17, 19, 21, 23, 25): Sl st into first loop, ch 3 (counts as dc), 4 dc in the same loop, Fan in each remaining loop, sl st to top of ch-3. (50 dc, 10 Fans)
Each mesh round centers its loops over the Fans below, so every new Fan sits between two old ones. This offset is what creates the triangular holes.
Checkpoint: After Round 25, the tube is 15 in (38.1 cm) tall. Rounds 6–25 add 20 rounds × 0.625 in = 12.5 in (31.8 cm) on top of the 2.5 in (6.4 cm) base.
Border: Top Rim and Opening Edge
Border gauge: 4 sc = 1 in (2.5 cm), and 4 sc rounds = 1 in (2.5 cm).
Top Rim
Round 26 (Color A, conversion): Ch 1, sc in each dc (50), plus 1 sc in the gap between each pair of Fans (10). Sl st to first sc. (50 + 10 = 60 sc)
Why this works: 60 sc ÷ 4 sc per inch = 15 in (38.1 cm), which matches the lattice circumference exactly. The rim lies flat without ruffling or pulling in.
Round 27: Change to Color B. Ch 1, sc in each st around, sl st to join. (60 sc)
Round 28: Repeat Round 27. (60 sc)
Round 29: Ch 1, rev sc in each st around, sl st to join. (60 rev sc) Fasten off.
The rim adds 4 rounds × 0.25 in = 1 in (2.5 cm), so the total height is 16 in (40.6 cm).
Opening Edge (Color B)
Join Color B at the bottom of the opening.
Round 1: Work sc evenly all the way around the opening:
– Bottom: 6 sc in loop 9, 1 sc in the sc between, 6 sc in loop 10 (13 sc)
– First side: 3 sc in each dc row end and 1 sc in each sc row end (3 + 1 + 3 + 1 = 8 sc)
– Top: 1 sc in each free loop of the 11-ch bridge (11 sc)
– Second side: same as first side (8 sc)
Sl st to join. (13 + 8 + 11 + 8 = 40 sc)
Round 2: Ch 1, sc in next 8 sts, sc2tog; repeat 3 more times, sl st to join. (4 × 9 = 36 sc) Fasten off.
Why this works: The four decreases sit at the corners of the rectangular gap and pull it into a circle. The clear opening ends up about 2.5 in (6.4 cm) across, which is snug enough to hold the bags but easy to pull from.
Hanging Tab (Color A, 5.0 mm Hook)
Ch 6.
Row 1: Sc in 2nd ch from hook and in each ch across. Turn. (5 sc)
Rows 2–16: Ch 1, sc in each st across. Turn. (5 sc)
The tab measures 1.25 in (3.2 cm) wide by 4 in (10.2 cm) long. Leave a long tail.
Flower Appliqués (4.0 mm Hook)
Large Flower (makes 1, about 2.25 in / 5.7 cm across)
Round 1 (Color C): MR, ch 1, 10 sc in ring, sl st to join. (10 sc) Fasten off.
Round 2 (Color B): Join Color B in any st. Sl st in next st, then in the next st work (hdc, dc, tr, ch 2, sl st in top of tr, dc, hdc); repeat 4 more times. Sl st to the first sl st. (5 pointed petals)
Small Flower (makes 1, about 1.75 in / 4.4 cm across)
Work Round 1 as for the large flower.
Round 2 (Color B): Sl st in next st, then in the next st work (sc, hdc, dc, ch 2, sl st in top of dc, hdc, sc); repeat 4 more times. Sl st to join. (5 petals)
For a textured center like the one shown, add 3–4 yellow French knots to each flower center.
Leaves (Color D)
Large leaf (make 2): Ch 10. Starting in the 2nd ch from hook, work sc, hdc, 4 dc, hdc, sc, sl st (9 sts on 9 ch). Ch 1, then work the same sequence in reverse along the other side of the chain. Sl st at the tip.
Small leaf (make 2): Ch 8. Starting in the 2nd ch from hook, work sc, hdc, 2 dc, hdc, sc, sl st (7 sts on 7 ch). Ch 1, work the same sequence in reverse along the other side, then sl st at the tip.
If you like, add a vein by surface slip-stitching down the center of each leaf in a lighter green.
Assembly
- Tab: At the back center (opposite the opening), sew one short end of the tab to the inside of the rim, 0.75 in (1.9 cm) below the top edge. Thread the tab through the wooden ring, fold it down, and sew the second end over the first.
- Large flower: Pin it at the right of the front, centered on Round 21. Tuck one large leaf behind it angled up, and the other angled down.
- Small flower: Pin it on the left of the front, centered on Round 15, at least 1.25 in (3.2 cm) above the opening edge. Tuck the small leaves behind it the same way.
- Sewing: Whipstitch through the back loops of the appliqués and into the mesh stitches only. Don’t sew across the open holes.
Final Blocking
- Fill a spray bottle with cool water.
- Slide the 4.75 in (12.1 cm) cylinder, or a firmly rolled towel, inside the tube.
- Lightly mist the whole holder until it’s damp but not soaked.
- Gently stretch the Fans sideways so the triangular holes open up evenly.
- Smooth the rim flat, and press the opening edge into a circle with your fingers.
- Pat the petals and leaves flat and shape the points.
- Let it dry completely on its form. Then measure: it should be 16 in (40.6 cm) tall and 15 in (38.1 cm) around.
Final Quality-Control Checklist
- [ ] Every fan round has 50 dc in 10 Fans.
- [ ] Every mesh round has 10 sc and 10 ch-5 loops.
- [ ] The rim has 60 sts on each of Rounds 26–29.
- [ ] The opening edge has 36 sc on its final round and is about 2.5 in (6.4 cm) across.
- [ ] The tab is sewn securely and the ring hangs centered at the back.
- [ ] The appliqués sit flat and stay clear of the opening.
- [ ] All tails are woven into solid stitches, not into the mesh holes.
Troubleshooting
- The base ruffles: Your dc are too loose. Go down a hook size for Rounds 1–5 only.
- The base cups too early: Your chains are too tight. Loosen the ch-4 and ch-5 loops.
- The tube twists: Make sure each Fan goes into a loop and each sc goes into a Fan center, never into the gap between Fans.
- The opening is too large: On Round 2 of the opening edge, sc2tog one extra time at the top and bottom.
- The rim flares: Skip the 10 extra stitches and work 1 sc per dc for 50 sts total, then check that it still fits over the body.
- Bags fall out of the opening: Add a third edging round: sc 7, sc2tog 4 times (32 sc).
Care
Hand wash in cool water and lay flat, or reshape over the cylinder, to dry. Don’t tumble dry, because cotton can shrink and distort the lattice.
Final Notes
The measurements build on each other in a simple chain:
- The base reaches 4.5 in (11.4 cm) across by Round 5.
- The 10-repeat lattice gives a 15 in (38.1 cm) circumference.
- 20 lattice rounds add 12.5 in (31.8 cm), bringing the body to 15 in (38.1 cm).
- The 60-stitch rim matches the circumference and adds 1 in (2.5 cm), for 16 in (40.6 cm) in total.
- The 40-to-36-stitch edging pulls the gap into a neat 2.5 in (6.4 cm) opening.
Check your gauge at each checkpoint and the finished holder will come out at exactly the right size.
Happy crocheting!