

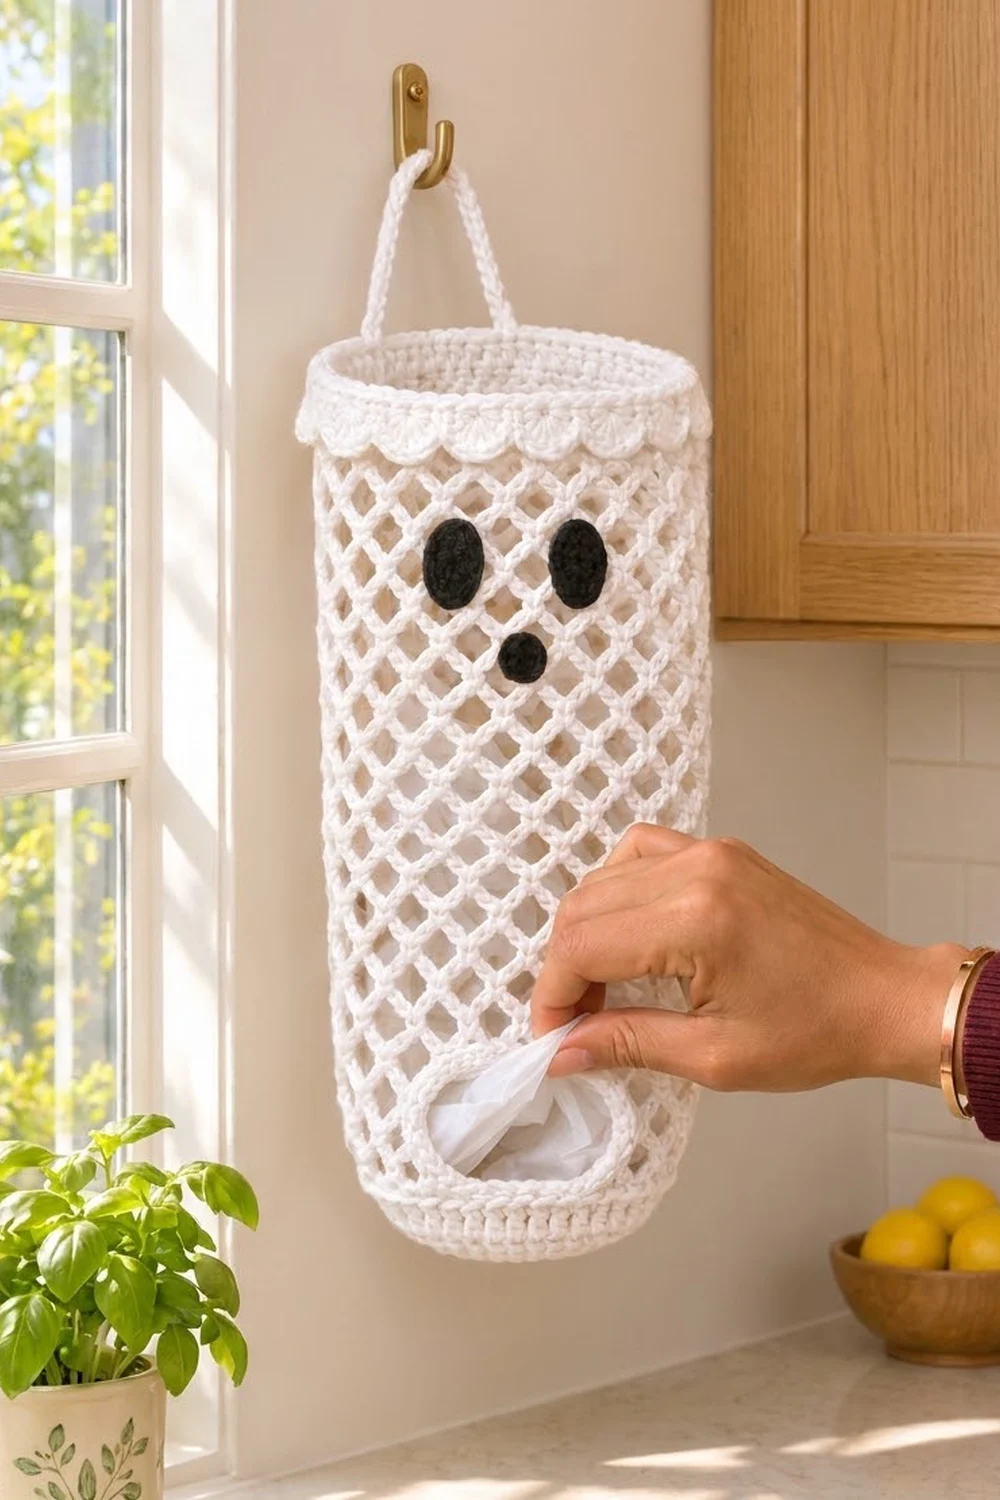
This little ghost keeps your plastic grocery bags in one place and gives your kitchen a friendly face. The body is an open diamond mesh, so you can see at a glance when it’s full. A solid band and a row of soft scallops finish the top, and a rounded base with a round opening lets you pull bags out one at a time from the bottom.
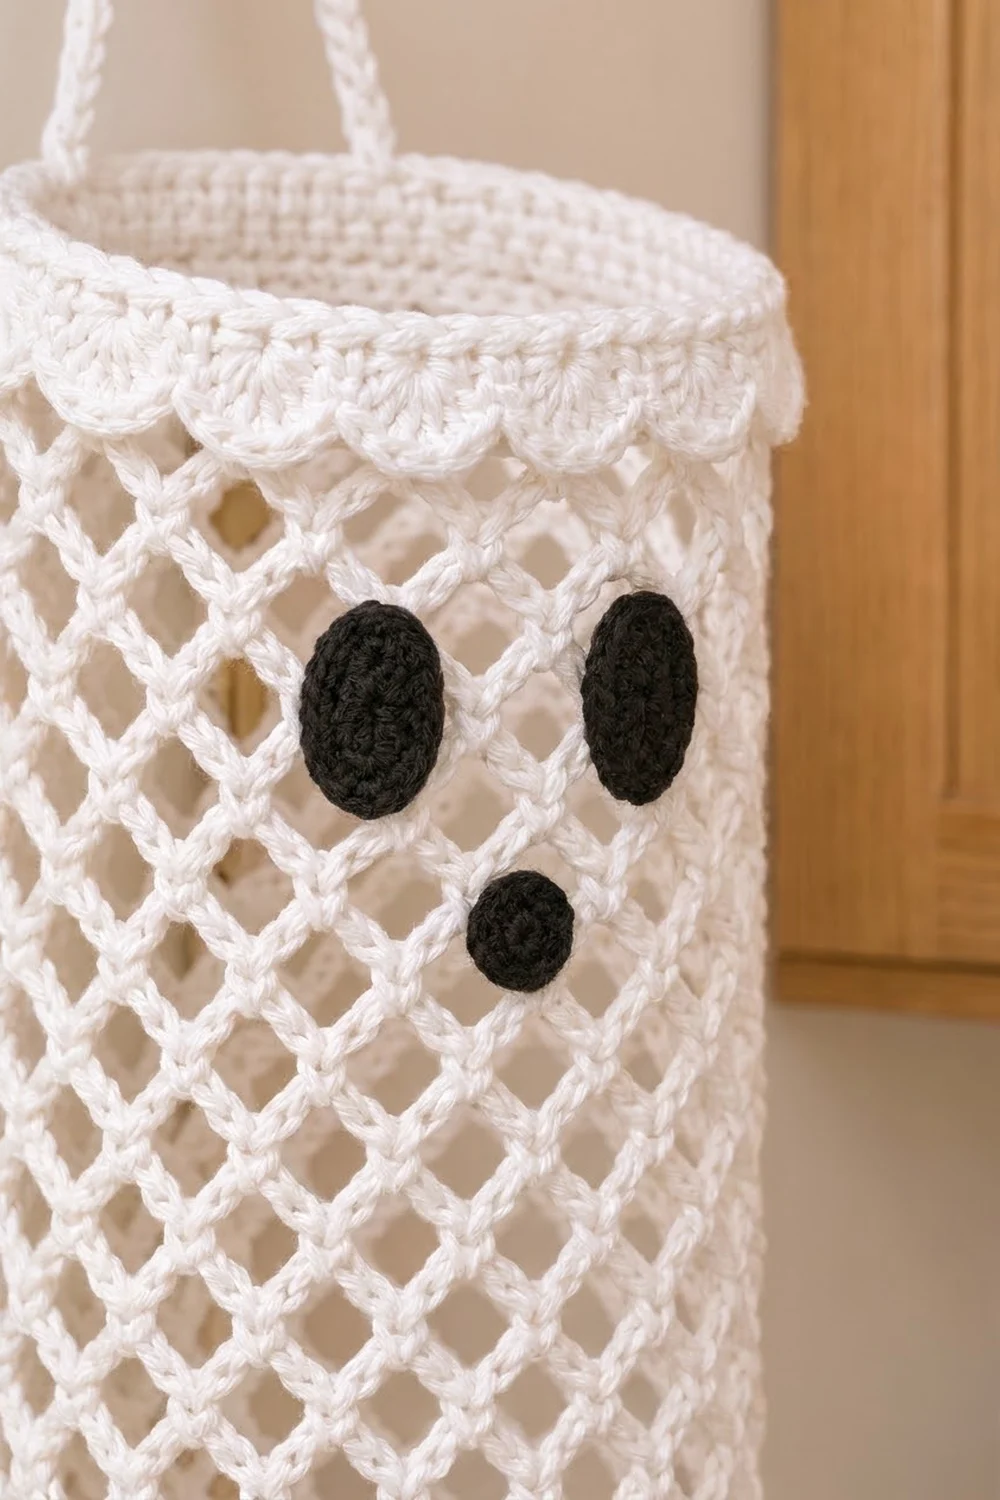
The holder is all white, with three small black appliqués for the face: two upright oval eyes and a round “oh” mouth. It works for Halloween, but the look is gentle enough to leave up all year.
This pattern uses US crochet terms. The finished holder is about 18 in (45.7 cm) long and 16 in (40.6 cm) around, so about 5 in (12.7 cm) across. The strap adds a hanging loop of about 5 in (12.7 cm) above the rim.
You work the holder in one piece from the bottom up. You start at the dispensing opening, increase in rounds to make the base, work a short solid band, switch to the mesh, convert back to solid stitches for the top band, and finish with the scallop edging. You make the strap and the three face pieces separately and sew them on.
Finished Size and Construction
- Finished size: 18 in (45.7 cm) long × 16 in (40.6 cm) around, about 5 in (12.7 cm) across
- Skill level: Easy / advanced beginner
- Terminology: US crochet terms
- Yarn weight: Worsted (#4) cotton
- Hook: US H-8 (5.0 mm)
- Number of pieces: 1 body plus 1 strap and 3 face appliqués
- Layout: One vertical tube with the face on the front and the strap at the center back
- Piece size: 64 stitches around, 16 mesh loops around
- Size before border: 17.5 in (44.5 cm) long
- Border depth: 0.5 in (1.3 cm), one scallop round
Materials
Use a smooth worsted-weight cotton or cotton blend. Cotton holds its shape when the holder is stuffed full of bags, and it doesn’t stretch out over time the way acrylic can. Avoid fuzzy or very splitty yarns, because the mesh looks best when the chains are crisp.
- White (main color): 70 g, about 120 yd (109.7 m)
- Black (face): 5 g, about 10 yd (9.1 m)
Both quantities include a small margin for your gauge swatch and weaving in ends.
Tools:
- US H-8 (5.0 mm) crochet hook
- Locking stitch markers (at least 3)
- Tapestry needle
- Scissors
- Measuring tape
- Rust-proof pins for blocking
Abbreviations (US Terms)
- ch – chain
- sl st – slip stitch
- sc – single crochet
- dc – double crochet
- inc – 2 sc in the same stitch
- sk – skip
- st(s) – stitch(es)
- rnd(s) – round(s)
- ch-5 loop – the space under a chain of 5
- *…* – repeat the steps between asterisks as directed
Special stitch – Scallop: Work 5 dc in the same stitch.
Work all rounds with the right side facing you. Do not turn. Join each round with a sl st to the first sc and start the next round with ch 1, unless the pattern says otherwise. The ch 1 never counts as a stitch.
Gauge and Checkpoints
Solid gauge: 16 sc and 16 rnds = 4 in (10.2 cm) in sc worked in the round.
Mesh gauge: 4 ch-5 loops = 4 in (10.2 cm) across, and 5 mesh rnds = 3 in (7.6 cm) tall, measured lightly stretched.
Treat the base and bottom band (Rnds 1–10) as your test piece. It uses only about 15 minutes of yarn, and it tells you whether the whole holder will come out right. Check these points as you go:
- After Rnd 1: The opening measures about 2 in (5.1 cm) across and stretches to about 2.5 in (6.4 cm).
- After Rnd 6: The base lies roughly flat at about 5 in (12.7 cm) across.
- After Rnd 10: The tube measures 16 in (40.6 cm) around and the bottom band is 1 in (2.5 cm) tall.
- After Rnd 20: The mesh section is about 6 in (15.2 cm) tall.
- After Rnd 35: The mesh section is about 15 in (38.1 cm) tall.
- After Rnd 39: The body is 17 in (43.2 cm) long and still 16 in (40.6 cm) around.
If your tube is more than 0.5 in (1.3 cm) too big around, go down one hook size. If it’s too small, go up one hook size. If only the mesh is too short or too long, add or remove mesh rounds; each one is about 0.6 in (1.5 cm). Don’t change the number of stitches. The scallops and the mesh both depend on a total of 64.
Body
Base
Foundation: With white, ch 24. Join with a sl st to the first ch to form a ring. Don’t twist the chain.
Rnd 1: Ch 1, sc in each ch around; join. (24 sts)
Rnd 2: Ch 1, *sc in next 2 sts, inc* 8 times; join. (32 sts)
Rnd 3: Ch 1, *sc in next 3 sts, inc* 8 times; join. (40 sts)
Rnd 4: Ch 1, *sc in next 4 sts, inc* 8 times; join. (48 sts)
Rnd 5: Ch 1, *sc in next 5 sts, inc* 8 times; join. (56 sts)
Rnd 6: Ch 1, *sc in next 6 sts, inc* 8 times; join. (64 sts)
The base is now a flat ring with a 2 in (5.1 cm) hole in the middle. That hole is the dispensing opening.
Bottom Band
Rnds 7–10: Ch 1, sc in each st around; join. (64 sts)
Once you stop increasing, the work turns upward and the base curves into a rounded bottom. Place a marker in the first st of Rnd 10. Later, this side will become the back.
Mesh Section
Rnd 11 (foundation mesh): Ch 1, sc in first st, *ch 5, sk 3 sts, sc in next st* 15 times, ch 5, sk 3 sts; join with a sl st to the first sc. (16 ch-5 loops)
Check the math: each repeat uses 4 stitches (1 sc + 3 skipped), and 16 repeats × 4 = 64.
Rnd 12: Sl st in each of the next 3 ch to reach the center of the first loop, ch 1, sc in same loop, *ch 5, sc in next ch-5 loop* 15 times, ch 5; join with a sl st to the first sc. (16 ch-5 loops)
Rnds 13–35: Repeat Rnd 12. (16 ch-5 loops in each rnd)
That gives you 25 mesh rounds (Rnds 11–35) and about 15 in (38.1 cm) of mesh. Each round shifts half a loop, so the loops stack into diamonds. Don’t pull the sc tight. It should sit snugly at the center of each loop.
Top Band
Rnd 36 (conversion round): Ch 1, sc in same st as join, 3 sc in next ch-5 loop, *sc in next sc, 3 sc in next ch-5 loop* 15 times; join. (16 sc worked in the sc of the last round + 48 sc worked into the 16 loops = 64 sts)
Rnds 37–39: Ch 1, sc in each st around; join. (64 sts)
The top band is now 1 in (2.5 cm) deep and matches the bottom band.
Scallop Border
The border is a single round of scallops worked straight into the 64 sts of the top band.
Border gauge: One scallop repeat uses 4 band stitches and measures 1 in (2.5 cm) wide and about 0.5 in (1.3 cm) tall.
Rnd 40: Ch 1, sc in first st, *sk 1 st, 5 dc in next st, sk 1 st, sc in next st* 15 times, sk 1 st, 5 dc in next st, sk 1 st; join with a sl st to the first sc. Fasten off. (16 scallops: 16 sc + 80 dc = 96 sts)
Why the math works: Each repeat uses exactly 4 band stitches (1 sc, 1 skipped, 1 scallop base, 1 skipped). Since 64 ÷ 4 = 16, the last scallop ends one stitch before the first sc. The round closes evenly with no half-scallop. That’s also why 64 can’t change anywhere in the body.
The body is now 17.5 in (44.5 cm) long before the border and 18 in (45.7 cm) long with it.
Strap
With white, ch 46.
Row 1: Sc in 2nd ch from hook and in each ch across; turn. (45 sts)
Row 2: Ch 1, sc in each st across. Fasten off, leaving a 12 in (30.5 cm) tail. (45 sts)
The strap is 11.25 in (28.6 cm) long and about 0.5 in (1.3 cm) wide. Find the marker from Rnd 10 and line it up with the top band to find the center back. Pin the strap ends to the inside of the top band, 6 stitches apart, with 3 stitches on each side of center. Each end should overlap Rnds 37–39. Sew each end down with whipstitch through both layers, going around the edges twice. This loop takes the full weight of the bags, so sew it firmly.
Face Appliqués
Eyes (make 2)
With black, ch 4.
Rnd 1: Sc in 2nd ch from hook, sc in next ch, 3 sc in last ch. Rotate and work along the other side of the chain: sc in next ch, 2 sc in the same ch as the first sc; join. (8 sts)
Rnd 2: Ch 1, inc in first st, sc in next st, inc in each of next 3 sts, sc in next st, inc in each of next 2 sts; join. (14 sts)
Fasten off, leaving an 8 in (20.3 cm) tail. Each eye is an upright oval about 1 in (2.5 cm) wide and 1.5 in (3.8 cm) tall.
Mouth (make 1)
With black, make a magic ring.
Rnd 1: Ch 1, 6 sc in ring; pull the ring closed and join. (6 sts)
Rnd 2: Ch 1, inc in each st around; join. (12 sts)
Fasten off, leaving an 8 in (20.3 cm) tail. The mouth is about 0.75 in (1.9 cm) across.
Placement
Turn the body so the strap is at the back. The face goes directly opposite.
- Eyes: Center each eye on mesh Rnd 32. Leave a 1.25 in (3.2 cm) gap between the eyes, so their centers are about 2.25 in (5.7 cm) apart.
- Mouth: Center the mouth on mesh Rnd 30, halfway between the eyes.
Pin each piece, then sew it to the mesh with small whipstitches around the outer edge. Catch the chains and sc of the mesh wherever they pass behind the appliqué. Keep the pieces flat. If you pull the mesh tight behind them, the face will pucker.
Final Blocking
- Weave in all ends inside the band or through the back of the appliqués.
- Wet the holder in cool water, gently squeeze out the water, and roll it in a towel.
- Slide a cylinder about 5 in (12.7 cm) across inside, such as a rolled towel or a tall container, so the mesh opens evenly.
- Pull the tube lengthwise until the mesh reaches about 15 in (38.1 cm) and the total length is 18 in (45.7 cm).
- Pin the scallops so each one opens into an even fan.
- Shape the base around the bottom of the form so it curves smoothly into the opening.
- Let it dry completely before you hang it.
Final Quality-Control Checklist
- Body measures 16 in (40.6 cm) around at both bands.
- Total length is 18 in (45.7 cm), and the mesh is about 15 in (38.1 cm).
- Every mesh round has exactly 16 loops, with no slanted or doubled diamonds.
- Top band has 64 sts and 16 even scallops.
- Dispensing opening is about 2 in (5.1 cm) across and stretches to 2.5 in (6.4 cm).
- Strap is sewn securely at the center back, 6 sts apart.
- Eyes and mouth are centered on the front and lie flat.
- All ends are woven in securely.
Troubleshooting
The base ruffles. Your sc may be loose. Go down one hook size for Rnds 1–6 only, then switch back.
The mesh spirals or leans. You may be skipping the sl sts at the start of each round. Always sl st across 3 ch to reach the center of the loop before working the first sc.
The top band flares. Rnd 36 is too loose. Work it with the next smaller hook, keeping the 64 count exactly.
The scallops don’t close evenly. Count the band; you need exactly 64 sts. Recount Rnd 36: 16 sc plus 3 sc in each of the 16 loops.
Bags fall out too easily. Work one extra round of sc around the opening, decreasing 4 sts evenly, to tighten the rim.
The strap stretches. Sew a second line of whipstitch, or add a third row of sc to the strap.
Care
Hand wash in cool water and lay flat or dry on a cylinder form. Don’t tumble dry, because heat can shrink cotton and distort the mesh.
Final Notes
Everything in this pattern follows one measurement chain. A 24-st opening grows to 64 sts in Rnd 6. The 64 sts make a 16 in (40.6 cm) tube. Those 64 sts become 16 mesh loops, the 16 loops convert back to 64 sts, and the 64 sts give you 16 scallops. If you check your count at each stage, the ghost comes out 18 in (45.7 cm) tall and even all around.
Happy crocheting!