

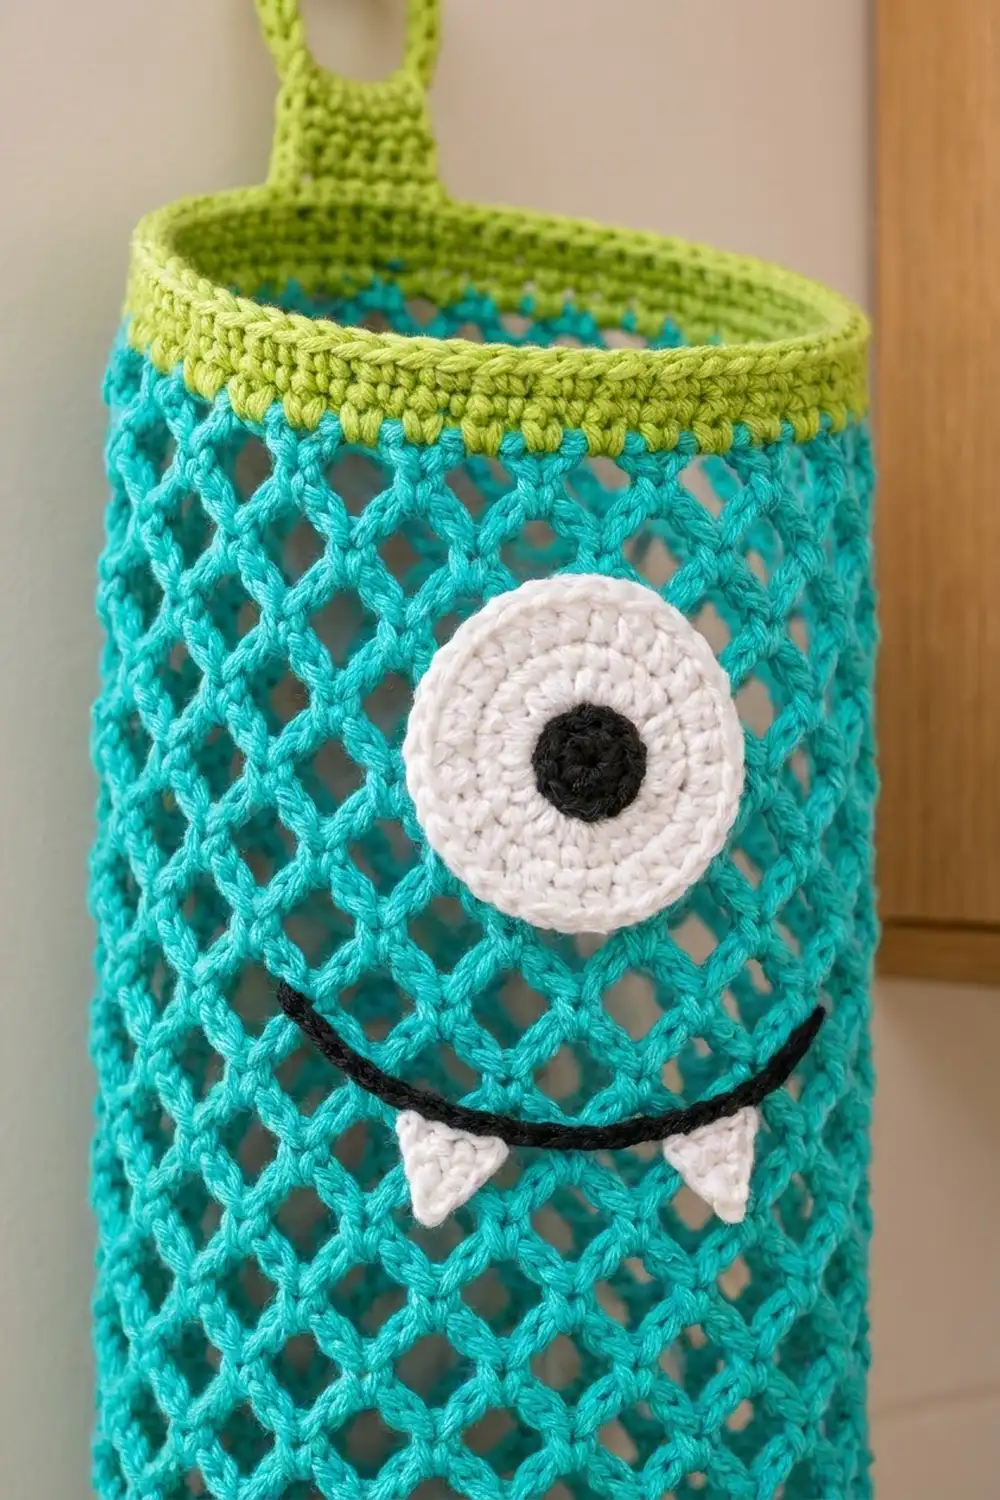
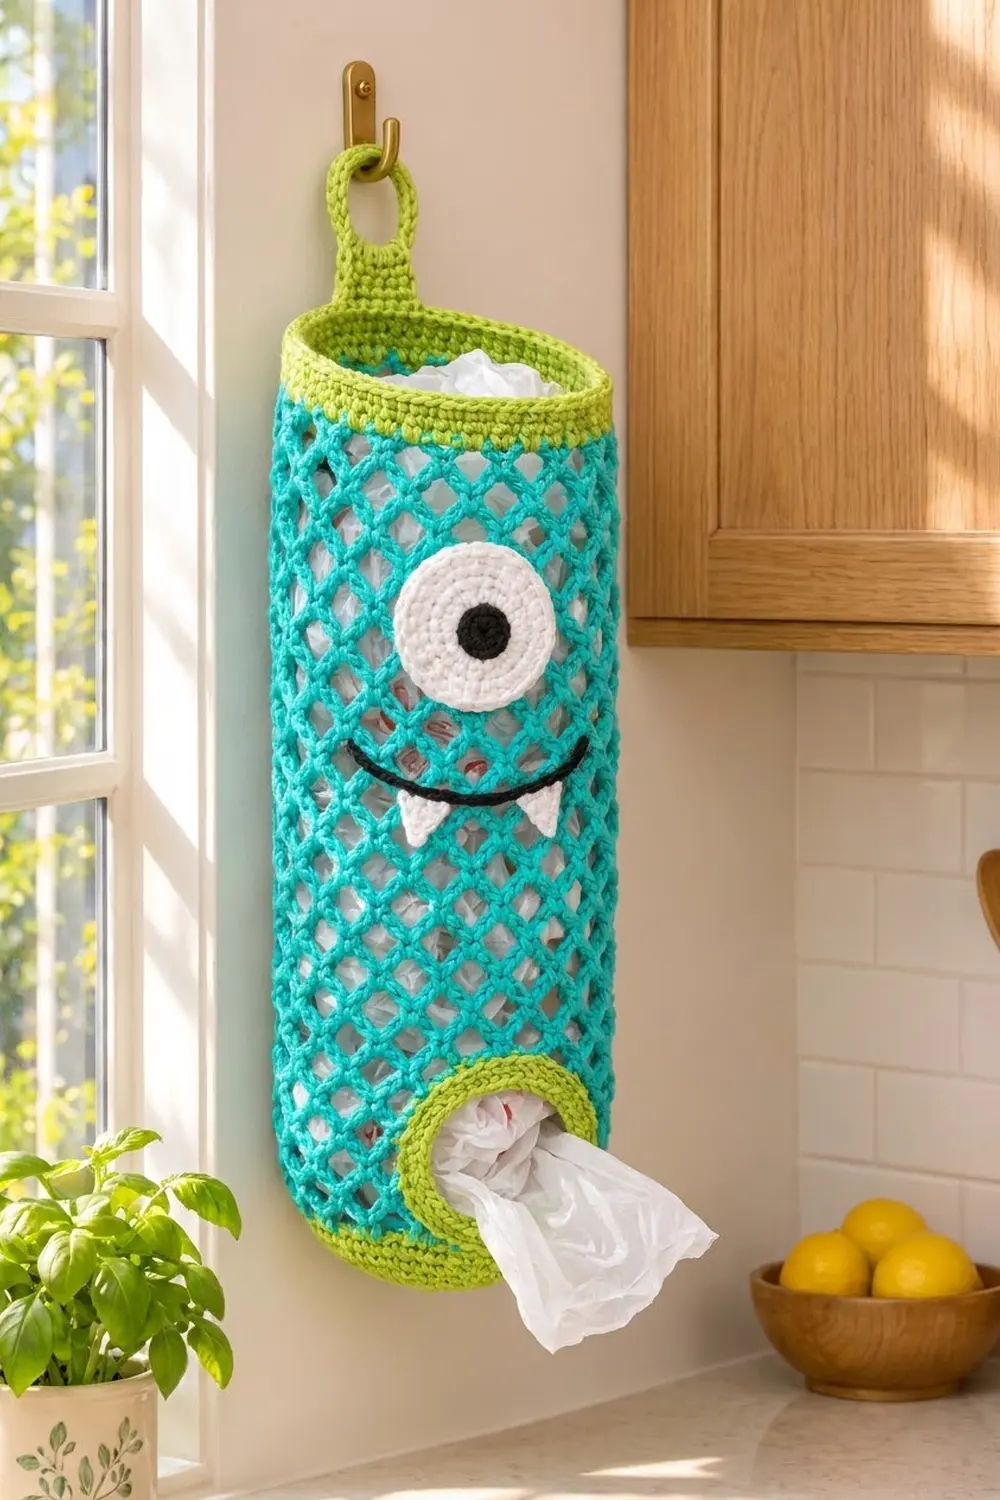
This cheerful one-eyed monster keeps plastic grocery bags tidy and gives your kitchen a pop of color. The body is a long, airy turquoise mesh tube, so you can see when it’s time to empty it. Lime-green bands finish the top and the closed bottom, and a padded lime loop hangs it from any hook.
The face is simple: a round white eye with a black center, a curved black smile, and two little white fangs. You stuff bags in through the open top and pull them out one at a time through the lime-rimmed hole on the lower front.
The pattern uses US crochet terms. The finished holder is 6 in (15.2 cm) wide when flat, about 12 in (30.5 cm) around, and 18.5 in (47.0 cm) tall. The hanging tab adds 3.5 in (8.9 cm), so the full length is 22 in (55.9 cm).
You work the body in one piece from the bottom up. First comes a flat lime base, then a short lime side band, then the turquoise mesh. Four of the mesh rounds are worked as turned rows to leave the dispensing hole. A lime top band, hanging tab, and opening trim finish the body. Then you make the eye, fangs, and smile and sew them on.
Finished Size and Construction
- Finished size: 6 in (15.2 cm) wide flat × 18.5 in (47.0 cm) tall, plus a 3.5 in (8.9 cm) tab
- Circumference: 12 in (30.5 cm)
- Skill level: Easy-intermediate
- Terminology: US crochet terms
- Yarn weight: Worsted (#4), cotton or cotton blend
- Hook: 5 mm (H-8)
- Number of pieces: 1 body (worked in one piece) + 1 eye, 2 fangs, 1 smile cord
- Layout: Single vertical tube. The hole and face are on the front, the tab is at the center back.
- Base diameter: about 3.75 in (9.5 cm)
- Size before finishing bands: base plus mesh is 17 in (43.2 cm) tall
- Band depths: bottom side band 1 in (2.5 cm), top band 1.5 in (3.8 cm), opening trim 0.75 in (1.9 cm)
Materials
Use a smooth, sturdy cotton. It holds its shape under the weight of the bags and keeps the stitches crisp. Acrylic also works, but the mesh will stretch longer over time.
- Turquoise (Color A): 110 g, about 175 m (191 yd)
- Lime green (Color B): 50 g, about 80 m (87 yd)
- White (Color C): 15 g, about 24 m (26 yd)
- Black (Color D): 5 g, about 8 m (9 yd)
Tools:
– 5 mm (H-8) crochet hook
– Tapestry needle
– 2 stitch markers
– Scissors
– Measuring tape
– Pins and a spray bottle for blocking
All quantities include a margin of about 15% for gauge swatches and differences in tension.
Abbreviations (US Terms)
- ch – chain
- sl st – slip stitch
- sc – single crochet
- dc – double crochet
- sc2tog – single crochet 2 together
- sk – skip
- sp – space
- MR – magic ring
- st(s) – stitch(es)
- rnd(s) – round(s)
Special stitch – mesh loop: ch 5, sc in the next ch-5 space.
Closing half loop: ch 2, dc in the first sc of the round. This acts as the last ch-5 loop and leaves your hook in the middle of that loop, ready for the next round.
Gauge and Checkpoints
- Solid sc (Color B): 16 sts and 16 rnds = 4 in (10.2 cm)
- Mesh (Color A): 4 loops = 3 in (7.6 cm) wide when relaxed on the tube, and 3 rnds = 2 in (5.1 cm) tall
Make the base first and use it as your test piece. All the later counts depend on it.
Checkpoints:
1. After Base Rnd 8, the flat circle measures 3.75 in (9.5 cm) across.
2. After the bottom side band, the tube measures 12 in (30.5 cm) around.
3. After Mesh Rnd 6, the mesh is 4 in (10.2 cm) tall and the hole is open.
4. After Mesh Rnd 24, the mesh is 16 in (40.6 cm) tall.
5. After the top band, the body is 18.5 in (47.0 cm) tall.
If your work is too big: go down to a 4.5 mm hook. If it’s too small: go up to a 5.5 mm hook. Keep the stitch counts the same. The mesh will stretch slightly in use, so aim for the measurements or just under them.
Base and Bottom Band (Color B)
Rnd 1: In an MR, work 6 sc. Join with sl st to the first sc. (6 sts)
Rnd 2: Ch 1, 2 sc in each st, join. (12 sts)
Rnd 3: Ch 1, (sc in next st, 2 sc in next st) 6 times, join. (18 sts)
Rnd 4: Ch 1, (sc in next 2 sts, 2 sc in next st) 6 times, join. (24 sts)
Rnd 5: Ch 1, (sc in next 3 sts, 2 sc in next st) 6 times, join. (30 sts)
Rnd 6: Ch 1, (sc in next 4 sts, 2 sc in next st) 6 times, join. (36 sts)
Rnd 7: Ch 1, (sc in next 5 sts, 2 sc in next st) 6 times, join. (42 sts)
Rnd 8: Ch 1, (sc in next 6 sts, 2 sc in next st) 6 times, join. (48 sts)
Checkpoint: the circle measures 3.75 in (9.5 cm) across.
Rnd 9: Ch 1, sc in the back loop only of each st, join. (48 sts) This makes a clean fold line where the base turns into the sides.
Rnds 10–12: Ch 1, sc in each st, join. (48 sts)
The side band is now 4 rnds, or 1 in (2.5 cm), tall and 12 in (30.5 cm) around. Fasten off Color B.
Mesh Body (Color A)
48 is 16 × 3, so the mesh sets up exactly 16 loops, each anchored over 3 sts.
Rnd 1: Join Color A in any st. Ch 1, sc in the same st. (Ch 5, sk 2 sts, sc in next st) 15 times. Ch 2, sk the last 2 sts, dc in the first sc. (16 loops)
Rnd 2: Ch 1, sc around the post of the dc just made. (Ch 5, sc in next ch-5 sp) 15 times. Ch 2, dc in the first sc. (16 loops)
Place a marker in Rnd 2 loops 13, 14, and 15, counting loop 1 as the first full ch-5 loop after the starting sc. These 3 loops will form the bottom edge of the dispensing hole.
Dispensing Hole (worked in turned rows)
Row 3 (right side): Ch 1, sc around the post of the dc. (Ch 5, sc in next ch-5 sp) 12 times, working into loops 1–12. (13 sc, 12 loops) Leave loops 13–15 unworked. Turn.
Row 4 (wrong side): Ch 5, sc in the first ch-5 sp. (Ch 5, sc in next ch-5 sp) 11 times. Ch 2, dc in the last sc. (12 sc, 12 ch-5 loops, plus the half loop at the edge) Turn.
Row 5: Ch 1, sc in the top of the dc. (Ch 5, sc in next ch-5 sp) 12 times, working the last sc into the turning ch-5. (13 sc, 12 loops) Turn.
Row 6: Repeat Row 4. Turn.
Rnd 7 (right side, close the tube): Ch 1, sc in the top of the dc. (Ch 5, sc in next ch-5 sp) 12 times, working the last sc into the turning ch-5. Ch 16 for the bridge, then join with sl st to the first sc. (12 loops + 1 bridge)
Rnd 8: Sl st into the first ch-5 sp, ch 1, sc in the same sp. (Ch 5, sc in next ch-5 sp) 11 times. (12 sc) Ch 5, sk 2 bridge ch, sc in the next ch. (Ch 5, sk 3 bridge ch, sc in the next ch) 3 times. (4 sc on the bridge, in bridge ch 3, 7, 11, and 15) Ch 2, dc in the first sc.
That makes 12 + 4 = 16 loops, so the round is back to its full count.
Checkpoint: the mesh is about 4 in (10.2 cm) tall. The hole is roughly 2.25 in (5.7 cm) wide and 2.75 in (7.0 cm) tall.
Rnds 9–24: Repeat Rnd 2. (16 loops in each rnd)
Checkpoint: the mesh measures 16 in (40.6 cm) from the bottom band when hanging relaxed. Do not fasten off yet.
Bands, Tab, and Opening Trim (Color B)
These lime sections act as the border. They use the same gauge: 16 sc = 4 in (10.2 cm).
Top Band
Rnd 1: Change to Color B. Ch 1, work 3 sc in each ch-5 sp around, including the closing half loop. Join. (16 loops × 3 = 48 sts)
Rnds 2–6: Ch 1, sc in each st, join. (48 sts)
Why the math works: The top band has 48 sts, the same as the bottom band. Both measure 12 in (30.5 cm) at 4 sts per inch, so the tube hangs straight instead of flaring or pulling in. The band is 6 rnds, or 1.5 in (3.8 cm), deep. Fasten off.
Hanging Tab
Flatten the tube with the hole centered on the front. Mark the 6 center sts on the back of Rnd 6.
Row 1: Join Color B in the first marked st. Ch 1, sc in each of the 6 marked sts. (6 sts)
Rows 2–8: Ch 1, turn, sc in each st. (6 sts) The tab is now 2 in (5.1 cm) tall.
Loop: Ch 14, then sl st into the first sc of Row 8 to make an arch. Work 22 sc over the ch-14 arch, packing them tightly. Sl st into the last st of Row 8 and fasten off.
The padded loop adds about 1.5 in (3.8 cm), so the tab is 3.5 in (8.9 cm) in total.
Opening Trim
Rnd 1: With the right side facing, join Color B at the lower right corner of the hole. Work sc evenly around the hole:
– 9 sc along the bottom edge (3 sc in each of the marked Rnd 2 loops)
– 6 sc up the left side, spread evenly over the row ends
– 9 sc across the free underside of the bridge chain
– 6 sc down the right side
Join. (9 + 6 + 9 + 6 = 30 sts)
Rnds 2–3: Ch 1, sc in each st, join. (30 sts)
Why the math works: 30 sts at 4 sts per inch is 7.5 in (19.1 cm) around. That is about 2.4 in (6.1 cm) across, which closely matches the raw hole. Because the trim has no increases, it stands up as a firm ring. The finished opening is about 2 in (5.1 cm), and the ring’s outer diameter is about 3.25 in (8.3 cm). Fasten off and weave in the ends.
Eye (make 1)
Rnd 1 (Color D): In an MR, work 6 sc, join. (6 sts)
Rnd 2: Ch 1, 2 sc in each st, join. (12 sts) Change to Color C.
Rnd 3: Ch 1, (sc in next st, 2 sc in next st) 6 times, join. (18 sts)
Rnd 4: Ch 1, (sc in next 2 sts, 2 sc in next st) 6 times, join. (24 sts)
Rnd 5: Ch 1, (sc in next 3 sts, 2 sc in next st) 6 times, join. (30 sts)
The eye measures 2.5 in (6.4 cm) across. Fasten off and leave a long tail for sewing.
Fangs (make 2, Color C)
Row 1: Ch 5. Sc in the 2nd ch from the hook and in each remaining ch. (4 sts)
Row 2: Ch 1, turn, sc2tog twice. (2 sts)
Row 3: Ch 1, turn, sc2tog. (1 st)
Each fang is a triangle about 1 in (2.5 cm) wide and 0.75 in (1.9 cm) tall. Fasten off and leave a tail.
Smile Cord (Color D)
Ch 21. Sl st in the 2nd ch from the hook and in each remaining ch. (20 sl sts) The cord is about 4.5 in (11.4 cm) long and stays firm. Fasten off and leave a tail.
Assembly of the Face
- Center the eye on the front, about 5 in (12.7 cm) below the top band. Sew it to the mesh crossings around its edge, catching every crossing that sits under the eye.
- Curve the smile about 1.25 in (3.2 cm) below the eye so it dips in the middle. Pin it, then whipstitch it to each mesh crossing it touches.
- Sew one fang below each end of the smile, about 0.5 in (1.3 cm) in from the ends. Put the wide edge against the smile so the points face down.
Final Blocking
- Weave in all the ends before blocking.
- Spray the whole holder lightly until it’s damp, not soaked.
- Slide a rolled towel or a 4 in (10.2 cm) tube, such as a mailing tube, inside the body.
- Ease the mesh until the diamonds are even and the body is 18.5 in (47.0 cm) tall.
- Flatten the eye and fangs with your fingers. Pin the opening trim into a neat circle.
- Let it dry completely, then remove the form.
Final Quality-Control Checklist
- The base is flat and 3.75 in (9.5 cm) across.
- Both lime bands have 48 sts and measure 12 in (30.5 cm) around.
- Every mesh round has 16 loops, and the diamonds are even.
- The hole sits at the center front with a smooth 30-st lime ring.
- The tab is centered at the back, opposite the hole.
- The eye, smile, and fangs are centered and sewn to the mesh crossings.
- The finished size is 6 in × 18.5 in (15.2 cm × 47.0 cm), plus a 3.5 in (8.9 cm) tab.
- All ends are secure.
Troubleshooting
- The base cups or ruffles: Your tension is changing between rounds. Re-check the counts for Rnds 5–8, or change your hook size.
- The mesh twists in a spiral: Always start each round in the post of the closing dc, and always work with the right side facing.
- The loop count drifts: Count the loops at the end of every round. Put a marker in the first loop.
- The hole is too small: Make sure Row 3 stops after 12 loops, leaving 3 loops unworked.
- The opening ring ripples: You have too many trim sts. Work exactly 30 sts.
- The tube grows too long: Cotton stretches under weight. Work only 22 mesh rounds next time, or go down a hook size.
- The tab sags: Work the tab more tightly, or add a second row of sc over the loop.
Care
Hand wash in cool water with mild soap. Press out the water gently, then reshape and dry flat over a rolled towel.
Final Notes
Everything in this holder follows one measurement chain. The 48-st base measures 12 in (30.5 cm) around. That becomes 16 mesh loops of 3 sts each, which become 48 sts again in the top band. Four turned rows leave out 3 loops to make the hole, and a 16-ch bridge with 4 anchors brings the count back to 16. The 30-st trim turns that opening into a neat ring. Check the measurements at each stage and the holder will finish at 6 in × 18.5 in (15.2 cm × 47.0 cm), ready to hang.
Happy crocheting!