

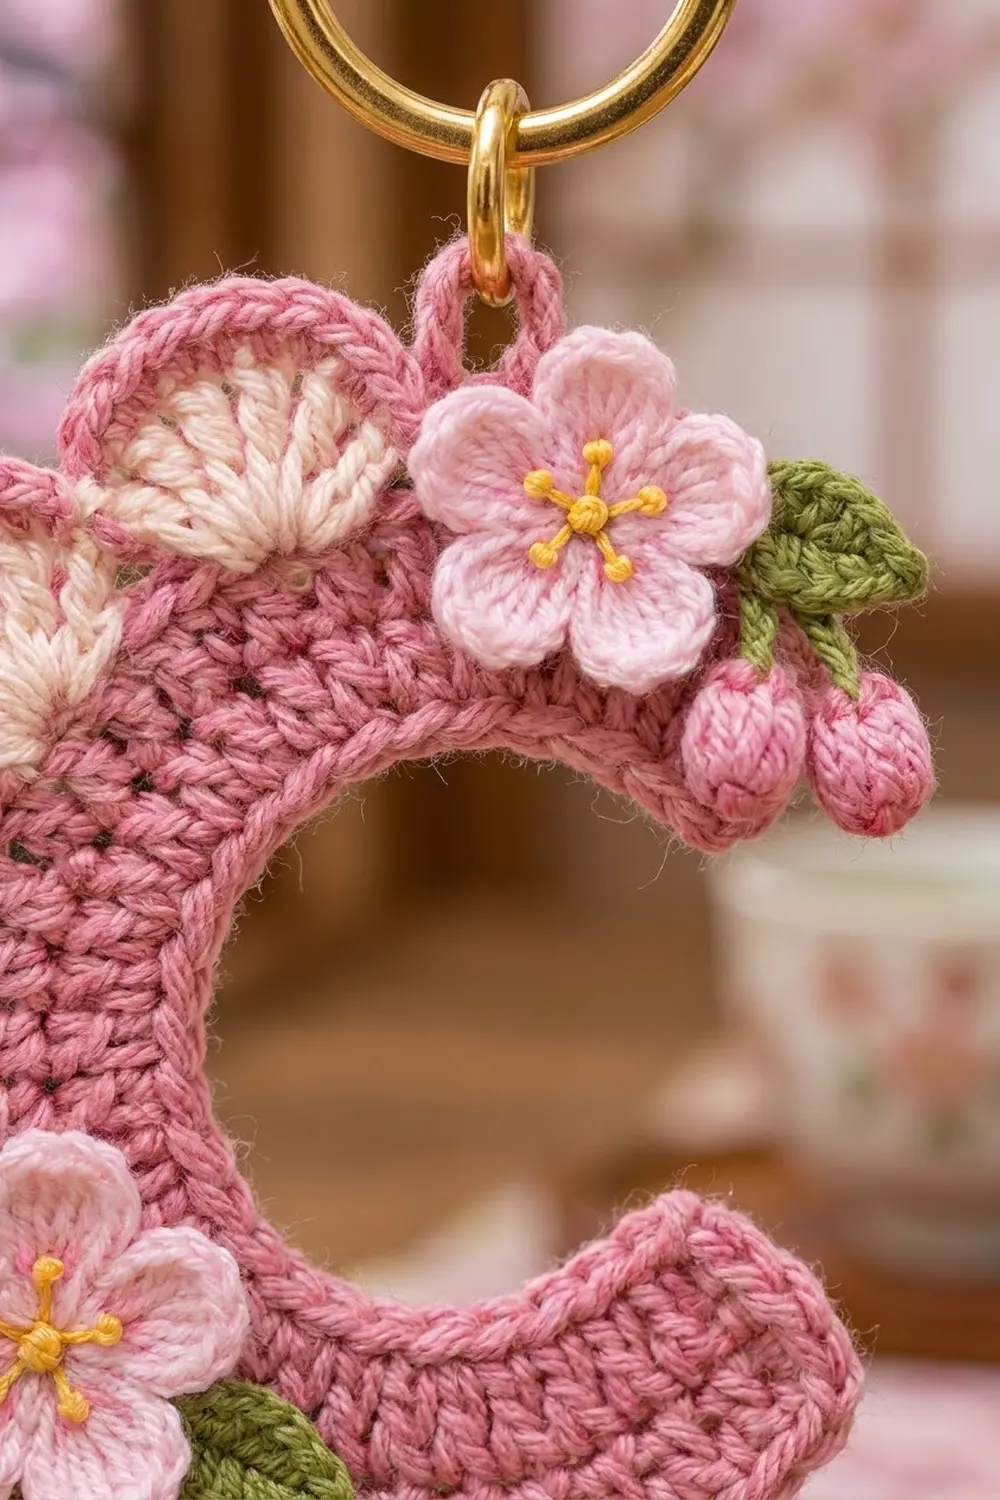
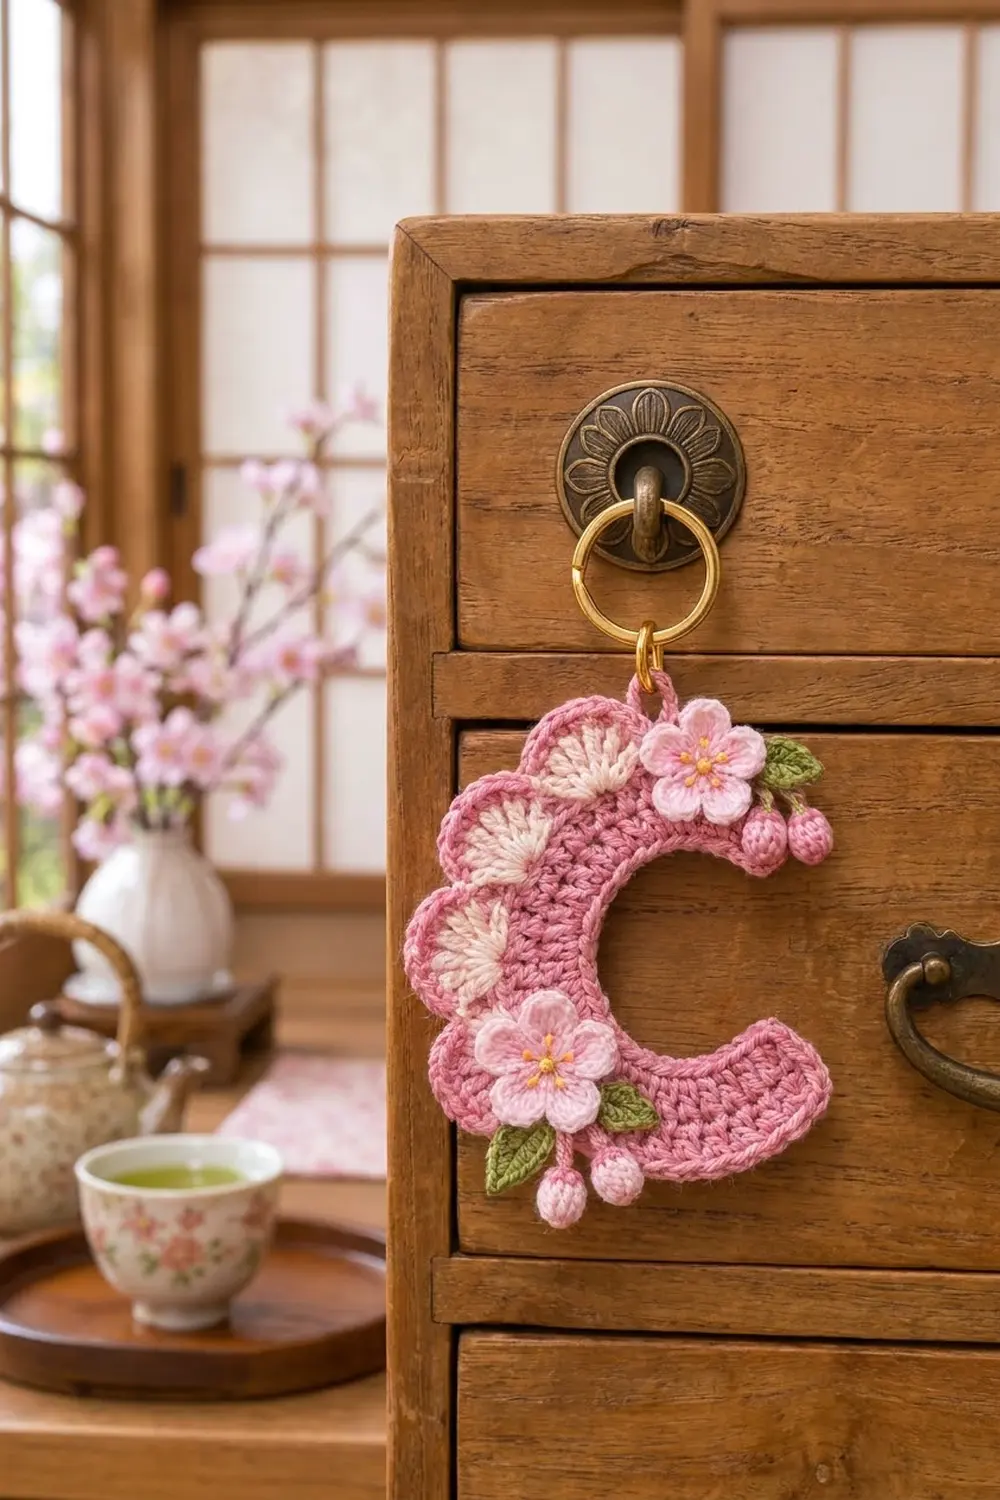
This little letter C keychain is a soft spring accessory with a sakura theme. A rose-pink curved band forms the letter, a row of cream-and-pink scallops runs along the outer curve, and two tiny cherry blossoms with buds and leaves finish the look.
The palette is gentle: rose pink for the body, cream for the scallop fans, light pink for the blossoms, yellow for the stamens, and leaf green for the foliage. A gold split ring sets it off, and it looks just as nice clipped to a bag as it does hanging from a drawer knob.
This pattern uses US crochet terms. The finished C body measures about 4.0 in (10.2 cm) across, or about 4.5 in (11.4 cm) at its widest point including the scallops. The loop and key ring are not included in those measurements.
Construction is simple. You work the C body flat in three short rows that curve naturally because of increases. Next comes a single crochet edging all the way around. Then you add the scallops to the upper outer curve. Finally, you crochet the small appliqués and sew them on.
Finished Size and Construction
- Finished size: 4.0 in (10.2 cm) across the C body; 4.5 in (11.4 cm) at the widest point with scallops
- Skill level: Easy to Intermediate
- Terminology: US
- Yarn weight: DK / light worsted (#3) cotton
- Hook: 3.0 mm (between US C/2 and D/3)
- Number of pieces: 1 main C body, plus 9 small appliqués sewn on permanently (2 blossoms, 3 leaves, 4 buds)
- Layout: single piece, so there’s no joining grid
- Band width before edging: 1.0 in (2.5 cm)
- Outer diameter before edging: 3.6 in (9.1 cm)
- Edging depth: 0.2 in (0.5 cm) on every side
- Scallop depth: 0.5 in (1.3 cm) beyond the edging
Materials
Smooth mercerized or combed cotton gives the crisp stitch definition shown here. These quantities assume roughly 120 m per 50 g ball (2.4 m per gram).
- Rose pink (Color A): 8 g / 19 m – body, edging, scallop outline, buds, loop
- Cream (Color B): 2 g / 5 m – scallop fans
- Light pink (Color C): 3 g / 7 m – blossoms
- Leaf green (Color D): 2 g / 5 m – leaves
- Yellow (Color E): 1 g / 2 m – stamens
All quantities include a margin for swatching and sewing tails.
Tools:
– 3.0 mm crochet hook
– Tapestry needle
– Small embroidery needle for the stamens
– 1 gold split key ring, about 25 mm
– 1 gold jump ring, about 6 mm, and two pairs of flat-nose pliers
– Rustproof pins and a blocking mat
– A pinch of fiberfill or yarn scraps for the buds
– Scissors and a stitch marker
Abbreviations (US Terms)
- ch – chain
- sl st – slip stitch
- sc – single crochet
- hdc – half double crochet
- dc – double crochet
- sc2tog – single crochet 2 together
- st(s) – stitch(es)
- RS – right side
- MR – magic ring
Special stitch – Shell: work 7 dc in the same stitch.
Special stitch – Petal: (hdc, dc, ch 1, dc, hdc) all in the same stitch. The ch-1 sits lower than the dc on either side of it, which forms the small notch at the tip of a cherry blossom petal.
Gauge and Checkpoints
Gauge: 20 sts and 10 dc rows = 4 in (10.2 cm). That means 5 sts per inch, 0.4 in (1.0 cm) per dc row, and 0.2 in (0.5 cm) per sc row.
Since this is a single small piece, the body works as your gauge test. Do Row 1 and measure it before going on.
Checkpoints:
– After Row 1: the strip measures 4.0 in (10.2 cm) long and 0.2 in (0.5 cm) high.
– After Row 2: the strip begins curling into an arc. The band is 0.6 in (1.5 cm) wide.
– After Row 3: the band is 1.0 in (2.5 cm) wide, the outer diameter is 3.6 in (9.1 cm), and the inner opening is 1.6 in (4.1 cm).
– After edging: the band is 1.4 in (3.6 cm) wide, the outer diameter is 4.0 in (10.2 cm), and the opening is 1.2 in (3.0 cm).
– After scallops: the piece is 4.5 in (11.4 cm) at its widest.
If your Row 1 is longer than 4.0 in (10.2 cm), go down to a 2.75 mm hook. If it’s shorter, go up to a 3.25 mm hook. Changing the hook keeps the curve correct. Changing the stitch counts would change how far the C closes.
C Body
Use Color A. You’ll work in rows, turning at the end of each row. Row 1 becomes the inner edge of the C, and Row 3 becomes the outer edge.
Row 1: Ch 21. Sc in the 2nd ch from hook and in each ch across. Turn. (20 sc)
Row 2 (growth row): Ch 2 (does not count as a st). Dc in next st, 2 dc in next st; repeat from * 9 more times. Turn. (30 dc)
Row 3 (growth row): Ch 2 (does not count as a st). Dc in next st, 2 dc in next st; repeat from * 14 more times. (45 dc) Fasten off.
The inner edge has 20 sts and the outer edge has 45. The difference of 25 sts (5.0 in / 12.7 cm) spread over a 1.0 in (2.5 cm) band turns the strip about 286 degrees. That leaves the opening of the C facing right.
Check the After Row 3 measurements now. If the C won’t lie flat, see Troubleshooting before you start the edging.
Edging and Scallop Border
Border gauge: the edging uses the same 5 sc per inch. On the row ends, work 1 sc per sc row and 2 sc per dc row. A dc row is twice as tall as an sc row, so this ratio keeps the ends from flaring or puckering.
Edging Round (Trim Round)
Hold the body with RS facing and Row 3 along the top. Join Color A in the first dc at the right-hand end of Row 3. This end will be the top end of the C.
Round 1: Ch 1. 3 sc in the first st (corner). Sc in each of the next 43 sts. 3 sc in the last st (corner). Work 5 sc evenly down the row ends of the lower end (2 sc in the Row 3 end, 2 sc in the Row 2 end, 1 sc in the Row 1 end). Sc in each of the 20 free loops of the foundation chain along the inner edge. Work 5 sc up the row ends of the top end, in the same 1-2-2 order reversed. Sl st to the first sc.
Count: (45 + 5 + 20 + 5 = 75 sts worked one per existing st or row end) + 4 extra sts (2 extra at each outer corner) = 79 sc.
Per side:
– Outer edge: 49 sc, corners included
– Lower end: 5 sc
– Inner edge: 20 sc
– Top end: 5 sc
To help with the next steps, number the stitches. Sts 1–3 are the top outer corner, with st 2 at the center. Sts 4–46 run along the outer edge, and sts 47–49 are the lower outer corner. Sts 50–54 are the lower end, sts 55–74 are the inner edge, and sts 75–79 are the top end.
The inner corners don’t get extra sts. The inner edge is the short, concave side, and increasing there would make it ripple.
Don’t fasten off yet.
Hanging Loop
Sl st across the top end to st 77, the center sc of the top end. Ch 8, then sl st in the same st. Work 12 sc into the ch-8 space, then sl st in st 77. Fasten off and weave in the end. The loop measures about 0.5 in (1.3 cm).
Scallops (Cream Fans)
The scallops run from the top end down the left curve.
With RS facing, join Color B in st 4 of the edging round.
Scallop Row: Sc in st 4. Skip 1 st, Shell in next st, skip 1 st, sc in next st; repeat from * 4 more times. The last sc lands in st 24. Fasten off. (5 shells: 6 sc + 35 dc = 41 sts)
The shells sit in sts 6, 10, 14, 18, and 22. The repeats use exactly 1 + (5 × 4) = 21 edging sts. That leaves sts 25–49 plain for the lower curve, where the second blossom will sit.
Scallop Outline
Join Color A with a sl st in the first cream sc (st 4).
Outline Row: Sc in each of the next 2 dc, 2 sc in each of the next 3 dc, sc in each of the next 2 dc, sl st in the next cream sc; repeat from * 4 more times. Fasten off. (50 sc + 6 sl st)
Each shell gets 7 sts worked into plus 3 extra = 10 sc. The 3 increases at the top of each shell let the pink outline wrap around the fan without cupping.
Appliqués
Cherry Blossoms (Make 2)
Use Color C.
Round 1: MR, 10 sc in the ring. Pull the ring closed and sl st to the first sc. (10 sc)
Round 2: Petal in next sc, sl st in next sc; repeat from * 4 more times. (5 petals: 25 sts + 5 sl st)
Fasten off and leave a 10 in (25.4 cm) tail. Each blossom measures about 1.0 in (2.5 cm) across.
Stamens: Thread Color E onto the embroidery needle. Work 5 straight stitches radiating from the center, each about 0.2 in (0.5 cm) long, and finish each one with a French knot. Add one French knot in the very center.
Leaves (Make 3)
Use Color D.
Ch 7. Sc in the 2nd ch from hook, then hdc in the next ch, dc in each of the next 2 ch, and hdc in the next ch. Work (sc, ch 2, sc) in the last ch to form the tip. Now work along the other side of the chain: hdc in the next ch, dc in each of the next 2 ch, hdc in the next ch, and sc in the last ch. Sl st to the first sc.
Fasten off and leave a tail. Each leaf is about 0.75 in (1.9 cm) long.
Buds (Make 4)
Use Color A.
Round 1: MR, 6 sc in the ring. (6 sc)
Round 2 (growth round): 2 sc in each st. (12 sc)
Round 3: Sc in each st. (12 sc)
Stuff the bud lightly with fiberfill or scraps.
Round 4: Sc2tog 6 times. (6 sts)
Fasten off. Use the tail to close the hole. Then ch 3 with the same tail and leave the rest long for sewing; this ch-3 becomes the stem. Each bud is about 0.4 in (1.0 cm) across.
Assembly
- Top blossom: sew it at the top end, overlapping the outer corner beside the hanging loop. Tuck 1 leaf under its right edge, and hang 2 buds below it by their stems.
- Lower blossom: sew it over the outer edge around sts 25–30, just below the last scallop. Tuck 2 leaves under it, one on the right and one at the lower left. Hang 2 buds below it.
- Stitching: sew through the flower centers and the base of each petal only, so the petal tips stay free and dimensional.
- Hardware: open the jump ring with the pliers, pass it through the hanging loop and the split ring, then close it.
Final Blocking
- Mist the C body with cool water until it’s damp. Don’t soak it.
- Lay it RS up on the gridded mat with the opening facing right.
- Pin the outer curve to a 4.0 in (10.2 cm) circle, and pin the inner opening to 1.2 in (3.0 cm).
- Pin each end square, keeping the band 1.4 in (3.6 cm) wide.
- Pin into the center of each scallop to open the fan, but keep the pins off the blossoms and buds.
- Leave it to dry completely before you remove the pins.
Final Quality-Control Checklist
- Body rows: 20 sc, 30 dc, 45 dc
- Edging total is 79 sc: outer 49, ends 5 each, inner 20
- 5 cream shells, each outlined with 10 pink sc
- Outer diameter is 4.0 in (10.2 cm), and the C lies flat
- Both blossoms have 5 notched petals and yellow stamens
- 3 leaves and 4 buds are secure, with no loose stems
- Hanging loop is firm and the jump ring is fully closed
- All ends are woven in on the wrong side
Troubleshooting
- The C cups or curls up: Row 3 is too tight. Redo it with a slightly looser tension, or go up half a hook size.
- The C ruffles: your dc stitches are loose. Redo Row 3 with a smaller hook.
- The ends flare: you worked more than 5 sc down an end. Stick to the 1-2-2 count.
- The scallops don’t fit: check that you joined in st 4 and skipped exactly 1 st on each side of every shell.
- The petals look round instead of notched: pull the ch-1 at each tip snugly.
- The buds look floppy: add a little more stuffing before Round 4.
Care
Hand wash in cool water with mild soap and lay flat to dry. Keep the metal hardware dry where possible so it stays shiny.
Final Notes
The measurement chain is easy to follow. Row 1 sets the 4.0 in (10.2 cm) inner strip. Rows 2 and 3 grow it to 45 sts and a 3.6 in (9.1 cm) curve. The 79-st edging brings the body to 4.0 in (10.2 cm), and the five scallops reach 4.5 in (11.4 cm) at the widest point. Check each stage as you go, and your C will block into a crisp, sweet sakura charm.
Happy crocheting!