

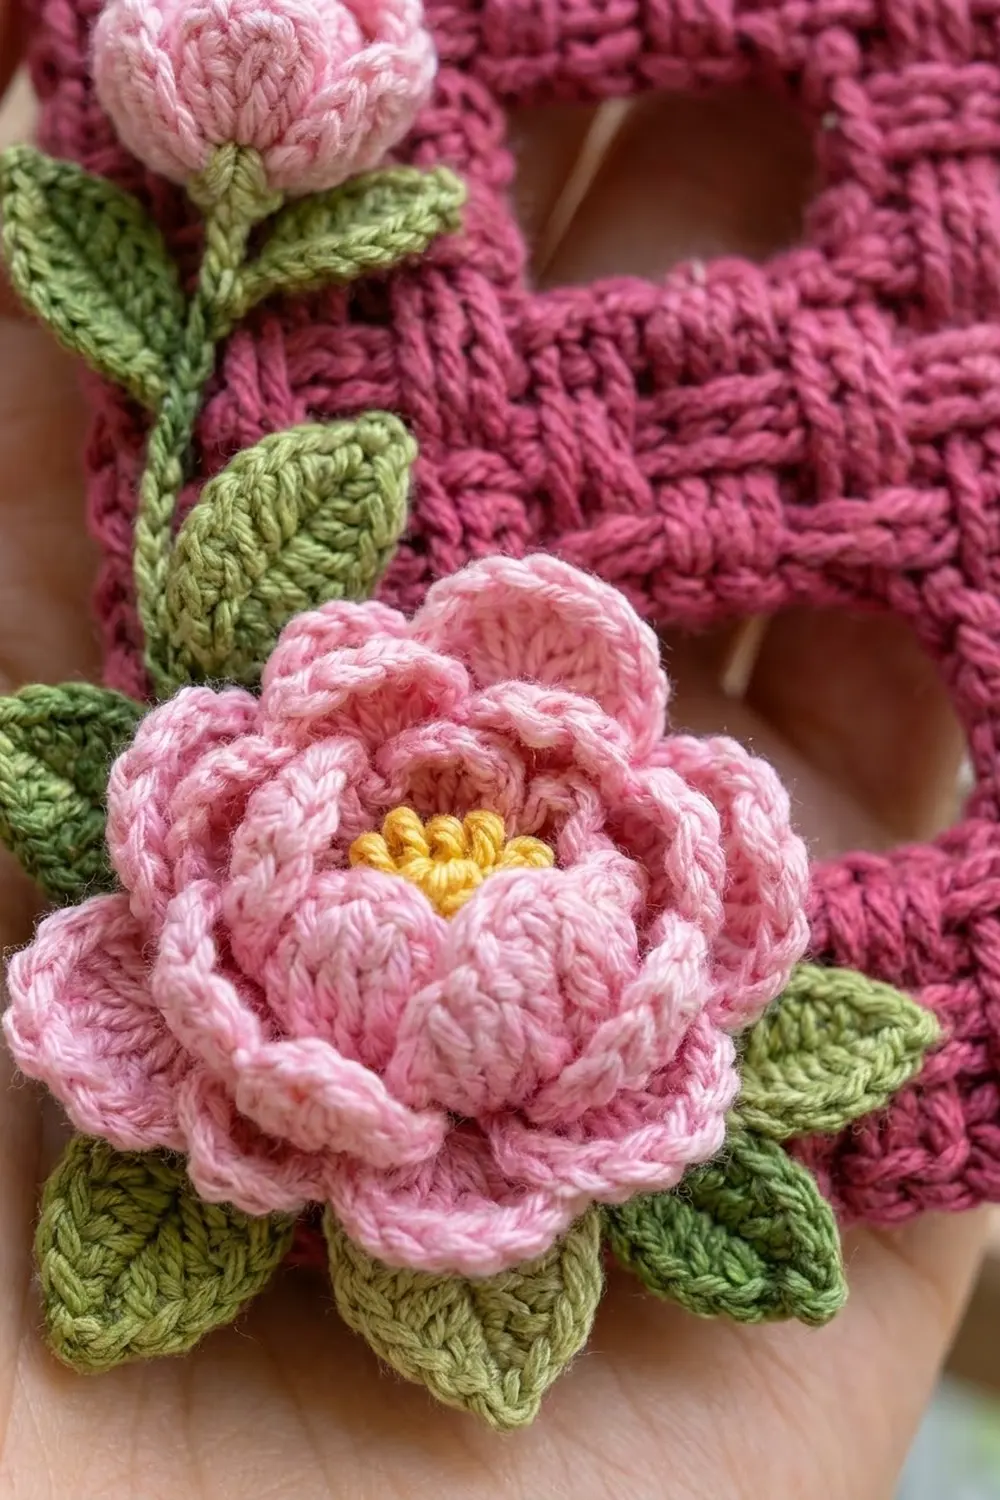
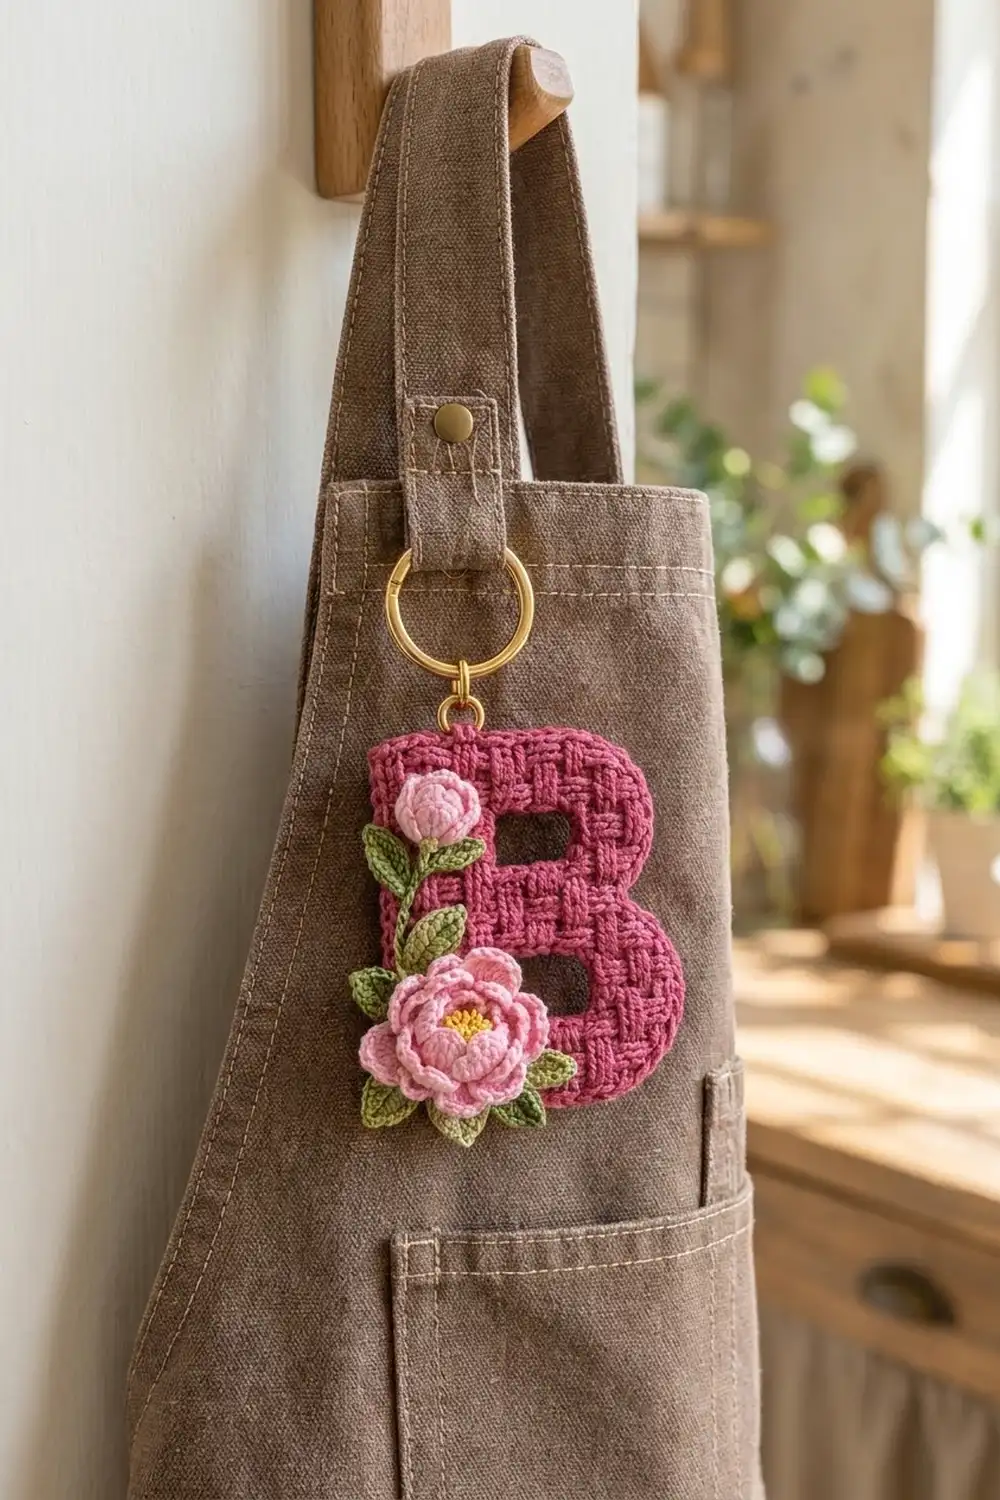
This little monogram keychain has a raised basketweave texture and a pink peony sewn on top. The letter is worked in a deep raspberry pink, and the flower is a soft blush pink with a sunny yellow center. Olive-green leaves and a chained stem run down the side of the B.
The style is cottage-garden and very personal. It’s a quick gift for a bridesmaid, teacher or gardener, and it looks just as good clipped to a bag or an apron strap.
All instructions use US crochet terms. The finished letter is 3.9 in (9.9 cm) wide and 4.8 in (12.2 cm) tall, not counting the keyring.
The letter is worked flat in rows from the bottom up. The basketweave comes from front-post and back-post double crochet. The two holes in the B (the counters) are made by working the stem and bowl sections separately for a few rows, then bridging them with a chain. Two border rounds neaten and round the edges. The peony, rosebud, stem and leaves are made separately and sewn on.
Finished Size and Construction
- Finished size: 3.9 in x 4.8 in (9.9 cm x 12.2 cm)
- Skill level: Intermediate (post stitches, simple sectioned rows)
- Terminology: US
- Yarn weight: DK / light (#3) cotton or cotton blend
- Hook: 3.5 mm (E-4) for the letter; 3.0 mm (C/D) for the appliqués
- Number of pieces: 1 letter plus appliqués (1 peony, 1 bud, 1 stem, 7 leaves)
- Layout: single letter, appliqués stacked along the left stem
- Letter size before border: 3.4 in x 4.3 in (8.6 cm x 10.9 cm), which is 17 stitches by 13 rows
- Border depth: 0.25 in (0.6 cm) per side
Materials
Choose a smooth, mercerized or matte cotton in DK weight. Cotton holds the basketweave crisply and wears well on a keychain. Avoid fluffy yarns, because they blur the blocks.
- Color A (raspberry pink): 15 g / 35 m, for the letter and border
- Color B (light blush pink): 6 g / 14 m, for the peony and bud
- Color C (golden yellow): 1 g / 2 m, for the peony center
- Color D (olive green): 4 g / 9 m, for the stem and leaves
Tools:
– 3.5 mm (E-4) and 3.0 mm (C/D) hooks
– Tapestry needle
– Scissors
– 2 locking stitch markers
– Blocking mat and rust-proof pins
– 1.25 in (3.2 cm) gold spring keyring and one 8 mm gold jump ring
– 2 pairs of flat-nose pliers
All yarn quantities include a margin of roughly 20 percent.
Abbreviations (US Terms)
- ch = chain
- sl st = slip stitch
- sc = single crochet
- hdc = half double crochet
- dc = double crochet
- tr = treble crochet
- FPdc = front post double crochet
- BPdc = back post double crochet
- FLO / BLO = front loop only / back loop only
- rev sc = reverse single crochet (crab stitch)
- st(s) = stitch(es)
- RS / WS = right side / wrong side
Special note on the blocks: The 17 letter stitches are always arranged as 1 edge dc, five 3-stitch blocks (Blocks 1–5, counted from the stem edge), and 1 edge dc. “Raised” means the block stands out on the RS.
– On RS rows, work raised blocks as FPdc and flat blocks as BPdc.
– On WS rows, work raised blocks as BPdc and flat blocks as FPdc.
The raised blocks swap every 2 rows.
Gauge and Checkpoints
Gauge: 20 sts and 12 rows = 4 in (10.2 cm) in basketweave with the 3.5 mm hook. That works out to 5 sts and 3 rows per inch.
The letter is your test piece. Check it at each stage:
- After Row 2: width is 3.4 in (8.6 cm).
- After Row 5: the lower counter gap is 1.2 in (3.0 cm) wide. The stem section is 0.8 in (2.0 cm) wide and the bowl section is 1.4 in (3.6 cm) wide.
- After Row 7: height is 2.3 in (5.8 cm).
- After Row 13: 3.4 in x 4.3 in (8.6 cm x 10.9 cm).
- After Border Round 1: 3.7 in x 4.6 in (9.4 cm x 11.7 cm).
- After Border Round 2: 3.9 in x 4.8 in (9.9 cm x 12.2 cm).
If the piece is more than 0.1 in (0.3 cm) too wide after Row 2, start again with a 3.25 mm hook. If it’s too narrow, use a 3.75 mm hook.
If the width is right but the rows are too short, pull each dc up slightly taller rather than changing hooks.
Letter B
Columns are counted 1–17 from the stem (left) edge as you look at the RS.
– RS rows travel from column 17 to column 1.
– WS rows travel from column 1 to column 17.
– The ch 2 at the start of each row does not count as a stitch.
With Color A and the 3.5 mm hook, ch 19.
Row 1 (RS): Dc in 4th ch from hook (the skipped ch count as the first dc) and in each ch across. Turn. (17 sts)
Row 2 (WS): Ch 2, dc in first st, [BPdc 3, FPdc 3] twice, BPdc 3, dc in top of turning ch. Turn. (17 sts)
Blocks 1, 3 and 5 are now raised on the RS.
Lower Counter (Rows 3–5)
Bowl section, continuing with the working yarn:
– Row 3 (RS): Ch 2, dc in first st, FPdc 3 (Block 5), BPdc 3 (Block 4). Turn and leave the rest unworked. (7 sts)
– Row 4 (WS): Ch 2, BPdc 3 (Block 4), FPdc 3 (Block 5), dc in last st. Turn. (7 sts)
– Row 5 (RS): Ch 2, dc in first st, BPdc 3 (Block 5), FPdc 3 (Block 4). Fasten off. (7 sts)
Stem section: With RS facing, join Color A in column 4 of Row 2.
– Row 3 (RS): Ch 2, FPdc 3 (Block 1), dc in last st. Turn. (4 sts)
– Row 4 (WS): Ch 2, dc in first st, FPdc 3. Turn. (4 sts)
– Row 5 (RS): Ch 2, BPdc 3, dc in last st. Turn. (4 sts)
Do not fasten off. This yarn becomes your working yarn.
Columns 5–10 stay unworked. That gap is the lower counter: 6 sts wide and 3 rows tall, or 1.2 in x 1.0 in (3.0 cm x 2.5 cm).
Middle Bar (Rows 6–8)
Row 6 (WS): Ch 2, dc in first st, BPdc 3 (Block 1), ch 6, then continue on the bowl section: FPdc 3 (Block 4), BPdc 3 (Block 5), dc in last st. Turn. (11 sts + ch-6)
Row 7 (RS): Ch 2, dc in first st, FPdc 3, BPdc 3, dc in each of the 6 ch, FPdc 3, dc in last st. Turn. (17 sts)
Row 8 (WS): Ch 2, dc in first st, [FPdc 3, BPdc 3] twice, FPdc 3, dc in last st. Turn. (17 sts)
This row sets the texture across the bridge stitches. Blocks 2 and 4 are now raised.
Upper Counter (Rows 9–10)
Bowl section, continuing with the working yarn:
– Row 9 (RS): Ch 2, dc in first st, BPdc 3 (Block 5), FPdc 3 (Block 4). Turn. (7 sts)
– Row 10 (WS): Ch 2, FPdc 3, BPdc 3, dc in last st. (7 sts)
Place a marker in the live loop and set the yarn aside.
Stem section: With RS facing, join a new strand of Color A in column 4 of Row 8.
– Row 9 (RS): Ch 2, BPdc 3, dc in last st. Turn. (4 sts)
– Row 10 (WS): Ch 2, dc in first st, BPdc 3. Fasten off. (4 sts)
The upper counter is 6 sts wide and 2 rows tall, or 1.2 in x 0.7 in (3.0 cm x 1.8 cm). It’s shorter than the lower counter, just like a printed B.
Top Bar (Rows 11–13)
Return the marked loop to your hook.
Row 11 (RS): Ch 2, dc in first st, FPdc 3, BPdc 3, ch 6, then continue on the stem section: FPdc 3, dc in last st. Turn. (11 sts + ch-6)
Row 12 (WS): Ch 2, dc in first st, FPdc 3, dc in each of the 6 ch, BPdc 3, FPdc 3, dc in last st. Turn. (17 sts)
Row 13 (RS): Ch 2, dc in first st, [BPdc 3, FPdc 3] twice, BPdc 3, dc in last st. (17 sts)
Do not turn or fasten off. Your yarn is now at the top-left corner.
Border
Border gauge:
– 1 sc in each stitch top or foundation chain.
– 2 sc in each dc row-end, because one dc row is about as tall as 2 sc.
The stem side gets 3-sc corners so it stays square. The bowl side gets 2-sc corners and a narrowed notch, which pull those corners into curves.
Round 1 (RS): Ch 1. Work in this order:
- Top-left corner: 3 sc in the last st of Row 13.
- Left (stem) side: 2 sc in each of the 13 row-ends (26 sc).
- Bottom-left corner: 3 sc in the first foundation ch.
- Bottom edge: 1 sc in each of the next 15 foundation ch (15 sc).
- Bottom-right corner: 2 sc in the last foundation ch.
- Right (bowl) side:
- 2 sc in each row-end of Rows 1–6 (12 sc)
- 1 sc in each row-end of Rows 7–9 (3 sc). This forms the notch.
- 2 sc in each row-end of Rows 10–13 (8 sc)
- Right side total: 23 sc.
- Top-right corner: 2 sc in the first st of Row 13.
- Top edge: 1 sc in each of the next 15 sts (15 sc).
- Sl st to the first sc.
Round 1 total: 89 sc (3 + 26 + 3 + 15 + 2 + 23 + 2 + 15).
Round 2 (RS): Ch 1. Do not turn. Rev sc in each st around (89 rev sc). Sl st to the first st and fasten off.
Why the math works:
– Every top-edge and bottom-edge stitch gets exactly 1 sc. That’s 15 between corners plus each corner stitch, so 17 columns are fully covered.
– Every one of the 13 rows gets 2 sc on the stem side.
– On the bowl side, only the 3 middle rows drop to 1 sc each, so the 23 stitches there come out to 26 – 3.
– Round 2 works one-to-one into Round 1, so the rope edge lies flat with no extra stitches.
Peony
Use the 3.0 mm hook.
Rnd 1 (Color C): Magic ring, 8 sc. Sl st to join. (8 sc)
Rnd 2 (Color C): Working in FLO, [sl st, ch 3] in each st around. Sl st to join and fasten off. (8 ch-3 loops)
Rnd 3 (Color B): Join in the BLO of any Rnd 1 st. Ch 1, 2 sc in the BLO of each st around. Sl st to join. (16 sc)
Checkpoint: about 1 in (2.5 cm) across.
Rnd 4, inner petals (FLO): [Sl st in next st, (hdc, dc, hdc) in next st] 8 times. (8 petals)
Rnd 5 (BLO of Rnd 3): [2 sc in next st, sc in next st] 8 times. (24 sc)
Rnd 6, middle petals (FLO): [Sl st in next st, (hdc, dc) in next st, (dc, hdc) in next st, sl st in next st] 6 times. (6 petals)
Rnd 7 (BLO of Rnd 5): [2 sc in next st, sc in next 2 sts] 8 times. (32 sc)
Checkpoint: 1.25 in (3.2 cm) across.
Rnd 8, outer petals (both loops): [Sl st in next st, (dc, tr) in next st, (tr, dc) in next st, sl st in next st] 8 times. Fasten off and leave a long tail. (8 petals)
Finished peony: about 1.75 in (4.4 cm) across. You now have three petal layers stacked around a yellow loop center.
Rosebud
With Color B and the 3.0 mm hook, ch 9.
Work 2 dc in the 4th ch from hook. Then [3 dc in next ch] 5 times. (18 dc, including the skipped ch)
The strip curls on its own. Roll it tightly with the first end at the center and stitch through the base to hold it. Finished bud: 0.6 in (1.5 cm) tall.
Stem and Leaves
Use Color D and the 3.0 mm hook.
Stem: Ch 14. Sl st in 2nd ch from hook and each ch across. (13 sl sts) The stem is about 2 in (5.1 cm) long.
Large leaf (make 4): Ch 7. Sc in 2nd ch from hook, hdc in next ch, dc in next 2 ch, hdc in next ch, (sc, ch 2, sc) in last ch. Working along the other side of the chain: hdc, dc 2, hdc, sc, sl st to the first sc. Each leaf is 0.9 in (2.3 cm) long.
Small leaf (make 3): Ch 5. Sc in 2nd ch from hook, hdc in next ch, dc in next ch, (hdc, ch 2, hdc) in last ch. Working along the other side: dc, hdc, sc, sl st. Each leaf is 0.6 in (1.5 cm) long.
Assembly
- Weave in all ends on the letter before blocking.
- Sew the stem vertically along the center of the stem column (Block 1). Start 0.5 in (1.3 cm) below the top edge.
- Sew the bud at the top of the stem. Sew 1 small leaf tucked under the bud and 2 small leaves angled outward along the stem.
- Sew the peony over the lower stem area so its outer petals extend about 0.25 in (0.6 cm) past the left border. Tack the petals only at their bases so they stay lifted.
- Tuck the 4 large leaves under the peony: 2 on the left, 1 below, and 1 to the lower right.
- Open the jump ring with pliers. Thread it through Border Round 1 at the top-left corner, between columns 2 and 3. Add the keyring and close the jump ring fully.
Final Blocking
- Pin the letter RS up on the mat before you sew on the appliqués, or after, if you can keep pins away from the flowers.
- Pin the stem side straight: 4.8 in (12.2 cm) tall.
- Pin the bottom and top edges straight: 3.9 in (9.9 cm) wide.
- Ease the bowl-side corners into smooth curves, and press the notch inward at Rows 7–9.
- Pin each counter square without stretching it.
- Mist with water until damp, then let it dry completely, about 6 hours.
- Shape the peony petals with your fingertips while they’re slightly damp.
Final Quality-Control Checklist
- Letter measures 3.9 in x 4.8 in (9.9 cm x 12.2 cm).
- Every row has 17 sts, except Rows 3–5 and 9–10 (4 + 7 sts) and Rows 6 and 11 (11 sts + ch-6).
- Raised blocks swap every 2 rows.
- Border Round 1 has 89 sc and Round 2 has 89 rev sc.
- The lower counter is taller than the upper counter.
- The stem side is square and the bowl side is rounded with a visible notch.
- All appliqués are firmly sewn, and no ends show on the RS.
- The jump ring is fully closed.
Troubleshooting
- Blocks look blurry: You’ve mixed up FP and BP on a WS row. On WS rows, raised blocks are BPdc.
- Counters are lopsided: Recount your join stitch. It must go in column 4, counted from the stem edge.
- Bridge stitches look gappy: Work the ch-6 a little tighter, or go down a hook size just for those chains.
- Stem side ripples: Your border is too loose. Rework it with a 3.25 mm hook.
- Bowl corners are pointed: Make sure the corners have 2 sc, not 3, and pin the curves firmly while blocking.
- Peony is flat: Work Rnds 4 and 6 strictly in the FLO so the layers stand up.
Care
Hand wash in cool water, press out the water in a towel, and dry flat. Reshape the petals while the piece is damp.
Final Notes
The measurement chain runs like this:
– Gauge: 20 sts and 12 rows = 4 in (10.2 cm).
– Letter before border: 17 sts x 13 rows, or 3.4 in x 4.3 in (8.6 cm x 10.9 cm).
– After Border Round 1 (89 sc): 3.7 in x 4.6 in (9.4 cm x 11.7 cm).
– After Border Round 2 (89 rev sc): 3.9 in x 4.8 in (9.9 cm x 12.2 cm).
If you hit each checkpoint, the counters, notch and appliqués will line up just like the sample. To make other initials, use the same block system.
Happy crocheting!