

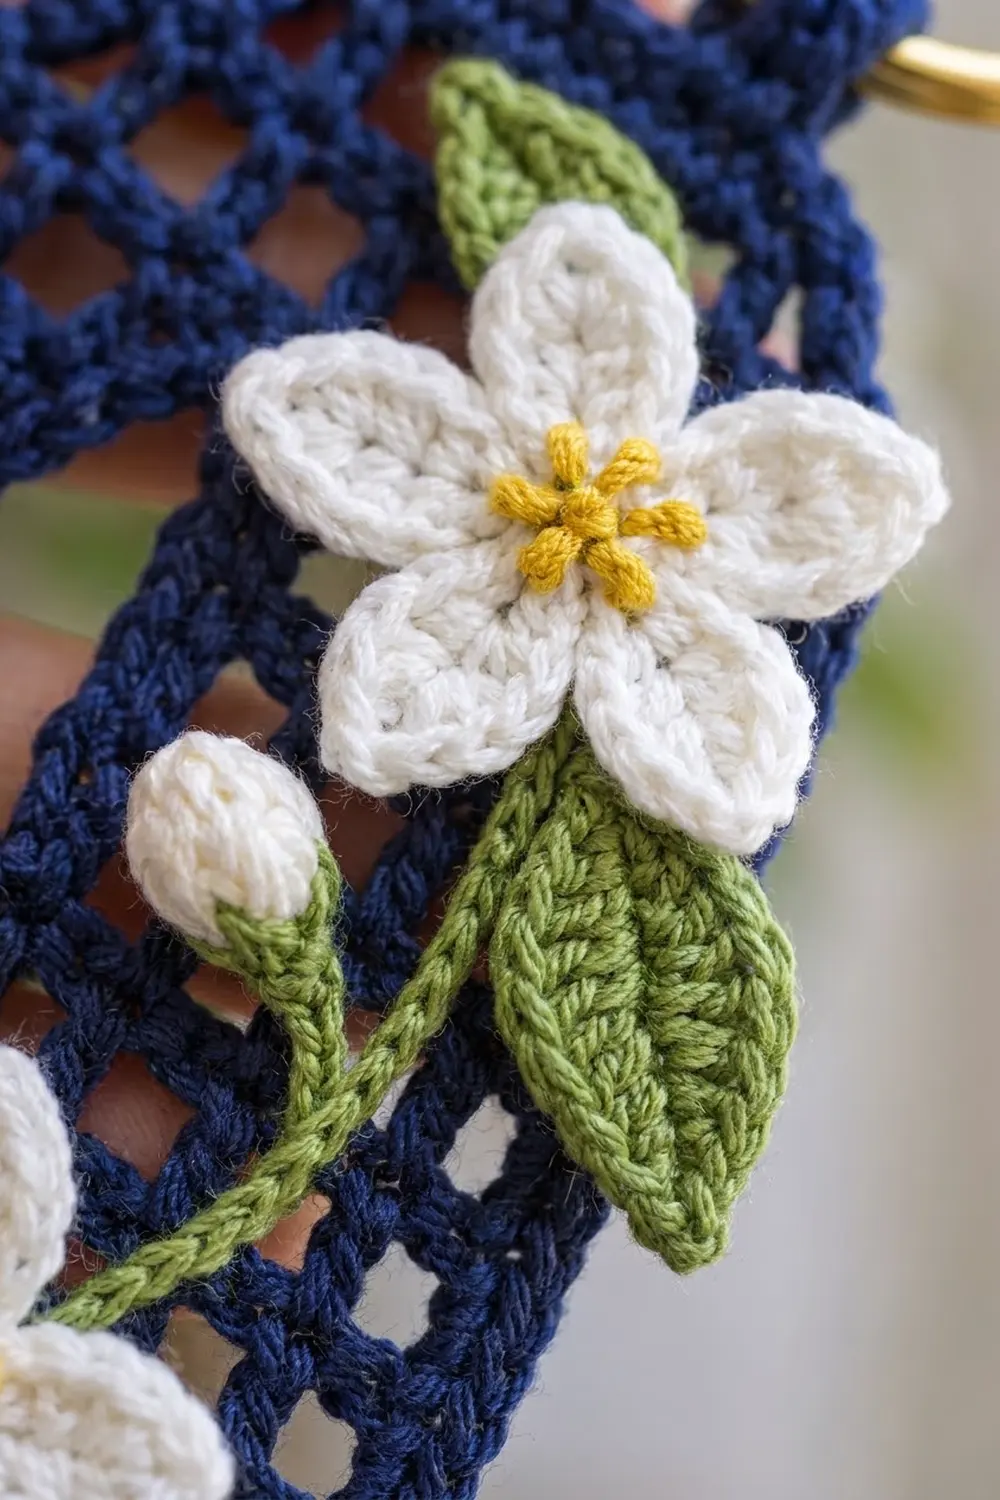
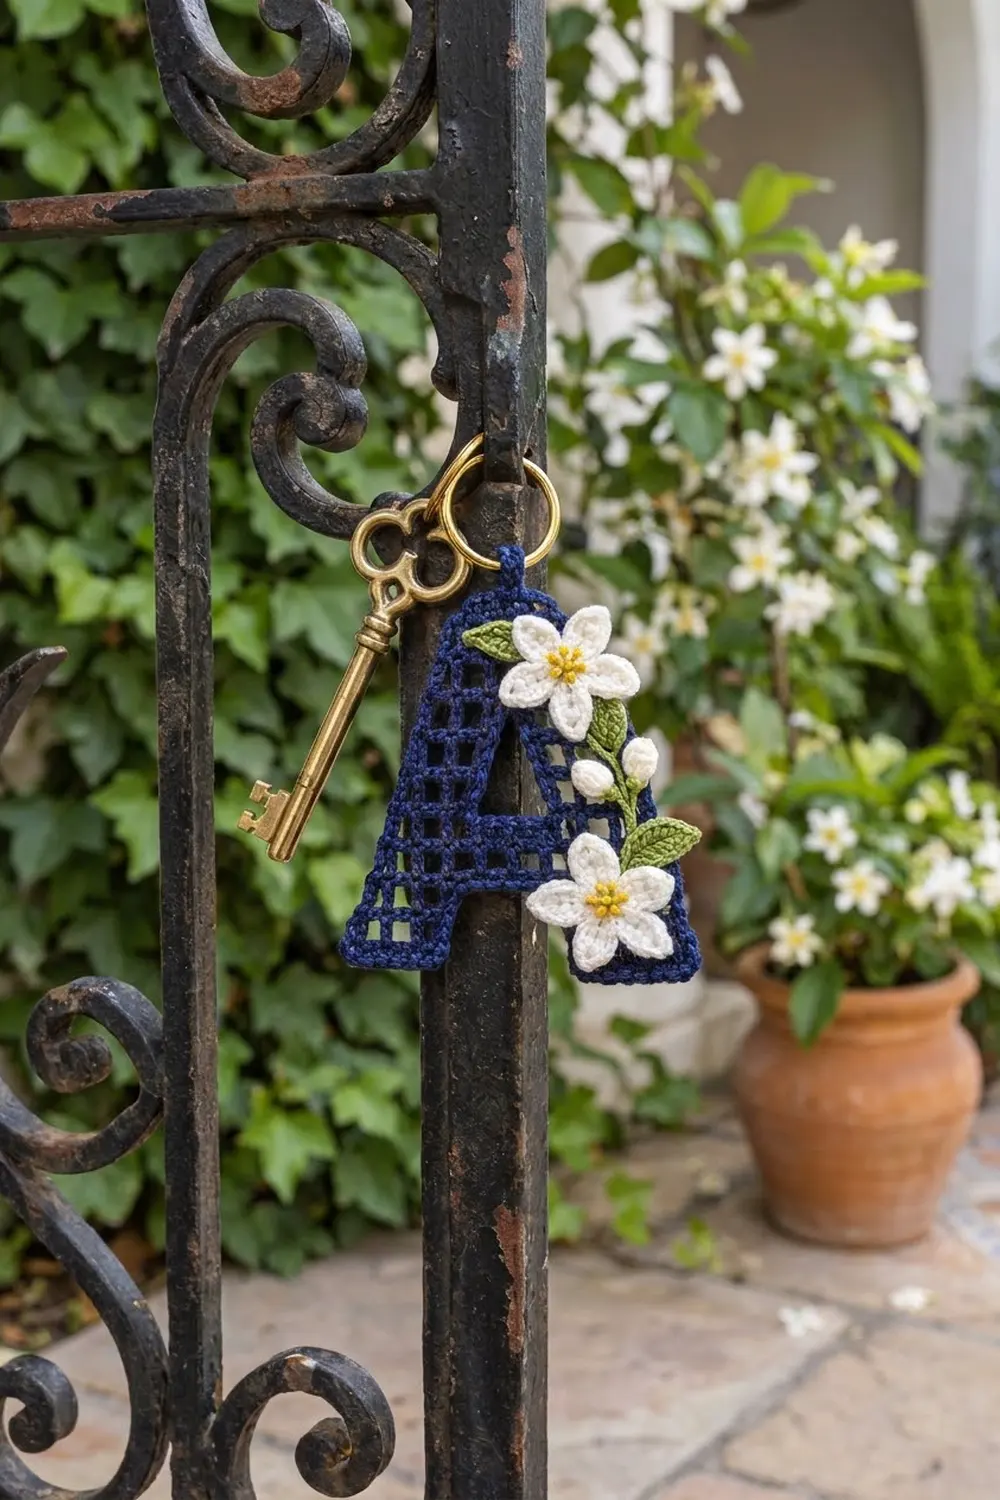
This little keychain is a capital letter A in deep navy filet mesh, finished with a firm single crochet outline and a hanging loop for a gold split ring. A spray of white jasmine runs along one slanted side: two five-petal flowers with yellow centers, two round buds, a slim green stem, and two pointed leaves.
The navy grid looks like a tiled window, and the white flowers add a soft accent on top. All instructions use US crochet terms.
The finished letter measures 3.5 in (8.9 cm) wide at the base and 4.5 in (11.4 cm) tall, or about 5 in (12.7 cm) to the top of the loop. You work the letter in one piece. First you make two short legs, then a crossbar row joins them, and the rest of the letter is worked upward in stepped rows. The flowers, buds, stem, and leaves are small appliqués sewn to the front.
Finished Size and Construction
- Finished size: 3.5 in (8.9 cm) x 4.5 in (11.4 cm), plus a 0.5 in (1.3 cm) hanging loop
- Skill level: Intermediate
- Terminology: US
- Yarn weight: Fingering (super fine, #1) mercerized cotton
- Hook: 2.25 mm (US B-1)
- Number of pieces: 1 letter worked in one piece, plus 7 small appliqués (2 flowers, 2 buds, 1 stem, 2 leaves)
- Layout: Single letter A in filet mesh with stepped outer edges
- Mesh grid: 13 meshes wide at the base, 17 rows tall
- Size before border: 3.25 in (8.3 cm) x 4.25 in (10.8 cm)
- Border depth: 1 round of sc, about 0.125 in (0.3 cm) on every edge
Materials
Use a smooth, tightly plied mercerized cotton of about 186 yd (170 m) per 50 g. Cotton gives crisp square meshes that won’t stretch out on a keyring.
- Navy: 10 g, about 34 m (letter, border, loop)
- White: 4 g, about 14 m (flowers and buds)
- Green: 2 g, about 7 m (stem and leaves)
- Yellow: 1 g, about 3 m (flower centers)
These amounts include a comfortable margin for gauge testing and sewing tails.
Tools:
- 2.25 mm (US B-1) crochet hook
- Tapestry needle and a fine sharp sewing needle
- 1 in (2.5 cm) gold split ring
- Stitch markers
- Blocking mat with a 1 in (2.5 cm) grid, rustproof pins, and a spray bottle
- Scissors
Abbreviations (US Terms)
- ch: chain
- sl st: slip stitch
- sc: single crochet
- hdc: half double crochet
- dc: double crochet
- tr: treble crochet
- sk: skip
- sp: space
- st(s): stitch(es)
- RS / WS: right side / wrong side
Special stitches
- Mesh: ch 1, sk 1 st or ch-1 sp, dc in next dc. A row of n meshes has n + 1 dc and n ch-1 sps, so 2n + 1 sts. A ch-3 at the start of a row counts as the first dc.
- Edge decrease (dec-m): At the start of a row, sl st in the first ch-1 sp and the next dc, then ch 3. At the end of a row, stop before the last mesh and leave it unworked.
- Mesh increase (inc-m): At the start of a row, ch 6, then dc in the dc at the base of the chain. The ch-6 makes a new outer mesh: 2 ch form its base, 3 ch stand as its edge dc, and 1 ch forms its top.
Gauge and Checkpoints
Gauge: 4 meshes (9 sts) = 1 in (2.5 cm) wide and 4 dc rows = 1 in (2.5 cm) tall, so each mesh is a 0.25 in (0.6 cm) square. For the border, 8 sc = 1 in (2.5 cm).
Your first leg works as the gauge swatch.
- After Leg Row 3: 1 in (2.5 cm) wide, 0.75 in (1.9 cm) tall
- After Leg Row 6: 1.5 in (3.8 cm) tall
- After Row 9: 2.25 in (5.7 cm) wide and 2.25 in (5.7 cm) tall
- After Row 17: 3.25 in (8.3 cm) x 4.25 in (10.8 cm)
- After border: 3.5 in (8.9 cm) x 4.5 in (11.4 cm)
If the leg is too wide, switch to a 2.0 mm hook. If it’s too narrow, switch to a 2.5 mm hook. If the width is right but the rows are too tall, pull each dc a little snugger.
Mesh Map
Mesh positions are numbered 1 to 13 in the direction the RS rows travel. Every square is an open mesh. Blank areas are simply left unworked.
| Rows | Meshes worked | Width |
|---|---|---|
| 1–3 | 1–4 and 10–13 (legs) | 13 |
| 4–6 | 2–5 and 9–12 | 11 |
| 7–9 | 3–11 (Row 7 bridges 6–8) | 9 |
| 10–12 | 4–5 and 9–10 (opening 6–8) | 7 |
| 13–15 | 5–9 (Row 13 bridges 6–8) | 5 |
| 16–17 | 6–8 | 3 |
Legs (Make 2)
Make both legs exactly the same. Fasten off the first leg (Leg B), leaving a 6 in (15.2 cm) tail. Don’t fasten off the second leg (Leg A).
With navy, ch 13.
Row 1 (RS): Dc in 7th ch from hook (the skipped 6 ch count as the first dc, a ch-1 sp, and the base under them). *Ch 1, sk 1 ch, dc in next ch; rep from * 2 more times. Turn. Row 1 ends at the inner edge, where the foundation tail hangs. (4 meshes; 5 dc + 4 ch-1 sps = 9 sts)
Row 2 (WS): Ch 3, *ch 1, sk ch-1 sp, dc in next dc; rep from * across, working the last dc in the top of the turning ch. Turn. (4 meshes, 9 sts)
Row 3: Rep Row 2. (9 sts)
Row 4 (step): Inc-m: ch 6, dc in the dc at the base of the ch. *Ch 1, sk ch-1 sp, dc in next dc; rep from * 2 more times. Leave the last mesh unworked (dec-m). Turn. (1 new mesh + 3 meshes = 4 meshes, 9 sts)
Row 5: Ch 3, work 4 meshes, placing the last dc in the 5th ch of the ch-6 (the top outer corner of the new mesh). Turn. (9 sts)
Row 6: Rep Row 2. The row ends at the outer edge. (9 sts)
The leg is still 4 meshes wide but has moved one mesh toward the center. Check that it measures 1 in (2.5 cm) wide and 1.5 in (3.8 cm) tall.
Letter Body
Lay Leg A RS up. Flip Leg B over and place it beside Leg A so the two inc-m edges face each other. Flipping turns Leg B into a mirror image of Leg A, and since filet mesh looks the same on both faces, the flip won’t show.
Row 7 (RS): Work dec-m on Leg A, then work 3 meshes. Ch 5 for the bridge. Dc in the top of the turning ch at the inner edge of Leg B’s Row 6, then work 3 meshes and leave the last mesh unworked. Turn. (7 sts + 5 bridge ch + 7 sts = 19 sts, 9 mesh positions)
Row 8 (WS): Ch 3, work 3 meshes, ending in the dc at the end of the bridge. Over the bridge: ch 1, sk 1 ch, dc in next ch twice, then ch 1, sk 1 ch, dc in next dc. Work 3 meshes across Leg A. Turn. (9 meshes, 19 sts)
Row 9: Ch 3, work 9 meshes. Turn. (19 sts)
Row 10, first side (WS): Work dec-m, then 2 meshes, and leave the rest unworked. Turn. (2 meshes, 5 sts)
Rows 11–12, first side: Ch 3, work 2 meshes, turn. (5 sts each) Fasten off after Row 12, which ends at the inner edge.
Row 10, second side (WS): Skip the 3 Row 9 meshes next to the first side; this gap is the opening. Join navy in the next dc, ch 3, work 2 meshes, and leave the last mesh unworked. Turn. (5 sts)
Rows 11–12, second side: Ch 3, work 2 meshes, turn. (5 sts each) Don’t fasten off.
Row 13 (RS): Work dec-m, then 1 mesh. Ch 5 for the bridge. Dc in the last dc of the first side’s Row 12, work 1 mesh, and leave the last mesh unworked. Turn. (3 sts + 5 ch + 3 sts = 11 sts, 5 mesh positions)
Row 14: Ch 3, work 5 meshes, working over the bridge as in Row 8. Turn. (11 sts)
Row 15: Ch 3, work 5 meshes. Turn. (11 sts)
Row 16: Work dec-m, then 3 meshes, and leave the last mesh unworked. Turn. (7 sts)
Row 17: Ch 3, work 3 meshes. Don’t turn. (7 sts)
Checkpoint: The letter should measure 3.25 in (8.3 cm) x 4.25 in (10.8 cm), with 5 one-mesh steps on each outer edge. The lower gap is 1.25 in (3.2 cm) wide at the base and 0.75 in (1.9 cm) wide above Row 3. The upper opening is 0.75 in (1.9 cm) wide.
Border
Border gauge: 8 sc = 1 in (2.5 cm). Work with the RS facing.
Work 2 sc into each row-end on the vertical edges and 2 sc per mesh on the horizontal edges. Add 1 corner sc at each of the 18 outward corners, and no extra stitch at inward corners. Leave the upper opening unedged.
Round 1: Ch 1, then work these segments in order:
- Top corner: 1 corner sc in the last dc of Row 17. (1)
- First side, going down: 4 sc over Rows 17–16. 2 sc along the shelf mesh, 1 corner sc, 6 sc over the next 3 rows; rep from * 5 times total. (49)
- Outer bottom corner: 1 corner sc. (1)
- Leg base: 8 sc into the foundation ch. (8)
- Inner bottom corner: 1 corner sc. (1)
- Lower gap: 6 sc up Rows 1–3, 2 sc under the inc-m, 1 corner sc, 8 sc up Rows 4–7, 6 sc over the bridge ch, 8 sc down Rows 7–4, 1 corner sc, 2 sc under the inc-m, 6 sc down Rows 3–1. (40)
- Second leg: 1 corner sc, 8 sc into the foundation ch, 1 corner sc. (10)
- Second side, going up: 6 sc over Rows 1–3. 1 corner sc, 2 sc along the shelf mesh, 6 sc over the next 3 rows; rep from * 3 more times. Then 1 corner sc, 2 sc along the last shelf, 4 sc over Rows 16–17. (49)
- Top: 1 corner sc, 3 sc, ch 12 for the loop (not counted), 3 sc. (7)
Sl st in the first sc. (166 sc = 148 edge sc + 18 corner sc) Fasten off.
Hanging loop: Join navy in the ch-12 loop, work 18 sc into the loop, and sl st in the first sc. Fasten off.
Why the math works: Each mesh and each dc row measures 0.25 in (0.6 cm). At 8 sc per inch, 2 sc also cover 0.25 in (0.6 cm), so every edge gets exactly the number of stitches its length needs. The corner sc let the outward points turn without cupping, and the two sides match at 49 sc each.
Flowers (Make 2)
With white, make a magic ring.
Round 1: Ch 1, 10 sc in ring, sl st in first sc. Pull the ring closed. (10 sc)
Round 2: *Sl st in next sc, (hdc, dc, tr, dc, hdc) in next sc; rep from * 4 more times, sl st in first sl st. (5 petals)
Each flower is about 1.25 in (3.2 cm) across. For the center, use yellow to make 5 short straight stitches radiating from the middle, with a French knot at the end of each and 1 more knot in the center.
Buds (Make 2)
With white, ch 3. Work 5 dc in 3rd ch from hook to make a popcorn: drop the loop, insert the hook in the first dc, and pull the dropped loop through. Ch 1 to close, then fasten off. Each bud is about 0.375 in (1.0 cm) long.
Stem
With green, ch 18. Sl st in 2nd ch from hook and in the next 5 ch. *Ch 4, sl st in 2nd ch from hook and the next 2 ch to make a bud branch, then sl st in the next 3 stem ch; rep from * once. Sl st to the end. The stem is about 2 in (5.1 cm) long.
Leaves (Make 2)
With green, ch 7. Starting in 2nd ch from hook, work sc, hdc, 2 dc, hdc, then 3 sc in the last ch. Working along the other side of the chain, work hdc, 2 dc, hdc, sc. Sl st in first sc. (13 sts) Each leaf is about 0.75 in (1.9 cm) long.
Appliqué Placement
Lay the letter RS up. Place one flower at the top right, just below the loop, and tuck a leaf under its left petals. Run the stem diagonally down the right slanted side, starting under the upper flower, and sew a bud to the end of each branch. Tuck the second leaf beside the stem. Place the second flower over the bottom of the right leg so it slightly overlaps the border.
Sew each piece down with single-ply strands of matching yarn, catching only the mesh bars so the stitches stay hidden. Attach the split ring to the loop.
Final Blocking
- Soak the letter, before sewing on the appliqués, in cool water for 5 minutes. Roll it in a towel to press out the water.
- Pin it to the grid at 3.5 in (8.9 cm) x 4.5 in (11.4 cm).
- Pin all 18 outward corners so the steps sit square.
- Pin the lower gap and the upper opening open evenly.
- Mist the flowers and leaves, shape the petals with your fingers, and let everything dry fully.
- Sew on the appliqués once all pieces are dry.
Final Quality-Control Checklist
- Letter measures 3.5 in (8.9 cm) x 4.5 in (11.4 cm)
- 17 rows, with 5 even steps on each side
- Lower gap is 5 meshes wide, then 3; upper opening is 3 meshes wide
- Border has 166 sc and lies flat
- Loop is firm and the ring turns freely
- Each flower is flat with 5 even petals
- All tails are woven in
Troubleshooting
- Meshes slant: Work every dc into a dc, never into a ch.
- Legs are different heights: Count rows before Row 7. Each leg needs exactly 6.
- Bridge sags: Rework the ch-5 more tightly.
- Border ruffles: You’ve added stitches. Recount each segment.
- Border cups: A corner sc is missing. Check all 18 outward corners.
- Flowers curl: Block them flat.
Care
Hand wash in cool water with mild soap and lay flat to dry. Reshape the corners while the piece is damp.
Final Notes
Here is the measurement chain from start to finish. Each leg is 1 in (2.5 cm) wide and 1.5 in (3.8 cm) tall. After Row 17 the body is 3.25 in (8.3 cm) x 4.25 in (10.8 cm). The 166-sc border brings it to 3.5 in (8.9 cm) x 4.5 in (11.4 cm). If every checkpoint matches, your keychain will come out the right size.
Happy crocheting!