

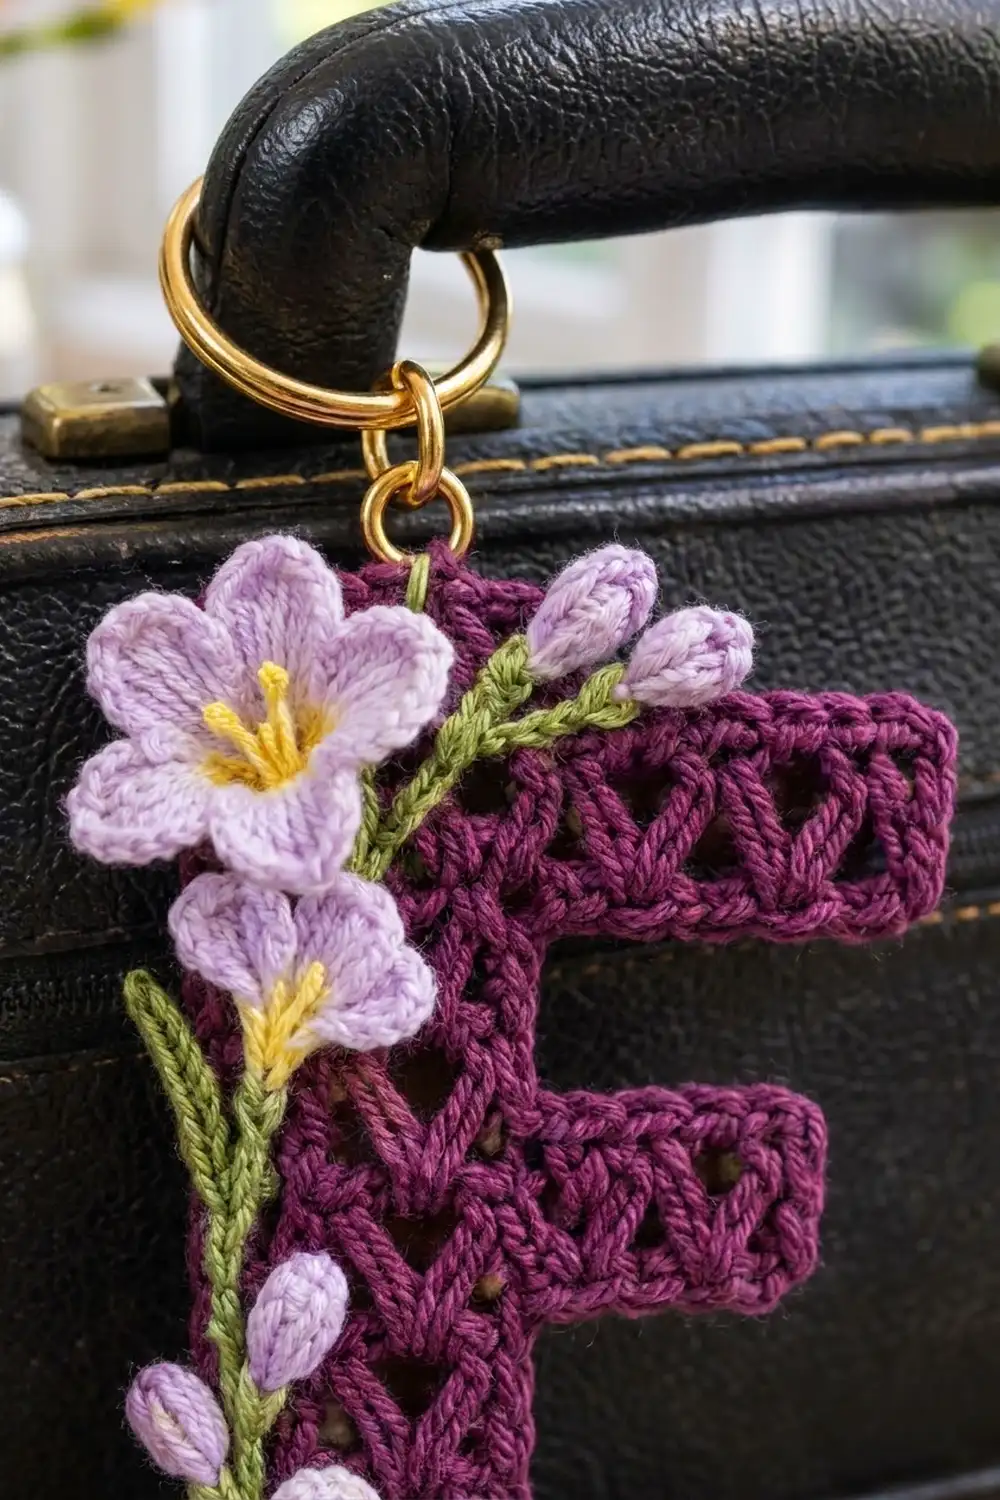
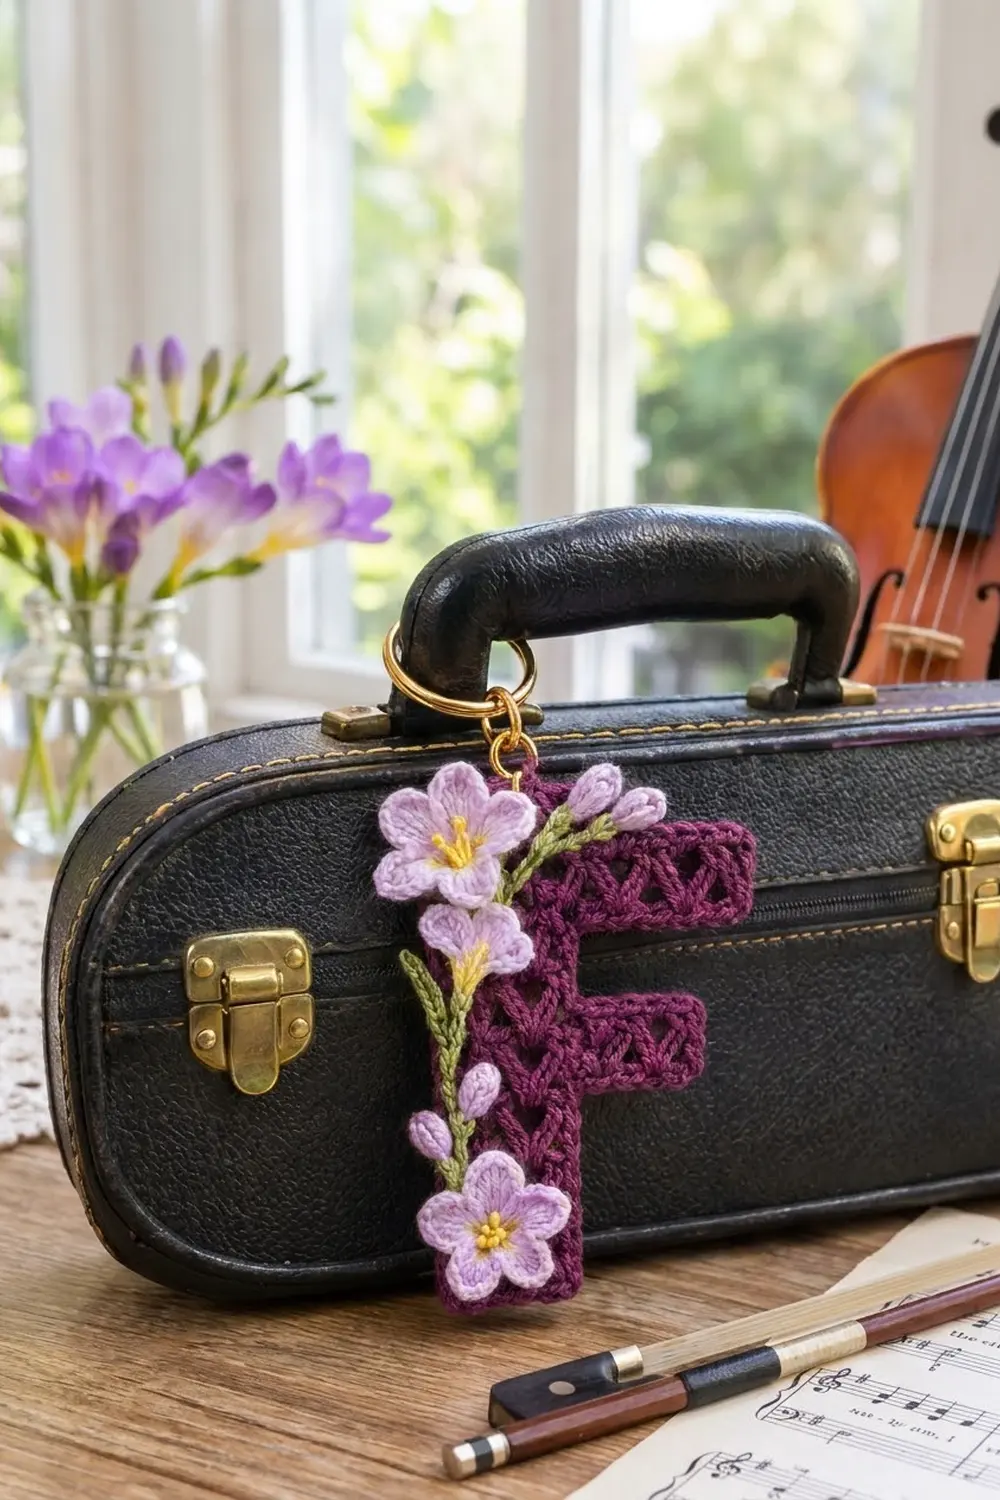
This keychain is a crocheted capital letter F in deep plum. It’s worked in columns of V-stitches and finished with a neat single crochet border. A spray of lavender freesia flowers, buds and a green stem runs up the left side. A gold split ring at the top-left corner turns it into a bag charm or key fob.
There are four colors: plum for the letter, soft lavender for the flowers and buds, leaf green for the stem and leaves, and a touch of yellow for the stamens. The style is sweet and botanical, and it makes a thoughtful personalized gift.
The pattern uses US crochet terms. The finished letter is 2 1/4 in (5.7 cm) wide and 3 1/4 in (8.3 cm) tall, not counting the ring.
The letter is worked flat in rows from the bottom up. Each arm is added with a short chain at the end of a row, so you don’t sew any part of the letter itself. One round of sc border goes all the way around. You make the flowers, buds and stem separately and sew them on as appliqués.
Finished Size and Construction
- Finished size: 2 1/4 in (5.7 cm) wide x 3 1/4 in (8.3 cm) tall
- Skill level: Easy to intermediate
- Terminology: US crochet terms
- Yarn weight: Fine (#2, sport) cotton
- Hook: 2.75 mm (US C-2)
- Number of pieces: 1 letter piece, plus small appliqués (2 open flowers, 1 half-open flower, 5 buds, 1 stem, 1 branch)
- Layout: A single letter; there are no panels to join
- Spine width before border: 1 in (2.5 cm), 2 V-sts wide
- Size before border: 2 in (5.1 cm) wide x 3 in (7.6 cm) tall
- Border depth: 1/8 in (0.3 cm) on every edge
Materials
Choose a smooth mercerized or combed cotton in sport weight. Cotton keeps the V-stitch texture crisp and holds its shape on a keychain that gets handled every day. Avoid fuzzy yarns, which blur the V shapes.
- Plum (letter and border): 8 g / 27 m
- Lavender (flowers and buds): 4 g / 14 m
- Leaf green (stem, leaves, bud caps): 2 g / 7 m
- Yellow (stamens): 1 g / 3 m
All quantities include extra for a gauge test and for weaving in ends.
Tools:
- 2.75 mm (US C-2) crochet hook
- Sharp-pointed tapestry needle for the appliqués
- 1 gold split key ring, 1 in (2.5 cm)
- 1 gold jump ring, 1/4 in (0.6 cm)
- Flat-nose pliers
- Rust-proof pins and a gridded blocking board
- Scissors and a ruler
Abbreviations (US Terms)
- ch – chain
- sl st – slip stitch
- sc – single crochet
- hdc – half double crochet
- dc – double crochet
- dc3tog – double crochet 3 together
- sk – skip
- sp – space
- MR – magic ring
- RS / WS – right side / wrong side
Special stitch – V-stitch (V-st): (dc, ch 1, dc) in the same stitch or space.
In this pattern, each V-st takes up 2 “positions” across the row: the skipped stitch plus the V-st itself. Each edge dc takes up 1 position. A row of 2 V-sts is 6 positions wide.
Gauge and Checkpoints
Make Rows 1–3 of the letter first and measure them before going on. The whole design depends on this small test.
Gauge: 6 positions (2 V-sts plus 2 edge dc) = 1 in (2.5 cm) wide; 3 V-st rows = 1 in (2.5 cm) tall.
Checkpoints:
- After Row 3: 1 in (2.5 cm) wide x 1 in (2.5 cm) tall
- After Row 4: 1 1/3 in (3.4 cm) tall
- After Row 5: the arm row is 1 2/3 in (4.2 cm) wide
- After Row 8: 2 2/3 in (6.8 cm) tall
- After Row 9: 2 in (5.1 cm) wide x 3 in (7.6 cm) tall
- After the border: 2 1/4 in (5.7 cm) x 3 1/4 in (8.3 cm)
If your piece is too big, go down to a 2.5 mm hook. If it’s too small, go up to a 3.0 mm hook. Fix any difference of more than 1/8 in (0.3 cm) on the 3-row test. Over the full letter it grows to about 3/8 in (1.0 cm).
Letter F
Work in rows with plum. Odd-numbered rows are RS rows. The ch 3 at the start of each row counts as the first dc.
Foundation: Ch 8.
Row 1 (RS): V-st in 5th ch from hook (the 4 skipped ch count as the edge dc plus 1 skipped ch), sk 1 ch, V-st in next ch, dc in last ch. Turn. (2 V-sts, 2 dc – 6 positions)
Row 2 (WS): Ch 3, V-st in ch-1 sp of each of next 2 V-sts, dc in top of turning ch. Turn. (2 V-sts, 2 dc)
Rows 3–4: Repeat Row 2, but don’t turn at the end of Row 4. (2 V-sts, 2 dc in each row)
Row 4 ends at the right-hand edge of the spine, seen from the RS. The middle arm grows from here.
Middle arm extension: At the end of Row 4, ch 7. Turn.
Row 5 (RS): V-st in 5th ch from hook (3 ch form the new edge dc, 1 ch is skipped), sk 1 ch, V-st in next ch, sk the last dc of Row 4, V-st in ch-1 sp of each of next 2 V-sts, dc in top of turning ch. Turn. (4 V-sts, 2 dc – 10 positions)
The 7 chains give 3 for the edge dc plus 4 positions (skip, V-st, skip, V-st). The skipped edge dc of Row 4 acts as the skip position between the old and new V-sts, so the V-st columns stay evenly spaced.
Row 6 (WS): Ch 3, V-st in ch-1 sp of each of next 2 V-sts, dc in the sp between the 2nd and 3rd V-sts. Leave the rest of the row unworked. Turn. (2 V-sts, 2 dc)
The unworked V-sts and edge dc of Row 5 form the middle arm. It’s 1 row deep, or 1/3 in (0.8 cm) before the border.
Rows 7–8: Ch 3, V-st in ch-1 sp of each of next 2 V-sts, dc in top of turning ch. Turn after Row 7 only. (2 V-sts, 2 dc in each row)
Top bar extension: At the end of Row 8, ch 9. Turn.
Row 9 (RS): V-st in 5th ch from hook, [sk 1 ch, V-st in next ch] twice, sk the last dc of Row 8, V-st in ch-1 sp of each of next 2 V-sts, dc in top of turning ch. Don’t fasten off. (5 V-sts, 2 dc – 12 positions)
The 9 chains give 3 for the edge dc plus 6 positions (3 skip-and-V-st pairs). The top bar is 1 V-st longer than the middle arm, which gives the F its classic shape.
Check: The letter is now 2 in (5.1 cm) wide across Row 9 and 3 in (7.6 cm) tall. The spine is 1 in (2.5 cm) wide, with 2 neat columns of stacked V-sts running its full height.
Border
Border gauge: One round of sc adds 1/8 in (0.3 cm) to every edge, so the letter grows by 1/4 in (0.6 cm) in each direction.
Placement rules:
- 2 sc in each dc row-end
- Along top edges: 2 sc in each V-st ch-1 sp and 1 sc in each edge dc
- Along bottom edges: 1 sc in each free loop of the foundation or extension chain
- 3 sc in the corner stitch at each of the 7 outer corners
- No extra stitches and no decreases at the 3 inner corners
Rnd 1 (RS): You’re at the top-left corner after Row 9. Ch 1 and rotate the piece to work down the left edge.
- Left edge: 2 sc in each row-end of Rows 9–1. (18 sc)
- Bottom edge: 3 sc in free loop of first foundation ch (corner), sc in each of next 4 ch, 3 sc in base of turning ch (corner). (10 sc)
- Lower right edge of spine: 2 sc in each row-end of Rows 1–4. (8 sc)
- Middle arm underside: Sc in free loop of each of next 4 extension ch, 3 sc in base of turning ch (corner). (7 sc)
- Middle arm end: 2 sc in Row 5 row-end. (2 sc)
- Middle arm top: 3 sc in edge dc (corner), 2 sc in each of next 2 V-st ch-1 sps. (7 sc)
- Upper right edge of spine: 2 sc in each row-end of Rows 6–8. (6 sc)
- Top bar underside: Sc in free loop of each of next 6 extension ch, 3 sc in base of turning ch (corner). (9 sc)
- Top bar end: 2 sc in Row 9 row-end. (2 sc)
- Top edge: 3 sc in top of turning ch (corner), 2 sc in each of next 5 V-st ch-1 sps, 3 sc in last dc (corner). (16 sc)
Sl st to the first sc. Fasten off, leaving a 6 in (15.2 cm) tail.
Total: 71 base sc + 14 corner extras (2 at each of 7 outer corners) = 85 sc.
Why the math works:
– A dc row is about as tall as 2 sc, so 2 sc per row-end keeps the side edges flat.
– Each V-st covers 2 positions, so 2 sc per V-st plus 1 sc per edge dc matches the width exactly. The top edge has 1 + 10 + 1 = 12 base sc for 12 positions, and the bottom has 6 for 6.
– The 2 extra sc at each outer corner let the border turn 90 degrees without cupping.
– Inner corners pull in on their own, so they need no decrease.
Appliqués
Leave an 8 in (20.3 cm) tail on every appliqué for sewing.
Open Flowers (make 2)
With lavender:
Rnd 1: 10 sc in MR. Sl st to first sc. (10 sc)
Rnd 2: Sl st in next sc, (hdc, 3 dc, hdc) in next sc; repeat from * 4 more times. Sl st to first sl st. (5 petals; 5 sl st + 25 petal sts = 30 sts)*
Each flower is 1 in (2.5 cm) across. With yellow, embroider 4 short straight stitches out from the center and finish each one with a French knot.
Half-Open Flower (make 1)
With lavender: MR, ch 2, 2 dc in ring, ch 2, sl st in ring; repeat from * 2 more times. (3 petals)* Pull the ring only partly closed so the petals fan into a cup. The flower is 3/4 in (1.9 cm) across. Add 2 yellow straight stitches at the base.
Buds (make 5)
With lavender: Ch 3, dc3tog in 3rd ch from hook, ch 1. Fasten off. Each bud is a small oval about 3/8 in (1.0 cm) long. With green, work 2 straight stitches over the base of each bud to make a calyx.
Stem and Branch (make 1 of each)
With green:
Main stem: Ch 21, sl st in back bump of 2nd ch from hook and each ch across. (20 sl st – about 2 1/2 in / 6.4 cm)
Branch: Ch 9, sl st in back bump of 2nd ch from hook and each ch across. (8 sl st – about 1 in / 2.5 cm)
Leaves: With green and the sharp needle, embroider 6 small lazy-daisy leaves in pairs along the lower half of the main stem.
Assembly
- Pin the main stem along the left side of the spine, from the bottom-left corner up to the top-left corner.
- Pin the branch so it starts at the top of the stem and runs right along the left half of the top bar.
- Place 1 open flower over the bottom-left corner and the other over the top-left corner.
- Place the half-open flower on the stem just below the top flower, at about Row 7.
- Place 2 buds at the end of the branch and 3 buds along the left side of the stem between Rows 2 and 6.
- Sew each piece down with small stitches through the plum fabric only. Catch the back loops of the appliqués so the stitches stay hidden.
- Open the jump ring with pliers and pass it through the 3-sc group at the top-left corner of the border. Add the split ring, then close the jump ring fully.
Final Blocking
- Spritz the keychain lightly with water, or pin it and steam from 1/2 in (1.3 cm) above. Don’t press the flowers flat.
- Pin each outer corner of the letter to the grid at 2 1/4 in (5.7 cm) wide and 3 1/4 in (8.3 cm) tall.
- Straighten the spine so the V-st columns run straight up, and set the arms at right angles.
- Add pins along the long left edge to keep it straight.
- Shape the petals gently with your fingertips so they cup slightly.
- Let it dry completely before unpinning.
Final Quality-Control Checklist
- The letter is 2 1/4 in (5.7 cm) x 3 1/4 in (8.3 cm).
- The spine shows 2 straight V-st columns from bottom to top.
- The middle arm is 4 V-sts wide and the top bar is 5 V-sts wide.
- The border has 85 sc and lies flat with crisp outer corners.
- All 7 outer corners are square, and the 3 inner corners are neat with no gaps.
- 2 open flowers, 1 half-open flower and 5 buds are sewn on securely.
- No sewing stitches show on the front.
- The jump ring is fully closed and anchored in the border.
- All ends are woven in and trimmed.
Troubleshooting
V-sts lean or the columns drift sideways: Make sure you’re working into the ch-1 sp, not between V-sts.
Arm rows look gappy at the join: Check that you skipped the last dc of the previous row. Working into it shifts the columns.
Border ruffles: Your sc tension is loose or you added extra sc. Recount against the segment list.
Border cups or pulls at the corners: You probably missed the 3 sc at an outer corner.
Inner corners pucker: Work the stitches on either side of the inner corner a little looser.
Flowers curl: Block them separately before sewing, or steam them lightly.
Letter too floppy for a keychain: Go down a hook size, or line the back with matching felt.
Care
Hand wash in cool water with mild soap and lay flat to dry. Take off the metal rings first to avoid tarnish.
Final Notes
Each measurement builds on the one before. Three rows of the 2-V-st spine make a 1 in (2.5 cm) square. Nine rows make a 3 in (7.6 cm) letter that is 2 in (5.1 cm) wide at the top bar. One round of 85 sc adds 1/8 in (0.3 cm) to every edge, for a finished size of 2 1/4 in (5.7 cm) x 3 1/4 in (8.3 cm). If your first checkpoint matches, the later ones will too.
Change the colors to match a favorite flower, or use the same V-st method to build other initials.
Happy crocheting!