

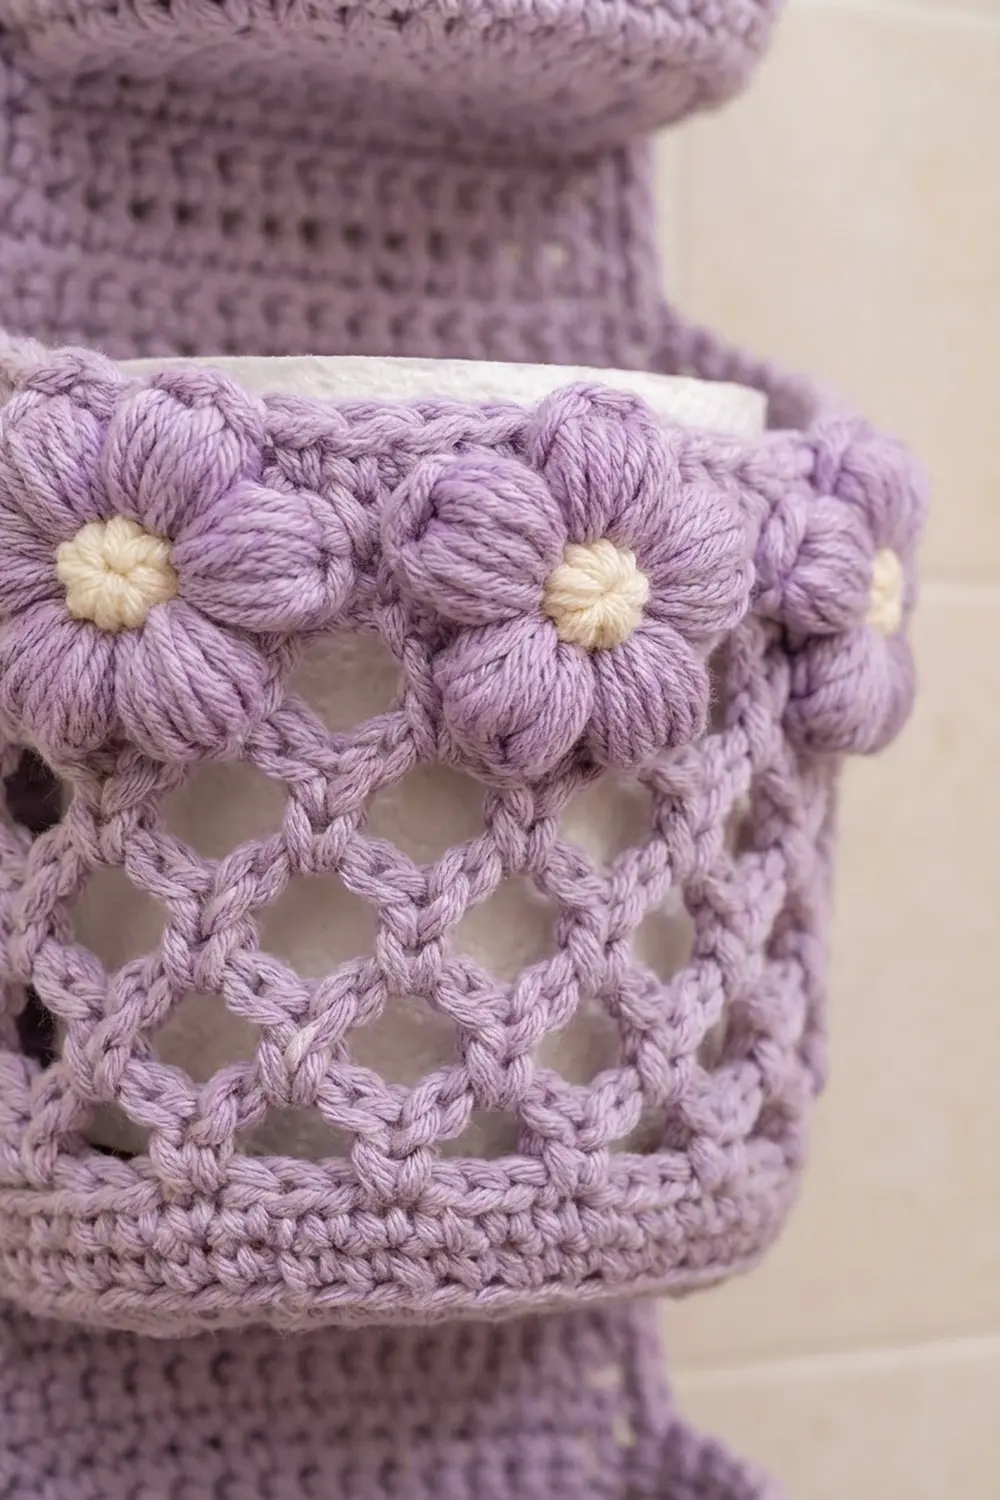
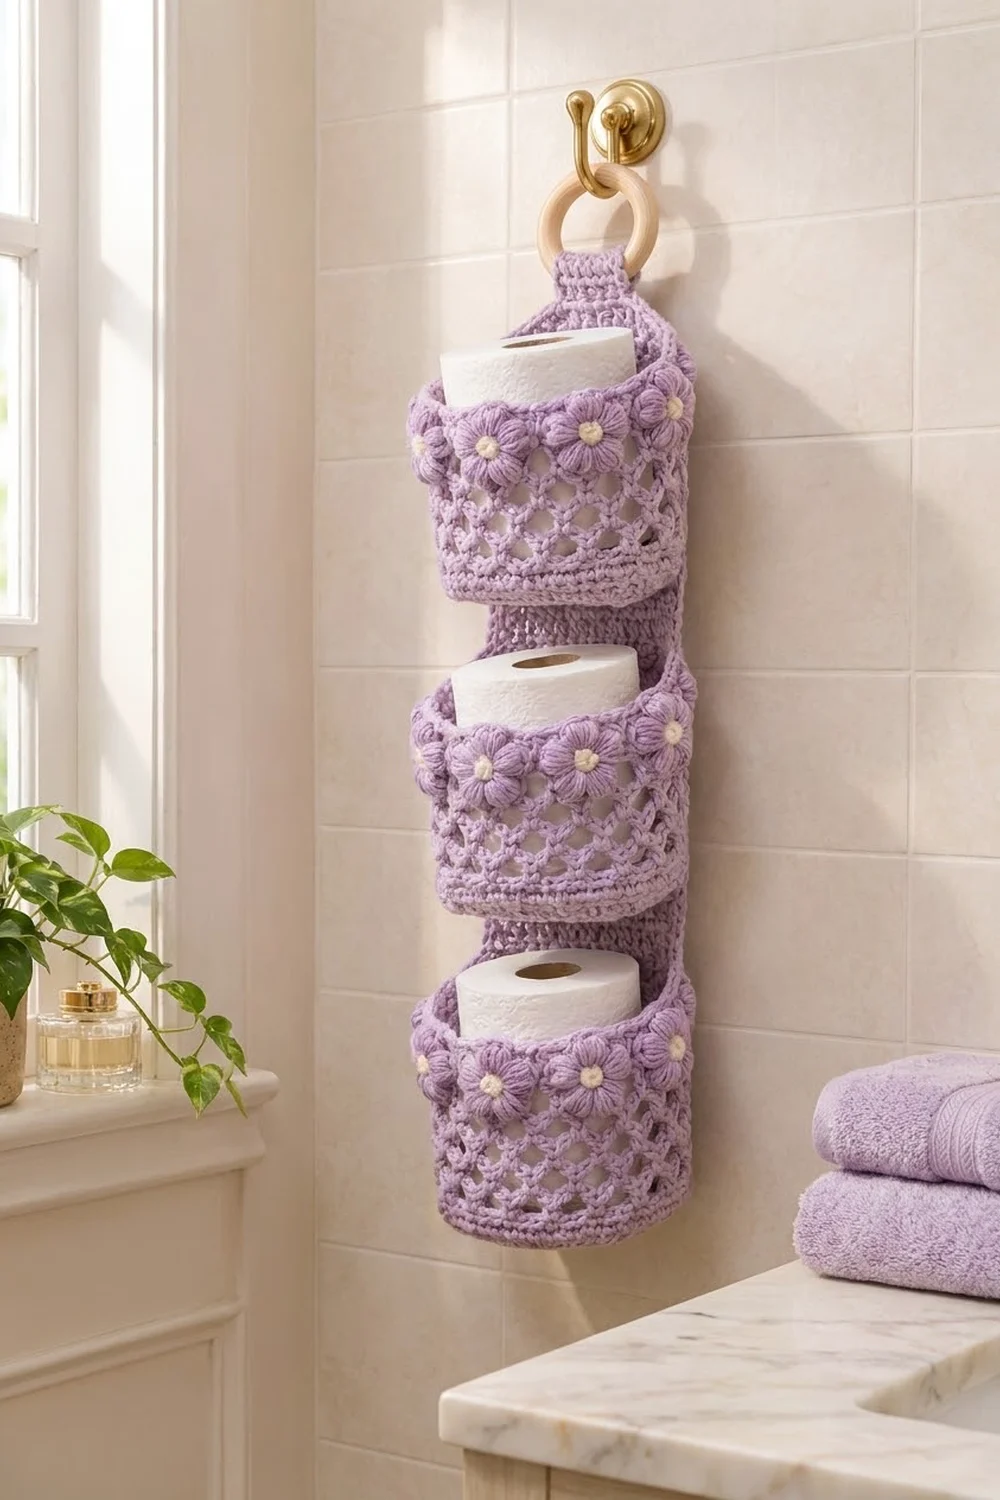
This hanging toilet paper holder keeps three spare rolls in sight and within reach. A tall lavender back panel holds three oval pockets. Each pocket has a solid base, an open diamond mesh, and a band of puff-stitch flowers with soft cream centers.
The palette is just lavender and cream, so it suits a light, calm bathroom. The mesh lets you see how many rolls are left, and the flowers add texture without making the piece busy.
The pattern uses US crochet terms. The finished holder measures about 6.75 in (17.1 cm) wide and 24 in (61.0 cm) tall from the bottom edge to the top of the folded tab, not counting the ring. Each pocket is about 6 in (15.2 cm) wide, 4.5 in (11.4 cm) deep and 3.75 in (9.5 cm) tall.
You will work the back panel in rows, then make three pockets in the round from an oval base, and then make fifteen small flowers. Next, sew the flowers to the pockets and the pockets to the panel. Finally, work a two-round border around the panel and fold the tab over a wooden ring.
Finished Size and Construction
- Finished size: 6.75 in × 24 in (17.1 × 61.0 cm), not counting the ring
- Skill level: Intermediate
- Terminology: US
- Yarn weight: Worsted (#4) cotton or cotton blend
- Hook: 5.0 mm (H-8)
- Number of pieces: 19 (1 panel, 3 pockets, 15 flowers)
- Layout: 3 pockets stacked vertically on one panel
- Pocket size: 6 × 4.5 × 3.75 in (15.2 × 11.4 × 9.5 cm)
- Panel before border: 6 in (15.2 cm) wide; 25.8 in (65.5 cm) long unfolded
- Border depth: about 3/8 in (1.0 cm)
Materials
Choose a smooth cotton or cotton blend that holds its shape. Cotton keeps the pockets firm and stands up to bathroom humidity. The quantities below assume about 190 m (208 yd) per 100 g.
- Color A, Lavender: 220 g, about 418 m (457 yd)
- Color B, Cream: 15 g, about 29 m (32 yd)
Tools:
– 5.0 mm (H-8) crochet hook
– Wooden ring, 3 in (7.6 cm) across
– Tapestry needle
– Stitch markers (at least 6)
– Pins
– Measuring tape
Both yarn amounts include a margin of about 15% for your gauge swatch and small differences in tension.
Abbreviations (US Terms)
- ch: chain
- sl st: slip stitch
- sc: single crochet
- sc2tog: single crochet 2 together
- BLO: back loop only
- rev sc: reverse single crochet (crab stitch)
- st(s): stitch(es)
- sp: space
- rnd: round
- yo: yarn over
Puff st (special stitch): (Yo, insert hook in the indicated st, yo and pull up a loop to about 1/2 in [1.3 cm]) 4 times. You now have 9 loops on the hook. Yo and draw through all 9 loops, then ch 1 to close the puff.
Gauge and Checkpoints
Gauge: 16 sc and 18 rows = 4 in (10.2 cm). One mesh round of ch-5 loops is about 1/2 in (1.3 cm) tall, and each ch-5 loop spans 4 base stitches, or 1 in (2.5 cm).
Make one pocket base first and treat it as your gauge test. After Rnd 10, the oval should measure about 4.5 × 6 in (11.4 × 15.2 cm).
Checkpoints:
– Panel width: 24 sts = 6 in (15.2 cm)
– Panel after Row 45: 10 in (25.4 cm)
– Panel after Row 90: 20 in (50.8 cm)
– Pocket wall after Rnd 13: about 0.65 in (1.7 cm)
– Pocket wall after Rnd 17: about 2.65 in (6.7 cm)
– Pocket wall after Rnd 22: about 3.75 in (9.5 cm)
– Flower diameter: about 1.75 in (4.4 cm)
If your work is too big, go down 0.5 mm in hook size. If it is too small, go up 0.5 mm. Fix the gauge before you make the panel, because the pockets are sewn to it stitch for stitch.
Back Panel
Use Color A.
Row 1: Ch 25. Sc in the 2nd ch from the hook and in each ch across. (24 sts)
Rows 2–90: Ch 1, turn. Sc in each st across. (24 sts)
Checkpoint: the panel is now 6 × 20 in (15.2 × 50.8 cm).
Taper
Row 91: Ch 1, turn. Sc2tog, sc in each st to the last 2 sts, sc2tog. (22 sts)
Rows 92–98: Repeat Row 91. You will have 20, 18, 16, 14, 12, 10 and then 8 sts.
The taper is 8 rows, about 1.8 in (4.6 cm) tall.
Tab
Rows 99–116: Ch 1, turn. Sc in each st across. (8 sts)
The tab is 2 in (5.1 cm) wide and 4 in (10.2 cm) long. Fasten off and weave in the ends.
Pockets (Make 3)
Use Color A.
Oval base
Rnd 1: Ch 9. Work 3 sc in the 2nd ch from the hook, sc in the next 6 ch, and 3 sc in the last ch. Rotate the work. Working along the opposite side of the foundation chain, sc in the next 6 ch. Join with a sl st to the first sc. (18 sts: 3 end, 6 side, 3 end, 6 side)
Rnd 2: Ch 1. Work 2 sc in each of the next 3 sts, sc in the next 6 sts, 2 sc in each of the next 3 sts, and sc in the next 6 sts. Join. (24 sts)
Rnd 3: Ch 1. [(Sc in the next st, 2 sc in the next st) 3 times, sc in the next 6 sts] twice. Join. (30 sts)
Rnd 4: Ch 1. [(Sc in the next 2 sts, 2 sc in the next st) 3 times, sc in the next 6 sts] twice. Join. (36 sts)
Rnds 5–10: Repeat the same pattern, working 1 more sc before each increase in every round. In Rnd 10, work (sc in the next 8 sts, 2 sc in the next st) 3 times at each end.
– Rnd 5: 42 sts
– Rnd 6: 48 sts
– Rnd 7: 54 sts
– Rnd 8: 60 sts
– Rnd 9: 66 sts
– Rnd 10: 72 sts
Each round adds 3 sts at each end and keeps both 6-st straight sides. Checkpoint: the base measures 4.5 × 6 in (11.4 × 15.2 cm).
Bottom band
Rnd 11: Ch 1. Sc in the BLO of each st around. Join. (72 sts) This round turns the edge up to start the wall.
Rnds 12–13: Ch 1. Sc in each st around. Join. (72 sts)
Mesh body
Rnd 14: Ch 1, sc in the first st. Ch 5, skip 3 sts, sc in the next st; repeat from * around, ending with ch 5, skip 3 sts, sl st to the first sc. (18 ch-5 loops)* 72 ÷ 4 = 18, so the loops divide evenly.
Rnds 15–17: Sl st in each of the first 3 ch of the first loop, so you are at its center. Ch 1, sc in the same loop. Ch 5, sc in the next loop; repeat from * around. Ch 5, sl st to the first sc. (18 loops)*
Each loop sits on the center of a loop below, which forms the diamond lattice.
Top band
Rnd 18 (conversion round): Ch 1. Sc in the first sc, then work 3 sc in the next ch-5 loop. Sc in the next sc, 3 sc in the next loop; repeat from * around. Join. (18 sc in sc + 54 sc in loops = 72 sts)*
Rnds 19–22: Ch 1. Sc in each st around. Join. (72 sts)
Fasten off and leave a 40 in (101.6 cm) tail for sewing.
Find the straight side directly above the base’s back straight side. On Rnd 22, mark the 24 sts centered on that side: these are the back sts that will be sewn to the panel. Mark the matching 24 sts on Rnd 11 as well. The remaining 48 sts form the front. The center 36 of those front sts carry the flowers.
Flowers (Make 15)
Rnd 1: With Color B, make a magic ring. Ch 1 and work 5 sc into the ring. Pull the ring closed and sl st to the first sc. (5 sts) Fasten off.
Rnd 2: Join Color A with a sl st in any sc. Work (ch 2, puff st, ch 2, sl st) in the same sc, then sl st in the next sc; repeat from * 4 more times. The last sl st lands in the starting sc. (5 petals)*
Fasten off and leave a 10 in (25.4 cm) tail. Push the cream center slightly forward so it sits raised, like a small bobble.
Make All Pieces
- Color A: 1 back panel
- Color A: 3 pockets
- Color B centers with Color A petals: 15 flowers, 5 per pocket
Layout, top to bottom:
        ( ring )
         [tab]   Rows 99–116, folded
        /taper\  Rows 91–98
   |  Pocket 3  |  base Row 60, rim Row 77
   |   panel    |
   |  Pocket 2  |  base Row 31, rim Row 48
   |   panel    |
   |  Pocket 1  |  base Row 2,  rim Row 19
Joining
Flowers to pockets: Pin 5 flowers across the 36 front center sts of each pocket, spacing their centers 7 sts apart (5 × 7 = 35 sts). The center of each flower should sit on Rnd 20, so the petals cover Rnds 18–22 and overlap the top of the mesh by about 1/2 in (1.3 cm). Sew around each center and tack down each petal tip.
Pockets to panel: Use whipstitch and match stitch to stitch.
- Lay the panel flat, right side up.
- Sew the 24 marked back sts of the pocket’s Rnd 11 to the 24 sts of the panel’s base row, one to one.
- Sew the 24 marked back sts of Rnd 22 to the 24 sts of the panel’s rim row, one to one.
- Repeat for each pocket using these rows:
- Pocket 1: base Row 2, at 0.4 in (1.0 cm) from the bottom; rim Row 19, at 4.2 in (10.7 cm)
- Pocket 2: base Row 31, at 6.9 in (17.5 cm); rim Row 48, at 10.7 in (27.2 cm)
- Pocket 3: base Row 60, at 13.3 in (33.8 cm); rim Row 77, at 17.1 in (43.4 cm)
There are 17 rows between each base row and rim row, which equals 3.78 in (9.6 cm). That matches the 3.75 in (9.5 cm) pocket height, so the back wall lies flat without bunching.
Sew into the panel’s stitches, not its row ends, so the side edges stay free for the border.
Tension: Keep your stitches snug but not tight. If the panel puckers behind a pocket, take out the stitches and sew again more loosely.
Checkpoint: The panel should still measure 6 in (15.2 cm) wide at every pocket.
Border
Border gauge: 4 sc = 1 in (2.5 cm). Work the border around the panel only; the pockets are not part of it.
Rnd 1 (conversion round): Join Color A at the bottom right corner and sc around the panel:
– Bottom edge: sc in each of the 24 sts, working 3 sc in each corner st.
– Each long side (Rows 1–90): 80 sc, which is 8 sc for every 9 rows.
– Each taper edge (Rows 91–98): 11 sc, spaced evenly.
– Each tab side (Rows 99–116): 16 sc, which is 8 sc for every 9 rows.
– Tab top: sc in each of the 8 sts, working 3 sc in each corner st.
Join to the first sc. (Base stitches 24 + 160 + 22 + 32 + 8 = 246, plus 2 extra sts at each of 4 corners = 8; total 254 sts)
Rnd 2: Ch 1. Rev sc in each st around. Join. (254 sts) Fasten off.
Why the math works:
– 80 sc ÷ 4 per inch = 20 in, the same as the 90 rows (90 ÷ 4.5 = 20 in).
– 16 sc = 4 in, the same as the 18 tab rows.
– The 24 bottom sts match the 6 in (15.2 cm) width.
– The diagonal taper edge is about 2.7 in long, so 11 sc keep it flat.
– The border adds 3/8 in (1.0 cm) on each side: 6 + 0.75 = 6.75 in (17.1 cm).
Attach the ring: Fold the tab through the wooden ring toward the back. Sew Row 116 to the back of Row 99. This leaves a 2 in (5.1 cm) loop around the ring.
Final Blocking
- Mist the panel lightly, or steam it from above without touching the yarn.
- Pin the panel flat at 6.75 in (17.1 cm) wide, with the side edges straight.
- Put a roll or a rolled towel inside each pocket to round out the oval.
- Shape the mesh into even diamonds with your fingers.
- Fluff each puff petal and lift each cream center.
- Let everything dry completely before hanging.
Final Quality-Control Checklist
- The panel is 6.75 in (17.1 cm) wide and about 24 in (61.0 cm) tall.
- Each pocket has 72 sts in its solid rounds and 18 loops in each mesh round.
- The border has 254 sts in each round.
- Each pocket has 5 flowers, evenly spaced.
- The pockets are centered and level.
- The ring is sewn on securely.
- All yarn ends are woven in.
Troubleshooting
- The base cups instead of lying flat: Your tension is too tight. Go up a hook size or loosen your increases.
- The base ripples: Go down a hook size.
- The mesh slants: Make sure each sc goes into the center of a loop, not to one side.
- The pocket is too tight for the roll: Add one more mesh round. This adds about 1/2 in (1.3 cm) of height but no width.
- The panel side edges wave: Recount the 80 border sc on each long side.
- The puffs look flat: Pull the loops up a little longer before closing each puff.
Care
Hand wash in cool water and lay flat to dry, reshaping the pockets while damp. Do not tumble dry.
Final Notes
Here is how the measurements connect. The gauge of 16 sc = 4 in (10.2 cm) sets the 24-stitch, 6 in (15.2 cm) panel and the 72-stitch pocket. The 72 stitches divide into 18 mesh loops and come back to 72 in the top band. Each pocket’s 24 back stitches are sewn one to one onto 24 panel stitches. The 254-stitch border brings the finished holder to 6.75 × 24 in (17.1 × 61.0 cm).
Happy crocheting!