
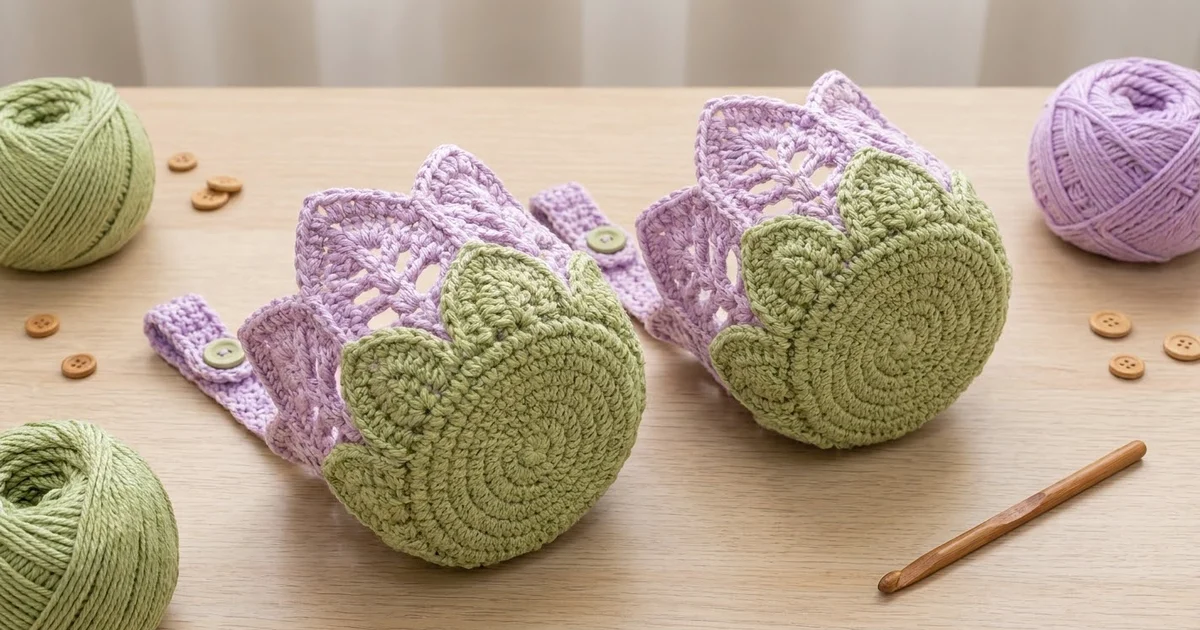
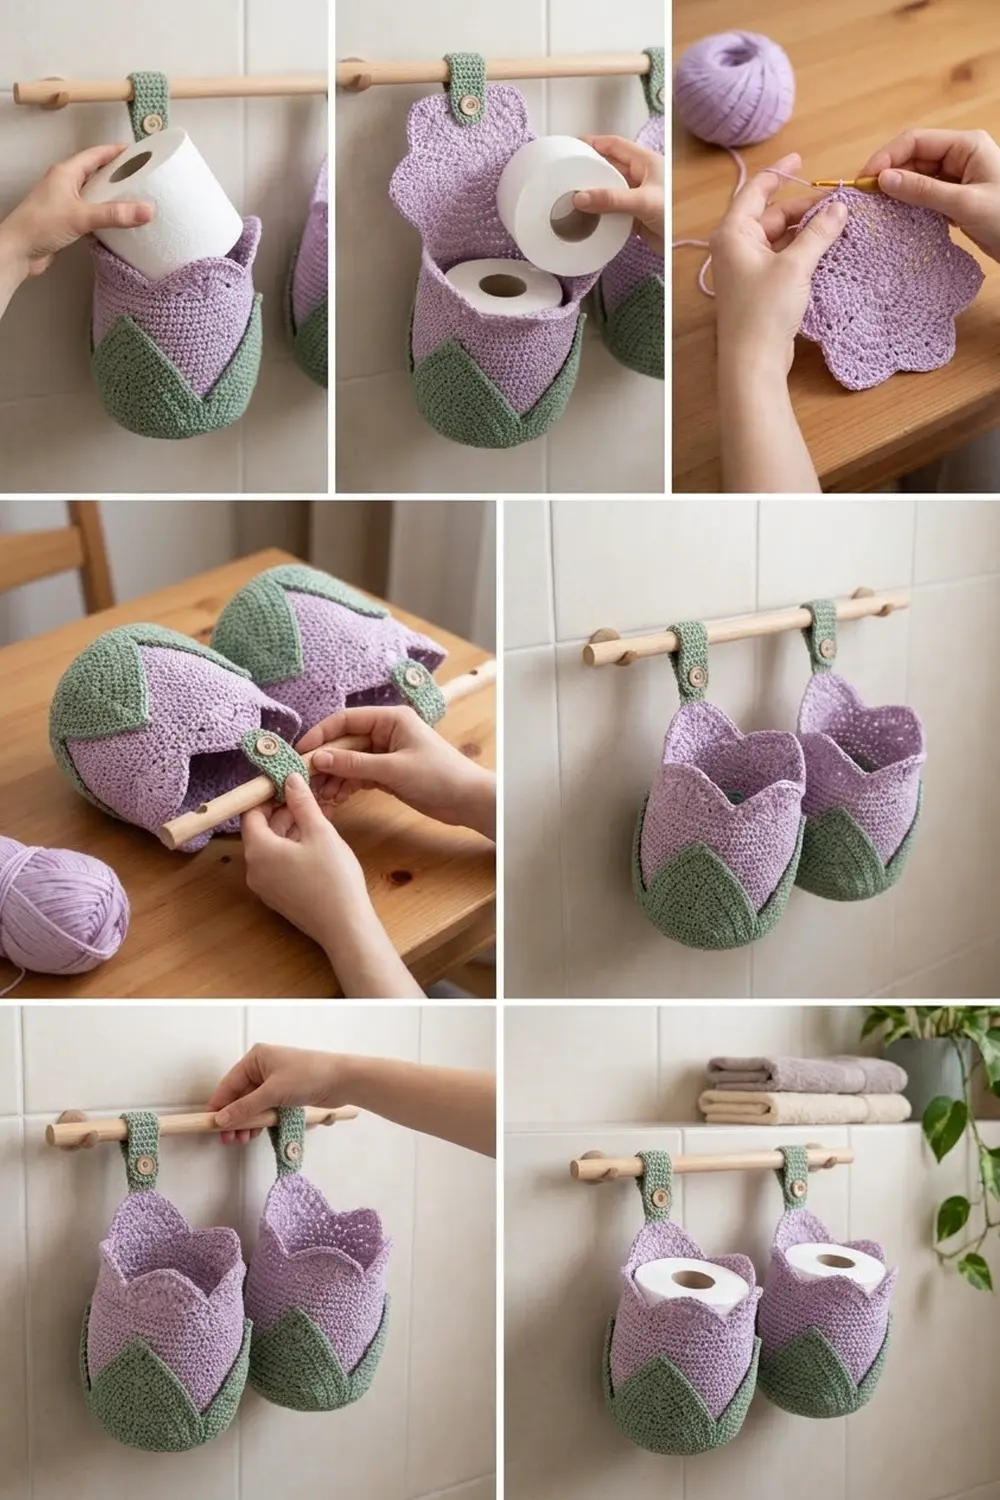
This pattern makes a pair of tulip-shaped hanging baskets. Each one holds a standard toilet paper roll, and they also work well for washcloths, cotton pads, or small bathroom items. Sage green leaves wrap around the bottom, and lavender lace petals open above them like a tulip coming into bloom.
The colors are soft and fresh: sage green for the base and leaves, lavender for the lace and the petal rim. The style is cottage-garden. It is practical enough for daily use and pretty enough to leave on display.
All instructions use US crochet terms. Each finished basket is about 5.75 in (14.6 cm) across at the base and 5 in (12.7 cm) tall at the petal tips. The opening flares to about 6.25 in (15.9 cm) across.
You work each basket in one continuous piece, in joined rounds. You start with a flat green base, turn it up into a short wall, and add a round of leaf shells into the front loops. The lavender is then worked into the free back loops behind the leaves. After five lace rounds, a petal-shaping rim finishes the top. A button strap is worked straight off one back petal. The two baskets are never sewn together. Each hangs on the rod by its own strap.
Finished Size and Construction
- Finished size (each basket): 5.75 in (14.6 cm) base diameter; 5 in (12.7 cm) tall at the tips; 4.25 in (10.8 cm) tall at the petal notches
- Skill level: Intermediate
- Terminology: US crochet terms
- Yarn weight: Worsted (#4), cotton or cotton blend
- Hook: 4.0 mm (G-6)
- Number of pieces: 2 identical baskets, not joined to each other
- Layout: Side by side on one rod, each hung from its own strap
- Piece size: 5.75 in (14.6 cm) base and 18 in (45.7 cm) base circumference
- Size before border: 4 in (10.2 cm) tall after Rnd 24
- Border depth: The petal rim (Rnds 25–26) adds 1 in (2.5 cm) at the tips
Materials
Use a firm, smooth cotton. Cotton holds the basket’s shape, shows the lace clearly, and stands up to a humid bathroom. Acrylic will work, but the walls will be softer.
- Sage green (Color A): 50 g / about 95 m (104 yd)
- Lavender (Color B): 50 g / about 95 m (104 yd)
Each basket uses about 20 g (38 m) of each color. These quantities include a margin of roughly 25% for gauge differences and swatching.
Tools:
– 4.0 mm (G-6) crochet hook
– 2 buttons, 5/8 in (1.6 cm)
– Stitch markers
– Tapestry needle
– Sewing needle and matching thread
– Scissors and a measuring tape
– A spray bottle and a 4.5 in (11.4 cm) cylinder for blocking (a toilet paper roll in a plastic bag works well)
Abbreviations (US Terms)
- ch – chain
- sl st – slip stitch
- sc – single crochet
- hdc – half double crochet
- dc – double crochet
- tr – treble crochet
- FPdc – front post double crochet
- inc – 2 sc in the same stitch
- BLO / FLO – back loop only / front loop only
- MR – magic ring
- sp – space
- st(s) – stitch(es)
Special stitches
– V-st: (dc, ch 2, dc) in the same stitch or space.
– Leaf shell: (2 dc, 5 tr, 2 dc) in the same stitch. That makes 9 stitches.
Gauge and Checkpoints
Gauge: 16 sc and 16 rounds = 4 in (10.2 cm) with a 4.0 mm hook. Each dc lace round is about 0.5 in (1.3 cm) tall.
Make the base of one basket first and treat it as your swatch.
- After Rnd 6: 36 sts, 3 in (7.6 cm) across.
- After Rnd 12: 72 sts, 5.75 in (14.6 cm) across, ±0.25 in (0.6 cm).
- After Rnd 17: The green wall is 1.25 in (3.2 cm) tall.
- After Rnd 24: The basket is 4 in (10.2 cm) tall.
- After Rnd 26: 5 in (12.7 cm) at the tips.
If your base is too big, go down half a hook size. If it is too small, go up half a size. Don’t change stitch counts, because every later round depends on 72 and 80. If the base ruffles, you are working too loosely. If it cups, you are working too tightly.
Pattern: Base (Color A)
Work in joined rounds. Join each round with a sl st to the first sc and start the next round with ch 1, which does not count as a stitch. Stagger the increases from round to round to keep the circle round.
Rnd 1: 6 sc in MR. (6)
Rnd 2: Inc in each st around. (12)
Rnd 3: (Sc in next st, inc) x 6. (18)
Rnd 4: (Sc in next 2 sts, inc) x 6. (24)
Rnd 5: (Sc in next 3 sts, inc) x 6. (30)
Rnd 6: (Sc in next 4 sts, inc) x 6. (36)
Rnd 7: (Sc in next 5 sts, inc) x 6. (42)
Rnd 8: (Sc in next 6 sts, inc) x 6. (48)
Rnd 9: (Sc in next 7 sts, inc) x 6. (54)
Rnd 10: (Sc in next 8 sts, inc) x 6. (60)
Rnd 11: (Sc in next 9 sts, inc) x 6. (66)
Rnd 12: (Sc in next 10 sts, inc) x 6. (72)
Checkpoint: 5.75 in (14.6 cm) across, lying flat.
Pattern: Green Wall and Leaves (Color A)
Rnd 13: Sc in the BLO of each st around. (72) This makes the turning ridge where the base meets the wall.
Rnds 14–17: Sc in each st around. (72)
Checkpoint: the wall stands 1.25 in (3.2 cm) tall.
Rnd 18 (leaves): Work this round in the FLO of Rnd 17 only. Ch 1, sc in the next 2 sts, skip 3 sts, leaf shell in the next st, skip 3 sts, sc in the next 2 sts. Repeat from * 6 more times, then skip 3 sts, leaf shell in the next st, skip 3 sts, and join to the first sc. That gives 8 leaf shells and 16 sc, for 88 sts.
Check the math: each repeat uses 9 sts of Rnd 17 (3 + 1 + 3 + 2), and 8 × 9 = 72. Fasten off Color A.
The leaves stand about 1 in (2.5 cm) above Rnd 17. All 72 back loops of Rnd 17 are now free behind them.
Pattern: Lavender Lace Wall (Color B)
Rnd 19 (conversion round): Tip the leaves forward. Join Color B with a sl st in any free back loop of Rnd 17. Ch 1, sc in the BLO of the next 8 sts, 2 sc in the BLO of the next st, 8 times. Join.
That gives 72 sc (one per existing st) + 8 extra = 80 sc. The lavender now grows from behind the leaves.
Rnd 20 (set-up): Ch 3 (counts as the divider dc), ch 1, skip 1, dc in the next st, ch 2, skip 2, V-st in the next st, ch 2, skip 2, dc in the next st, ch 1, skip 1. Dc in the next st (divider), ch 1, skip 1, dc in the next st, ch 2, skip 2, V-st in the next st, ch 2, skip 2, dc in the next st, ch 1, skip 1. Repeat from * 6 more times. Join to the top of the ch-3.
Each repeat uses 10 sts, and 8 × 10 = 80. Each repeat has 5 dc and 6 ch-sps, so the round has 8 petals, 40 dc and 48 ch-sps.
Rnds 21–24: Ch 3 (counts as FPdc), ch 1, dc in the next dc, ch 2, V-st in the V-st’s ch-2 sp, ch 2, dc in the next side dc, ch 1. FPdc around the next divider, ch 1, dc in the next dc, ch 2, V-st in the V-st’s ch-2 sp, ch 2, dc in the next side dc, ch 1. Repeat from * 6 more times. Join. (40 sts, 48 ch-sps)
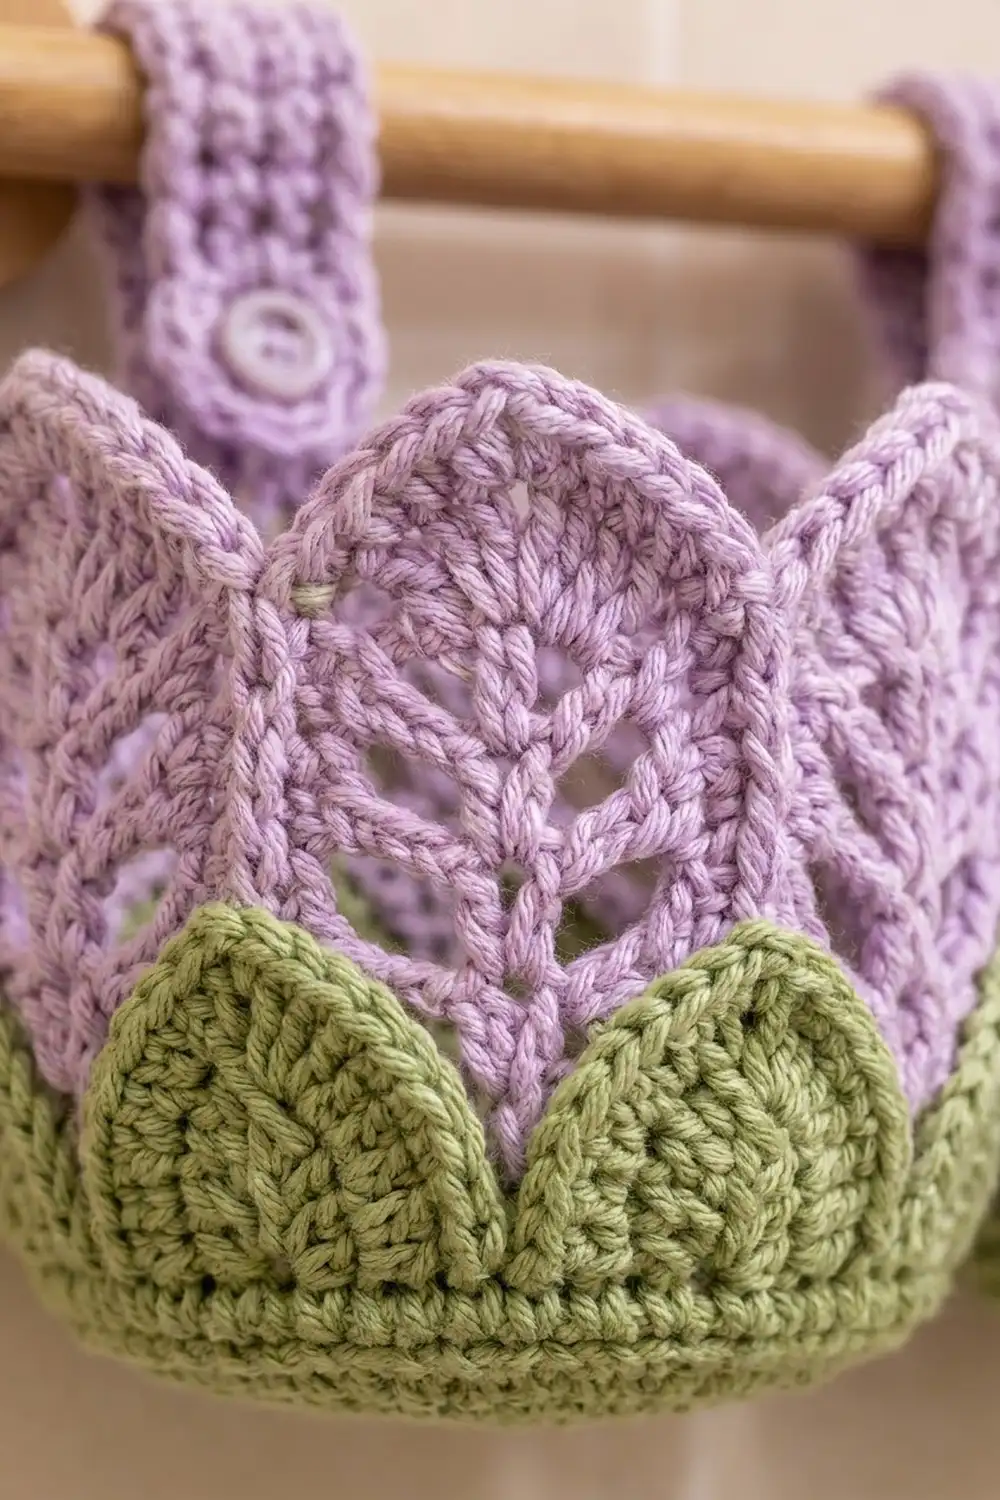
The stacked V-sts make each petal’s central vein. The front-post divider columns make the raised ridges between petals.
Checkpoint after Rnd 24: the basket is 4 in (10.2 cm) tall.
Make Both Baskets
Work Rnds 1–24 on both baskets before starting the rim. That way you can compare the heights side by side.
- Basket A: 20 g (38 m) of Color A, 20 g (38 m) of Color B
- Basket B: 20 g (38 m) of Color A, 20 g (38 m) of Color B
Layout on the rod:
[o=========== wooden rod ===========o]
       | strap A |        | strap B |
     (  Basket A  )     (  Basket B  )
Leave about 0.5 in (1.3 cm) between the two baskets so the petal tips don’t catch on each other.
Joining
The baskets are not joined to each other or seamed in any way. Each one connects only to the rod, through its own strap. You’ll work the strap after the border, from one back petal tip.
- Stitch-to-stitch logic: The strap is 5 sts wide and is centered on the tip ch-2 sp of Rnd 26 (2 sc + tip sp + 2 sc). That keeps the basket hanging level.
- Tension: Work the strap firmly. A loose strap stretches and lets the basket sag.
- Size checkpoint: When the strap is buttoned, the loop should fit snugly around a rod up to 1.25 in (3.2 cm) in diameter. The rim should sit level once the basket is loaded.
Border: Petal Rim (Color B)
Border gauge: Rnd 25 rises from sc height at the notches to tr height at the tips, about 0.75 in (1.9 cm). Rnd 26 adds 0.25 in (0.6 cm).
Each petal starts from the 10 elements of Rnd 24, in this order: divider, ch-1 sp, dc, ch-2 sp, V-dc, V-sp, V-dc, ch-2 sp, dc, ch-1 sp.
Rnd 25 (shaping): Ch 1, sc in the divider. Sc in the ch-1 sp, hdc in the next dc, 2 dc in the ch-2 sp, tr in the V-dc, (2 tr, ch 2, 2 tr) in the V-sp, tr in the V-dc, 2 dc in the ch-2 sp, hdc in the next dc, sc in the ch-1 sp, sc in the next divider. Repeat from * around, ending the last repeat at **. Join to the first sc.
Each petal has 15 sts plus a ch-2 tip, for a total of 120 sts and 8 tips.
Rnd 26 (outline): Sl st in the next sc. Ch 1, sc in the same st and the next 6 sts, (sc, ch 2, sc) in the tip sp, sc in the next 7 sts. Skip the divider sc, sc in the next 7 sts, (sc, ch 2, sc) in the tip sp, sc in the next 7 sts. Repeat from * 6 more times. Skip the last divider and join.
Each petal works 14 of its 15 sts once (the divider is skipped) and adds 2 extra sc at the tip, for 16 sc per petal. The round has 128 sc and 8 tips.
Why the math works: 80 sts = 8 petals × 10. Every border petal is built on exactly one 10-element repeat, so all 8 petals come out identical. Skipping the divider pulls each notch into a sharp V, and the extra sc at each tip keeps the points crisp.
Strap: Choose a petal at the back of the basket. Join Color B 2 sc before its tip ch-2 sp.
– Row 1: Ch 1, sc in the same st and the next sc, sc in the tip sp, sc in the next 2 sc. (5)
– Rows 2–25: Ch 1, turn, sc across. (5)
– Row 26: Ch 1, turn, sc in the first st, ch 3, skip 3, sc in the last st. This makes the buttonhole.
– Row 27: Ch 1, turn, sc in the first st, 3 sc in the ch-3 sp, sc in the last st. (5)
– Row 28: Ch 1, turn, sc across. (5) Fasten off.
The strap is 1.25 in (3.2 cm) wide and 7 in (17.8 cm) long. Sew the button to the outer face of Row 9, which is 2.25 in (5.7 cm) above the rim. The button-to-buttonhole loop measures 4.25 in (10.8 cm).
Repeat the border and strap on Basket B.
Final Blocking
- Weave in all ends on the inside, following the stitch direction.
- Slip the bagged 4.5 in (11.4 cm) cylinder inside the basket.
- Mist the basket until it is evenly damp, but not soaked.
- Ease the base flat and pinch the Rnd 13 ridge into a crisp fold.
- Fold each leaf down slightly so it lies against the lavender.
- Pull each petal tip upward and slightly outward until the rim measures 6.25 in (15.9 cm) across.
- Lay the strap flat and straighten its edges.
- Let it dry completely, at least 24 hours, before hanging.
Final Quality-Control Checklist
- Base is 5.75 in (14.6 cm) across and lies flat.
- 8 leaves, evenly spaced, standing in front of the lavender.
- Rnd 19 has 80 sc. All lace rounds have 8 straight petal columns.
- 8 matching petals, with tips at 5 in (12.7 cm) and notches at 4.25 in (10.8 cm).
- Strap is centered on a back tip and is 7 in (17.8 cm) long.
- Button is sewn on securely and passes snugly through the buttonhole.
- Both baskets match in height within 0.25 in (0.6 cm).
Troubleshooting
- Base cups upward: Your tension is too tight. Go up half a hook size or loosen your sc.
- Base ruffles: Your tension is too loose. Go down half a size.
- Leaves look crowded: You probably skipped only 2 sts. Recount the 9-st repeats.
- Lavender shows gaps at the bottom: You worked into the front loops. Rnd 19 must go into the back loops.
- Petals lean: A V-st has drifted. Always work the V into the previous V’s ch-2 sp.
- Notches are rounded: You worked into the divider sc on Rnd 26. Skip it.
- Basket tilts on the rod: The strap is off-center. Re-attach it at the tip sp.
- Strap stretches: Work tighter or use a smaller hook for the strap only.
Care
Hand wash cool with mild soap, press out the water in a towel, and reshape the basket over a cylinder to dry flat. Don’t tumble dry.
Final Notes
Everything in this pattern follows one chain of measurements:
– The 72-st base is 5.75 in (14.6 cm) across.
– The 1.25 in (3.2 cm) green wall carries 8 leaves.
– The lavender wall increases to 80 sts for 8 lace petals.
– The basket is 4 in (10.2 cm) tall after Rnd 24.
– The rim brings the tips to 5 in (12.7 cm).
– A 7 in (17.8 cm) strap hangs each basket.
Hit each checkpoint and the two baskets will match.
Happy crocheting!