

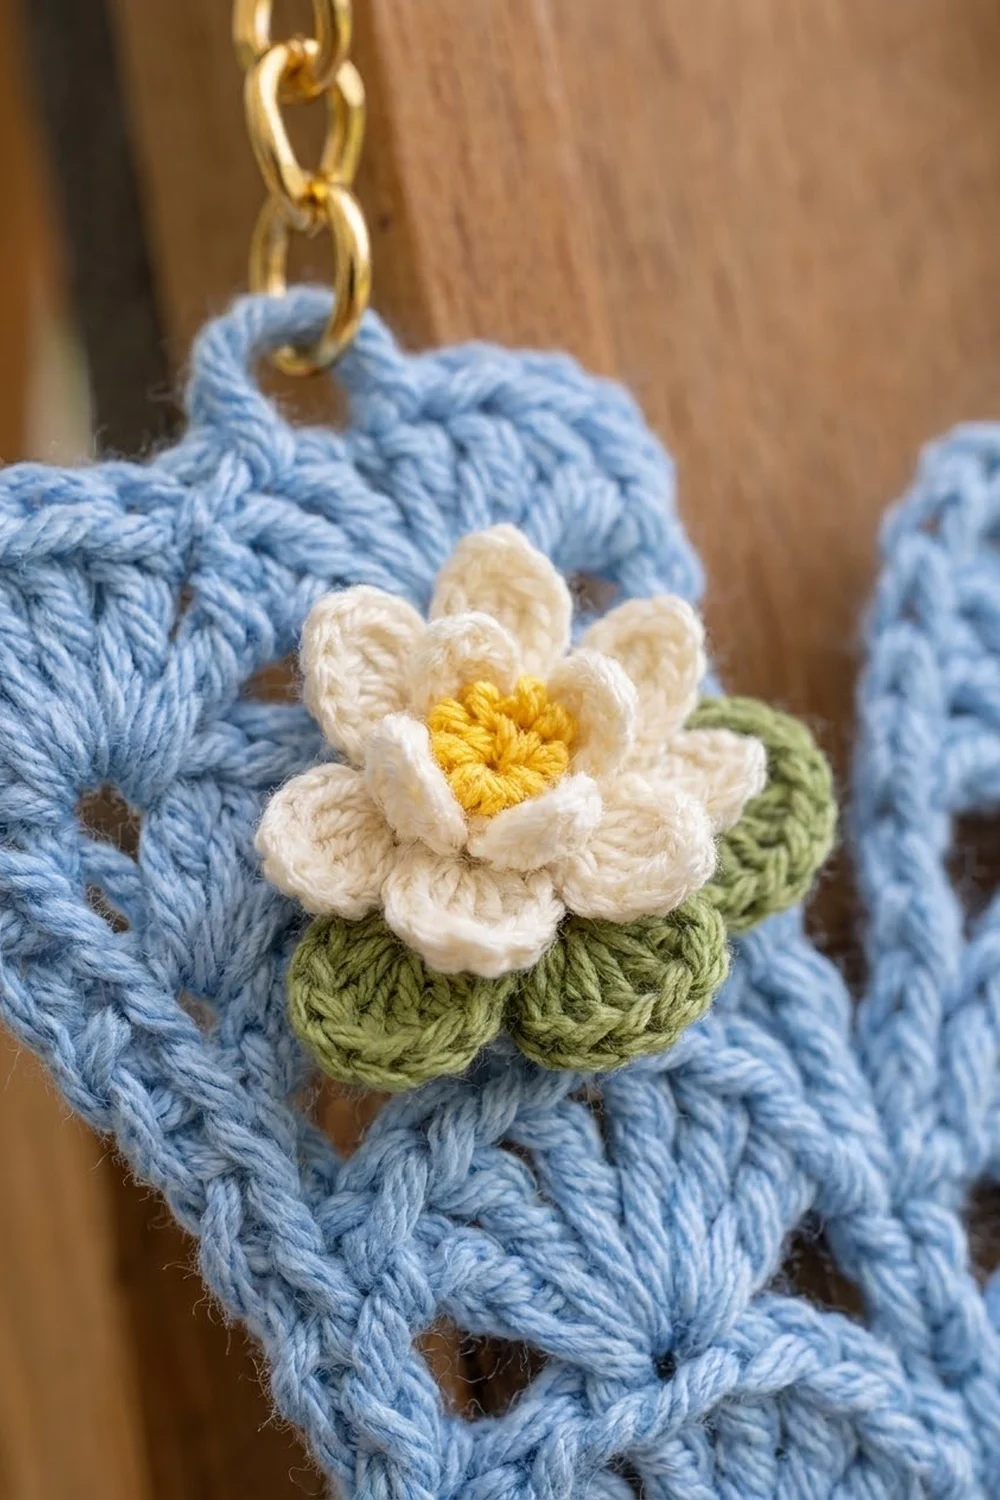
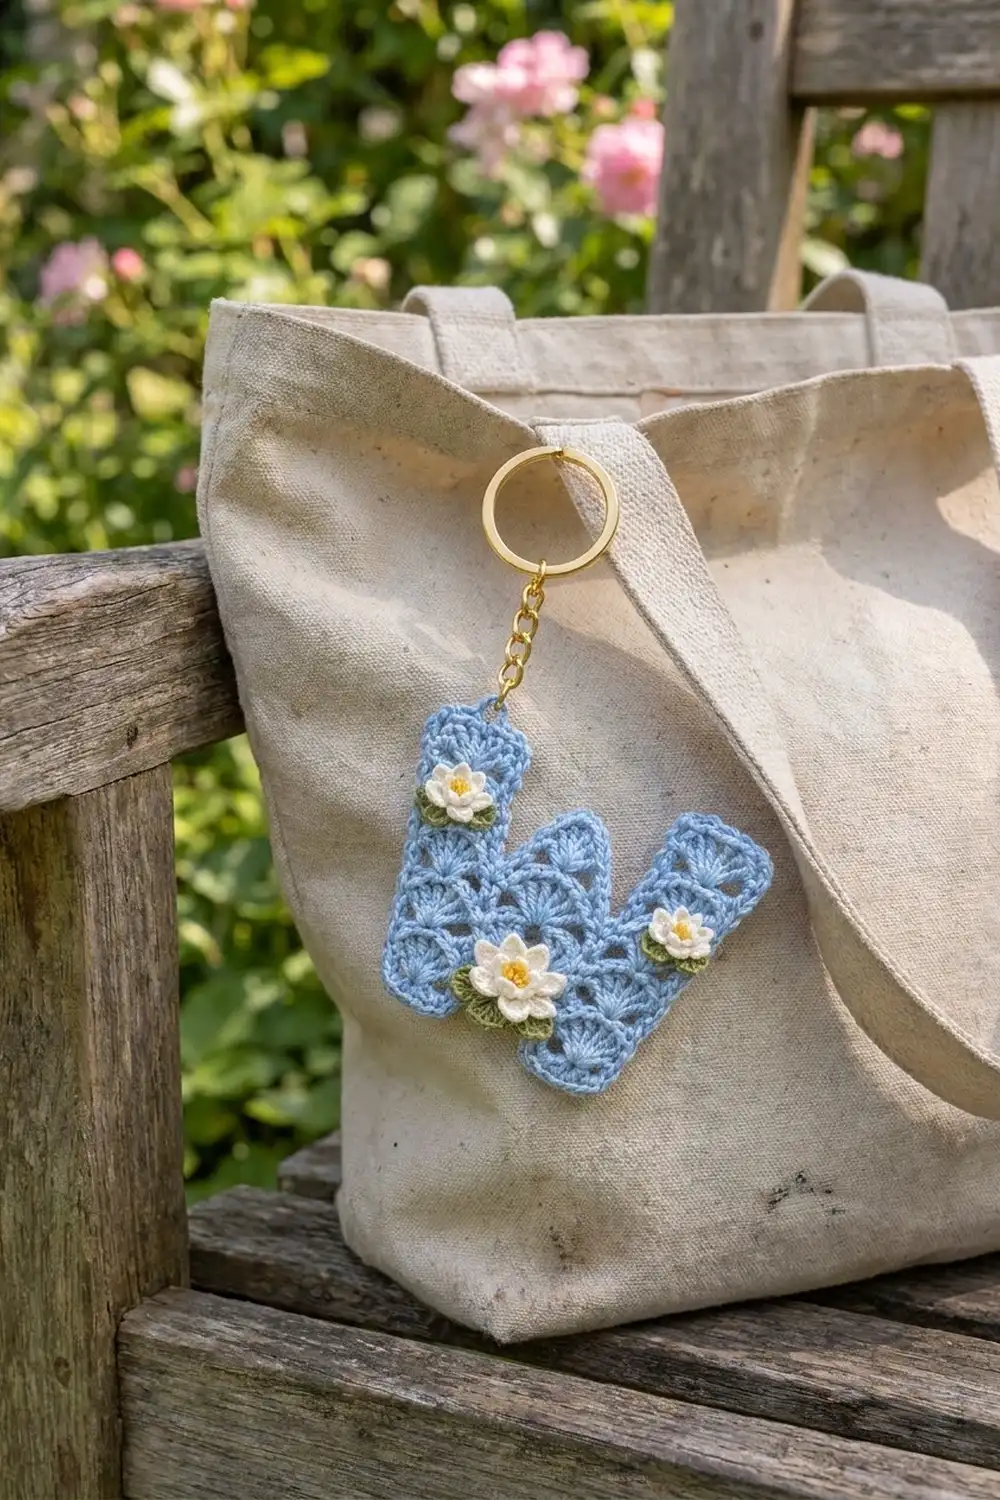
This keychain is a capital letter W in soft sky blue, made in rows of small fan shells. Three water lilies sit on top, each with cream petals, a yellow center and a green lily pad. It’s a monogram charm for a bag, pencil case or set of studio keys.
The colors stay calm: light blue for the water, cream and yellow for the flowers, and olive green for the pads. The shell texture gives the letter a lacy, rippled look, and a single-crochet border keeps the outline crisp.
This pattern uses US crochet terms. The finished keychain measures 4.25 in (10.8 cm) wide x 4 in (10.2 cm) tall, not counting the key ring.
Construction overview: You start with a shell-stitch band across the middle of the W. Then you work three prongs upward from it: two tall outer strokes and a short pointed center peak. Next, you work two feet downward into the foundation chain. One border round outlines the whole letter. Last, you make the three lilies separately, sew them on, and attach the hardware.
Finished Size and Construction
- Finished size: 4.25 in (10.8 cm) wide x 4 in (10.2 cm) tall
- Skill level: Intermediate
- Terminology: US
- Yarn weight: Fine (2), sport-weight cotton
- Hook: 2.5 mm
- Number of pieces: 1 W body plus 3 sewn-on lily appliqués (each lily is a flower and a pad)
- Layout: a single W shape, no joining
- Size before border: 4 in (10.2 cm) x 3.75 in (9.5 cm)
- Border depth: 1 round of sc, about 1/8 in (0.3 cm) on every edge
Materials
Use a smooth mercerized cotton or a cotton blend in sport weight. Cotton shows the shells clearly and holds its shape on a keychain. The amounts below assume about 3 m per gram.
- Light blue: 12 g (36 m)
- Cream: 4 g (12 m)
- Olive green: 3 g (9 m)
- Yellow: 1 g (3 m)
Tools:
– 2.5 mm crochet hook
– Tapestry needle
– One gold split key ring, 25 mm (1 in / 2.5 cm)
– One gold jump ring (6–8 mm) and a short gold chain of 2–3 links
– Two pairs of flat-nose pliers
– Rust-proof pins and a blocking board
– Spray bottle and scissors
Quantities include a margin for a gauge swatch and weaving in ends.
Abbreviations (US Terms)
- ch – chain
- sl st – slip stitch
- sc – single crochet
- hdc – half double crochet
- dc – double crochet
- tr – treble crochet
- sc2tog – single crochet 2 together
- sk – skip
- st(s) – stitch(es)
- sp – space
- MR – magic ring
- FLO / BLO – front loop only / back loop only
Special stitches:
– Shell: 5 dc in the same stitch.
– Half shell: at the start of a row, ch 3 (counts as 1 dc) and 2 dc in the same stitch. At the end of a row, 3 dc in the same stitch.
– Inner petal: (hdc, dc, ch 1, dc, hdc) in the same stitch.
– Outer petal: (dc, tr, ch 1, tr, dc) in the same stitch.
Gauge and Checkpoints
Gauge: 25 sts = 4 in (10.2 cm) across one shell row. One shell row is 0.4 in (1.0 cm) tall, and the sc foundation row is about 0.15 in (0.4 cm) tall.
Test with the center band first. The band is the first section of the W, so it doubles as your swatch.
- Checkpoint 1 (after Row 3): the band is 4 in (10.2 cm) wide and about 0.95 in (2.4 cm) tall.
- Checkpoint 2 (after the prongs): from the foundation chain to the top of an outer prong measures 2.55 in (6.5 cm). Each prong is about 1.1 in (2.8 cm) wide, and the top notches are about 0.3 in (0.8 cm) wide.
- Checkpoint 3 (after the feet): total height is 3.75 in (9.5 cm). Each foot is 1.2 in (3.0 cm) long, and the bottom opening is about 1.75 in (4.4 cm) wide.
- Checkpoint 4 (after the border): 4.25 in (10.8 cm) x 4 in (10.2 cm).
If your band is too wide, go down to a 2.25 mm hook. If it’s too narrow, go up to 2.75 mm. Don’t add or remove stitches, because the shell placement depends on 25 sts.
Section 1: Center Band
With light blue, ch 26.
Row 1: Sc in the 2nd ch from the hook and in each ch across, turn. (25 sc)
Row 2 (Shell row A): Ch 1, sc in the first st, sk 2, shell in next st, sk 2, sc in next st; repeat from * 3 more times, turn. (4 shells + 5 sc = 25 sts)
Row 3 (Shell row B): Half shell in the first sc, sk 2 dc, sc in the center dc of the shell, sk 2 dc, shell in the next sc; repeat from * 2 more times, sk 2 dc, sc in the center dc of the last shell, sk 2 dc, 3 dc in the last sc, turn. (2 half shells + 3 shells + 4 sc = 25 sts)
Check Checkpoint 1. Don’t fasten off.
For the prongs, number the Row 3 stitches 1 to 25, starting from the stitch you just worked.
- Sts 1–3 are a half shell.
- St 4 is a sc.
- St 7 is the center dc of a shell.
- St 10 is a sc.
- St 13 is a center dc.
- St 16 is a sc.
- St 19 is a center dc.
- St 22 is a sc.
- Sts 23–25 are the last half shell.
Section 2: Left Outer Prong (Sts 1–7)
Row 4 (A): Ch 1, sc in st 1, sk 2, shell in st 4, sk 2, sc in st 7, turn. Leave the rest unworked. (7 sts)
Row 5 (B): Half shell in the first sc, sk 2 dc, sc in the center dc, sk 2 dc, 3 dc in the last sc, turn. (7 sts)
Row 6 (A): Ch 1, sc in the first dc, sk 2, shell in the sc, sk 2, sc in the top of the ch-3, turn. (7 sts)
Row 7 (B): Repeat Row 5. (7 sts) Fasten off.
The half shells on Row 7 give the prong its flat top.
Section 3: Center Peak (Sts 10–16)
Sts 8–9 stay unworked. They form the left top notch.
Row 4 (A): With the same side facing as the left prong’s Row 4, join light blue with a sc in st 10. Sk 2, shell in st 13, sk 2, sc in st 16, turn. (7 sts)
Row 5 (Point): Sl st in the first sc and the next 2 dc. Work (2 dc, ch 2, 2 dc) in the center dc. Sl st in the next 2 dc and the last sc. (6 sl st + 4 dc + 1 ch-2 sp) Fasten off.
The ch-2 makes the sharp tip of the peak. The peak stands 0.8 in (2.0 cm) above the band, half the height of the outer prongs.
Section 4: Right Outer Prong (Sts 19–25)
Sts 17–18 stay unworked. They form the right top notch.
Row 4 (A): With the same side facing, join light blue with a sc in st 19. Sk 2, shell in st 22, sk 2, sc in the top of the ch-3 (st 25), turn. (7 sts)
Rows 5–7: Work as for the left prong. (7 sts each row) Fasten off.
Check Checkpoint 2.
Section 5: Feet
Turn the band upside down. Number the free loops of the foundation chain 1 to 25 from the right edge.
Right foot, Row F1 (A): Join light blue with a sc in loop 1. Sk 2, shell in loop 4, sk 2, sc in loop 7, turn. (7 sts)
Row F2 (B): Half shell in the first sc, sk 2 dc, sc in the center dc, sk 2 dc, 3 dc in the last sc, turn. (7 sts)
Row F3 (A): Ch 1, sc in the first dc, sk 2, shell in the sc, sk 2, sc in the top of the ch-3. (7 sts) Fasten off.
Left foot: Join in loop 19 and work Rows F1–F3 over loops 19–25. (7 sts each row)
Loops 8–18 stay unworked and form the arched bottom opening. Check Checkpoint 3.
Border
Border gauge: 6.25 sc per inch (2.5 cm), the same as the body.
- Along the side edges, work 2 sc into the end of each A row, 3 sc into the end of each B row, and 1 sc into the end of Row 1.
- Along the tops and bottoms, work 1 sc in each st.
- At outer corners, work 3 sc in the corner st.
Border Round: With light blue, join with a sc in the outer top corner of the left prong. Work 2 more sc in the same st, then continue as follows.
- Left prong top: 1 sc in each of the next 5 sts, 3 sc in the corner st. (11 sc including both corners)
- Left prong inner edge: work down Rows 7–4. (10 sc)
- Left top notch: sc2tog over sts 8–9. (1)
- Center peak: 2 sc in the Row 4 end, 1 sc in each of the next 3 sl sts, 1 sc in each of the next 2 dc, (sc, ch 2, sc) in the ch-2 tip, 1 sc in each of the next 2 dc, 1 sc in each of the next 3 sl sts, 2 sc in the Row 4 end. (16 sc + ch-2)
- Right top notch: sc2tog over sts 17–18. (1)
- Right prong inner edge: work up Rows 4–7. (10 sc)
- Right prong top: 3 sc in the corner, 5 sc, 3 sc in the corner. (11)
- Right outer edge: work down Rows 7–1 and F1–F3. (23 sc)
- Foot bottom: 3 sc in the corner, 5 sc, 3 sc in the corner. (11)
- Foot inner edge: work up F3–F1. (7 sc)
- Bottom opening: 1 sc in each of free loops 18–8. (11 sc)
- Other foot inner edge: work down F1–F3. (7 sc)
- Other foot bottom: (11)
- Left outer edge: work up F3–F1 and Rows 1–7. (23 sc)
Sl st to the first sc. Round total: 153 sc + 1 ch-2 sp. Fasten off.
Why the math works: Each outer edge has 5 A-row ends (10 sc), 4 B-row ends (12 sc) and Row 1 (1 sc), for 23 sc. That edge is 3.75 in (9.5 cm) long, and 3.75 x 6.25 = 23.4 sc, so the edge lies flat. Each prong’s inner edge is 1.6 in (4.1 cm) long and takes 10 sc. Each foot’s inner edge is 1.2 in (3.0 cm) long and takes 7 sc.
The sc2tog in each narrow notch keeps it from puckering. The border adds 1/8 in (0.3 cm) on each side, so the piece grows from 4 x 3.75 in (10.2 x 9.5 cm) to 4.25 x 4 in (10.8 x 10.2 cm).
Water Lily Appliqués
Small Lily (make 2)
Rnd 1: With yellow, MR, 5 sc. Sl st to the first sc, pulling cream through to change color. (5 sc)
Rnd 2 (inner petals): Working in the FLO, make 1 inner petal in each st. Sl st to the first hdc. (5 petals)
Rnd 3 (outer petals): Fold the inner petals forward. Working in the BLO of Rnd 1, make 1 outer petal in each st. Sl st to the first dc. (5 petals)
Fasten off and leave a 6 in (15.2 cm) tail. The flower is about 0.9 in (2.3 cm) across, with the inner petals stacked over the gaps of the outer ring.
Small pad: With green, MR, 8 sc, sl st to join. (8 sc) Next round: sl st in the next st, 5 dc in the next st; repeat 3 more times, then sl st to join. (4 rounded lobes) The pad is about 1.1 in (2.8 cm) across. Leave an 8 in (20.3 cm) tail.
Large Lily (make 1)
Rnd 1: With yellow, MR, 6 sc, sl st and change to cream. (6 sc)
Rnd 2: In the FLO, make 1 inner petal in each st. (6 petals)
Rnd 3: In the BLO of Rnd 1, make 1 outer petal in each st. (6 petals)
The flower is about 1.25 in (3.2 cm) across.
Large pad: With green, MR, 10 sc, sl st to join. (10 sc) Next round: sl st in the next st, 7 dc in the next st; repeat 4 more times, then sl st to join. (5 lobes) The pad is about 1.5 in (3.8 cm) across.
Assembly
- Sew each flower to its pad, slightly above the pad’s center, so 2–3 green lobes show below and to the sides.
- Sew one small lily onto the upper part of the left prong (Rows 5–6) and one onto the right prong (Rows 5–6).
- Sew the large lily centered over st 13, low on the band, so its pad overlaps the top of the bottom opening.
- Stitch through the back loops only so the stitching doesn’t show on the front.
- Open the jump ring with two pliers. Thread it through the border at the center of the left prong’s top, add the chain and split ring, then close it fully.
Final Blocking
- Weave in all ends before blocking. Hide the tails under the lily pads where you can.
- Mist the W until it’s damp, not soaked.
- Pin it flat to 4.25 x 4 in (10.8 x 10.2 cm). Put a pin at each of the 6 outer corners, the peak tip and the 2 top notches.
- Line up the outer edges with the grid so they’re straight and parallel.
- Pin the bottom opening into a smooth arch.
- Leave it to dry completely, about 6–8 hours.
- Don’t press the lilies flat. Fluff the petals with your fingers once the piece is dry.
Final Quality-Control Checklist
- Every prong and foot row has 7 sts, and Rows 1–3 have 25 sts.
- The outer prongs are equal in height and flat on top.
- The center peak comes to a clear point.
- The border round has 153 sc + 1 ch-2 sp.
- The finished size is 4.25 x 4 in (10.8 x 10.2 cm).
- All three lilies are secure, and the petal layers are visible.
- The jump ring is fully closed, with no gap that could catch thread.
Troubleshooting
- The band is wider than 4 in (10.2 cm): Your shells are loose. Go down a hook size, or shorten the dc by pulling up less yarn.
- The prongs lean outward: Your turning chains are too loose. Make the ch-3 snug, or replace it with a standing dc.
- The border ruffles along the sides: Use 2 sc in the B-row ends instead of 3 for one or two rows.
- The border pulls in or cups: Add 1 sc on each long outer edge, the same number on both sides.
- The notches pucker: Make sure you worked sc2tog in the notches, not 2 separate sc.
- The petals flop: Tighten your tension on Rnd 3, or block the flower lightly with a drop of fabric stiffener.
Care
Hand wash in cool water with mild soap, press out the water in a towel, and dry flat. Take off the metal key ring before washing so it doesn’t tarnish.
Final Notes
The measurements build on each other:
- The 25-st band sets the width at 4 in (10.2 cm).
- Each 7-st prong and foot is 1.1 in (2.8 cm) wide.
- Nine shell rows plus the sc foundation row make 3.75 in (9.5 cm) of height.
- The 153-st border brings the piece to 4.25 x 4 in (10.8 x 10.2 cm).
Check your gauge at the band, and the rest of the measurements will follow.
Happy crocheting!