
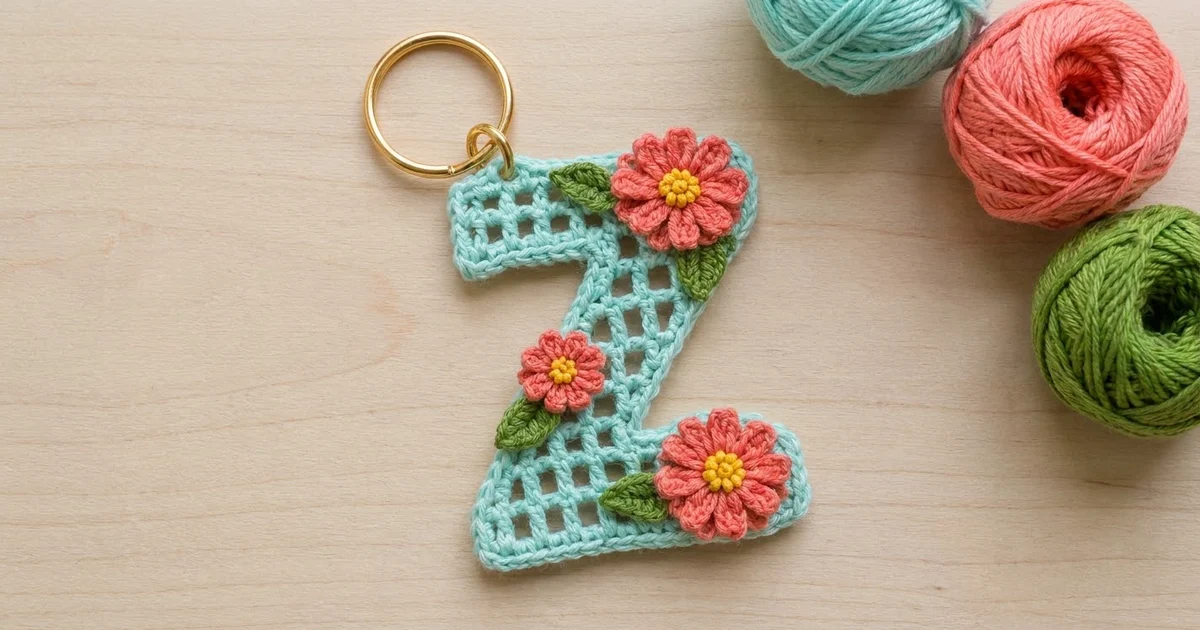
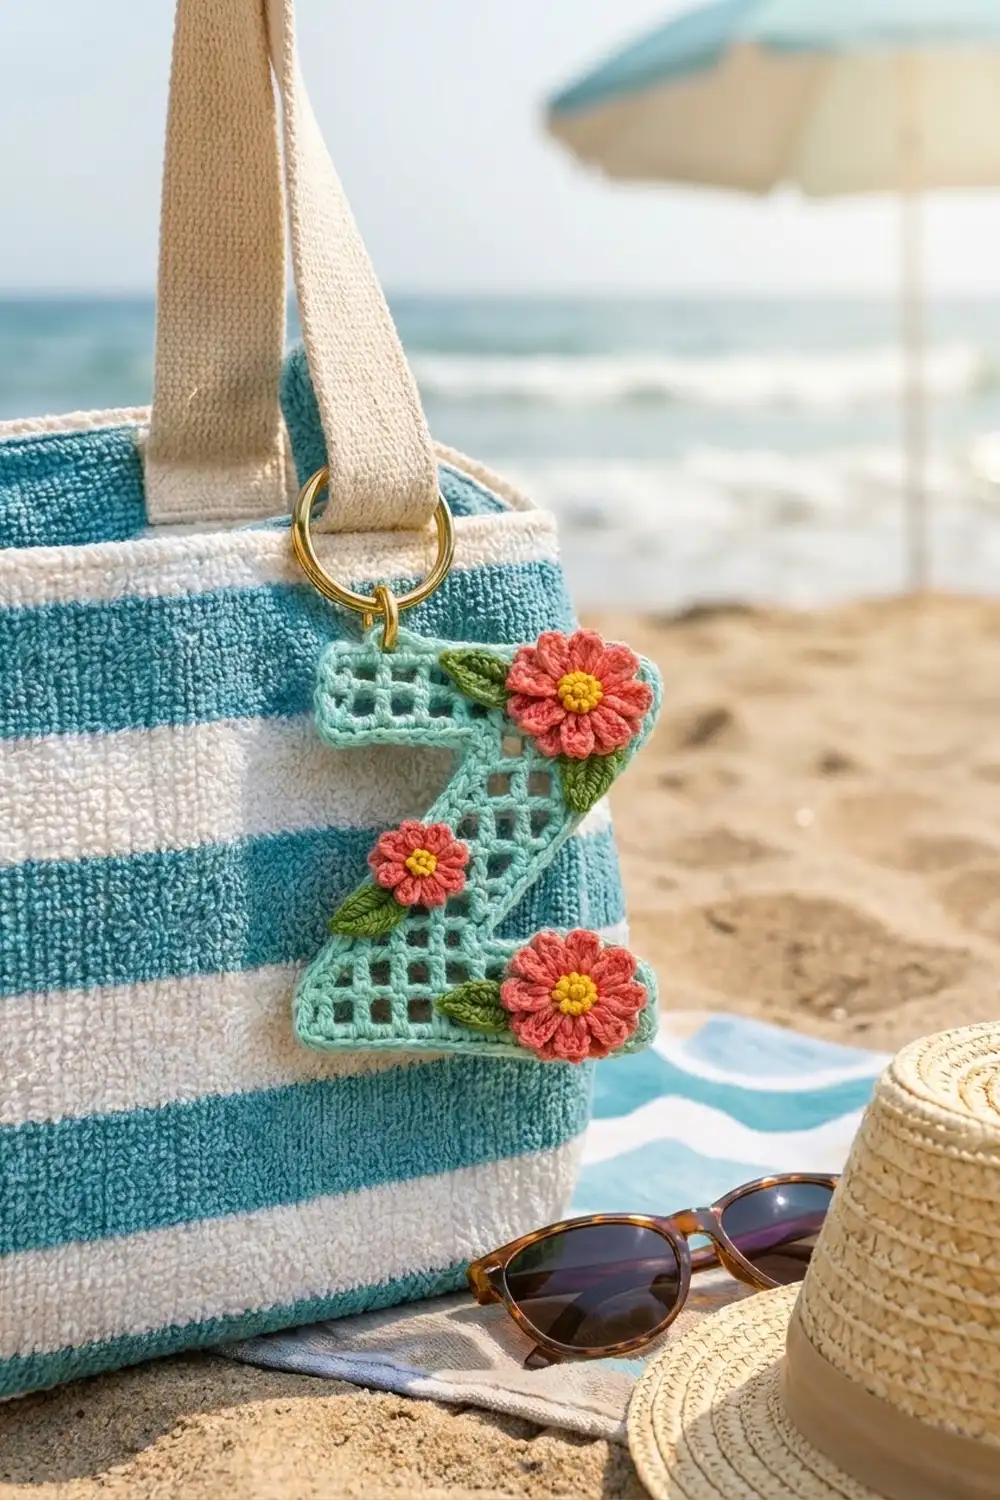
This little letter Z keychain pairs an airy filet mesh grid with a cheerful cluster of coral flowers. The open squares keep it light, so it hangs nicely from a bag handle, a key ring, or a zipper pull.
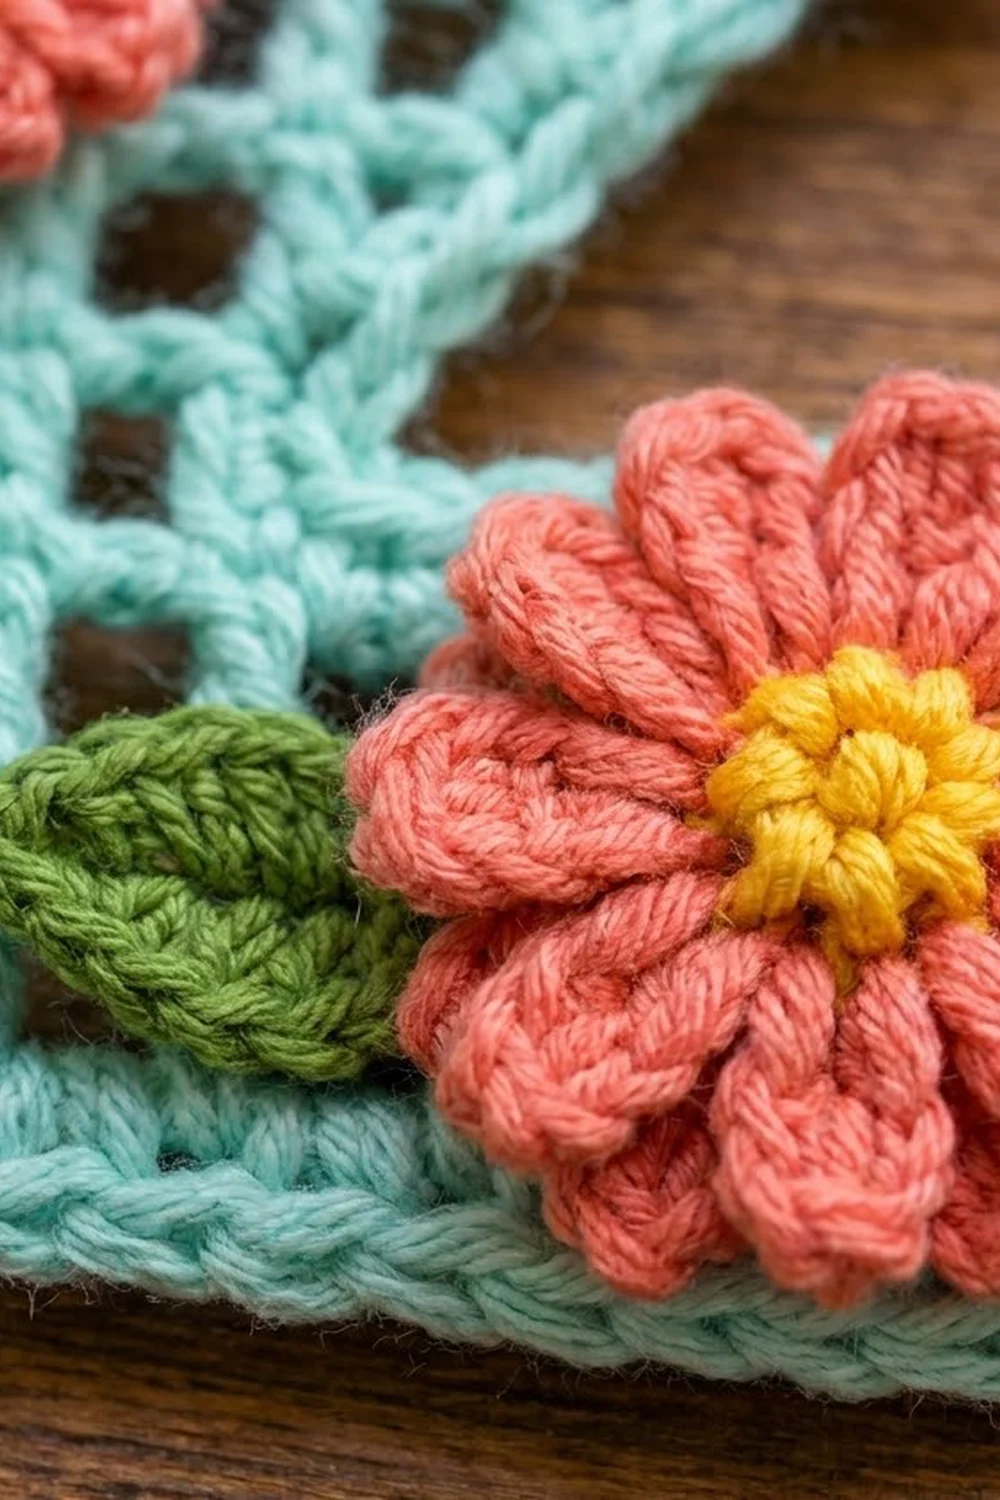
The letter is worked in soft mint cotton. Three coral flowers with sunny yellow centers sit on top: two large layered blooms and one smaller single-layer bloom, each tucked against small green leaves. A thick, rope-like crab stitch edge frames every corner of the letter.
The pattern uses US crochet terms. The finished keychain measures 3.2 in wide x 4.0 in tall (8.1 x 10.2 cm), not counting the hanging loop and ring.
You work the Z flat in filet mesh rows from the bottom bar up, shaping the diagonal with slip stitches and chained increases. Then you add a two-round border, block the letter, and sew on flowers and leaves made separately.
Finished Size and Construction
- Finished size: 3.2 in x 4.0 in (8.1 x 10.2 cm), excluding loop and ring
- Skill level: Intermediate (filet shaping)
- Terminology: US
- Yarn weight: Sport (#2 fine) cotton
- Hook: 2.75 mm (US C-2)
- Number of pieces: 1 Z panel, plus 3 flowers and 4 leaves sewn on as appliqués
- Layout: single piece, no joining
- Piece size: 7 meshes wide x 9 rows tall (43 meshes total)
- Size before border: 2.8 in x 3.6 in (7.1 x 9.1 cm)
- Border depth: 0.2 in (0.5 cm) per side, 2 rounds
Materials
Choose a smooth, mercerized or combed sport-weight cotton with clear stitch definition. Cotton keeps the square mesh open and stands up to daily handling. Avoid fuzzy or stretchy yarns, which blur the grid.
- Mint (Color A): 10 g / 33 m, for the Z panel, border, and loop
- Coral (Color B): 5 g / 17 m, for the petals
- Yellow (Color C): 2 g / 7 m, for the flower centers
- Green (Color D): 2 g / 7 m, for the leaves
These quantities include a comfortable margin for your gauge swatch and weaving in ends.
Tools:
- 2.75 mm (US C-2) crochet hook
- Tapestry needle
- 1 gold split ring, 1 in (2.5 cm), and 1 small jump ring
- Small pliers (optional)
- Rustproof pins and a blocking board
- Spray bottle, scissors, and a ruler
Abbreviations (US Terms)
- ch: chain
- sl st: slip stitch
- sc: single crochet
- hdc: half double crochet
- dc: double crochet
- tr: treble crochet
- sk: skip
- sp: space
- st(s): stitch(es)
- MR: magic ring
- FLO / BLO: front loop only / back loop only
- rev sc: reverse single crochet (crab stitch)
Special stitches and terms:
- Mesh: one open square made of a ch-1 sp between two dc posts. A row of n meshes has n + 1 posts.
- Turning post: the ch-4 at the start of a row counts as 1 dc plus ch 1, and its top is the 3rd ch. On beginning-increase chains (ch-8 or ch-12), the top of the post is the 2nd-to-last ch made.
- Rev sc (crab stitch): working left to right, insert the hook in the next st to the right, yarn over, pull up a loop, yarn over, and pull through both loops.
Gauge and Checkpoints
Gauge: 5 meshes and 5 rows = 2 in (5.1 cm) square. One mesh is 0.4 in (1.0 cm) each way.
Test first: ch 15, dc in 7th ch from hook, (ch 1, sk 1 ch, dc in next ch) 4 times. (5 meshes) Work 4 more rows of mesh, then spray lightly and measure.
- Too big: go down to a 2.5 mm hook.
- Too small: go up to a 3 mm hook.
Checkpoints on the Z panel:
- After Row 2: 2.8 in wide x 0.8 in tall (7.1 x 2.0 cm)
- After Row 4: 1.6 in (4.1 cm) tall; diagonal block 1.2 in (3.0 cm) wide
- After Row 7: 2.8 in (7.1 cm) tall
- After Row 9: 2.8 in x 3.6 in (7.1 x 9.1 cm)
- After the border: 3.2 in x 4.0 in (8.1 x 10.2 cm)
Stay within 0.1 in (0.3 cm) at every checkpoint. Small mesh errors grow quickly once the border goes on.
Z Panel
Use Color A. Work odd rows right to left with the right side facing, and even rows left to right.
Mesh map (X = mesh, . = empty; Row 9 at top, column 1 at left):
Row 9:  X X X X X X X
Row 8:  X X X X X X X
Row 7:  . . . . X X X
Row 6:  . . X X X . .
Row 5:  . . X X X . .
Row 4:  X X X . . . .
Row 3:  X X X . . . .
Row 2:  X X X X X X X
Row 1:  X X X X X X X
Row 1 (RS): Ch 19. Dc in 7th ch from hook, (ch 1, sk 1 ch, dc in next ch) 6 times. (7 meshes, 8 posts)
The 6 skipped chains make the first post and its base. The 4 chains nearest the hook act as this row’s turning post.
Row 2: Ch 4, turn, dc in next dc, (ch 1, dc in next dc) 5 times, ch 1, dc in 3rd ch of the turning post. (7 meshes)
Row 3: Turn. (Sl st in next ch-1 sp, sl st in next dc) 4 times. Ch 4, dc in next dc, ch 1, dc in next dc, ch 1, dc in 3rd ch of turning ch-4. (8 sl sts + 3 meshes, columns 1–3)
Row 4: Ch 4, turn, dc in next dc, ch 1, dc in next dc, ch 1, dc in 3rd ch of turning ch-4. (3 meshes)
Row 5: Ch 8, turn. Dc in 7th ch from hook, ch 1, sk next ch, dc in last dc of Row 4 (at the base of the ch-8). Ch 1, dc in next dc. Leave the remaining 2 meshes unworked. (3 meshes, columns 3–5)
The ch-8 adds 2 meshes on the right, and stopping short drops 2 on the left, so the diagonal shifts 2 columns.
Row 6: Ch 4, turn, dc in next dc, ch 1, dc in next dc, ch 1, dc in 7th ch of beginning ch-8. (3 meshes)
Row 7: Ch 8, turn. Dc in 7th ch from hook, ch 1, sk next ch, dc in last dc of Row 6. Ch 1, dc in next dc. Leave the remaining 2 meshes unworked. (3 meshes, columns 5–7)
Row 8: Ch 12, turn. Dc in 7th ch from hook, (ch 1, sk next ch, dc in next ch) twice, ch 1, sk last ch, dc in last dc of Row 7. (Ch 1, dc in next dc) twice, ch 1, dc in 7th ch of beginning ch-8. (4 new meshes + 3 meshes = 7 meshes)
Row 9: Ch 4, turn, dc in next dc, (ch 1, dc in next dc) 5 times, ch 1, dc in 11th ch of beginning ch-12. (7 meshes)
Fasten off. Check that the panel measures 2.8 x 3.6 in (7.1 x 9.1 cm).
Flowers and Leaves
Large Flower (make 2):
- Round 1: With C, MR, ch 1, 6 sc in ring, sl st to first sc. (6 sc) Fasten off.
- Round 2: Join B in any sc, ch 1, 2 sc in each st around, sl st to first sc. (12 sc)
- Round 3 (inner petals): Working in FLO, (sl st, ch 2, dc, ch 2, sl st) in each st around. (12 petals)
- Round 4 (outer petals): Fold the inner petals forward. Working in BLO of Round 2, (sl st, ch 3, tr, ch 3, sl st) in each st around. (12 petals) Fasten off.
The large flower is about 1.25 in (3.2 cm) across.
Small Flower (make 1):
- Round 1: With C, MR, ch 1, 5 sc in ring, sl st to first sc. (5 sc) Fasten off.
- Round 2: Join B, ch 1, 2 sc in each st around, sl st to first sc. (10 sc)
- Round 3: (Sl st, ch 2, dc, ch 2, sl st) in each st around. (10 petals) Fasten off.
The small flower is about 0.9 in (2.3 cm) across.
Leaf (make 4):
With D, ch 7. Starting in the 2nd ch from hook, work: sl st, sc, hdc, dc, hdc, sc. (6 sts) Ch 1, rotate, and work along the other side of the chain: sc, hdc, dc, hdc, sc, sl st. (6 sts) Sl st in the skipped ch at the tip. Fasten off, leaving a tail for sewing.
Each leaf is about 0.7 in (1.8 cm) long.
Placement (sew after blocking):
- Large flower 1: over the top-right corner (columns 5–7, Rows 7–9), with one leaf to its left on the top bar and one leaf below it on the diagonal.
- Small flower: on the left edge of the diagonal at Rows 5–6, with one leaf below-left.
- Large flower 2: over the bottom-right corner (columns 5–7, Rows 1–2), with one leaf to its left.
Border
Border gauge: 5 sc = 1 in (2.5 cm). That works out to 2 sc per mesh width and 2 sc per row end.
Placement rules:
- Mesh edges: work 1 sc in each ch-1 sp (or chain) and 1 sc in each interior dc. An edge of n meshes takes 2n – 1 sc, not counting corners.
- Row ends: work 2 sc around each post. An edge of r rows takes 2r sc.
- Outer corners: 3 sc in the corner point.
- Inner corners: 1 sc in the junction stitch.
- Top of Row 2 (columns 4–7): work through the slip stitches into the spaces and dc beneath them.
Round 1: With RS facing, join A with a standing sc in the top-right corner. Work counterclockwise:
| Section | Stitches |
|---|---|
| Top-right outer corner | 3 |
| Top edge (7 meshes) | 13 |
| Top-left outer corner | 3 |
| Left side, Rows 9–8 | 4 |
| Outer corner under Row 8 | 3 |
| Underside of Row 8 (4 meshes) | 7 |
| Inner corner | 1 |
| Left side, Row 7 | 2 |
| Inner corner | 1 |
| Top of Row 6 (2 meshes) | 3 |
| Outer corner | 3 |
| Left side, Rows 6–5 | 4 |
| Inner corner | 1 |
| Top of Row 4 (2 meshes) | 3 |
| Outer corner | 3 |
| Left side, Rows 4–1 | 8 |
| Bottom-left outer corner | 3 |
| Bottom edge (7 meshes) | 13 |
| Bottom-right outer corner | 3 |
| Right side, Rows 1–2 | 4 |
| Outer corner | 3 |
| Top of Row 2 (4 meshes) | 7 |
| Inner corner | 1 |
| Right side, Rows 3–4 | 4 |
| Inner corner | 1 |
| Underside of Row 5 (2 meshes) | 3 |
| Outer corner | 3 |
| Right side, Rows 5–6 | 4 |
| Inner corner | 1 |
| Underside of Row 7 (2 meshes) | 3 |
| Outer corner | 3 |
| Right side, Rows 7–9 | 6 |
The standing sc counts as the first of the 3 corner stitches. Sl st to the first sc. Total: 124 sc (88 edge sts + 30 at 10 outer corners + 6 at 6 inner corners).
Round 2: Ch 1, do not turn. Rev sc in each sc around, sl st to first st. (124 rev sc) Fasten off.
Hanging loop: Join A in the center st of the top-left corner. Ch 6, sl st in the same st, work 8 sc into the ch-6 loop, and sl st to the first sc. Fasten off.
Why the math works: 2 sc per 0.4 in (1.0 cm) gives 5 sc per inch on both mesh edges and row ends, which matches the border gauge, so the edges lie flat. Three sc turn each outer corner a full 90 degrees, and one sc at each inner corner keeps the notches from bunching. Each round adds 0.1 in (0.3 cm) per side, taking the panel from 2.8 x 3.6 in (7.1 x 9.1 cm) to 3.2 x 4.0 in (8.1 x 10.2 cm).
Final Blocking
- Weave in all ends on the Z. Keep the flower and leaf tails for sewing.
- Pin the Z right side up, with one pin at each of the 10 outer corners.
- Pin it to 3.2 in (8.1 cm) wide and 4.0 in (10.2 cm) tall.
- Nudge every mesh square and check that the diagonal steps line up evenly.
- Mist thoroughly and let it dry completely before unpinning.
- Mist the flowers, shape the petals with your fingers, and let them dry flat.
- Sew the leaves on first, then the flowers over them. Catch only the mesh posts so your stitches don’t show through the open squares.
- Thread the jump ring through the loop and the split ring, then close it firmly.
Final Quality-Control Checklist
- 9 rows and 43 meshes, matching the mesh map
- Every mesh is open and square, with no doubled or missing posts
- Diagonal blocks are 3 meshes wide and shift at Rows 5 and 7
- Border Round 1 has 124 sc and Round 2 has 124 rev sc
- 10 crisp outer corners and 6 flat inner corners
- Final size is 3.2 x 4.0 in (8.1 x 10.2 cm)
- Flowers are firmly sewn, with no loose petals
- Jump ring is fully closed
Troubleshooting
- Meshes look tall: Snug up each dc before closing it, or try a smaller hook.
- Gaps at the diagonal steps: Recount the ch-8. The new dc must go into the 7th ch from hook.
- Twisted bottom bar: The foundation chain was twisted. Rip back and keep the chain flat.
- Border ruffles: Check that you work 2 sc per mesh, not 3.
- Border pulls inward: Relax your tension, or go up one hook size for the border only.
- Puckered inner corners: Work just 1 sc at each junction.
- Flat-looking crab stitch: Pull each first loop up a little longer.
Care
Hand wash in cool water with mild soap, press out the water in a towel, and dry flat. Take the keychain off bags before washing them.
Final Notes
Everything follows one measurement chain. A 0.4 in (1.0 cm) mesh, worked 7 meshes x 9 rows, makes a 2.8 x 3.6 in (7.1 x 9.1 cm) panel. A 0.2 in (0.5 cm) border then brings it to 3.2 x 4.0 in (8.1 x 10.2 cm). Check your gauge, count each row against the mesh map, and the flowers will sit neatly on a crisp, open letter.
Happy crocheting!