

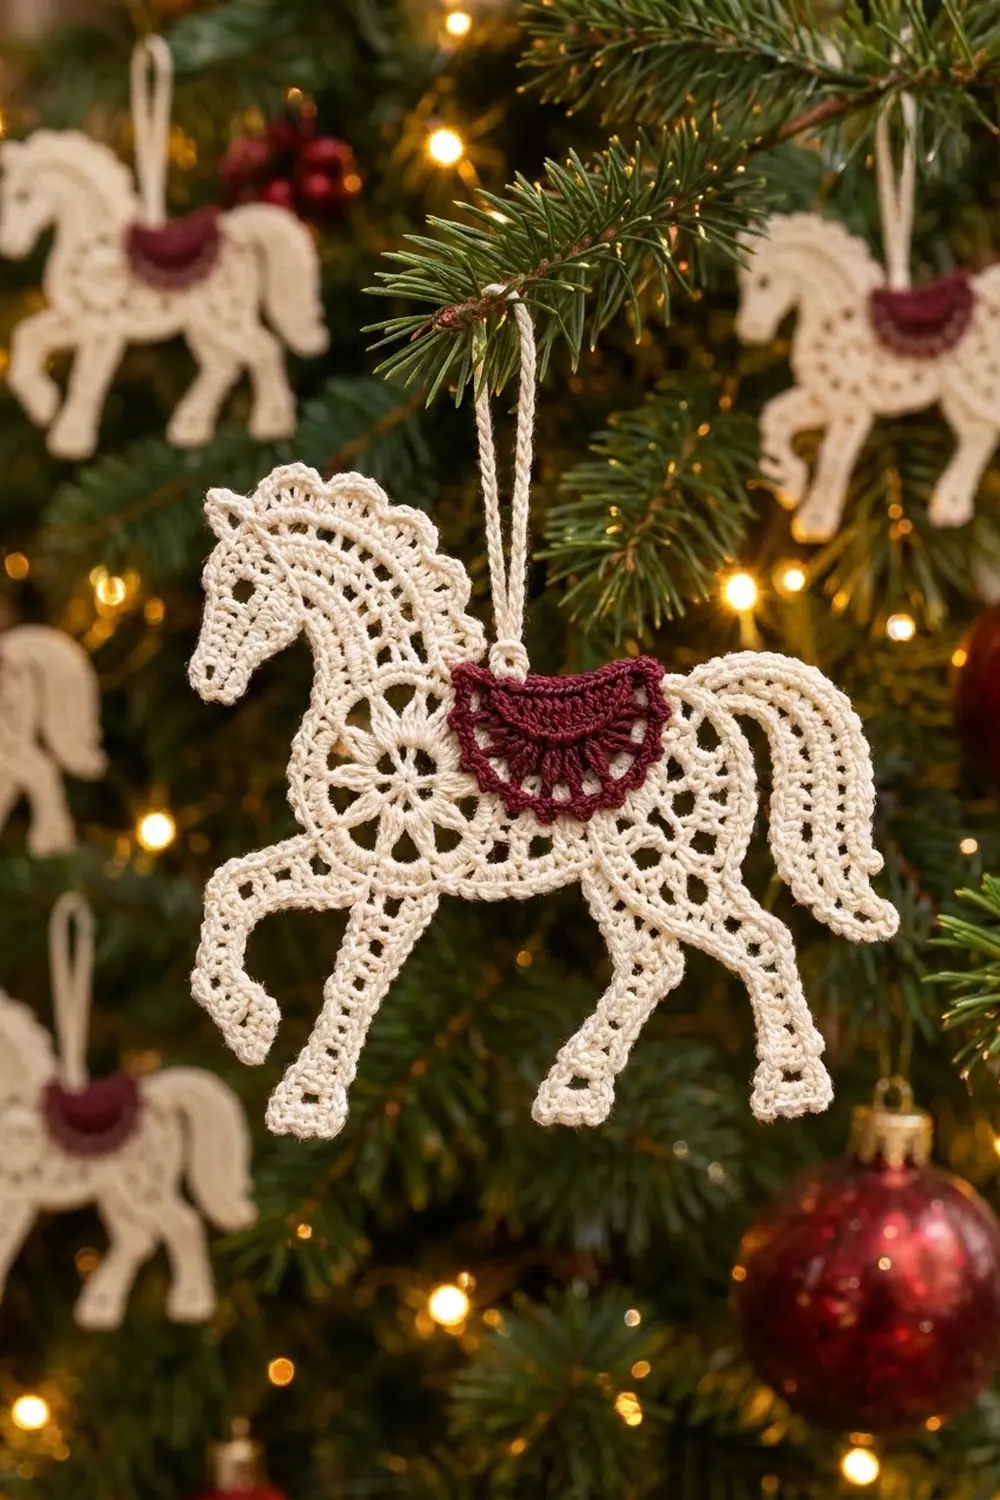
This lacy horse ornament looks like it came off an old carousel. It’s made in cream cotton thread with a cartwheel medallion in the barrel and open mesh on the chest, neck and legs. It also has a scalloped mane and a tail made of hanging strands.
A small burgundy saddle sits on the horse’s back, and a cream cord loop lets it hang from the tree. The two colors give it a vintage, festive look.
The pattern uses US terms. The finished horse is about 5 in (12.7 cm) wide and 4.5 in (11.4 cm) tall, not counting the 1.5 in (3.8 cm) loop.
The horse body is one continuous piece. You start with a medallion. Then you work the chest and rump panels, neck, head and four legs off its edge. Next comes one sc outline round, followed by the mane and tail. Last, you sew on the saddle and add the loop.
Finished Size and Construction
- Finished size: 5 in (12.7 cm) × 4.5 in (11.4 cm), plus a 1.5 in (3.8 cm) loop
- Skill level: Intermediate
- Terminology: US
- Yarn weight: Lace (0), size 10 crochet thread
- Hook: 1.5 mm (US steel 8)
- Number of pieces: 1 lace horse (continuous), plus a sewn-on saddle and a hanging loop
- Layout: Single ornament, horse in profile
- Piece size: Medallion 2.1 in (5.3 cm) across; saddle 1.6 in (4.1 cm) × 0.8 in (2.0 cm)
- Size before border: 4.75 in (12.1 cm) × 4.25 in (10.8 cm)
- Border depth: 1/8 in (0.3 cm), one round of sc
Materials
Use mercerized size 10 cotton thread. It gives crisp stitches and holds starch well. Avoid fuzzy thread, because it blurs the mesh.
- Cream: 12 g, about 40 m
- Burgundy: 2 g, about 7 m
These amounts include a margin of roughly 25%.
Tools: 1.5 mm hook, fine tapestry needle, 4 stitch markers, scissors, blocking mat with a 1 in grid, rustproof pins, spray starch.
Abbreviations (US Terms)
- ch: chain
- sl st: slip stitch
- sc: single crochet
- hdc: half double crochet
- dc: double crochet
- tr: treble crochet
- sc2tog: single crochet 2 together
- sk: skip
- sp(s): space(s)
- st(s): stitch(es)
- RS / WS: right side / wrong side
Standing dc: Start with a slip knot on the hook, yarn over, insert the hook and work a dc.
Shell: (3 dc, ch 2, 3 dc) in the same space.
Ear shell: (hdc, dc, ch 2, dc, hdc) in the same stitch.
Gauge and Checkpoints
Gauge: 10 dc = 1 in (2.5 cm); 5 dc rows = 1 in (2.5 cm).
The medallion is your gauge test. Measure it before you go on.
- After Round 1: 0.6 in (1.5 cm)
- After Round 2: 1.1 in (2.8 cm)
- After Round 3: 1.75 in (4.4 cm)
- After Round 5: 2.1 in (5.3 cm)
- Mesh panel (5 dc, 4 sps): 0.9 in (2.3 cm) tall
- Each leg: 1.7 in (4.3 cm); neck: 1.2 in (3.0 cm); head: 1.3 in (3.3 cm)
- Body from chest to rump: 3.3 in (8.4 cm)
If the medallion comes out more than 1/8 in (0.3 cm) too big, change to a 1.25 mm hook. If it comes out too small, use a 1.75 mm hook. Don’t go on until Round 5 measures correctly.
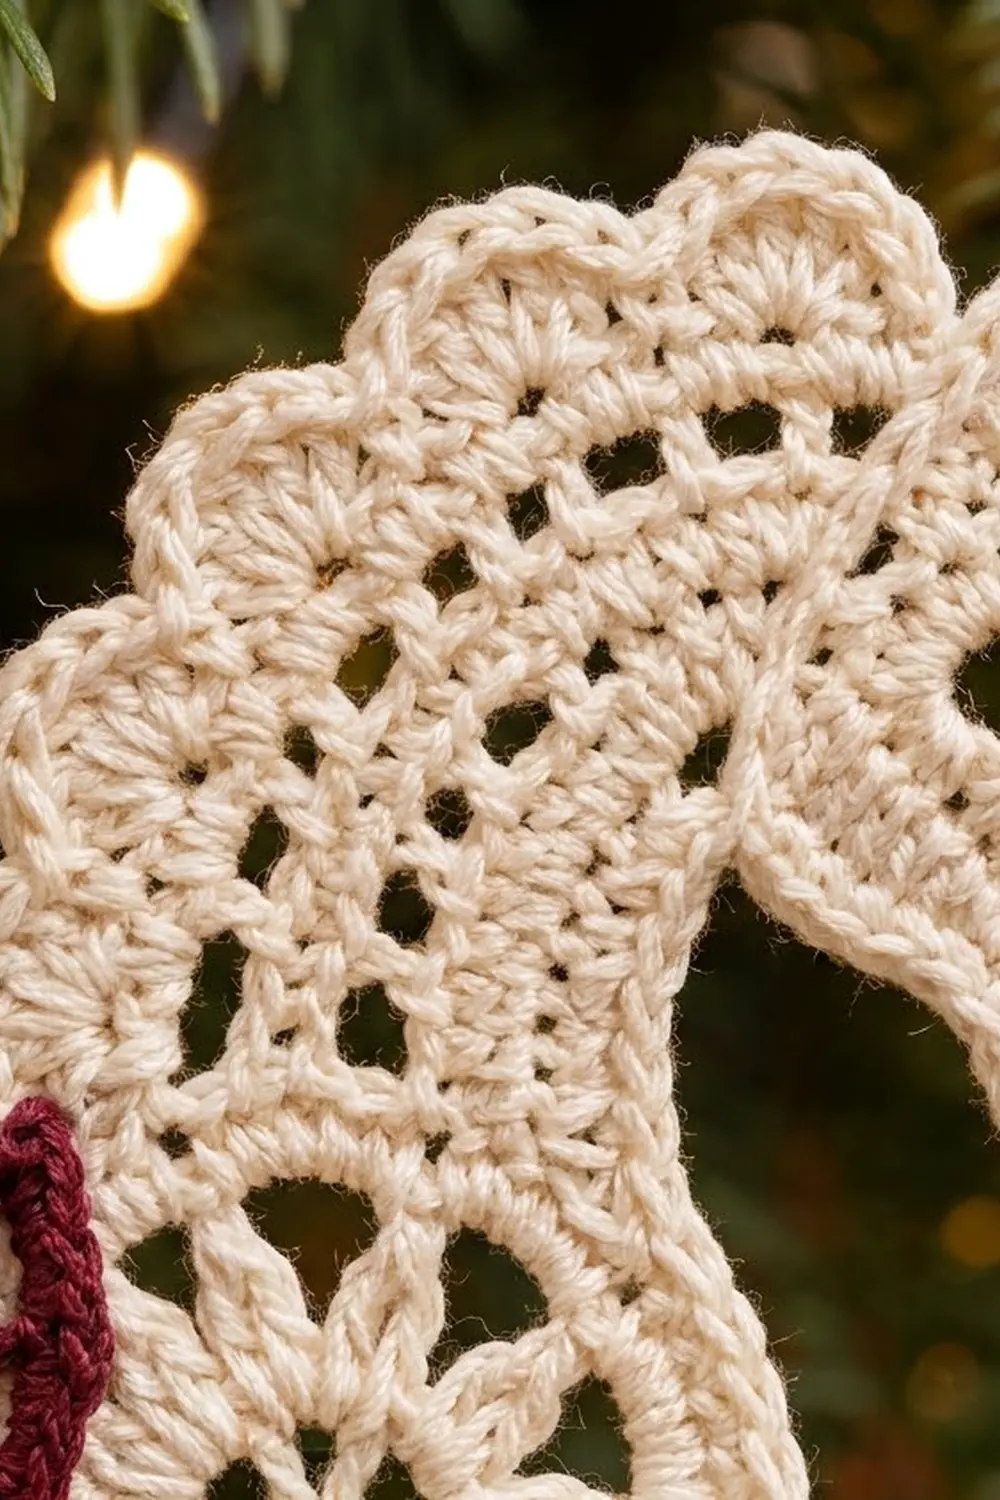
Medallion (Barrel)
Use cream.
Round 1: Magic ring, ch 3 (counts as dc), 15 dc in the ring, then join to the top of the ch-3. (16 dc)
Round 2: Ch 3 (counts as dc), dc in the next st, ch 3. Dc in each of the next 2 sts, ch 3. Repeat from * 6 more times, then join. (16 dc in 8 pairs, 8 ch-3 sps) These pairs form the wheel spokes.
Round 3: Sl st in the next dc and into the ch-3 sp. Ch 3 (counts as dc), work (2 dc, ch 2, 3 dc) in the same sp, then ch 1. Shell in the next ch-3 sp, ch 1. Repeat from * 6 more times, then join. (8 shells: 48 dc, 8 ch-2 points, 8 ch-1 sps)
Round 4: Sl st in the next 2 dc and into the ch-2 point. Ch 1, sc in the same sp, ch 4, sc in the next ch-1 sp, ch 4. Sc in the next ch-2 point, ch 4, sc in the next ch-1 sp, ch 4. Repeat from * 6 more times, then join. (16 sc, 16 ch-4 loops)
Round 5: Sl st into the first loop. Ch 1, then work 4 sc in each ch-4 loop, skipping the Round 4 sc. Join. (64 sc) Fasten off.
Number the Round 5 stitches 1–64 in the order you worked them, so sc 1 is the first sc after the join. Mark sc 16 for the chest, sc 32 for the belly center and sc 48 for the rump.
The parts attach to these stitches:
- Back (left plain): sc 53–64 and sc 1–8
- Neck: sc 9–11
- Chest panel: sc 12–20
- Gap: sc 21–23
- Leg B: sc 24–26
- Belly: sc 27–37
- Leg C: sc 38–40
- Gap: sc 41–43
- Rump panel: sc 44–52
Check: 20 + 3 + 9 + 3 + 3 + 11 + 3 + 3 + 9 = 64.
Chest and Rump Panels
Chest, Row 1 (RS): Make a standing dc in sc 20. Ch 1, sk 1, dc in the next st. Repeat from * 3 more times, ending in sc 12. (5 dc, 4 ch-1 sps)
Rows 2–3: Ch 4 (counts as dc + ch 1) and turn. Dc in the next dc, then (ch 1, dc in the next dc) 3 times; the last dc goes into the 3rd ch of the turning ch. (5 dc, 4 sps) Fasten off.
Rump: Work the same 3 rows over sc 44–52, starting with a standing dc in sc 44.
Checkpoint: Each panel adds 0.6 in (1.5 cm), so the body now measures 3.3 in (8.4 cm).
Neck
Row 1 (RS): Make a standing dc in sc 9, then ch 1, sk sc 10, dc in sc 11, ch 1. Dc in the top of the chest Row 2 turning ch, ch 1, then dc in the last dc of chest Row 3. (4 sts, 3 sps)
The back (mane) edge is worked in tr and the front edge in dc. The longer back edge makes the neck arch forward.
Row 2 (WS): Ch 4 (counts as dc + ch 1) and turn. Dc in the next dc, ch 1, dc in the next dc, ch 1, tr in the last st. (4 sts, 3 sps)
Row 3: Ch 5 (counts as tr + ch 1) and turn. (Dc in the next st, ch 1) twice, then dc in the 3rd ch of the turning ch. (4 sts, 3 sps)
Rows 4–6: Work Row 2, then Row 3, then Row 2 again. Row 6 ends at the back edge. Don’t fasten off.
Checkpoint: The neck measures 1.2 in (3.0 cm).
Head
Row 1: Ch 1 and turn. Sc in each of the 7 sts and sps, then ch 7. (7 sc, plus ch 7)
Row 2: Turn. Sc in the 2nd ch from the hook and the next 5 ch, then sc in each of the 7 sc. (13 sc)
Row 3 (eye): Ch 1 and turn. Sc in the next 4 sts, ch 1, sk 1, sc in the next 8 sts. (12 sc + 1 ch-1 sp = 13 sts)
Row 4: Ch 1 and turn. Sc2tog, then sc in the next 9 sts (one of them goes into the ch-1 sp), then sc2tog. (11 sc)
Row 5 (ear): Ch 1 and turn. Sc in the next 2 sts, ear shell in the next st, sl st in the next st. Fasten off. The 7 unworked sts form the forehead.
Checkpoint: The head measures 1.3 in (3.3 cm) long.
Legs (make 4)
Basic leg:
- Row 1: Dc in the 1st attachment st, ch 1, dc in the 3rd attachment st. (2 dc, 1 sp)
- Rows 2–8: Ch 4 (counts as dc + ch 1) and turn. Dc in the last st (the 3rd ch of the turning ch). (2 sts, 1 sp)
- Row 9 (hoof): Ch 1 and turn. 2 sc in the first st, sc in the sp, 2 sc in the last st. (5 sc) Fasten off.
Knee row: Ch 2 (counts as hdc), ch 1, tr in the last st. If the next row is also a knee row, work it as: ch 5 (counts as tr + ch 1), hdc in the last st. This keeps the tall stitch on the same edge. (2 sts, 1 sp)
Leg A (raised front leg): Make a standing dc in the bottom row-end of chest Row 1, ch 1, then dc in the Row 3 row-end. Work Rows 2–4 as a basic leg. Work Rows 5–6 as knee rows with the tr on the front edge. Finish with Rows 7–9 as a basic leg.
Leg B: Work a basic leg over sc 24–26.
Leg C: Work a basic leg over sc 38–40.
Leg D: Start it on the bottom row-ends of the rump panel, the same way as leg A. Row 4 is one knee row with the tr on the back edge. All other rows are basic leg rows.
Checkpoint: The horse now measures 4.75 in (12.1 cm) × 4.25 in (10.8 cm).
Border
Border gauge: 10 sc = 1 in (2.5 cm).
Why the math works: A dc row is 0.2 in (0.5 cm) tall, so 2 sc per dc row-end matches 10 sc per inch. Along stitch edges, 1 sc per stitch gives the same rate. The only added stitches are 2 corner increases at each hoof, 2 at the muzzle, and the ear tip, so the outline lies flat.
Round 1: Join cream with a sc in sc 8 of the medallion. Work sc around the horse in this order:
- Back: sc 8–1 and sc 64–53, 1 sc in each st: 20
- Rump top: 2 sc in each of 3 row-ends: 6
- Rump back edge: 1 sc in each st of Row 3: 9
- Leg D: 17 sc down the first side (2 per dc row-end, 1 in the hoof row-end); 7 sc around the hoof (2 sc in the first st, 1 sc in each of the next 3, 2 sc in the last st); 17 sc up the other side: 41
- Gap (sc 43–41): 3
- Leg C: 41
- Belly (sc 37–27): 11
- Leg B: 41
- Gap (sc 23–21): 3
- Leg A: 41
- Chest front: 9
- Front of neck: 2 sc in each of 6 row-ends: 12
- Under jaw: 1 sc in each free chain loop: 6
- Muzzle: 1 sc in each of 3 row-ends, plus 1 extra sc at each corner: 5
- Forehead: 1 sc in each unworked st: 7
- Ear: Sc in the hdc, sc in the dc, (sc, ch 2, sc) in the tip, sc in the dc, sc in the hdc, then sc in each of the 2 sc of Row 5: 8 sc + ch-2
- Back of head and neck: 4 sc across the head row-ends, then 2 sc in each of 6 neck row-ends: 16
Join. (279 sc + ch-2 tip)
Check: 20 + 6 + 9 + 41 + 3 + 41 + 11 + 41 + 3 + 41 + 9 + 12 + 6 + 5 + 7 + 8 + 16 = 279.
Mane: Join with a sl st in the last ear sc. Working along the 16 sc of section 17: sk 1, 5 dc in the next sc, sk 1, sc in the next sc. Repeat from * 3 more times. (4 scallops: 20 dc, 4 sc) Fasten off.
Tail: Join with a sl st at the top-back corner of the rump. Make each strand by chaining, then working hdc back along the chain starting in the 3rd ch from the hook.
- Strand 1: Ch 20, work back along it (18 hdc), sl st in the same st.
- Strand 2: Ch 20, work back along it (18 hdc), sl st in the next sc.
- Strand 3: Ch 18, work back along it (16 hdc), sl st in the same st.
- Strand 4: Ch 16, work back along it (14 hdc), sl st in the next sc. Fasten off.
The tail measures about 1.8 in (4.6 cm).
Saddle and Hanging Loop
Use burgundy.
Row 1: Magic ring, ch 3 (counts as dc), 6 dc in the ring. Don’t join. (7 dc)
Row 2: Ch 3 (counts as dc) and turn. Dc in the same st, then 2 dc in each remaining st. (14 dc)
Row 3: Ch 4 (counts as dc + ch 1) and turn. (Dc in the next dc, ch 1) 12 times, then dc in the last dc. (14 dc, 13 sps)
Row 4 (scallops): Ch 1 and turn. Sc in the first dc. 3 dc in the next sp, sc in the next sp. Repeat from * 5 more times. Then work 3 dc in the last sp and sc in the last dc. (7 scallops: 21 dc + 8 sc = 29 sts)
Row 5 (band): Ch 1 and rotate to work along the straight edge. Work 7 sc across the row-ends of one side (2 per dc row, 1 for the sc row), sc in the ring, then 7 sc across the other side. (15 sc) Fasten off, leaving a 10 in (25.4 cm) tail.
Checkpoint: The saddle measures 1.6 in (4.1 cm) × 0.8 in (2.0 cm).
Center the saddle’s band along the border above sc 64 and sc 1, so the scallops overlap the top of the medallion. Whipstitch the band and the scallop tips in place.
Loop: Join cream in the border sc above sc 1, going through the center of the saddle band. Ch 36, then sl st in the same st. Sl st in the back bump of each ch, then sl st at the base and fasten off. The loop stands 1.5 in (3.8 cm) tall.
Final Blocking
- Weave in all ends.
- Soak the ornament and press out the water in a towel.
- Lay it RS up on the grid.
- Pin the body to 3.3 in (8.4 cm) and each leg to 1.7 in (4.3 cm).
- Bend leg A forward at the knee and angle leg D back.
- Pin the neck into an arch, then pin the ear and each mane scallop.
- Curve the tail strands downward and pin them.
- Check that the ornament measures 5 in (12.7 cm) × 4.5 in (11.4 cm).
- Starch, let it dry fully and unpin.
Final Quality-Control Checklist
- Medallion: 64 sc, 2.1 in (5.3 cm) across
- Panels: 5 dc and 4 sps in every row
- Neck: 4 sts and 3 sps in all 6 rows
- Legs: 2 sts wide with a 5-sc hoof
- Border: 279 sc plus the ch-2 ear tip
- Mane: 4 scallops; tail: 4 strands
- Saddle: 29-st scallop edge, 15-sc band
- Loop: centered and firm
Troubleshooting
- Medallion cups: Go up one hook size for Round 5 only.
- Medallion ruffles: Use a smaller hook.
- Legs twist: Always work the last dc into the 3rd ch of the turning ch.
- Neck stands straight: Make sure every row has its tr on the back edge.
- Border waves: Use no more than 2 sc per dc row-end.
- Saddle curls: Steam it flat before sewing it on.
Care
Hand wash in cool water and dry flat. Re-starch after washing so the ornament keeps its shape.
Final Notes
The medallion sets all the other measurements. At 2.1 in (5.3 cm) across, it plus the two 0.6 in (1.5 cm) panels gives a 3.3 in (8.4 cm) body. Add 1.7 in (4.3 cm) legs, a 1.2 in (3.0 cm) neck and a 1.3 in (3.3 cm) head, and the horse measures 4.75 in (12.1 cm) × 4.25 in (10.8 cm). The 1/8 in (0.3 cm) border brings it to 5 in (12.7 cm) × 4.5 in (11.4 cm).
Happy crocheting!