

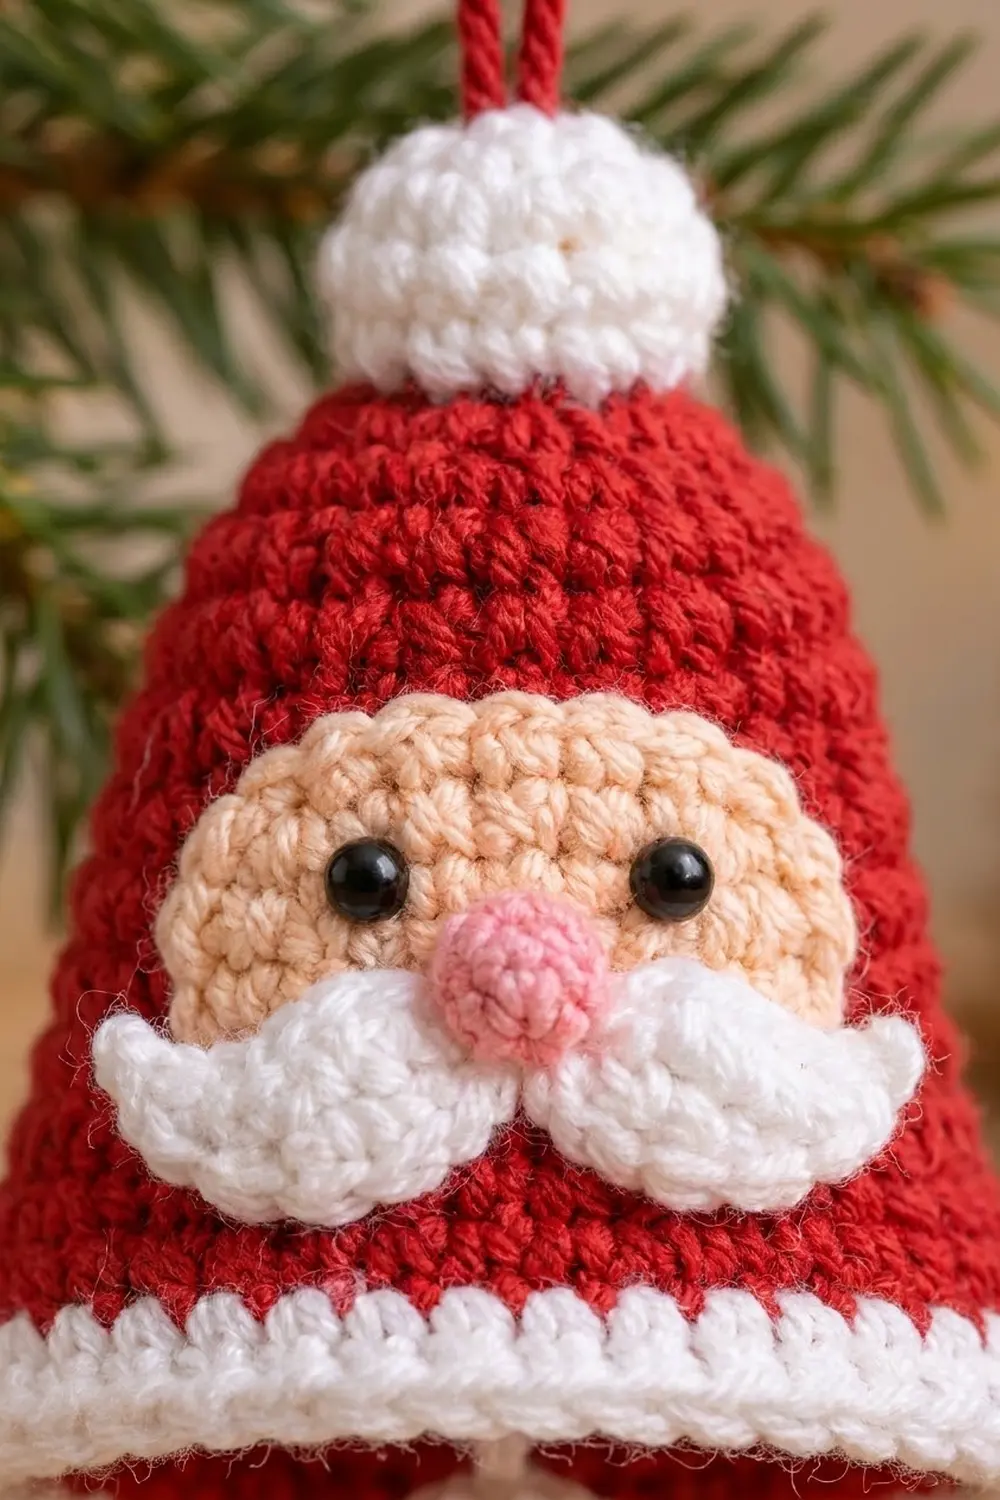
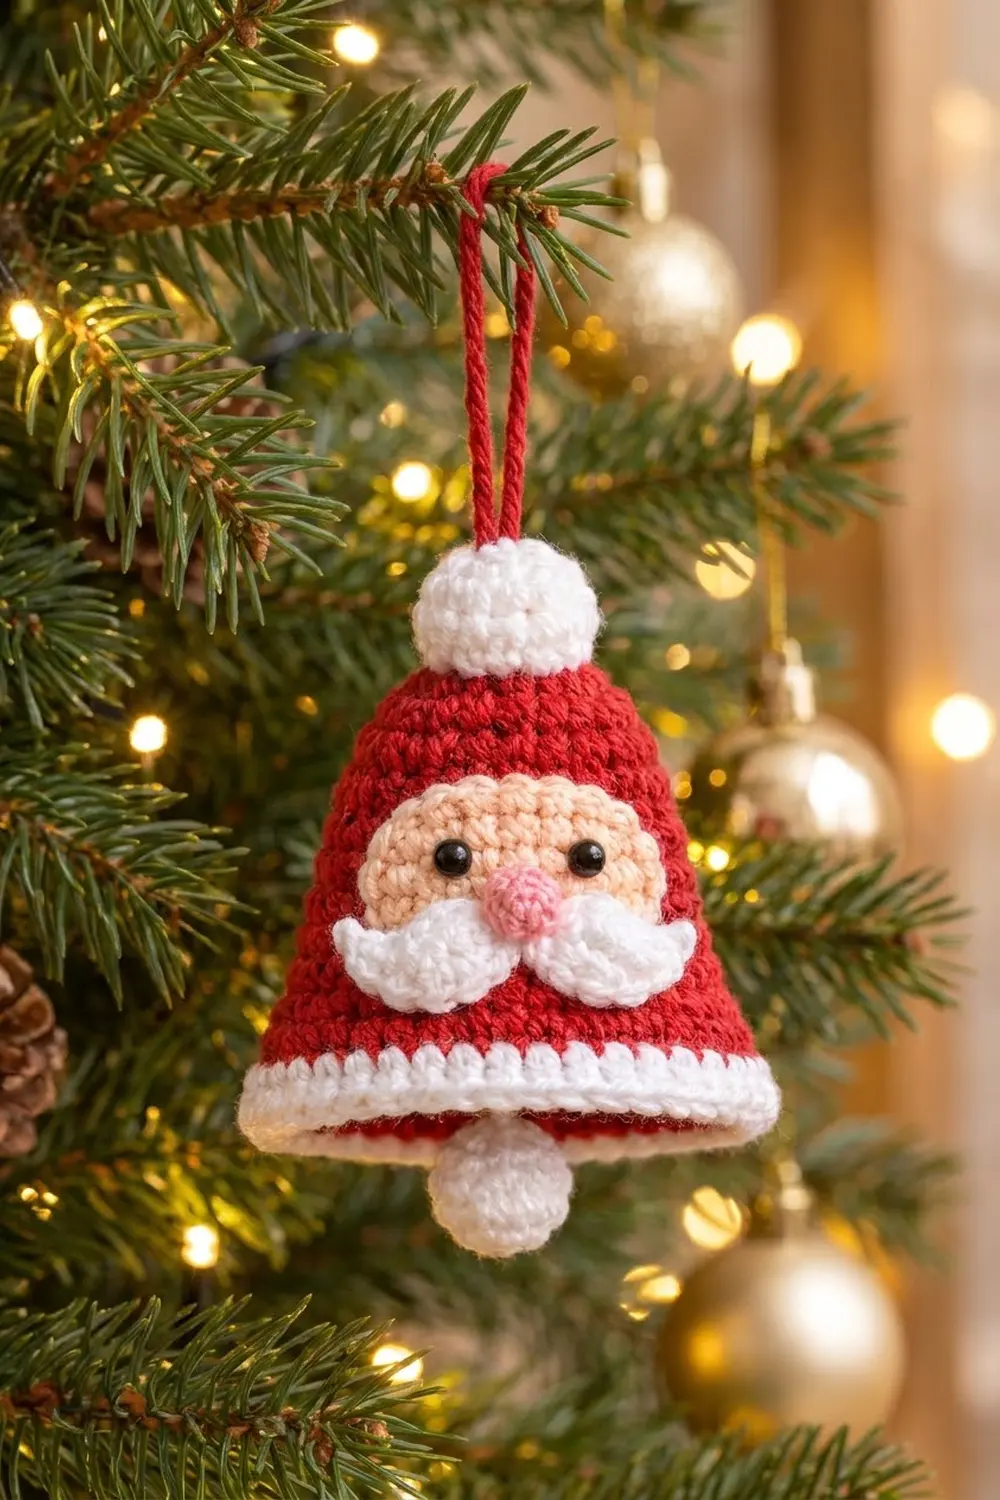
This little Santa bell is a quick, cheerful ornament for the tree. The bell is bright red with a snowy white rim, and a round white pompom ball sits on top like the tip of Santa’s hat. A peach face, two black eyes, a pink button nose and a curly white mustache turn the bell into a friendly Santa.
It’s made in classic amigurumi style: tight single crochet, a firm shape that holds well, and small appliqués sewn in place. Inside the bell, a white ball clapper hangs on a short strand, so it looks like a real bell from every angle.
This pattern uses US crochet terms. The finished bell is about 4.0 in (10.2 cm) across the rim and 3.1 in (7.9 cm) tall. It’s about 4.1 in (10.4 cm) to the top of the pompom ball, not counting the hanging loop.
The construction is simple:
1. Work the bell from the top down in continuous rounds.
2. Add a three-round white border at the rim.
3. Make the top ball, clapper, face, nose and mustache separately and sew them on.
4. Add a red chain loop for hanging.
Finished Size and Construction
- Finished size: 4.0 in (10.2 cm) rim diameter, 3.1 in (7.9 cm) bell height, about 4.1 in (10.4 cm) with the top ball
- Skill level: Easy (advanced beginner)
- Terminology: US crochet terms
- Yarn weight: Worsted, medium #4
- Hook: 3.5 mm (E-4)
- Number of pieces: 1 finished ornament (one bell body plus small sewn-on parts)
- Layout: Single standalone ornament, no joining
- Piece size before border: 3.4 in (8.6 cm) rim diameter, 2.6 in (6.6 cm) side height
- Border depth: 0.5 in (1.3 cm), 3 rounds in white
Materials
Choose a smooth worsted-weight acrylic or cotton blend. Smooth yarn shows the single crochet texture clearly and keeps the bell firm. Avoid fuzzy or very splitty yarn for the small face pieces.
- Red: 15 g (about 30 m) for the bell body and hanging loop
- White: 8 g (about 16 m) for the rim border, top ball, clapper and mustache
- Peach: 3 g (about 6 m) for the face
- Pink: 1 g (about 2 m) for the nose
These amounts assume a yarn of about 100 g per 200 m and include a small safety margin.
Tools and notions:
- 3.5 mm (E-4) crochet hook
- Two 6 mm black safety eyes (or embroider the eyes for a child-safe version)
- A small amount of polyester fiberfill
- Stitch marker
- Tapestry needle
- Sewing pins
- Scissors
Abbreviations (US Terms)
- ch: chain
- sl st: slip stitch
- sc: single crochet
- hdc: half double crochet
- dc: double crochet
- inc: 2 sc in the same stitch
- dec: sc2tog (the invisible decrease is recommended)
- BLO: back loop only
- MR: magic ring
- st(s): stitch(es)
- rnd(s): round(s)
Special stitch: invisible decrease. Insert the hook into the front loop of the next st, then into the front loop of the following st. Yarn over and pull through both front loops (2 loops on hook). Yarn over and pull through both loops.
Gauge and Checkpoints
Gauge: 18 sc and 20 rnds = 4 in (10.2 cm) in continuous rounds. That’s 4.5 sc and 5 rnds per inch (2.54 cm).
Because this is one small ornament, the bell itself is your gauge test. Work Rnds 1–4 and measure before you go on.
Checkpoints:
- After Rnd 4: a flat disc 1.7 in (4.3 cm) across, 24 sts
- After Rnd 7: sides 0.6 in (1.5 cm) tall
- After Rnd 15: 40 sts, sides 2.2 in (5.6 cm) tall, opening about 2.8 in (7.1 cm) across
- After Rnd 17: 48 sts, sides 2.6 in (6.6 cm) tall, rim 3.4 in (8.6 cm) across
- After the border: 56 sts, rim 4.0 in (10.2 cm) across, bell 3.1 in (7.9 cm) tall
If your disc is too big, switch to a 3.25 mm or 3.0 mm hook. If it’s too small, switch to a 3.75 mm hook. Your fabric should be tight enough that stuffing wouldn’t show through the top ball. The same tension keeps the bell stiff.
Bell Body (Red)
Work in continuous rounds without joining. Place a stitch marker in the first st of each round and move it up as you go.
Rnd 1: With red, MR, 6 sc in ring. (6 sts)
Rnd 2: Inc in each st around. (12 sts)
Rnd 3: (Sc 1, inc) 6 times. (18 sts)
Rnd 4: (Sc 2, inc) 6 times. (24 sts)
The disc should lie flat and measure 1.7 in (4.3 cm). This is the closed top of the bell.
Rnd 5: Working in BLO, sc in each st around. (24 sts)
Working this round in the back loops makes a crisp fold, so the sides turn down cleanly from the flat top.
Rnds 6–7: Sc in each st around. (24 sts)
Rnd 8: (Sc 5, inc) 4 times. (28 sts)
Rnd 9: Sc in each st around. (28 sts)
Rnd 10: (Sc 6, inc) 4 times. (32 sts)
Rnd 11: Sc in each st around. (32 sts)
Rnd 12: (Sc 7, inc) 4 times. (36 sts)
Rnd 13: Sc in each st around. (36 sts)
Rnd 14: (Sc 8, inc) 4 times. (40 sts)
Rnd 15: Sc in each st around. (40 sts)
Check: the sides should be 2.2 in (5.6 cm) tall and the opening about 2.8 in (7.1 cm) across. Increasing gently on every other round gives the bell its sloped, hat-like sides.
Rnd 16: (Sc 4, inc) 8 times. (48 sts)
Rnd 17: Sc in each st around. (48 sts)
Rnd 16 has twice as many increases as the earlier rounds, so the lower edge flares out like a real bell. Sl st in the next st, fasten off, and weave in the end on the inside.
Check: 48 sts, sides 2.6 in (6.6 cm) tall, rim 3.4 in (8.6 cm) across.
Top Pompom Ball (White)
Rnd 1: MR, 6 sc in ring. (6 sts)
Rnd 2: Inc in each st around. (12 sts)
Rnd 3: (Sc 1, inc) 6 times. (18 sts)
Rnds 4–5: Sc in each st around. (18 sts)
Rnd 6: (Sc 1, dec) 6 times. (12 sts)
Stuff firmly.
Rnd 7: Dec 6 times. (6 sts)
Fasten off, leaving a 10 in (25.4 cm) tail. Close the hole and keep the tail for sewing. The ball measures about 1.25 in (3.2 cm) across.
Clapper Ball (White)
Rnd 1: MR, 6 sc in ring. (6 sts)
Rnd 2: Inc in each st around. (12 sts)
Rnds 3–4: Sc in each st around. (12 sts)
Stuff lightly.
Rnd 5: Dec 6 times. (6 sts)
Fasten off, leaving a 6 in (15.2 cm) tail, and close the hole. The ball measures about 0.85 in (2.2 cm) across.
Face (Peach)
The face is a half circle worked in rows. The straight edge goes at the bottom, under the mustache.
Row 1: MR, ch 1 (doesn’t count as a st), 4 sc in ring, pull the ring closed, turn. (4 sts)
Row 2: Ch 1, inc in each st across, turn. (8 sts)
Row 3: Ch 1, (sc 1, inc) 4 times, turn. (12 sts)
Row 4: Ch 1, (sc 2, inc) 4 times. (16 sts)
Fasten off, leaving a 12 in (30.5 cm) tail. The half circle measures 1.6 in (4.1 cm) along the straight edge and 0.8 in (2.0 cm) tall.
Insert the safety eyes between Rows 2 and 3, about 5 sts apart and centered left to right. Secure the backs before sewing the face on.
Nose (Pink)
Rnd 1: MR, 6 sc in ring, sl st to the first sc. (6 sts)
Fasten off, leaving an 8 in (20.3 cm) tail. Pull the ring tight. The nose is about 0.4 in (1.0 cm) across.
Mustache (White, Make 2)
Each half is a small curl, thin at one end and plump at the other.
Ch 8. Starting in the 2nd ch from the hook, work: sl st, sc, hdc, dc, dc, 2 dc in next ch, 3 dc in last ch. (10 sts)
Fasten off, leaving an 8 in (20.3 cm) tail. Each half is about 1 in (2.5 cm) long. The extra stitches at the end push the piece into a curve. Gently bend the thin tip upward with your fingers.
Hanging Loop (Red)
Ch 30, about 6 in (15.2 cm) long. Fasten off, leaving short tails at both ends.
Border (White Rim)
Join white to the red rim and work into the last round of the bell (Rnd 17, 48 sts).
Border gauge: the same as the body, 4.5 sc per inch (2.54 cm). Because the bell is round, the counts below are given per round and per quarter of the rim instead of per side.
Border Rnd 1: Join white with a sc in any st. Work (sc 5, inc) 8 times, counting the joining sc as your first sc. Count: 48 sts worked 1 per existing st + 8 extra sts = 56 sts, or 14 sts per quarter. Join with a sl st to the first sc.
Border Rnd 2: Ch 1, sc in each st around, join. (56 sts, 14 per quarter)
Border Rnd 3: Sl st loosely in each st around. (56 sts, 14 per quarter)
Fasten off and weave in the ends on the inside.
Why the math works:
– Rnd 16 added 8 sts to create the flare. Border Rnd 1 adds 8 more, one every 6 sts. This keeps the same angle, so the white rim tips slightly outward without ruffling or cupping.
– At 56 sts and 4.5 sts per inch, the circumference is 12.4 in (31.5 cm), which gives a rim diameter of 4.0 in (10.2 cm).
– Two rounds of sc plus one round of sl st add 0.5 in (1.3 cm), so the bell grows from 2.6 in (6.6 cm) to 3.1 in (7.9 cm) tall.
Assembly
- Face: Pin the face to the front of the bell with the straight edge along Rnd 11 and the curved top reaching about Rnd 7. Whipstitch around the edge with the peach tail.
- Nose: Pin the nose at the center of the straight edge so it overlaps the face slightly. Sew around it.
- Mustache: Pin the two plump ends together just below the nose, with the thin tips curling up toward the cheeks. The mustache covers Rnds 11–13. Sew it on with small stitches through the center of each curl.
- Clapper: Thread a 6 in (15.2 cm) white strand from inside the bell up through the center of the top. Tie the clapper tail to it so the ball hangs 3 in (7.6 cm) below the inside of the top, with about half the ball showing below the rim. Knot it securely inside.
- Hanging loop: Fold the red chain in half. Thread both ends down through the center of the top ball and through the bell top, then knot them inside.
- Top ball: Sew the top ball to the center of the flat top with the white tail, going around the base twice.
Final Blocking
- Lightly mist the bell with water.
- Fill the bell with a ball of plastic wrap or a small cup so the sides dry smooth.
- Shape the white rim so it flares evenly all the way around.
- Press the mustache curls flat and nudge the tips upward.
- Let it dry completely, for at least 4 hours, then remove the form.
Don’t steam acrylic directly. If you use steam at all, hold the iron above the piece.
Final Quality-Control Checklist
- The rim is 4.0 in (10.2 cm) across and the bell is 3.1 in (7.9 cm) tall
- The white border has 56 sts and lies evenly with no ruffle
- The face is centered and level, with its straight edge along Rnd 11
- The eyes are level and the safety backs are secure
- The nose sits exactly at center
- The two mustache halves are mirror images
- The clapper hangs straight with about half of it showing
- The top ball is firmly attached and the loop is centered
- All ends are woven in on the inside
Troubleshooting
The top disc cups up. Your tension is too tight on Rnds 1–4. Go up one hook size for those rounds only.
The sides flare too soon. You may have added extra increases. Recount Rnds 8–15; the odd-numbered rounds have no increases.
The rim ruffles. Use a smaller hook for Border Rnd 1, or work (sc 11, inc) 4 times for a softer flare. That gives 52 sts, so work 52 sts in Border Rnds 2–3.
The face looks lopsided. Fold the bell flat to find the front center, pin the middle of the straight edge there, and count sts out to each side.
The mustache won’t curl. Work the 3 dc at the end more tightly, or dampen the piece and pin it into a curve to dry.
Stuffing shows through the top ball. Use a smaller hook for the ball, or stuff it less firmly.
Care
Spot clean with a damp cloth and mild soap, then reshape and air dry. Store it in a box between seasons so the rim keeps its flare.
Final Notes
Here’s the measurement chain from top to rim:
– The 24-st top disc measures 1.7 in (4.3 cm).
– Gradual increases bring the bell to 48 sts, 3.4 in (8.6 cm) across and 2.6 in (6.6 cm) tall.
– The 56-st white border adds 0.5 in (1.3 cm) of height and finishes the rim at 4.0 in (10.2 cm).
If each checkpoint matches, the face, mustache and clapper will fit exactly as shown. Make one as a gift topper, or a whole set for the tree.
Happy crocheting!