

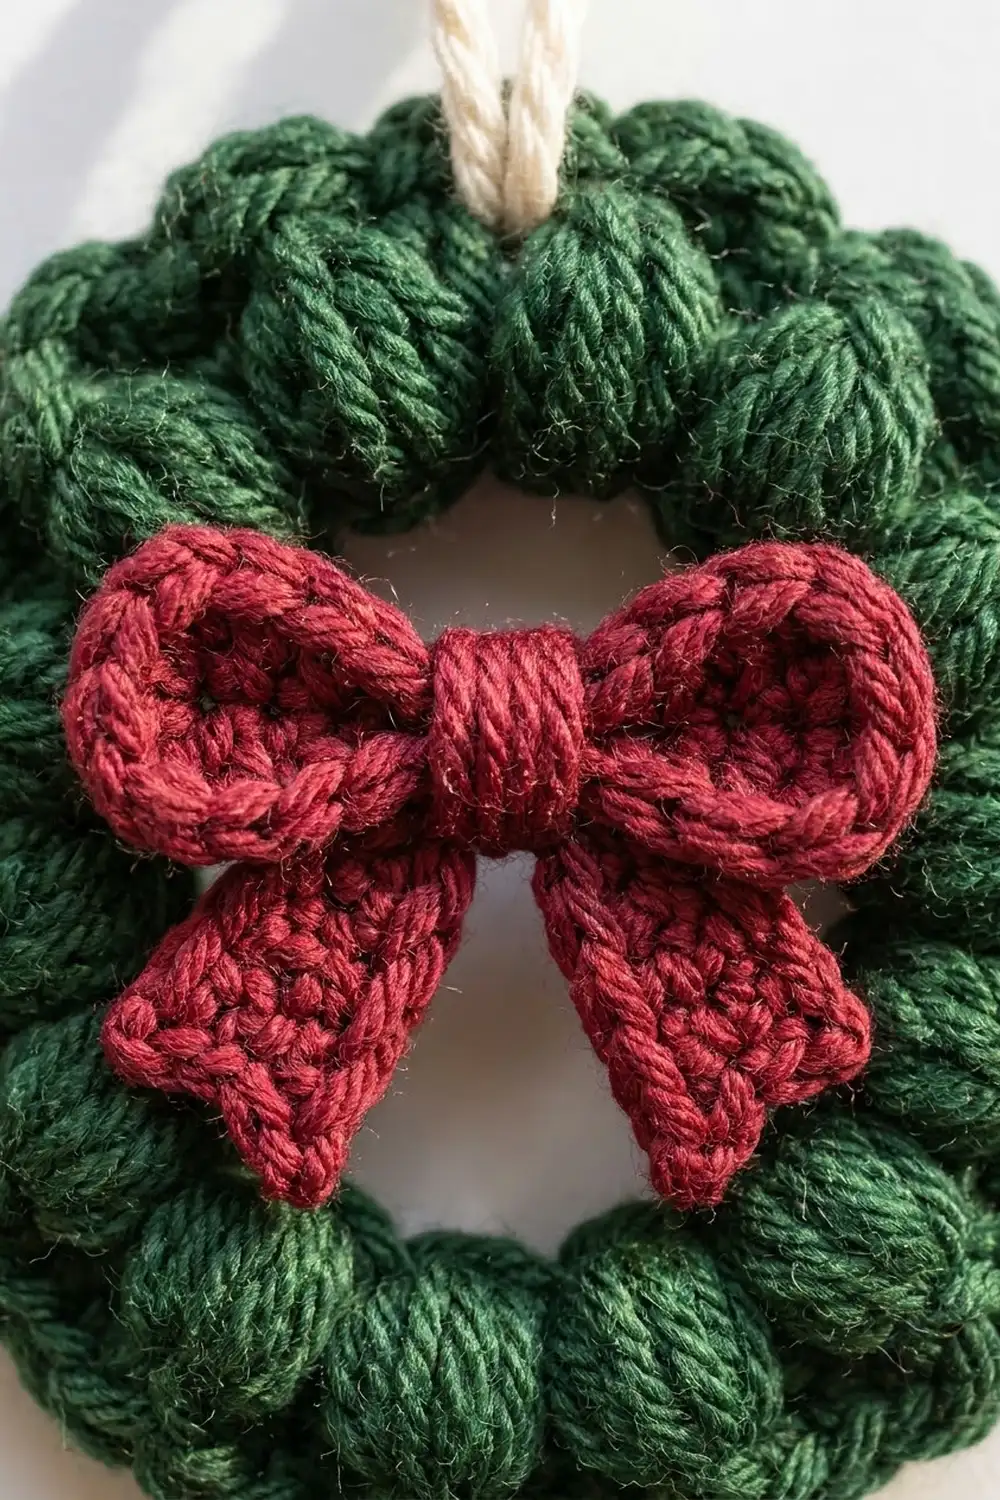
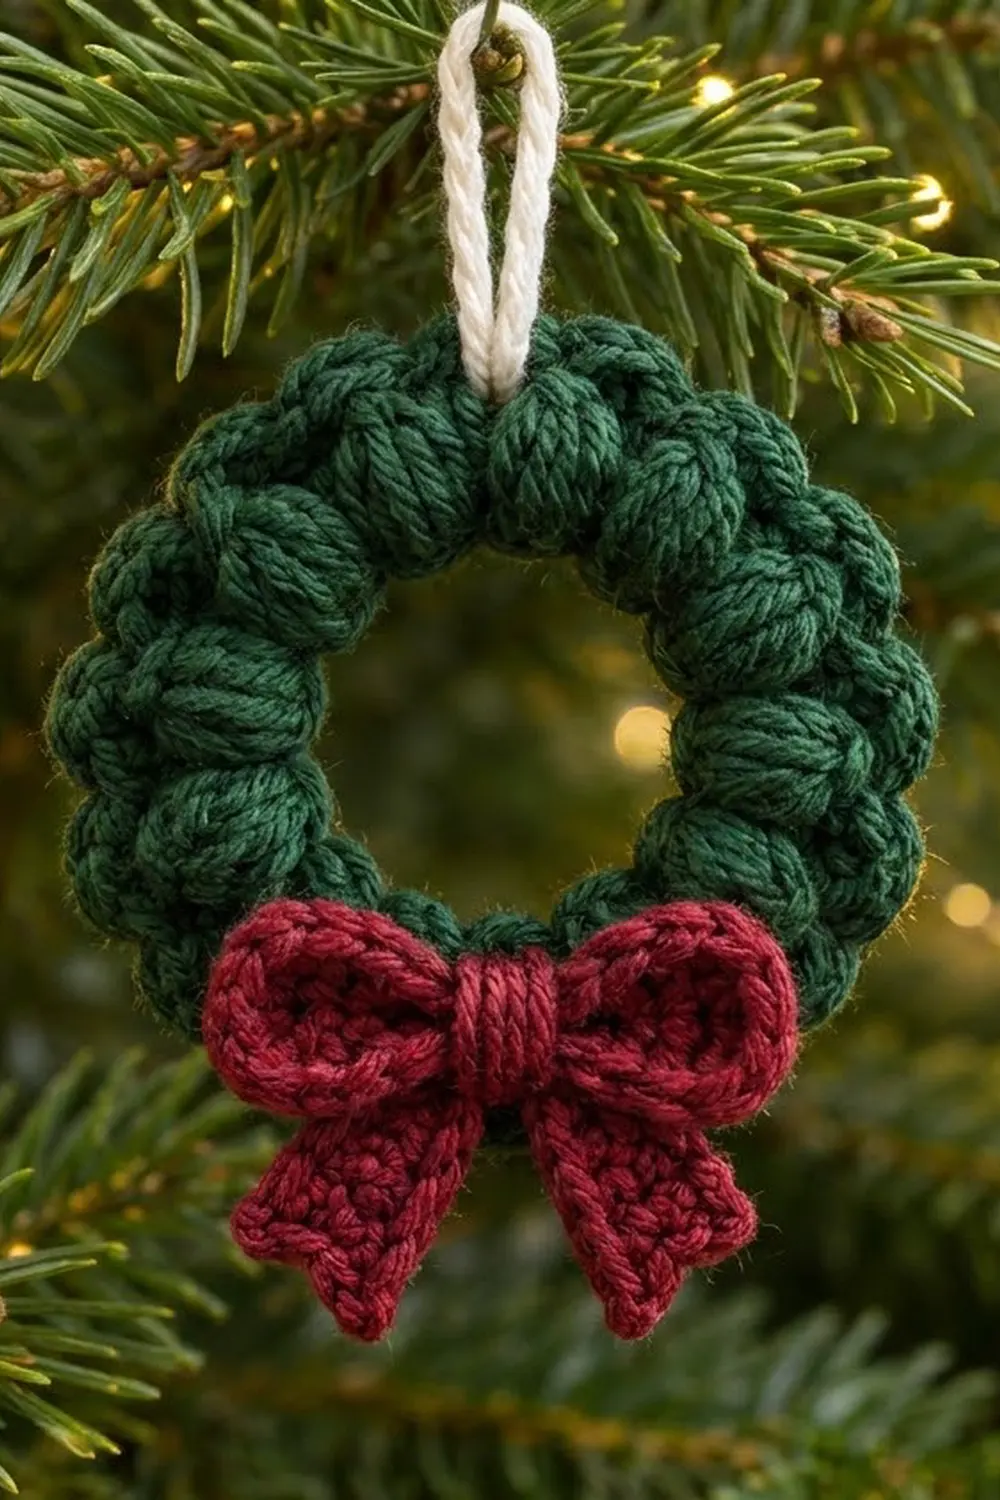
This small wreath is a single, chunky ornament. It is a ring of round forest-green puff stitches with an open center, finished with a cranberry bow and a cream hanging loop. It looks like a front-door wreath shrunk down to hang on a branch.
The colors are classic Christmas. Deep forest green makes the ring, cranberry red makes the bow and its two notched tails, and soft cream makes the hanging loop. The puff stitches give a round, bumpy texture that catches the tree lights.
The pattern uses US crochet terms. The finished wreath is 3.25 in (8.3 cm) across. From the top of the ring to the tips of the bow tails it is about 3.75 in (9.5 cm) tall, not counting the hanging loop.
The construction is simple. You chain a small ring and work single crochet over it. Then you add two rounds of puff stitches that grow outward and finish with a firm edge round. The bow loops, two tails, center wrap and hanging loop are made separately and sewn on.
Finished Size and Construction
- Finished size: 3.25 in (8.3 cm) across; 3.75 in (9.5 cm) tall including bow tails
- Center opening: about 1.25 in (3.2 cm)
- Skill level: Easy / advanced beginner (good puff stitch practice)
- Terminology: US crochet terms
- Yarn weight: Worsted (#4, medium)
- Hook: 4.0 mm (G-6)
- Number of pieces: 1 wreath ring, plus small sewn-on parts (bow loops, 2 tails, center wrap, hanging loop)
- Layout: single ornament, bow at bottom center, hanging loop at top center
- Piece size: ring 3.25 in (8.3 cm); bow 2.25 in (5.7 cm) wide
- Size before border: 3 in (7.6 cm) after Round 3
- Border depth: one round of single crochet, about 0.25 in (0.6 cm), mostly hidden behind the puffs
Materials
Choose a smooth, tightly twisted worsted yarn. Acrylic or a wool blend both work well. Acrylic holds the puff shape firmly and doesn’t crush easily in storage. Avoid fuzzy or brushed yarns, which blur the puffs.
- Forest green (Color A): 12 g / 24 m (26 yd)
- Cranberry red (Color B): 5 g / 10 m (11 yd)
- Cream (Color C): 2 g / 4 m (4.5 yd)
These amounts include about 20 percent extra for a gauge swatch and weaving in ends.
Tools:
- 4.0 mm (G-6) crochet hook
- Tapestry needle
- Scissors
- Stitch marker
- Rustproof pins and a small blocking surface
- Spray bottle with water
Abbreviations (US Terms)
- ch: chain
- sl st: slip stitch
- sc: single crochet
- sc2tog: single crochet 2 together
- sp: space
- st(s): stitch(es)
- rep: repeat
- puff: puff stitch (see below)
Puff stitch (puff): [Yarn over, insert hook in the given st or sp, yarn over and pull up a loop about 0.25 in (0.6 cm) tall] 3 times (7 loops on hook). Yarn over and pull through all 7 loops. Any ch 1 is worked separately when the pattern calls for it. It is not part of the puff.
Beginning puff: Ch 2 (does not count as a st), then work a puff in the same st or sp.
Gauge and Checkpoints
Gauge: 18 sc and 20 rows = 4 in (10.2 cm) in Color A with a 4.0 mm hook.
Gauge matters less here than for a garment. It still decides whether the ring lies flat and whether the bow fits the ring. Make one complete wreath and measure it before you make a batch.
Checkpoints (measured flat):
- Foundation ring: opening about 1.25 in (3.2 cm) across
- After Round 1: about 1.75 in (4.4 cm) across
- After Round 2: about 2.5 in (6.4 cm) across
- After Round 3: about 3 in (7.6 cm) across
- After Round 4 (border): 3.25 in (8.3 cm) across
- Bow loops before folding: 2.25 in (5.7 cm) wide × 1 in (2.5 cm) tall
If it’s too big: Go down to a 3.75 mm (F-5) hook, or pull your puff loops up shorter. Tall, loose loops are the most common reason for an oversized ring.
If it’s too small or cupping: Go up to a 4.5 mm (7) hook. If Round 1 pulls the center closed, work it more loosely. The sc should cover the chain without squeezing it.
Wreath Ring
Work in joined rounds with the right side facing you the whole time. Do not turn.
Foundation: With Color A, ch 20. Sl st to the first ch to form a ring. Make sure the chain is not twisted.
Round 1: Ch 1. Work 30 sc over the chain ring, into the center opening, not into the individual chains. Sl st to the first sc to join. (30 sc)
Working over the chain lets you fit more stitches than the 20 chains would hold. That gives the puffs room and keeps the ring flat. Slide the sc together evenly so they cover the chain completely.
Round 2 (inner puff ring): Sl st in next st. Beginning puff in same st, ch 1, skip next st. Puff in next st, ch 1, skip next st. Rep from * 13 more times. Sl st to the top of the first puff to join. (15 puffs, 15 ch-1 sps)
Check: 30 sc ÷ 2 sts per repeat = 15 repeats. Each puff should lean slightly outward to form the inner ring of bobbles around the opening.
Round 3 (outer puff ring): Sl st in the next ch-1 sp. Beginning puff in same sp, ch 1, puff in same sp, ch 1. (Puff, ch 1) in each of the next 2 ch-1 sps. (Puff, ch 1) twice in next ch-1 sp, (puff, ch 1) in each of the next 2 ch-1 sps. Rep from * 3 more times. Sl st to the top of the first puff to join. (20 puffs, 20 ch-1 sps)
Check: The 15 ch-1 sps make 5 groups of 3 sps. Each group gets 2 + 1 + 1 = 4 puffs, and 5 groups × 4 = 20 puffs. That is this round’s full count, not a running total.
The extra puffs give the outer ring a fuller, scalloped look. The two rings of puffs nest against each other, so the wreath reads as one thick band of bobbles.
Measure now: The ring should be about 3 in (7.6 cm) across. If it is far off, change your hook before you continue.
Border
The border is one round of sc that tidies the outer edge and holds the puffs in place. It sits slightly behind the puffs, so the scalloped outline stays visible.
Border gauge: Same as the main gauge, 18 sc = 4 in (10.2 cm), but work it firmly.
Round 4 (border): Ch 1. Sc in the top of the next puff, sc in the next ch-1 sp. Rep from * 19 more times. Sl st to the first sc to join. Fasten off, leaving a 6 in (15.2 cm) tail for attaching the hanging loop. (40 sc)
This is a conversion round: 20 sc (1 per puff) + 20 sc (1 per ch-1 sp) = 40 sc.
To check that the round is even, think of the ring in four quarters. 40 sc ÷ 4 = 10 sc per quarter, which is 5 puffs and 5 spaces per quarter.
Why the math works: At 18 sc per 4 in (10.2 cm), 40 sc is about 8.9 in (22.6 cm) around the base of the border. That makes a circle about 2.8 in (7.1 cm) across. The puffs stick out past that line, which brings the measurement from puff tip to puff tip to 3.25 in (8.3 cm). One stitch per puff and one per space means nothing is added or skipped. The edge will neither ruffle nor pull in.
Bow
Make all bow parts with Color B and the 4.0 mm hook.
Bow Loops
Row 1: Ch 11. Sc in the 2nd ch from hook and in each ch across. (10 sc)
Rows 2–5: Ch 1, turn. Sc in each st across. (10 sc)
Fasten off, leaving a 10 in (25.4 cm) tail. The rectangle should measure 2.25 in (5.7 cm) × 1 in (2.5 cm).
Shape: Lay the rectangle wrong side up. Fold both short ends to the center so they overlap by about 0.25 in (0.6 cm). Sew the overlap together with the tail. Turn it right side out. You now have two puffy loops.
Bow Tails (make 2)
Row 1: Ch 5. Sc in the 2nd ch from hook and in each ch across. (4 sc)
Rows 2–6: Ch 1, turn. Sc in each st across. (4 sc)
Notched end, first point:
- Row 7: Ch 1, turn. Sc in the next 2 sts only. (2 sc)
- Row 8: Ch 1, turn. Sc2tog. (1 sc) Fasten off.
Notched end, second point: Join yarn in the 3rd st of Row 6.
- Row 7: Ch 1, sc in the same st and the last st. (2 sc)
- Row 8: Ch 1, turn. Sc2tog. (1 sc) Fasten off.
The two points leave a V-shaped notch between them, like the cut end of a ribbon. Each tail is about 0.9 in (2.3 cm) wide and 1.6 in (4.1 cm) long including the points. Leave a long starting tail on each one for sewing.
Center Wrap and Assembly
- Pinch the bow loops together at the center to form a waist.
- Place the tops of both tails behind the pinch, angled outward in an upside-down V.
- Cut a 20 in (50.8 cm) length of Color B. Wrap it snugly 8 to 10 times around the pinched center and the tops of the tails. Lay each wrap neatly beside the last to make a smooth, rounded knot.
- Secure the wrap at the back with a few stitches through all layers.
Attaching the Bow
Place the bow at the bottom center of the wreath so the knot sits on the ring and the tails hang below the outer edge. Using the wrap tail, sew through the back of the knot and into Rounds 1–3 of the ring. Add one tacking stitch behind each bow loop so the loops don’t flop forward.
Hanging Loop
With Color C, ch 21. Sl st in the back bump of the 2nd ch from hook and in each ch across. (20 sl st) Fasten off, leaving a 6 in (15.2 cm) tail.
The strip is about 3.5 in (8.9 cm) long. Fold it in half to make a 1.75 in (4.4 cm) loop. Sew both ends to the back of the wreath at top center, directly opposite the bow, catching the border and Round 3. Weave in all ends.
Final Blocking
- Lightly spray the wreath and bow with water until damp, not soaked.
- Lay the wreath face up on the blocking surface.
- Pat it into a true circle 3.25 in (8.3 cm) across, with the center opening about 1.25 in (3.2 cm).
- Pin through the border sc only, never through the puffs, so the puffs stay round.
- Gently plump each puff with your fingertips.
- Shape the bow loops round and pin the tail points so the notches open cleanly.
- Let it dry completely before you take out the pins.
For acrylic, you can instead hold a steam iron 1 in (2.5 cm) above the piece without touching it. Then shape it and let it cool.
Final Quality-Control Checklist
- Ring lies flat with no cupping or ruffling
- Diameter is 3.25 in (8.3 cm)
- Round 2 has 15 puffs, Round 3 has 20 puffs, and Round 4 has 40 sc
- Puffs are all the same height
- Bow loops are 2.25 in (5.7 cm) wide and match each other
- Both tails have clean V-notched ends and hang at matching angles
- Center wrap is smooth and tightly secured
- Hanging loop is centered opposite the bow
- All ends are woven in on the back
Troubleshooting
The ring cups like a bowl. Round 3 is too tight, or the extra puffs were skipped. Recount for 20 puffs, or go up a hook size for Round 3.
The ring ruffles. The puff loops are pulled up too tall, or the border was worked loosely. Make the loops shorter and work Round 4 firmly.
The center opening closed up. Round 1 was worked too tightly over the chain. Redo it more loosely and keep it to exactly 30 sc.
Puffs look flat or messy. Pull each loop up to the same height before the final yarn over, and use a smooth yarn.
The bow tilts. Redo the center wrap more evenly and add tacking stitches behind both loops.
The notch is uneven. Make sure the second point starts in the 3rd st of Row 6, so each point uses exactly 2 sts.
Care
Hand wash in cool water, press out the water in a towel, and reshape it to dry flat. Store it flat or hanging so the puffs and bow don’t get crushed.
Final Notes
The measurements build in a short chain that is easy to track. A 20-chain ring holds 30 sc and a 1.25 in (3.2 cm) opening. 15 puffs bring the wreath to 2.5 in (6.4 cm), and 20 puffs bring it to 3 in (7.6 cm). A 40-sc border finishes it at 3.25 in (8.3 cm). A 10-stitch bow, 2.25 in (5.7 cm) wide, balances the ring.
Check your first wreath at each stage, and every one after it will match.
Happy crocheting!