

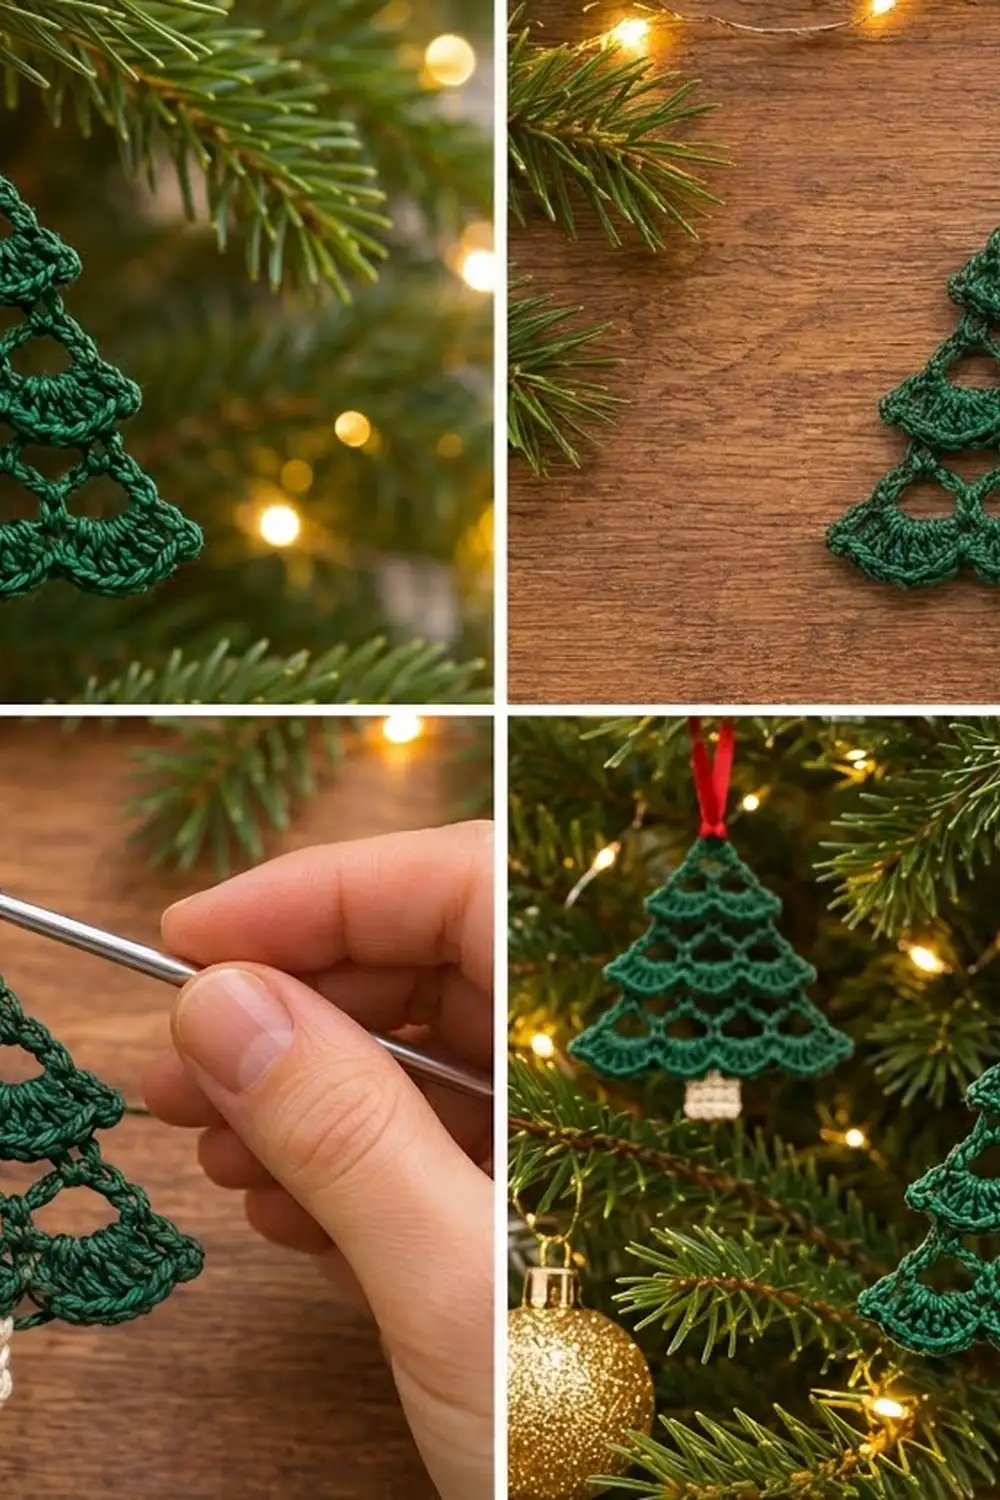
This little lace tree is light and open, with tiers of scalloped shells that look like layered branches. It makes a sweet ornament for your own tree, a gift-wrap topper, or a stocking-stuffer tie-on. It works up in under an hour once you know the rhythm.
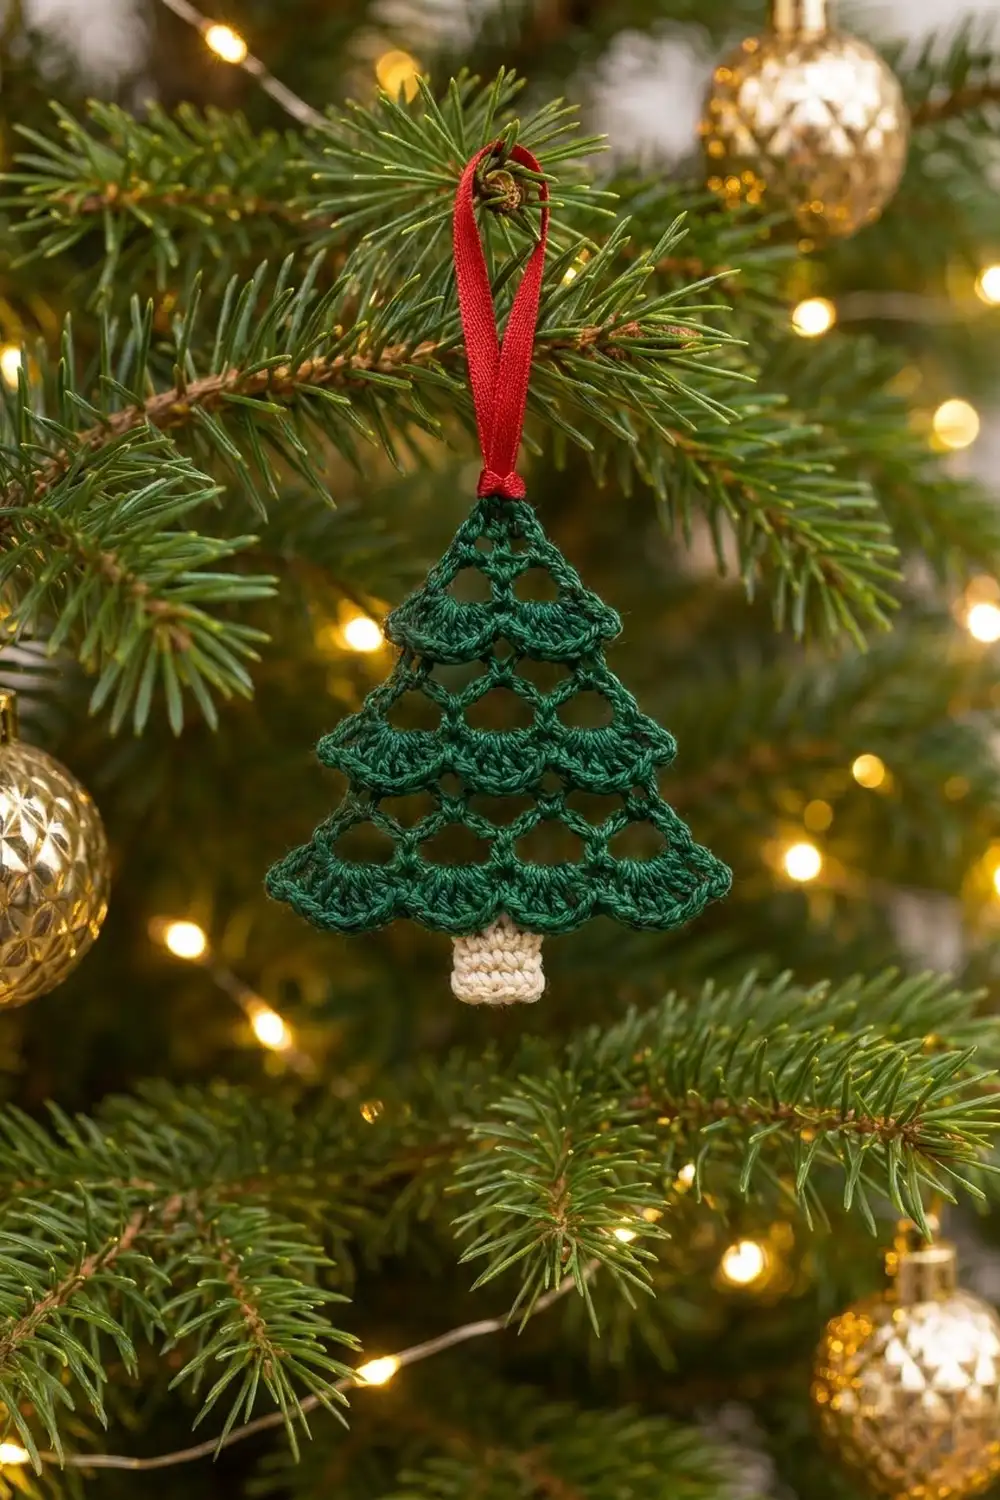
The tree is worked in deep forest green cotton thread, with a small cream trunk and a red satin ribbon for hanging. Chain-loop mesh forms diamond openings, and three shell tiers (2, 3 and 4 shells) give the stepped Christmas tree outline.
This pattern uses US crochet terms. The finished ornament measures about 3 in (7.6 cm) wide and 3.5 in (8.9 cm) tall, including the trunk.
You work the tree flat from the top point down in turned rows, growing by one chain loop per mesh row. A shell row follows every two mesh rows. Then you add a single crochet edging along both slanted sides, crochet the trunk directly onto the bottom center, block, and add the ribbon.
Finished Size and Construction
- Finished size: 3 in (7.6 cm) wide × 3.5 in (8.9 cm) tall, including trunk
- Skill level: Easy–Intermediate (simple stitches; requires counting loops)
- Terminology: US crochet terms
- Yarn weight: Size 3 cotton crochet thread
- Hook: 2.25 mm (US B-1)
- Number of pieces: 1 (single ornament; trunk worked on)
- Layout: Single triangle, point up, trunk centered at bottom
- Tree size before edging: about 2.9 in (7.4 cm) wide × 2.9 in (7.4 cm) tall
- Edging depth: 1 round of sc, about 1/16 in (0.2 cm) per side
- Tree size after edging: 3 in (7.6 cm) wide × 3 in (7.6 cm) tall, plus about 0.5 in (1.3 cm) of trunk below the scallop tips
Materials
Yarn: Use mercerized cotton thread in size 3. It gives crisp shell definition and holds its shape after blocking. A fingering-weight cotton also works, but your ornament will be slightly larger. Avoid fuzzy or very stretchy fibers, because they blur the mesh diamonds.
- Forest green (A): 5 g, about 21 m (23 yd)
- Cream (B): 1 g, about 4 m (4.4 yd)
These quantities include a margin for your gauge swatch and weaving in ends.
Tools and notions:
- 2.25 mm (US B-1) crochet hook
- Red satin ribbon, 1/4 in (0.6 cm) wide, 8 in (20.3 cm) long
- Tapestry needle (small eye)
- Scissors
- Rust-proof pins and a foam blocking mat
- Optional: spray starch or a fabric stiffener
Abbreviations (US Terms)
- ch – chain
- sl st – slip stitch
- sc – single crochet
- dc – double crochet
- st(s) – stitch(es)
- sp – space
- RS / WS – right side / wrong side
Special stitch: Shell – work 7 dc into the same ch-5 loop. The center dc of a shell is the 4th dc, with 3 dc on each side of it.
Gauge and Checkpoints
Gauge matters more for an ornament set than for a single tree, because you want every tree to match. Work Rows 1–4 as a test, measure them, and adjust before going on.
Gauge (unblocked, relaxed):
- One ch-5 loop, sc to sc = 0.4 in (1.0 cm) wide
- One 7-dc shell = 0.75 in (1.9 cm) wide × 0.4 in (1.0 cm) tall
- 7 sc = 1 in (2.5 cm) along an edge
Checkpoints:
- After Row 4: about 1.5 in (3.8 cm) wide × 1.25 in (3.2 cm) tall
- After Row 7: about 2.25 in (5.7 cm) wide × 2.1 in (5.3 cm) tall
- After Row 10: about 2.9 in (7.4 cm) wide × 2.9 in (7.4 cm) tall
- After edging: 3 in (7.6 cm) × 3 in (7.6 cm)
Too big? Go down to a 2.0 mm hook, or make your chain loops snugger. Too small? Go up to a 2.5 mm hook. Change the hook, not the stitch counts. The shape depends on the loop and shell numbers.
Tree Pattern
With A, ch 4 and sl st into the first ch to form a ring.
Row 1 (RS): Ch 1, sc in ring, ch 5, sc in ring. Turn.
(1 ch-5 loop, 2 sc)
Row 2: Ch 1, sc in first sc, ch 5, sc in ch-5 loop, ch 5, sc in last sc. Turn.
(2 ch-5 loops, 3 sc)
Row 3: Ch 1, sc in first sc, [ch 5, sc in next ch-5 loop] twice, ch 5, sc in last sc. Turn.
(3 ch-5 loops, 4 sc)
Each mesh row places an extra loop at both edges, so the row’s loop count always equals its row number up to this point. That steady growth gives the clean triangle.
Row 4 (Shell tier 1): Ch 1, sc in first sc, Shell in first ch-5 loop, sc in next ch-5 loop, Shell in last ch-5 loop, sc in last sc. Turn.
(2 shells + 3 sc = 14 dc + 3 sc = 17 sts)
The shells hang below the mesh. Gently pull each one down so it curves like a branch tip.
Row 5: Ch 1, sc in first sc, ch 5, sc in center dc of next shell, ch 5, sc in next sc, ch 5, sc in center dc of next shell, ch 5, sc in last sc. Turn.
(4 ch-5 loops, 5 sc)
Row 6: Ch 1, sc in first sc, [ch 5, sc in next ch-5 loop] 4 times, ch 5, sc in last sc. Turn.
(5 ch-5 loops, 6 sc)
Row 7 (Shell tier 2): Ch 1, sc in first sc, [Shell in next ch-5 loop, sc in next ch-5 loop] twice, Shell in last ch-5 loop, sc in last sc. Turn.
(3 shells + 4 sc = 21 dc + 4 sc = 25 sts)
Row 8: Ch 1, sc in first sc, ch 5, sc in center dc of next shell, [ch 5, sc in next sc, ch 5, sc in center dc of next shell] twice, ch 5, sc in last sc. Turn.
(6 ch-5 loops, 7 sc)
Row 9: Ch 1, sc in first sc, [ch 5, sc in next ch-5 loop] 6 times, ch 5, sc in last sc. Turn.
(7 ch-5 loops, 8 sc)
Row 10 (Shell tier 3, hem): Ch 1, sc in first sc, [Shell in next ch-5 loop, sc in next ch-5 loop] 3 times, Shell in last ch-5 loop, sc in last sc. Do not fasten off.
(4 shells + 5 sc = 28 dc + 5 sc = 33 sts)
For reference, the 33 stitches of Row 10 run in this order: sc (st 1), Shell (sts 2–8), sc (st 9), Shell (sts 10–16), sc (st 17), Shell (sts 18–24), sc (st 25), Shell (sts 26–32), sc (st 33). Stitch 17 is the exact center, which is where the trunk goes.
Checkpoint: About 2.9 in (7.4 cm) wide and 2.9 in (7.4 cm) tall, with 2, 3 and 4 shells in the three tiers.
Side Edging
The edging firms up the two slanted sides so they stay straight instead of rippling between tiers. It is worked up one side, over the top point, and down the other. The bottom scallops are left unedged so they stay soft and rounded.
Edging gauge: 7 sc = 1 in (2.5 cm).
Edging Round: With Row 10 just finished, ch 1 and rotate to work up the side edge into the row ends.
- Side 1 (rows 10 up to 1): Work 3 sc evenly over each shell-row end (Rows 10, 7, 4), working around the outer dc post. Work 2 sc over each mesh-row end (Rows 9, 8, 6, 5, 3, 2, 1), working around the end sc. (3 shell rows × 3 sc = 9 sc, plus 7 mesh rows × 2 sc = 14 sc: 23 sc)
- Top point: In the starting ring, work (sc, ch 3, sc). (2 sc + 1 ch-3 hanging loop)
- Side 2 (rows 1 down to 10): Repeat the Side 1 sequence in reverse: 2 sc over each mesh-row end and 3 sc over each shell-row end. (23 sc)
Sl st to the first sc of Row 10 at the bottom corner. Fasten off and weave in ends.
Edging total: 23 + 2 + 23 = 48 sc, plus 1 ch-3 loop.
Why the math works: Each slanted side is about 3.3 in (8.4 cm) long once lightly stretched. At 7 sc per inch, 23 sc measures 23 ÷ 7 = 3.3 in (8.4 cm), so the edging matches the side length. The side won’t be pulled in or left wavy. Shell rows are taller than mesh rows, so they get 3 sc instead of 2, which keeps the spacing even along the full slant.
Trunk
Turn the tree so the bottom scallops point toward you, RS facing. Count Row 10 stitches from the right-hand corner.
Row 1: Join B with a sc in st 15 (the 6th dc of the second shell). Sc in st 16, st 17 (center sc), st 18 and st 19. Turn.
(5 sc)
Rows 2–6: Ch 1, sc in each sc across. Turn.
(5 sc each row)
Fasten off and weave in ends along the trunk’s side edges.
The trunk measures about 0.7 in (1.8 cm) wide × 0.75 in (1.9 cm) tall from the valley it hangs from. Because the center valley sits higher than the scallop tips, about 0.5 in (1.3 cm) of trunk shows below the hem. That brings the overall height to 3.5 in (8.9 cm).
Hanging Ribbon
Fold the 8 in (20.3 cm) red ribbon in half and thread both ends through the ch-3 loop at the top point. Tie an overhand knot snug against the tree tip, so the loop stands about 2 in (5.1 cm) above the ornament. Trim the ends at an angle to stop fraying.
You can add the ribbon after blocking if you plan to starch, to keep the satin clean.
Final Blocking
- Soak the ornament in cool water for a few minutes, then press out the water in a towel. Don’t wring it.
- Lay it flat on the blocking mat, RS up.
- Pin the top point first, then the two bottom corners, to make a triangle 3 in (7.6 cm) wide and 3 in (7.6 cm) tall.
- Pin the bottom of each of the 4 hem shells into a smooth, even arc.
- Open each mesh diamond with a pin tip so the openings look the same size.
- Push the shells of tiers 1 and 2 slightly downward so each tier overlaps the mesh below it.
- Pin the trunk straight and square, 0.7 in (1.8 cm) wide.
- If you like, mist with spray starch for a crisper ornament.
- Let it dry completely, at least 6 hours, before unpinning.
Final Quality-Control Checklist
- Tier shell counts are 2, 3 and 4, from top to bottom.
- Each shell has exactly 7 dc, with the next row anchored in its 4th dc.
- Row 10 has 33 stitches, and the trunk is centered on stitch 17.
- Each side has 23 edging sc, and both sides are the same length.
- The tree measures 3 in (7.6 cm) × 3 in (7.6 cm) before the trunk, and 3.5 in (8.9 cm) tall overall.
- The trunk is 5 sc wide and 6 rows tall.
- All ends are woven in securely and none show on the RS.
- The ribbon is knotted tightly and the ornament hangs straight.
Troubleshooting
The tree leans or one side is longer. You probably skipped the first or last sc in a mesh row. Every mesh row must start and end in the edge sc.
Shells look flat or cupped. Seven dc in a ch-5 loop should fan out. If they cup, loosen your chains. If they ruffle, tighten them or go down a hook size.
Mesh diamonds look uneven. Keep every chain loop exactly 5 ch and make the sc anchors snug. Blocking evens out small differences.
The sides ripple after edging. You’ve worked too many sc. Make sure it’s exactly 2 per mesh row and 3 per shell row.
The sides pull inward after edging. Your edging is too tight. Redo it with a hook 0.25 mm larger.
The trunk is off-center. Recount Row 10 from either corner. Stitch 17 should be the sc between the second and third hem shells.
Ornament won’t hang straight. Check that the ribbon is tied through the center ch-3 loop, and re-block with a little starch if needed.
Care
Hand wash in cool water with mild soap, press dry in a towel, and re-pin flat to dry. Store flat between tissue paper so the shells keep their shape from year to year.
Final Notes
Here is the full measurement chain at a glance. Row 4 should reach 1.5 in (3.8 cm) wide, Row 7 should reach 2.25 in (5.7 cm), and Row 10 should reach 2.9 in (7.4 cm) with 33 stitches. Then 23 edging sc on each side brings the tree to 3 in (7.6 cm) square. The 5-stitch, 6-row trunk adds enough length to bring the ornament to 3.5 in (8.9 cm) tall overall. If your test rows match the first checkpoint, the rest will follow.
Once you’ve made one, try a few more in different greens, or in white thread for a snowy forest.
Happy crocheting!