

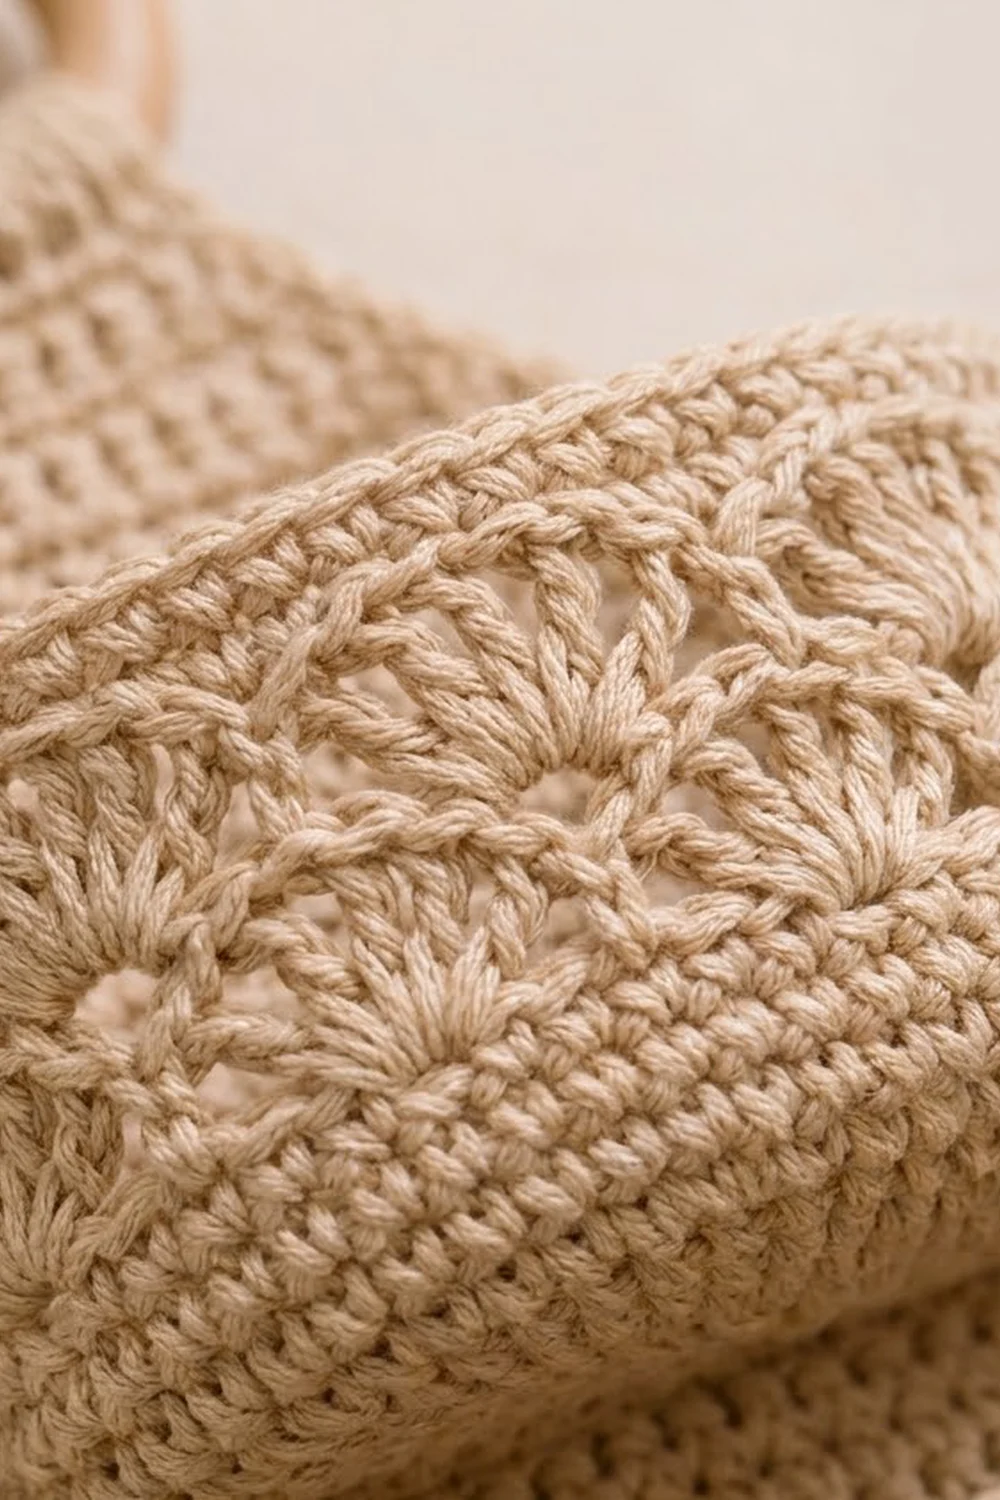
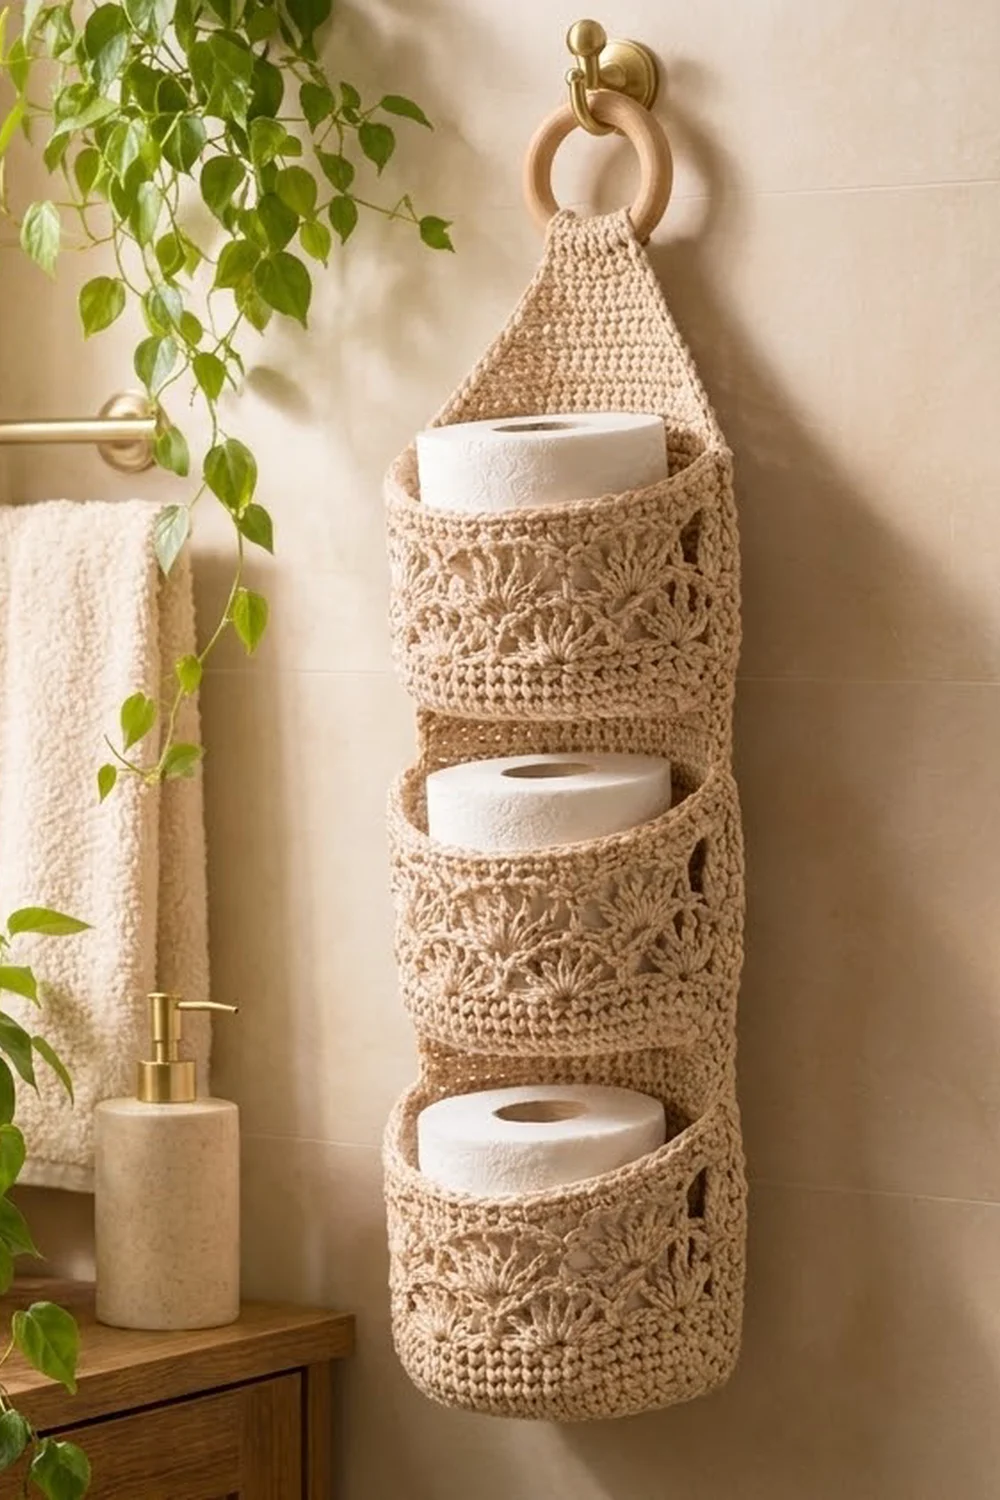
The Sandbar Fan holder is a slim wall organizer that keeps three spare toilet rolls tidy and within reach. A tall back panel narrows into a strap that wraps around a wooden ring. Three rounded pockets are sewn down the front, and each one has a band of overlapping fan lace between firm single crochet edges.
The whole piece is worked in one warm sand-beige cotton. The look is calm and natural, with solid single crochet for strength, lace for texture, and a rolled reverse single crochet edge around the panel.
This pattern uses US crochet terms. The finished panel measures 6.8 in (17.3 cm) wide and 25.9 in (65.8 cm) long laid flat. With the strap folded over the ring, it hangs 23.4 in (59.4 cm) from the bottom edge to the top of the ring loop, not counting the ring. Each pocket is about 5 in (12.7 cm) wide across the back and 4 in (10.2 cm) tall, and holds a standard roll up to 4.5 in (11.4 cm) across.
You’ll crochet one flat back panel in rows, taper it, and add a two-round border. Next you’ll make three identical pockets in the round, each starting from a flat circular base. Last, you’ll sew the pockets to the panel and wrap the strap around the ring.
Finished Size and Construction
- Finished panel size: 6.8 x 25.9 in (17.3 x 65.8 cm) flat
- Hanging length: 23.4 in (59.4 cm), ring excluded
- Skill level: Intermediate
- Terminology: US crochet terms
- Yarn weight: Worsted (#4) cotton
- Hook: 5.0 mm (H-8)
- Number of pieces: 4 (1 back panel + 3 pockets), plus 1 wooden ring
- Layout: 1 column of 3 pockets, stacked vertically
- Pocket size: 4.75 in (12.1 cm) base diameter, 4 in (10.2 cm) tall
- Panel size before border: 6 x 25.1 in (15.2 x 63.8 cm)
- Border depth: 0.4 in (1.0 cm) on every edge
Materials
Choose a smooth, firm worsted-weight cotton or cotton blend. Cotton holds the pocket shape, copes with bathroom humidity, and shows the fan lace clearly. Very soft or stretchy yarns will sag under the weight of the rolls.
Yarn:
– Sand beige: 260 g, about 470 m
Tools:
– 5.0 mm (H-8) crochet hook
– 1 wooden ring, 3 in (7.6 cm) outer diameter
– 4 locking stitch markers
– Tapestry needle
– Rustproof pins or clips
– Measuring tape
– 1 toilet roll for test fitting
The yarn amount includes a margin of about 20 percent for your gauge test, sewing, and small gauge differences. Buy all the yarn from one dye lot.
Abbreviations (US Terms)
- ch – chain
- sl st – slip stitch
- sc – single crochet
- dc – double crochet
- sc2tog – single crochet 2 together
- BLO – back loop only
- MR – magic ring
- st(s) – stitch(es)
- sk – skip
- RS – right side
- rev sc – reverse single crochet (crab stitch)
Special stitches:
- Shell: 5 dc in the same stitch.
- Rev sc: Working from left to right (right-handed), insert the hook in the next stitch to the right, yarn over, pull up a loop, yarn over, pull through both loops. This makes a rolled, corded edge.
Gauge and Checkpoints
Gauge: 16 sc and 18 rows = 4 in (10.2 cm) in sc worked in rows.
Fan gauge: 1 repeat (sc + shell, 6 sts) = 1.5 in (3.8 cm) wide; 4 fan rounds = 2 in (5.1 cm) tall.
Make one pocket first. It tests the base, the lace, and the fit around a real roll.
Checkpoints:
– Pocket base after Rnd 10: 60 sts, 4.75 in (12.1 cm) across, lying flat.
– Pocket wall after Rnd 14: 0.9 in (2.3 cm) tall.
– Pocket wall after Rnd 18: 2.9 in (7.4 cm) tall.
– Finished pocket after Rnd 23: 4 in (10.2 cm) tall.
– Panel after Row 81: 6 x 18 in (15.2 x 45.7 cm).
– Panel after Row 113: 6 x 25.1 in (15.2 x 63.8 cm).
If your piece is too big: use a hook 0.5 mm smaller. A base wider than 5 in (12.7 cm) makes floppy pockets.
If your piece is too small: use a hook 0.5 mm larger. A base under 4.5 in (11.4 cm) won’t hold a standard roll.
Pocket (Make 3)
Work each pocket in joined rounds with the RS always facing. Keep every join in the same place. That join line becomes the back center of the pocket and will be hidden against the panel.
Base
Rnd 1: Make a MR, ch 1, 6 sc in ring, join with sl st to first sc. (6 sts)
Rnd 2: Ch 1, 2 sc in each st around, join. (12 sts)
Rnd 3: Ch 1, sc in next st, 2 sc in next st 6 times, join. (18 sts)
Rnd 4: Ch 1, sc in next 2 sts, 2 sc in next st 6 times, join. (24 sts)
Rnd 5: Ch 1, sc in next 3 sts, 2 sc in next st 6 times, join. (30 sts)
Rnd 6: Ch 1, sc in next 4 sts, 2 sc in next st 6 times, join. (36 sts)
Rnd 7: Ch 1, sc in next 5 sts, 2 sc in next st 6 times, join. (42 sts)
Rnd 8: Ch 1, sc in next 6 sts, 2 sc in next st 6 times, join. (48 sts)
Rnd 9: Ch 1, sc in next 7 sts, 2 sc in next st 6 times, join. (54 sts)
Rnd 10: Ch 1, sc in next 8 sts, 2 sc in next st 6 times, join. (60 sts)
Checkpoint: 4.75 in (12.1 cm) across.
Lower Wall
Rnd 11: Ch 1, sc in BLO of each st around, join. (60 sts)
This round turns the wall upward. It leaves the unused front loops of Rnd 10 on the outside, and you’ll sew through them later.
Rnds 12–14: Ch 1, sc in each st around, join. (60 sts)
Fan Lace Band
Rnd 15: Ch 1, sc in first st, sk 2 sts, shell in next st, sk 2 sts, sc in next st, sk 2 sts, shell in next st, sk 2 sts 9 times, join to first sc. (10 shells + 10 sc = 60 sts)
Rnd 16: Ch 3 (counts as dc), 2 dc in same st as join (half shell made), sk 2 dc, sc in center dc of next shell, sk 2 dc, shell in next sc, sk 2 dc, sc in center dc of next shell, sk 2 dc 9 times, 2 dc in same st as beginning ch-3, join to top of ch-3. (10 shells + 10 sc = 60 sts)
The half shells at the start and end of the round meet to make one full shell. Its center stitch is the beginning ch-3.
Rnd 17: Ch 1, sc in top of ch-3, sk 2 dc, shell in next sc, sk 2 dc, sc in center dc of next shell, sk 2 dc, shell in next sc, sk 2 dc 9 times, join to first sc. (10 shells + 10 sc = 60 sts)
Rnd 18: Repeat Rnd 16. (60 sts)
Each round sets its fans between the fans below, so the four rounds build two layers of overlapping scallops.
Checkpoint: the wall is 2.9 in (7.4 cm) tall.
Upper Wall and Rim
Rnd 19: Ch 1, sc in each st around (each dc, each sc, and top of ch-3), join. (60 sts)
Rnds 20–23: Ch 1, sc in each st around, join. (60 sts)
Fasten off and leave a 36 in (91.4 cm) tail for sewing. The finished pocket is 4 in (10.2 cm) tall and 15 in (38.1 cm) around.
Back Panel
Work the panel in rows from the bottom up.
Foundation: Ch 25.
Row 1: Sc in 2nd ch from hook and in each ch across, turn. (24 sts)
Rows 2–81: Ch 1, sc in each st across, turn. (24 sts)
Checkpoint: 6 x 18 in (15.2 x 45.7 cm).
Taper
Row 82: Ch 1, sc2tog, sc in each st to last 2 sts, sc2tog, turn. (22 sts)
Row 83: Ch 1, sc in each st across, turn. (22 sts)
Rows 84–95: Repeat Rows 82–83 six more times. (10 sts after Row 95)
There are 7 decrease rows, and each removes 2 sts, so 24 − 14 = 10. The taper is 3.1 in (7.9 cm) tall.
Strap
Rows 96–113: Ch 1, sc in each st across, turn. (10 sts)
The strap is 2.5 in (6.4 cm) wide and 4 in (10.2 cm) long. Don’t fasten off. Go straight on to the border.
Checkpoint: 6 x 25.1 in (15.2 x 63.8 cm).
Make All Pieces
Every piece uses the one sand-beige color:
- Back panel with border: 1 (about 95 g)
- Pockets: 3 (about 40 g each, 120 g total)
- Sewing and margin: the remaining 45 g
Layout (front view, top to bottom):
        [ ring ]
        [strap ]      rows 96-113
        ( taper )     rows 82-95
      |   gap    |    rows 75-81
      | POCKET 3 |    rows 56-74
      |   gap    |    rows 48-55
      | POCKET 2 |    rows 29-47
      |   gap    |    rows 21-28
      | POCKET 1 |    rows 2-20
      |__________|    row 1
Border
Work the border around the panel before you attach the pockets.
Border gauge: along row ends, work 8 sc for every 9 rows. That gives 4 sc per inch against 4.5 rows per inch, so the edges stay flat.
Rnd 1 (RS): Ch 1, 3 sc in first st of Row 113, sc in next 8 sts, 3 sc in last st. (14 sts on top edge)
Turn the piece and work down the side:
– Strap, Rows 113–96: sc in next 8 row ends, sk 1 row end 2 times. (16 sts)
– Taper, Rows 95–82: sc in each row end. (14 sts)
– Body, Rows 81–1: sc in next 8 row ends, sk 1 row end 9 times. (72 sts)
Side total: 16 + 14 + 72 = 102 sts.
Bottom, working into the foundation loops: 3 sc in first st, sc in next 22 sts, 3 sc in last st. (28 sts)
Second side: work 72 + 14 + 16 sts as before, in reverse order. (102 sts)
Join to first sc. Total: 14 + 102 + 28 + 102 = 246 sts.
Rnd 2: Ch 1, rev sc in each st around, join. (246 sts) Fasten off and weave in the ends.
Why the math works: The top (10 sts) and bottom (24 sts) are worked 1 sc per stitch, and each 3-sc corner group adds 2 sts: 10 + 4 = 14 and 24 + 4 = 28. The 102-st sides sit between those corner groups, so no corner is counted twice. The taper’s diagonal edge is about 3.5 in (8.9 cm) long, so 14 sc gives 4 sc per inch, the same as the 8-per-9 sections. Every edge has the right count for its length, so nothing ruffles or pulls in.
Checkpoint: 6.8 x 25.9 in (17.3 x 65.8 cm).
Joining
Sew the pockets to the RS of the bordered panel using each pocket’s tail and a tapestry needle.
1. Mark the back. On each pocket, count 10 sts each way from the join line on Rnd 23 and mark the ends. These 20 sts are the flat back section, 5 in (12.7 cm) wide. Mark the matching 20 front loops of Rnd 10.
2. Mark the panel. Mark Rows 2, 29, and 56 for the pocket bases and Rows 20, 47, and 74 for the rims. On each of these rows, use the center 20 sts (sts 3–22). That leaves about 0.9 in (2.3 cm) free on each side, including the border.
3. Sew the base. Whipstitch the 20 marked front loops of Rnd 10 to sts 3–22 of the base row, 1 loop to 1 st. The back of the round base flattens, so the base becomes a D shape.
4. Sew the rim. Whipstitch the 20 marked sts of Rnd 23 to sts 3–22 of the rim row, 1 st to 1 st.
5. Sew the sides. Whipstitch up each side edge of the back section. Spread the 13 wall rounds evenly along the 18 panel rows; each taller fan round covers about 2 rows.
Tension advice: Sew snugly but not tightly, and keep the panel flat behind each pocket.
Size checkpoint: Each pocket base sits 6 in (15.2 cm) above the one below it, which leaves a 2 in (5.1 cm) gap between one pocket’s rim and the next pocket’s base.
Attach the ring. Slide the strap through the ring from front to back. Fold the top 2.5 in (6.4 cm) of the strap down behind itself and whipstitch it across the full width. The hanging length is now 23.4 in (59.4 cm).
Final Blocking
- Lightly spray the piece with water until it is damp, not soaked.
- Lay it RS up on a blocking mat or folded towel.
- Pin the panel body straight at 6.8 in (17.3 cm) wide with the edges parallel.
- Put a plastic-wrapped toilet roll in each pocket so the walls dry round and upright.
- Gently open each fan with your fingers so the scallops sit evenly.
- Let it dry completely, at least 24 hours.
Final Quality-Control Checklist
- The panel is 6.8 in (17.3 cm) wide along the whole body.
- Every pocket round has 60 sts.
- Each fan round shows 10 even shells.
- All join lines are hidden at the back center.
- Pocket bases sit at Rows 2, 29, and 56.
- The gaps between pockets measure 2 in (5.1 cm).
- The border lies flat, including along the taper.
- The strap is stitched securely around the ring.
- All ends are woven in.
Troubleshooting
Pocket base cups: Your sc is too tight. Use a hook 0.5 mm larger or loosen your tension.
Fans lean or spiral: Check that every shell sits in an sc and every sc sits in a center dc. Recount to 60 sts.
Pocket is loose around the roll: Make it again with a smaller hook.
Panel edge waves: There are too many border sts. Work 7 sc per 8 rows instead.
Panel edge pulls in: There are too few border sts. Work 1 sc into every row end along the strap.
Panel puckers behind a pocket: Unpick the seam and sew it again more loosely.
Holder tilts: The strap fold is uneven. Refold it so both strap edges line up.
Care
Take out the rolls, hand wash in cool water with mild soap, and dry flat. Reshape each pocket around a roll while it dries.
Final Notes
The measurements build on each other in a short chain. A 60-st base measures 4.75 in (12.1 cm) and fits a 4.5 in (11.4 cm) roll. Thirteen wall rounds reach 4 in (10.2 cm). The 24-st panel measures 6 in (15.2 cm) and grows to 6.8 in (17.3 cm) with the border. Pockets placed 6 in (15.2 cm) apart leave 2 in (5.1 cm) gaps, and the folded strap sets the hanging length at 23.4 in (59.4 cm). Check each number as you go, and the holder will hang straight and hold every roll securely.
Happy crocheting!