

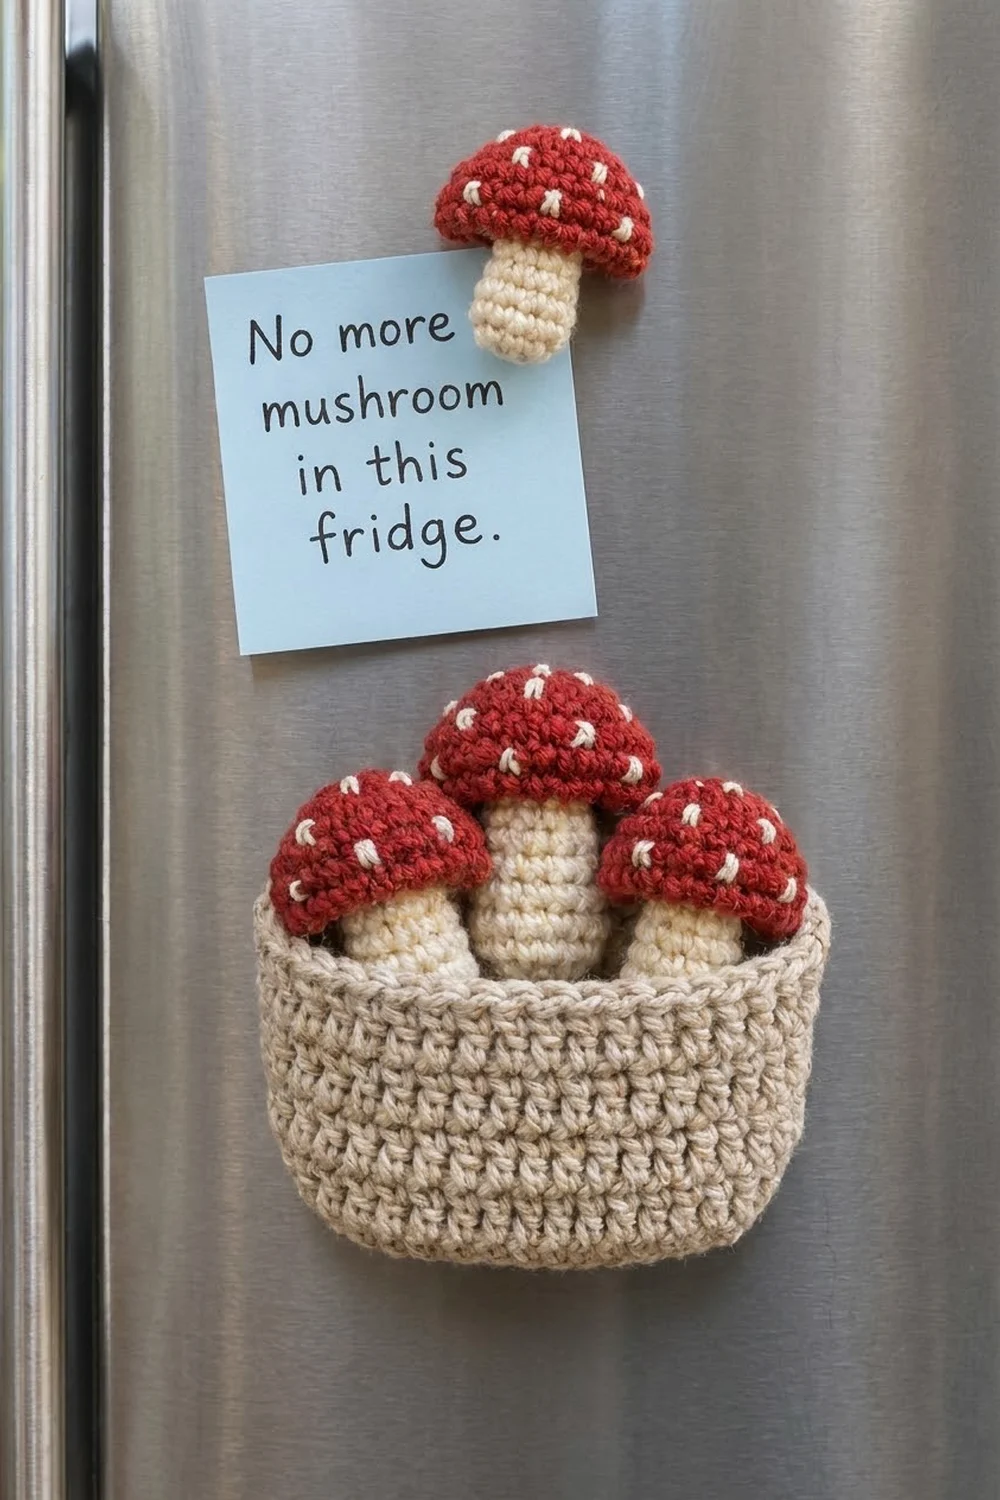
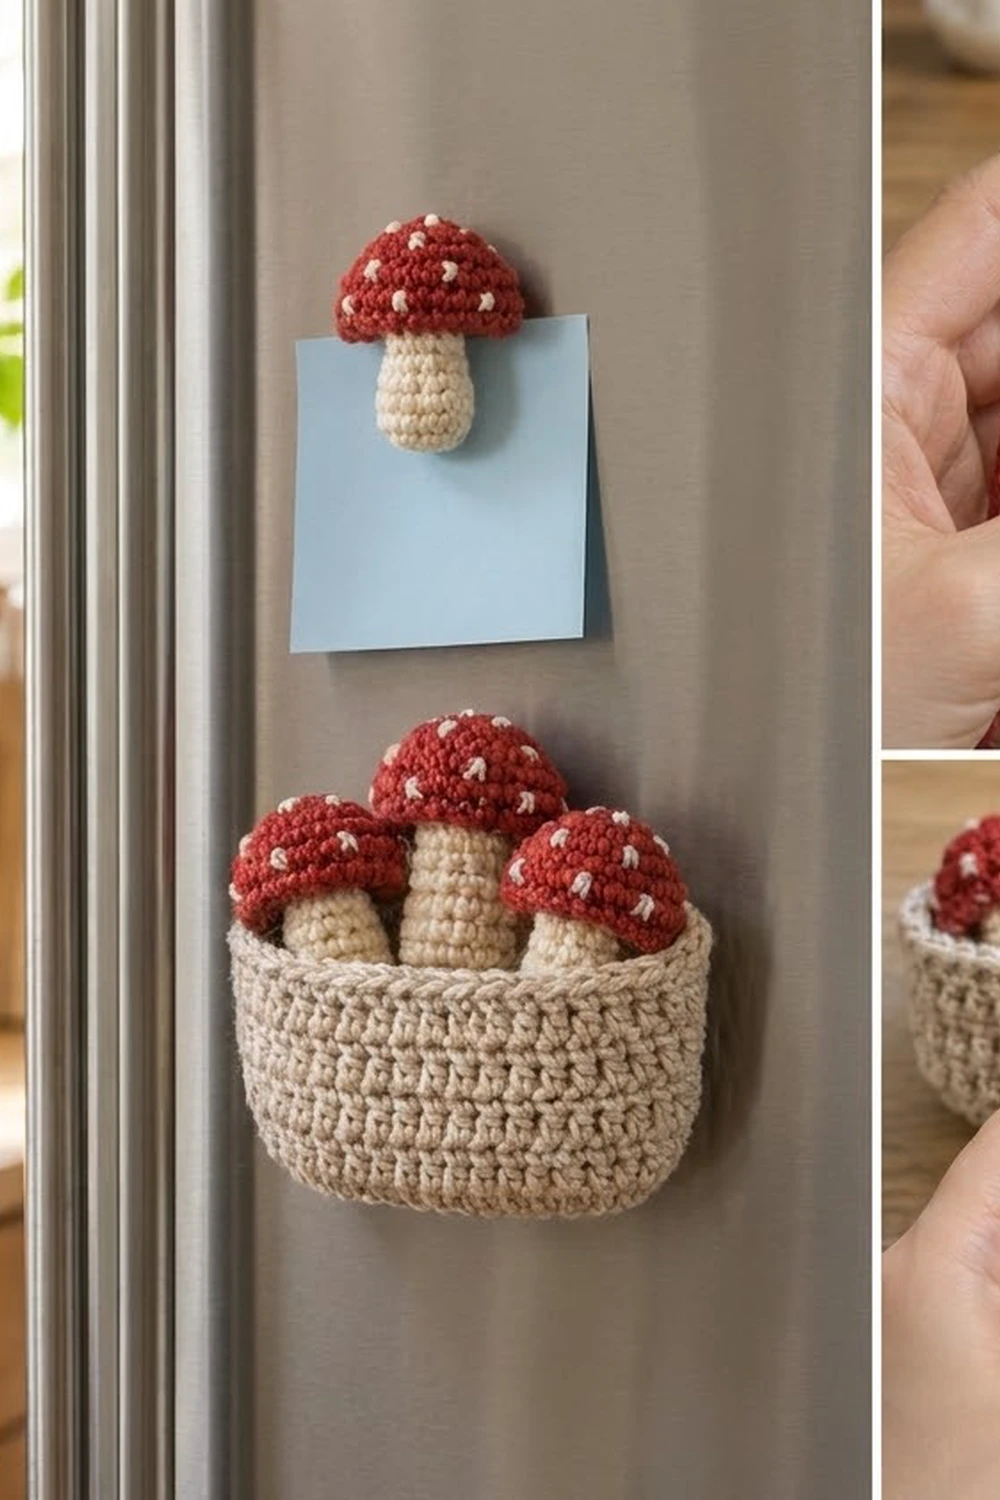
This little set brings a woodland touch to the kitchen. It has one red-capped toadstool magnet to hold notes, plus a small oatmeal basket magnet with three more toadstools tucked inside. Each mushroom is flat, so it sits close to the fridge door. The basket is a shallow pocket that holds its mushrooms upright.
The colors are classic toadstool: brick-red caps with small cream dots, soft cream stems, and a heathered oatmeal-beige basket with a rolled rim. The whole set is plain single crochet, which keeps the pieces firm and the shapes crisp.
The pattern uses US crochet terms. A standard solo mushroom finishes at about 2.3 in (5.8 cm) wide and 2.8 in (7.1 cm) tall. The basket finishes at about 4.4 in (11.2 cm) wide, 1.6 in (4.1 cm) tall and 1 in (2.5 cm) deep.
Construction is simple. Each mushroom starts with the cap, worked in rows from the brim up to the dome. Then you work the stem downward from the free loops of the cap’s foundation chain, so there is no seam. One round of edging finishes each piece, and you embroider the cream dots last. The basket is worked in the round from an oval base, and the magnets go on the back under small fabric patches.
Finished Size and Construction
- Finished size: solo mushroom 2.3 in x 2.8 in (5.8 cm x 7.1 cm); basket 4.4 in x 1.6 in x 1 in (11.2 cm x 4.1 cm x 2.5 cm)
- Skill level: Easy
- Terminology: US
- Yarn weight: DK (#3)
- Hook: 3.25 mm (US D-3)
- Number of pieces: 5 separate pieces (4 mushrooms and 1 basket), not crocheted to each other
- Layout: 1 solo mushroom magnet above 1 basket magnet holding 3 loose mushrooms
- Piece size before edging (solo mushroom): 2.0 in x 2.5 in (5.1 cm x 6.4 cm)
- Size after edging: 2.3 in x 2.8 in (5.8 cm x 7.1 cm)
- Edging depth: 1 round of sc, about 0.17 in (0.4 cm) on every edge
Materials
Choose a smooth cotton or cotton-blend DK yarn. Cotton holds flat shapes well and shows each stitch clearly. Avoid fuzzy yarns, because they blur the dots.
- Brick red (caps): 10 g, about 23 m
- Cream (stems and dots): 12 g, about 28 m
- Oatmeal beige (basket): 15 g, about 35 m
These quantities include a margin of about 30 percent for testing gauge and weaving in ends.
Tools:
- 3.25 mm (US D-3) crochet hook
- Tapestry needle
- 6 round ceramic or flexible magnets, 0.75 in (1.9 cm) in diameter (1 per mushroom and 2 for the basket)
- Cream linen or felt scraps for 6 patches, each 1.25 in (3.2 cm) square
- Sewing needle and strong thread
- Stitch marker
- Ruler or tape measure
- Blocking mat and pins
Abbreviations (US Terms)
- ch: chain
- sc: single crochet
- sc2tog: single crochet 2 together
- sl st: slip stitch
- BLO: back loop only
- rev sc: reverse single crochet (crab stitch)
- st(s): stitch(es)
- rnd: round
Reverse single crochet: Work from left to right (right to left if you crochet left-handed). Insert the hook into the next stitch to the right, yarn over and pull up a loop. Yarn over again and pull through both loops on the hook. This makes the corded, rolled rim on the basket.
Gauge and Checkpoints
The gauge is 22 sc and 24 rows = 4 in (10.2 cm). That works out to 5.5 sc and 6 rows per 1 in (2.5 cm). Crochet tightly, because these pieces should feel firm, not floppy.
Test one piece first. Make the solo mushroom (Mushroom A) before anything else, and check it at these points:
- After Cap Row 1: 11 sc measure 2.0 in (5.1 cm).
- After Cap Row 7: the cap is about 1.2 in (3.0 cm) tall.
- Stem width: 5 sc measure about 0.9 in (2.3 cm).
- Before edging: 2.0 in x 2.5 in (5.1 cm x 6.4 cm).
- After edging: 2.3 in x 2.8 in (5.8 cm x 7.1 cm).
If your piece is too big, use a hook 0.25 mm smaller. If it is too small, use a hook 0.25 mm larger. Small differences matter here, because the basket mushrooms have to fit inside the basket.
Mushroom Cap (all mushrooms)
With brick red, ch 12.
Row 1: Sc in 2nd ch from hook and in each ch across. (11 sc)
Rows 2–3: Ch 1, turn, sc in each st across. (11 sc)
Row 4: Ch 1, turn, sc2tog, sc in next 7 sts, sc2tog. (9 sc)
Row 5: Ch 1, turn, sc in each st across. (9 sc)
Row 6: Ch 1, turn, sc2tog, sc in next 5 sts, sc2tog. (7 sc)
Row 7: Ch 1, turn, sc2tog, sc in next 3 sts, sc2tog. (5 sc)
Fasten off and leave a short tail. The cap is now a dome that is 11 sts wide at the brim, 5 sts wide at the crown and 7 rows tall.
Mushroom Stem
Turn the cap upside down so the foundation chain is at the top. Number its 11 free loops from 1 to 11, starting at the end where you will join the yarn. You’ll work the stem into loops 4 to 8, which leaves 3 free loops on each side for the brim to overhang.
Stem Row 1: Join cream in loop 4, ch 1, sc in loops 4 through 8. (5 sc)
Stem Row 2 and onward: Ch 1, turn, sc in each st across. (5 sc)
Keep working rows until the stem has the right number of rows for the mushroom you are making:
- Mushroom A (solo magnet): 8 stem rows, about 1.3 in (3.3 cm)
- Mushroom B (sides of the basket): 11 stem rows, about 1.8 in (4.6 cm)
- Mushroom C (center of the basket): 13 stem rows, about 2.2 in (5.6 cm)
Fasten off. Before edging, Mushroom A is 2.5 in (6.4 cm) tall, Mushroom B is 3.0 in (7.6 cm) tall and Mushroom C is 3.3 in (8.4 cm) tall.
Make All Pieces
| Piece | Qty | Red | Cream | Beige |
|---|---|---|---|---|
| Mushroom A (8 stem rows) | 1 | cap, edging | stem, edging, dots | none |
| Mushroom B (11 stem rows) | 2 | cap, edging | stem, edging, dots | none |
| Mushroom C (13 stem rows) | 1 | cap, edging | stem, edging, dots | none |
| Basket | 1 | none | none | all |
Work order: Finish Mushroom A completely, edging included, and check it against the gauge checkpoints. Then make the remaining three caps in one sitting so your tension stays even, and add their stems. Make the basket last, so you can test the fit with the finished mushrooms.
Basket
With oatmeal beige, ch 18.
Rnd 1: Sc in 2nd ch from hook, sc in next 15 ch, 3 sc in last ch. Rotate the work and continue along the free loops of the chain: sc in next 15 loops, 2 sc in last loop (the same ch as the first sc). Join with sl st to first sc. (36 sc)
Rnd 2: Ch 1, 2 sc in first st, sc in next 15 sts, 2 sc in each of next 3 sts, sc in next 15 sts, 2 sc in each of last 2 sts. Join. (42 sc)
Rnd 3: Ch 1, sc in first st, 2 sc in next st, sc in next 15 sts, (sc in next st, 2 sc in next st) 3 times, sc in next 15 sts, (sc in next st, 2 sc in next st) 2 times. Join. (48 sc)
Checkpoint: The oval base measures about 4.1 in x 1.0 in (10.4 cm x 2.5 cm).
Rnd 4: Ch 1, sc in BLO of each st around. Join. (48 sc) This round turns the edge of the base upward to start the walls.
Rnds 5–10: Ch 1, sc in each st around. Join. (48 sc)
Checkpoint: The walls measure about 1.2 in (3.0 cm) from the base ridge. Don’t fasten off yet; you’ll work the rim in the Border section.
Layout grid (on the fridge):
        [ A ]            <- solo magnet, about 2 in (5.1 cm) above basket

    [ B ] [ C ] [ B ]    <- caps above the rim, overlapping slightly
   [    BASKET     ]     <- flat back against the door
Joining: Magnets and Assembly
The pieces are not crocheted together. Here, “joining” means attaching the magnets securely and arranging the set.
Mushroom magnets: Place one magnet on the wrong side of each mushroom, centered over the line where the cap meets the stem. Cover it with a 1.25 in (3.2 cm) fabric patch. Sew around the patch with a running stitch about 0.12 in (0.3 cm) from its edge. Catch only the back half of each crochet stitch so nothing shows on the front.
Basket magnets: Flatten the basket so the joining seam sits at one side. Use the cleaner wall as the front. On the inside of the back wall, place one magnet about 1 in (2.5 cm) from each side and 0.5 in (1.3 cm) below the rim. Cover each magnet with a patch and sew it on the same way.
Tension: Keep the running stitches snug but relaxed. If you pull too hard, the crochet will pucker around the patch and the piece won’t lie flat against the door.
Size checkpoint: Drop Mushrooms B and C into the basket. About 0.5 in (1.3 cm) of each B stem should show above the rim, and C should sit about 0.3 in (0.8 cm) higher than the B mushrooms.
Border
All edging uses the same 3.25 mm hook and gauge, with 1 sc per row-end. The edging adds about 0.17 in (0.4 cm) to each edge.
Cap edging (red), all mushrooms: With the right side facing, join red in loop 9 of the foundation chain, next to the stem.
- First brim: sc in loops 9, 10 and 11. (3 sc)
- First side: 2 sc in the row-end of Row 1, then 1 sc in each row-end of Rows 2–7. (8 sc)
- Crown: 2 sc in first st of Row 7, sc in next 3 sts, 2 sc in last st. (7 sc)
- Second side: 1 sc in each row-end of Rows 7–2, then 2 sc in the row-end of Row 1. (8 sc)
- Second brim: sc in loops 3, 2 and 1. (3 sc)
Total: 3 + 8 + 7 + 8 + 3 = 29 sc. Sl st into the edge of the stem and fasten off.
Stem edging (cream): Join cream at the top of one stem edge, just below the cap.
- First side: 1 sc in each stem row-end. (A: 8, B: 11, C: 13)
- Bottom: 2 sc in first st, sc in next 3 sts, 2 sc in last st. (7 sc)
- Second side: 1 sc in each stem row-end. (A: 8, B: 11, C: 13)
Totals: A = 23 sc, B = 29 sc, C = 33 sc. Sl st into the cap edging and fasten off.
Dots (cream): On the front of each cap, embroider 10 short straight stitches, each one over 1 sc. Place 4 across Row 3, 4 across Row 5 (offset from the Row 3 dots) and 2 on Row 7.
Basket rim (beige):
Rnd 11: Ch 1, rev sc in each st around. Join. (48 rev sc) Fasten off.
Why the math works: At this gauge, the height of 1 sc row is nearly the same as the width of 1 sc. That means 1 sc per row-end keeps the sides flat. The 2-sc increases at the brim corners, the crown and the bottom of the stem round those corners without making them ruffle. The basket rim stays at 48 stitches, so it stays snug instead of flaring.
Final Blocking
- Weave in all ends on the wrong side, through stitches of the same color.
- Lightly mist each mushroom with water.
- Pin each mushroom flat on the mat, shaping the crown into a smooth dome and squaring up the stem.
- Check that the solo mushroom measures 2.3 in x 2.8 in (5.8 cm x 7.1 cm).
- Stuff the basket with a folded cloth to open out the oval, then mist it.
- Let everything dry completely before you sew on the magnets.
Final Quality-Control Checklist
- Cap counts are 11, 11, 11, 9, 9, 7 and 5 sc.
- The stem is centered, with 3 free brim loops on each side.
- Every mushroom has 29 sc of cap edging.
- Stem edging is 23 sc (A), 29 sc (B) or 33 sc (C).
- Each cap has 10 evenly spaced dots.
- The basket has 48 sts on every round from Rnd 3 through Rnd 11.
- The magnets are fully covered and don’t show on the front.
- Each piece holds firmly on a vertical metal surface.
Troubleshooting
The cap looks pointed: Your decreases are too tight. Work the sc2tog more loosely, or block the crown into a rounder shape.
The stem is off-center: Count the free loops again. Loops 4 to 8 leave exactly 3 on each side.
The edges ripple: You’ve added too many edging stitches. Check that you placed 1 sc per row-end, not 2.
The edges cup: You have too few stitches, or the edging is too tight. Crochet the edging round a little more loosely.
The mushrooms sink into the basket: Add 1 or 2 stem rows to Mushrooms B and C.
The top of the basket gapes: Work the rev sc more tightly, or use a hook 0.25 mm smaller for Rnd 11.
A magnet slides down the door: Use a stronger magnet. The layer of yarn weakens the magnet’s hold.
Care
Wipe the pieces gently with a damp cloth. Don’t machine wash them, because the magnets are sewn in. Keep the magnets away from young children and pets.
Final Notes
Every measurement in this set builds on the one before it. A gauge of 5.5 sc and 6 rows per 1 in (2.5 cm) gives an 11-st cap that is 2.0 in (5.1 cm) wide. Seven cap rows plus 8 stem rows make Mushroom A 2.5 in (6.4 cm) tall. One round of edging brings the solo mushroom to 2.3 in x 2.8 in (5.8 cm x 7.1 cm). The basket’s 48-st rounds flatten to 4.4 in (11.2 cm), which leaves room for three mushrooms side by side. Check each stage as you go, and the set will fit together exactly.
Happy crocheting!