

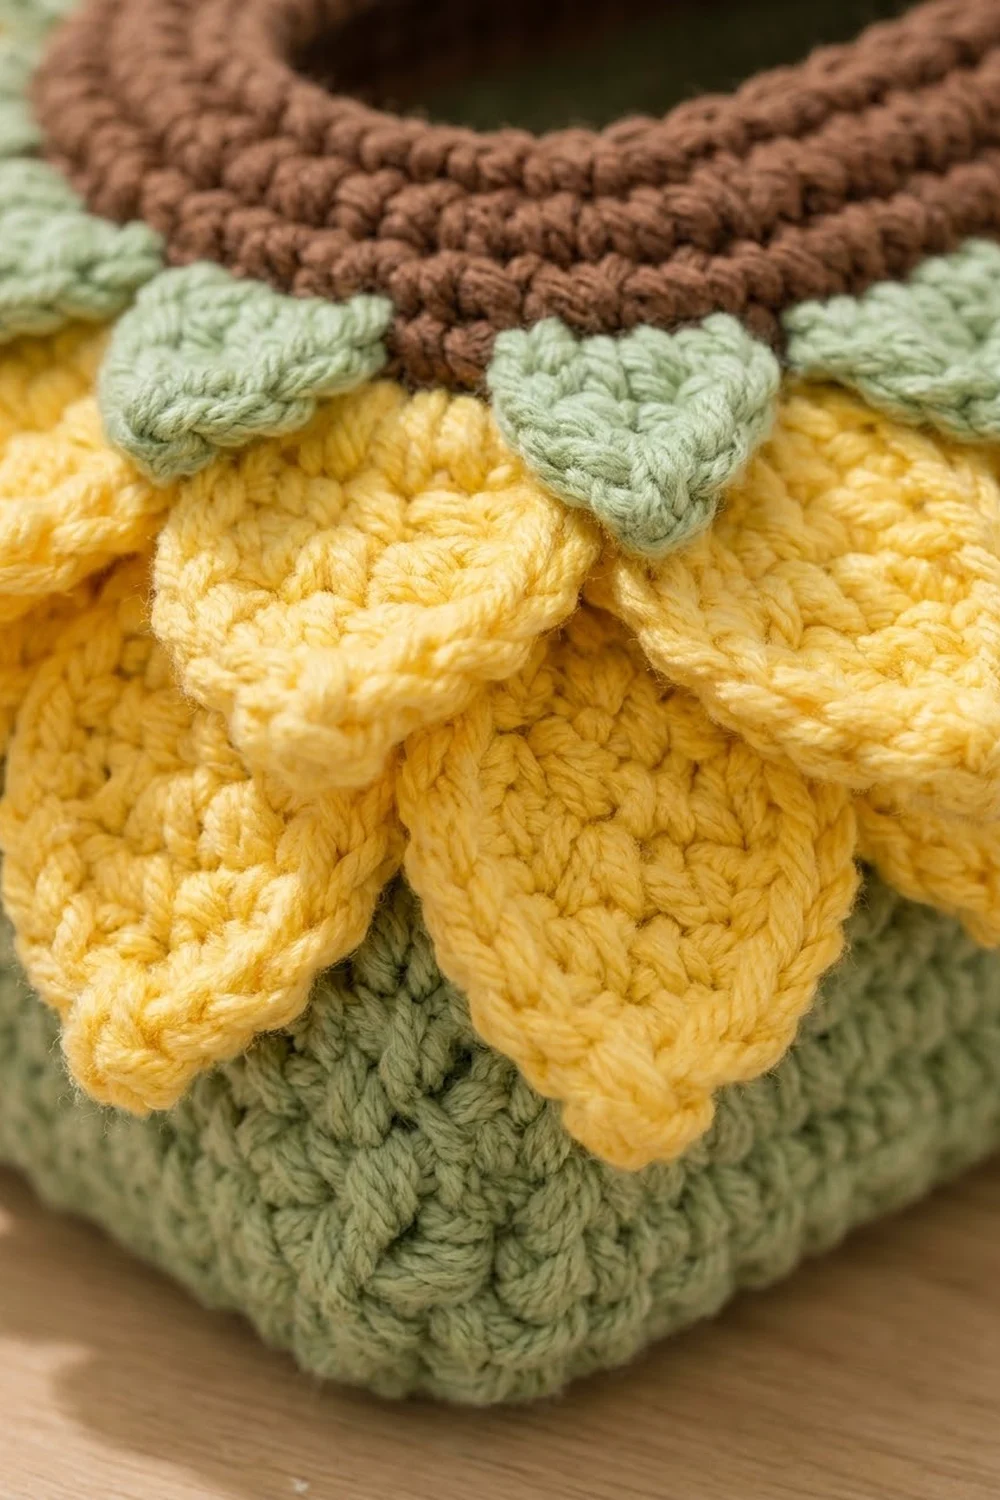
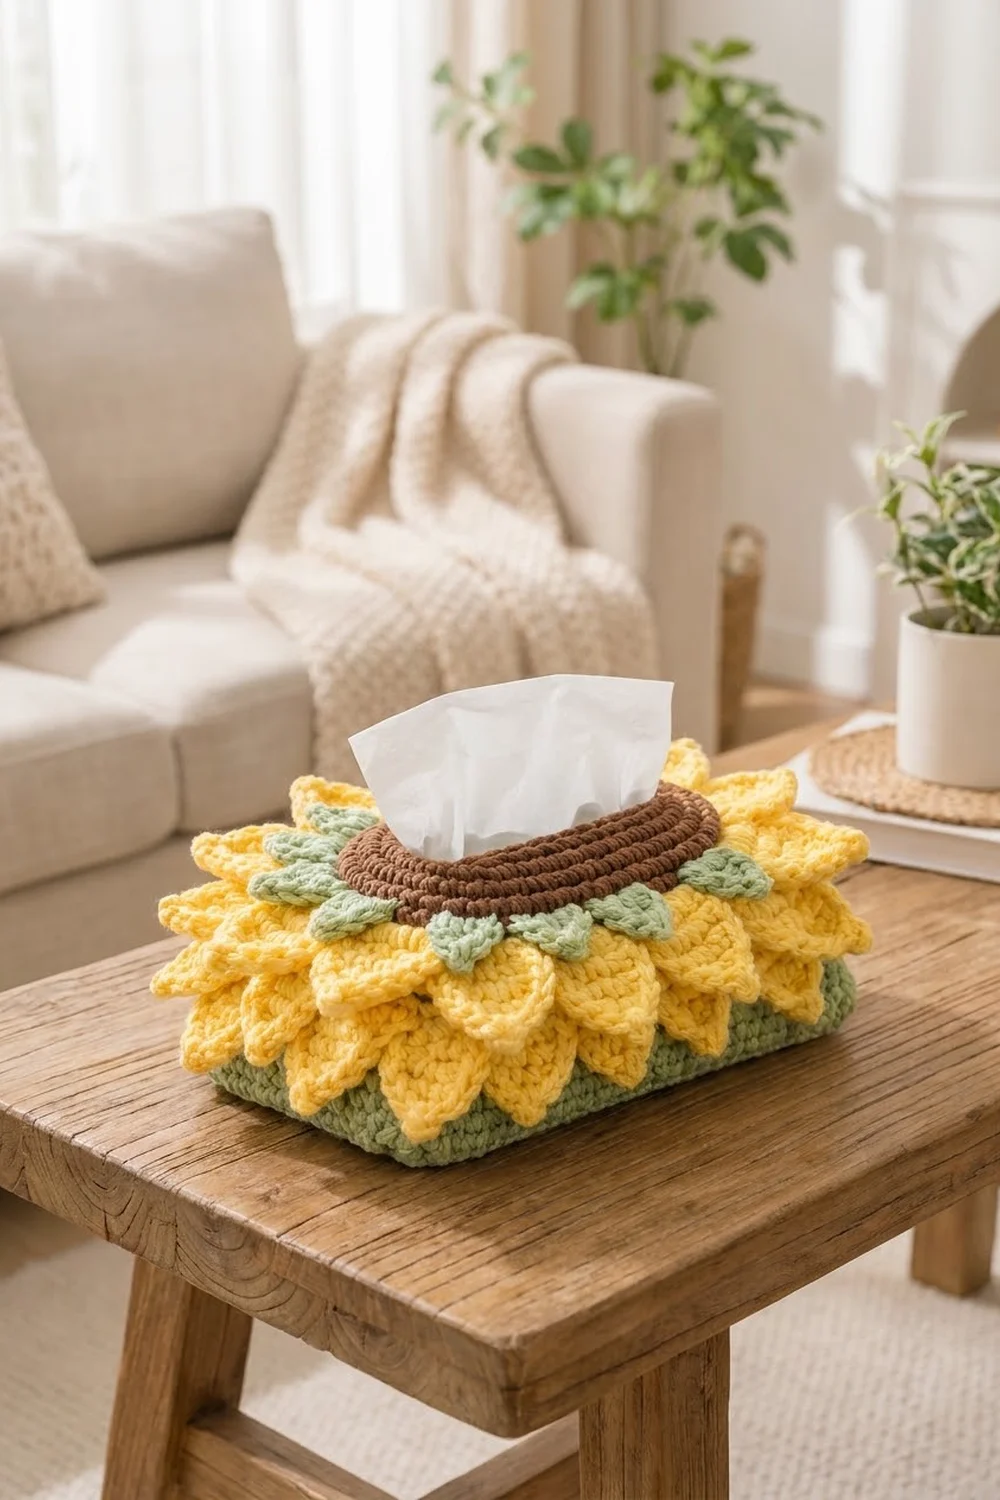
This sunflower tissue box cover turns a plain tissue box into something cheerful. A brown oval rim frames the tissue opening like a sunflower’s seed center. Small sage-green leaves sit around the rim, and two layers of pointed butter-yellow petals spread outward and drape over the sides.
The palette is soft and warm: sage green for the body and leaves, butter yellow for the petals, and chocolate brown for the center. The look is cottage-style and textured, but it is built from simple stitches.
This pattern uses US crochet terms. The finished cover measures 10 x 5 in (25.4 x 12.7 cm) across the top and about 3.5 in (8.9 cm) deep. It slides easily over a long tissue box about 9.5 x 4.75 x 3.5 in (24.1 x 12.1 x 8.9 cm).
You’ll work the top panel flat in rows, leaving a slot for the opening. Next you add the brown rim around the slot and work the sides in rounds down from the top panel. Last, you crochet the leaves and petals separately and sew them on in three layers.
Finished Size and Construction
- Finished size: 10 x 5 in (25.4 x 12.7 cm) top; about 3.5 in (8.9 cm) deep
- Skill level: Easy-intermediate
- Terminology: US
- Yarn weight: Worsted (#4) cotton
- Hook: 4.5 mm (US 7)
- Number of pieces: 1 body (top panel, rim, sides) + 14 leaves + 14 medium petals + 20 large petals
- Layout: Rim at the center, a leaf ring at the rim base, a medium petal ring on the top panel, and a large petal ring along the top fold
- Top panel size: 10 x 5 in (25.4 x 12.7 cm)
- Side depth before border: about 3.1 in (7.9 cm)
- Border depth: about 0.4 in (1.0 cm)
Materials
Use a smooth worsted-weight cotton or cotton blend, about 170 m per 100 g. Cotton keeps the petals crisp and holds the box shape well.
- Sage green (body and leaves): 80 g / 135 m
- Butter yellow (petals): 40 g / 70 m
- Chocolate brown (rim): 15 g / 25 m
These quantities include a margin of about 20 percent.
Tools:
– 4.5 mm (US 7) crochet hook
– Tapestry needle
– Stitch markers (at least 6)
– Locking pins or sewing clips
– Measuring tape
– Scissors
– A tissue box to use as a blocking form
Abbreviations (US Terms)
- ch – chain
- sl st – slip stitch
- sc – single crochet
- hdc – half double crochet
- dc – double crochet
- sc2tog – single crochet 2 together
- BLO – back loop only
- st(s) – stitch(es)
- rnd – round
- RS – right side
Special stitch – crab stitch (reverse sc): Without turning, work sc from left to right (right to left if you crochet left-handed). Insert the hook into the next st to the right, pull up a loop, and yarn over and draw through both loops. It makes a firm, rope-like edge.
Gauge and Checkpoints
Gauge: 16 sc and 18 rows = 4 in (10.2 cm) in sc worked in rows.
Make a test swatch of 20 sts by 20 rows before you start. It should measure 5 x 4.4 in (12.7 x 11.2 cm). If it is too big, go down 0.5 mm in hook size. If it is too small, go up 0.5 mm.
Test one large petal before you make the full set. It should measure about 2.75 in (7.0 cm) long and 1.75 in (4.4 cm) wide. If it’s larger, use a smaller hook for the petals only.
Checkpoints:
– After Row 8: panel is 10 in (25.4 cm) wide and about 1.8 in (4.6 cm) tall.
– After Row 23: panel is 10 x 5 in (25.4 x 12.7 cm).
– Slot: about 5.5 in (14.0 cm) long and 1.3 in (3.3 cm) wide.
– After side Rnd 14: the sides are about 3.1 in (7.9 cm) deep.
Top Panel (Sage Green)
Ch 41.
Row 1 (RS): Sc in 2nd ch from hook and in each ch across, turn. (40 sts)
Rows 2–8: Ch 1, sc in each st across, turn. (40 sts)
Slot, first side:
Row 9: Ch 1, sc in first 9 sts, turn. Leave the remaining 31 sts unworked. (9 sts)
Rows 10–14: Ch 1, sc in each st across, turn. (9 sts) Fasten off at the end of Row 14.
Slot, second side:
Row 9: Join yarn in the last st of Row 8 at the opposite outer edge. Ch 1, sc in the same st and in the next 8 sts toward the slot, turn. (9 sts) This leaves 22 sts unworked in the center.
Rows 10–14: Ch 1, sc in each st across, turn. (9 sts) Row 14 ends at the outer edge. Do not fasten off.
Row 15 (closing row): Ch 1, sc in the 9 sts of the second side, ch 22, then sc in the 9 sts of the first side, turn. (18 sc + 22 ch = 40 sts)
Row 16: Ch 1, sc in each sc and in each ch across, turn. (40 sts)
Rows 17–23: Ch 1, sc in each st across, turn. (40 sts)
Fasten off. The panel is 10 x 5 in (25.4 x 12.7 cm), with a slot centered 9 sts in from each short end.
Brown Rim
The rim is worked in joined rounds around the slot edge, with the RS facing.
Rnd 1: Join brown in the first free st of Row 8 at a slot corner. Ch 1 and work around the slot as follows:
– 22 sc in the 22 free sts of Row 8
– 6 sc along the row ends of the first side (1 per row)
– 22 sc in the underside of the 22 chains
– 6 sc along the row ends of the second side
Join with a sl st to the first sc. (56 sts)
Place a marker in each of the 4 corner sts.
Rnd 2 (BLO): Ch 1. Working in BLO, sc in each st around, but work a sc2tog over each marked corner st and the st after it. Join. (52 sts) Using BLO turns the rim upward, and the corner decreases round the slot into an oval.
Rnds 3–5: Ch 1, sc in each st around, join. (52 sts)
Fasten off. The rim stands about 1.1 in (2.8 cm) tall and curls slightly outward on its own, giving the plump, rolled center.
Sides (Sage Green)
Rnd 1 (setup): With the RS facing, join sage green at one corner of the panel and work around the outer edge:
– 40 sc along Row 23
– 20 sc across the 23 row ends of the short edge (skip 3 row ends, evenly spaced)
– 40 sc in the underside of the foundation chain
– 20 sc across the other short edge
Join. (120 sts: 40 + 20 + 40 + 20) There are no extra corner stitches.
Rnd 2 (BLO): Ch 1, sc in BLO of each st around, join. (120 sts) This makes a crisp fold between the top and the sides. The free front loops form a ridge that you’ll use later to place the large petals.
Rnds 3–14: Ch 1, sc in each st around, join. (120 sts)
The sides should now be about 3.1 in (7.9 cm) deep. Do not fasten off.
Leaves (Make 14, Sage Green)
Ch 6.
Rnd 1: Working along the chain, sl st in 2nd ch from hook (tip), sc in next ch, dc in next ch, hdc in next ch, and 3 sc in the last ch (base). Rotate the piece and work along the other side of the chain: hdc in next ch, dc in next ch, sc in next ch. Join with a sl st to the tip sl st. (10 sts)
Tip: Ch 2, sl st in the same st.
Fasten off, leaving a 10 in (25.4 cm) tail. Each leaf measures about 1.25 x 0.9 in (3.2 x 2.3 cm).
Medium Petals (Make 14, Yellow)
Ch 9.
Rnd 1: Sl st in 2nd ch from hook (tip), sc in next ch, hdc in next ch, dc in next 2 ch, hdc in next ch, sc in next ch, and 3 sc in the last ch (base). Along the other side of the chain: sc, hdc, dc in next 2 ch, hdc, sc. Join to the tip sl st. (16 sts)
Rnd 2:
1. Ch 1, sc in the next 6 sts.
2. 2 sc in the next st, sc in the next st, 2 sc in the next st (base).
3. Sc in the next 6 sts.
4. Work (sc, ch 2, sc) in the tip sl st.
Join. (21 sc + one ch-2 tip) Fasten off, leaving a 12 in (30.5 cm) tail. Each medium petal measures about 2.25 x 1.5 in (5.7 x 3.8 cm).
Large Petals (Make 20, Yellow)
Ch 11.
Rnd 1: Sl st in 2nd ch from hook (tip), sc in next ch, hdc in next ch, dc in next 4 ch, hdc in next ch, sc in next ch, and 3 sc in the last ch (base). Along the other side of the chain: sc, hdc, dc in next 4 ch, hdc, sc. Join to the tip sl st. (20 sts)
Rnd 2:
1. Ch 1, sc in the next 8 sts.
2. 2 sc in the next st, sc in the next st, 2 sc in the next st (base).
3. Sc in the next 8 sts.
4. Work (sc, ch 2, sc) in the tip sl st.
Join. (25 sc + one ch-2 tip) Fasten off, leaving a 12 in (30.5 cm) tail. Each large petal measures about 2.75 x 1.75 in (7.0 x 4.4 cm).
Make All Pieces
- Sage green: 1 body (top panel and sides) + 14 leaves
- Yellow: 14 medium petals + 20 large petals
- Brown: 1 rim, worked directly onto the body
Top-view layout (not to scale):
 L  L  L  L  L  L  L   <- large petals on the fold ridge
   M   M   M   M   M     <- medium ring
     g g g g g g         <- leaves at rim base
 L   [ BROWN  RIM ]   L
     g g g g g g
   M   M   M   M   M
 L  L  L  L  L  L  L
Leaves (g) sit at the base of the rim. Medium petals (M) alternate with the leaves. Large petals (L) circle the fold.
Joining (Sewing the Layers)
Large petals first: Mark the front-loop ridge from side Rnd 2 every 6 sts, starting at one corner. That gives 20 marks (120 ÷ 6 = 20). Pin a large petal so its base is centered on each mark, with the tip pointing down the side. Whipstitch the 5 base sts of the petal to the free front loops. The petals overlap by about 0.25 in (0.6 cm) and cover most of the side, leaving the green lower edge showing.
Medium petals next: Sew one medium petal for every 4 sts of rim Rnd 1, placed between leaf positions. Each base sits about 0.5 in (1.3 cm) out from the rim, with the tip pointing outward. On the long sides, the tips reach just past the fold. Sew only the base and the lower 0.5 in (1.3 cm) of each side, so the tips stay free.
Leaves last: Sew one leaf at every 4th st of rim Rnd 1 (56 ÷ 4 = 14), tight against the rim, with the tips pointing outward. The leaves overlap the bases of the medium petals.
Keep your sewing tension snug but not puckered, so the top panel stays flat.
Size checkpoint: Measure the top again. It should still be 10 x 5 in (25.4 x 12.7 cm).
Border
The border is worked on the live loop at the bottom of the sides. It has the same gauge as the body: 4 sts per inch (2.5 cm).
Rnd 15: Ch 1, sc in each st around, join. (120 sts: 40 on each long side, 20 on each short side)
Rnd 16: Ch 1, crab stitch in each st around, join. (120 sts: 40 / 20 / 40 / 20)
Fasten off and weave in all ends.
Why the math works: The box opening’s perimeter is 2 x (10 + 5) = 30 in (76.2 cm). At 4 sts per inch, that is exactly 120 sts. The sides are a straight tube, so the border needs no corner increases. Crab stitch adds firmness without spreading, and the border adds about 0.4 in (1.0 cm) for a total depth of about 3.5 in (8.9 cm).
Final Blocking
- Lightly mist the whole cover with water.
- Slide the cover onto a tissue box.
- Square the corners and straighten the fold ridge.
- Shape each petal tip to a point with your fingers.
- Push the brown rim into an even oval and let it curl slightly outward.
- Let the cover dry completely on the box.
Final Quality-Control Checklist
- Top panel is 10 x 5 in (25.4 x 12.7 cm).
- The rim has 52 sts and stands about 1.1 in (2.8 cm) tall.
- There are 14 leaves, 14 medium petals, and 20 large petals, all sewn securely.
- Sides are about 3.5 in (8.9 cm) deep, including the border.
- The border has 120 sts with no ripples.
- All tails are woven in on the wrong side.
Troubleshooting
- Cover too loose: Your gauge is loose. Rework the sides with a 4 mm hook.
- Rim flops inward: Make sure Rnd 2 was worked in BLO. You can also work Rnd 5 with a slightly tighter tension.
- Petals curl: Block them flat and pin the tips while drying.
- Slot too narrow: Add 1 row to each slot side (7 rows). Rim Rnd 1 then becomes 58 sts and Rnds 2–5 become 54 sts.
- Border flares: Work the crab stitch more tightly, or use a hook one size smaller.
Care
Hand wash in cool water and lay the cover flat to dry, reshaping the petals while damp. Don’t tumble dry.
Final Notes
The measurements build on each other:
– The gauge of 16 sc = 4 in (10.2 cm) gives a 40-st panel that is 10 in (25.4 cm) wide.
– A 22-st slot is 5.5 in (14.0 cm) long, with a 56-st rim reduced to 52 sts.
– 120 side stitches cover a 30 in (76.2 cm) perimeter.
– The leaf and medium petal rings both follow the 4-st spacing of rim Rnd 1.
– The 20 large petals follow the 6-st spacing on the side fold ridge.
If the stitch counts at each checkpoint match, the cover will fit the box. Happy crocheting!