

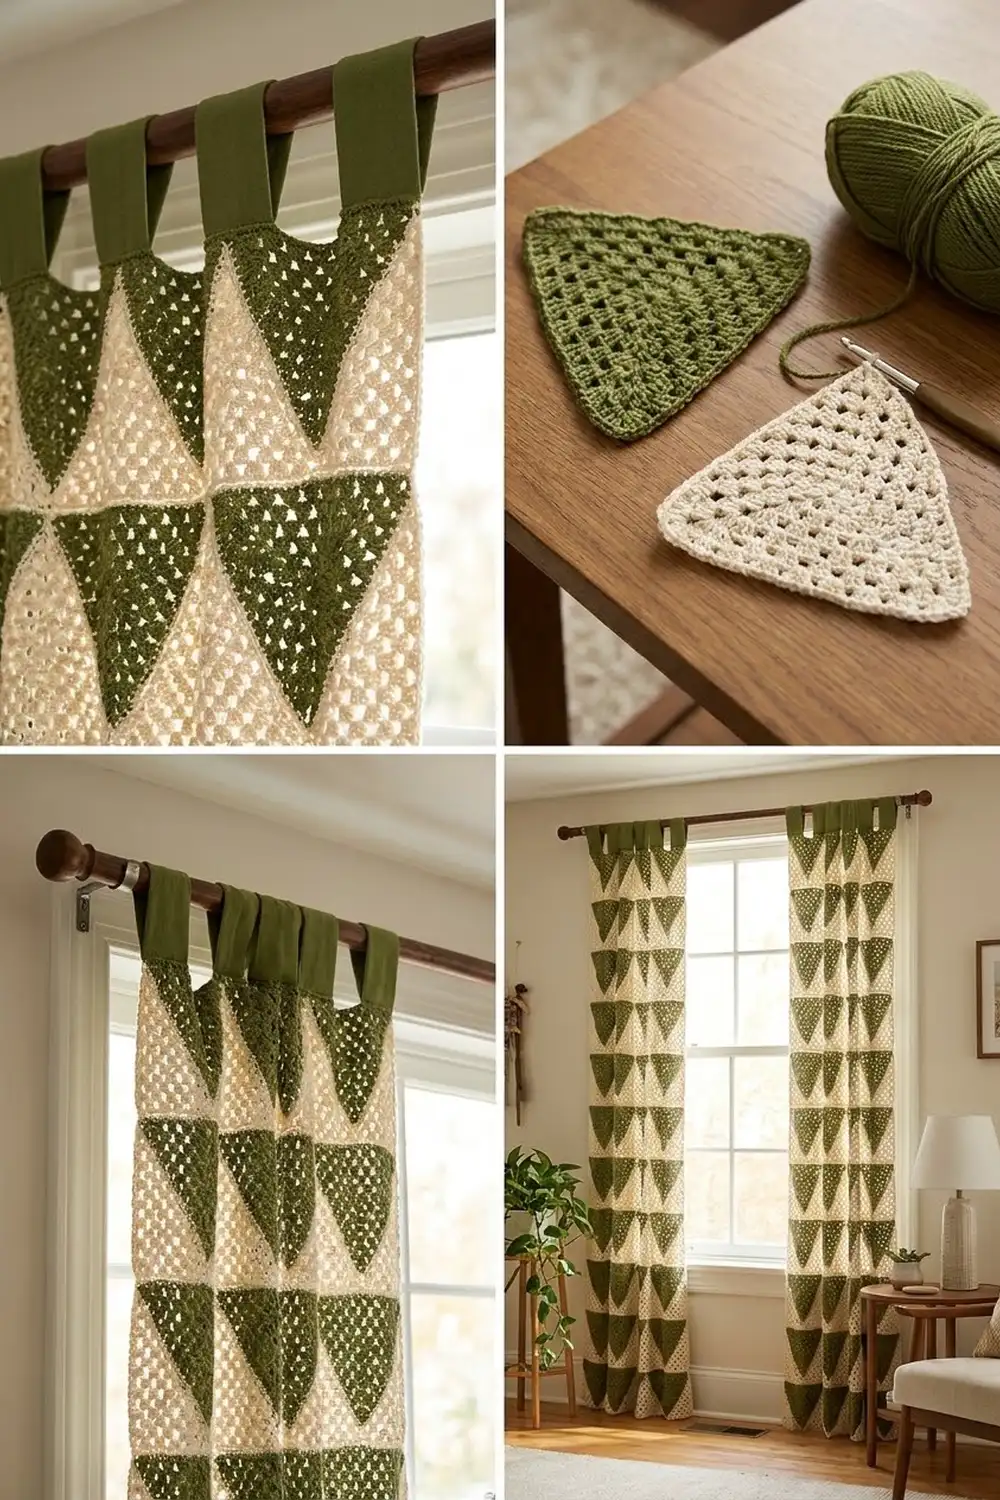
The Olive Grove Triangle Curtain is a long crocheted panel built from small granny triangles. Olive green triangles point down and cream triangles point up, and they lock together in offset bands. Light shows through the eyelets and the open seams, so the curtain filters light without fully blocking it.
The palette is calm and earthy. It works well in cottage, farmhouse, and modern rustic rooms. Folded green tabs at the top slide straight onto a curtain rod, so you don’t need rings or clips.
This pattern uses US crochet terms. One finished panel measures 31 in x 84.2 in (78.7 cm x 213.9 cm), not counting the tabs. The photographed window uses two panels, so make two for a matching pair.
You’ll crochet full triangles in the round and half triangles in rows, then sew them together into 16 bands. Two rounds of single crochet border the panel, and the tabs are worked straight off the top edge.
Finished Size and Construction
- Finished panel size: 31 in x 84.2 in (78.7 cm x 213.9 cm), tabs not included
- Skill level: Intermediate
- Terminology: US
- Yarn weight: Worsted (#4)
- Hook: 5 mm (H-8)
- Number of pieces per panel: 144 full triangles and 32 half triangles
- Layout: 16 bands, each 11 pieces wide
- Full triangle size: 6 in (15.2 cm) per side, 5.2 in (13.2 cm) tall
- Half triangle size: base 3 in (7.6 cm), straight side 5.2 in (13.2 cm), slanted side 6 in (15.2 cm)
- Size before border: 30 in x 83.2 in (76.2 cm x 211.3 cm)
- Border depth: 0.5 in (1.3 cm) on every side
Materials
Choose a smooth worsted-weight cotton or cotton blend. Cotton keeps sharp triangle points, holds its shape when it hangs, and survives washing. Avoid fuzzy yarns, which fill in the eyelets.
For one panel:
- Olive green: 1,000 g (about 1,900 m)
- Cream: 1,100 g (about 2,090 m). This includes the yarn for joining and the border.
For a pair, double these amounts: 2,000 g (3,800 m) of olive green and 2,200 g (4,180 m) of cream.
Tools:
- 5 mm (H-8) crochet hook
- Tapestry needle
- Stitch markers
- Rust-proof pins and a blocking surface
- Spray bottle
- Measuring tape
All quantities include roughly a 10% margin for swatching and joining. Buy all of each color from a single dye lot.
Abbreviations (US Terms)
- ch – chain
- sl st – slip stitch
- sc – single crochet
- dc – double crochet
- dc2tog – double crochet 2 together
- sp – space
- st(s) – stitch(es)
- RS / WS – right side / wrong side
- rep – repeat
Special stitches:
- Group: 3 dc worked into the same space. The stitches stay separate and aren’t joined at the top.
- dc2tog: [Yarn over, insert hook in next st, pull up a loop, yarn over, pull through 2 loops] twice, then yarn over and pull through all 3 loops on the hook.
Gauge and Checkpoints
Gauge: 23 sc = 6 in (15.2 cm) along one edge of a finished full triangle. That’s about 3.8 sc per inch.
Before you make dozens of triangles, crochet and block one full triangle as a test. Check its size at each stage:
- After Rnd 1: each side measures about 1.5 in (3.8 cm).
- After Rnd 3: each side measures about 3.25 in (8.3 cm).
- After Rnd 5: each side measures about 5.25 in (13.3 cm).
- After Rnd 6 and blocking: each side measures 6 in (15.2 cm).
If your triangle is too big, for example 6.25 in (15.9 cm), go down half a hook size. If it’s too small, for example 5.75 in (14.6 cm), go up half a hook size.
Small errors add up. A difference of 0.25 in (0.6 cm) per triangle becomes 1.25 in (3.2 cm) across a single band.
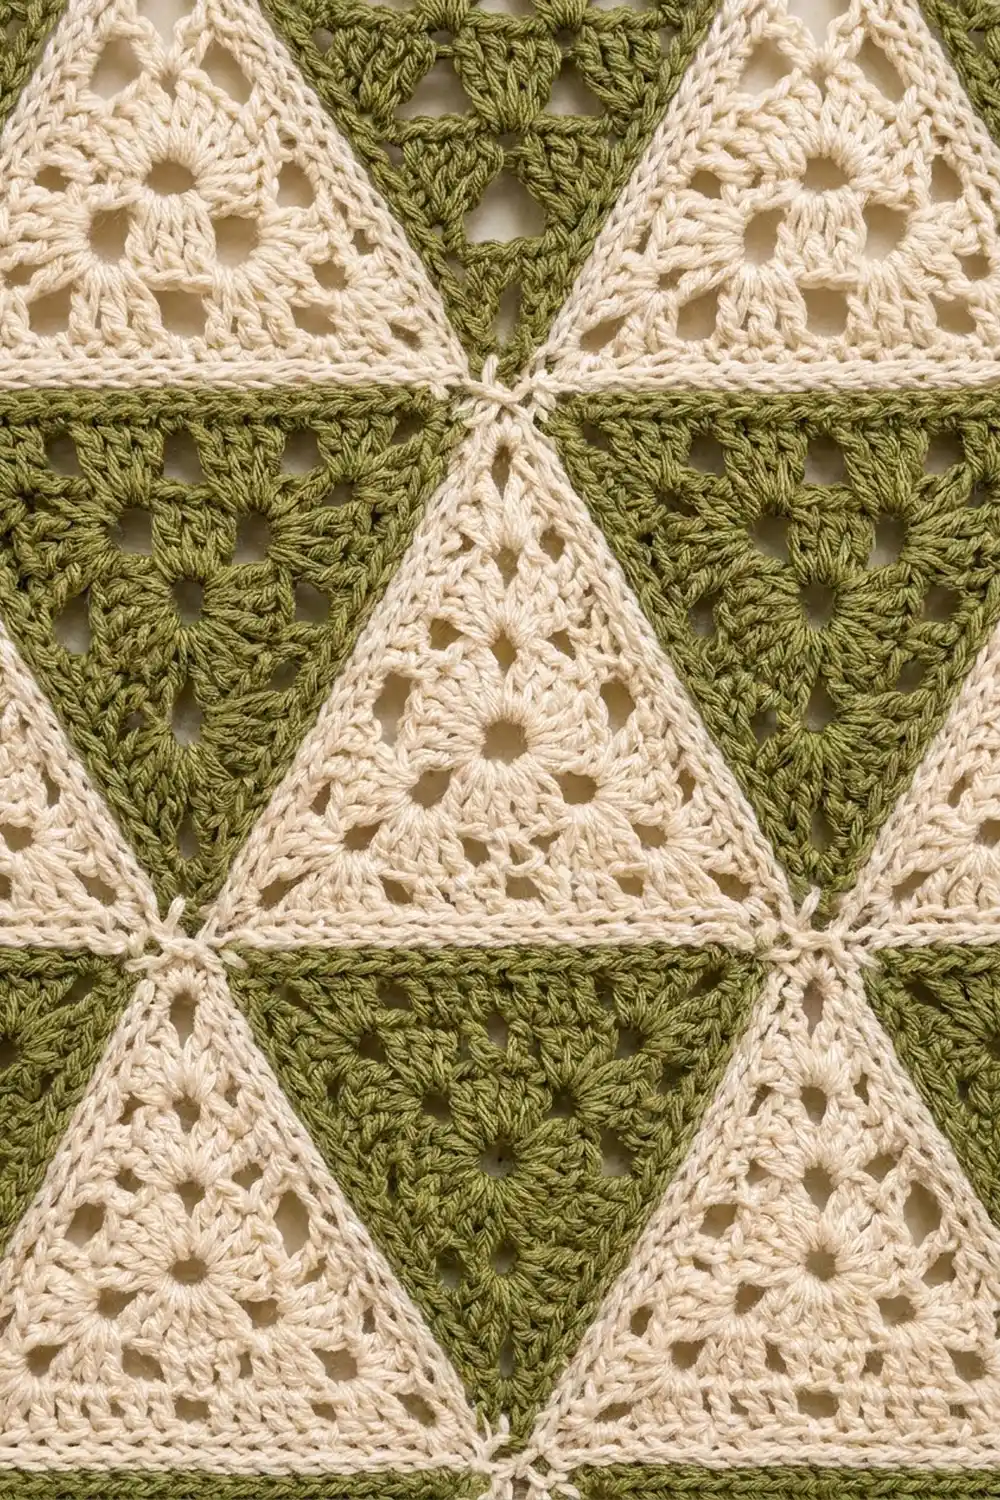
Full Triangle (Make 72 Olive, 72 Cream)
Both colors use the same motif.
Rnd 1: Ch 4 and sl st to form a ring. Ch 3 (counts as dc), 2 dc in ring, ch 3, [3 dc in ring, ch 3] twice. Sl st to the top of the beginning ch-3. (9 dc: 3 groups and 3 corner ch-3 sps.)
Rnd 2: Sl st in the next 2 dc and into the corner sp. Ch 3, (2 dc, ch 3, 3 dc) in the same sp, ch 1. (3 dc, ch 3, 3 dc) in the next corner sp, ch 1. Rep from * once more. Sl st to the top of the beginning ch-3. (18 dc: 2 groups per side.)*
Rnd 3: Sl st in the next 2 dc and into the corner sp. Ch 3, (2 dc, ch 3, 3 dc) in the same sp, ch 1, group in the next ch-1 sp, ch 1. (3 dc, ch 3, 3 dc) in the next corner sp, ch 1, group in the next ch-1 sp, ch 1. Rep from * once more. Sl st to join. (27 dc: 3 groups per side.)*
Rnd 4: Work as Rnd 3, putting a group in each ch-1 sp along the sides. (36 dc: 4 groups and 3 ch-1 sps per side.)
Rnd 5: Work as Rnd 4. (45 dc: 5 groups and 4 ch-1 sps per side.)
Rnd 6 (edge round):
- Ch 1. Sc in the same st as the join and in the next 2 dc, then 3 sc in the corner sp.
- *Sc in the next 3 dc, [sc in the ch-1 sp, sc in the next 3 dc] 4 times, 3 sc in the corner sp. Rep from * once more.
- Sc in the next 3 dc, [sc in the ch-1 sp, sc in the next 3 dc] 3 times, then sc in the last ch-1 sp.
- Sl st to the first sc.
(66 sc total.)
Here’s how that count breaks down. Each side has 19 sc between its corner groups (15 dc + 4 ch-1 sps), and each corner has 3 sc. The middle sc of each corner group is the corner stitch. Counted from corner stitch to corner stitch, each side has 23 sc, both corners included: 1 + 1 + 19 + 1 + 1. As a check, 3 sides x 23 = 69, minus the 3 corners that were counted twice, gives 66.
Fasten off and weave in the ends.
Half Triangle (Make 16 Olive, 16 Cream)
The half triangles sit at both ends of every band so the curtain has straight sides. You’ll work the body in rows, then add a single crochet edge.
Row 1: Ch 10. Dc in the 4th ch from the hook and in each ch across. Turn. (8 sts; the skipped ch-3 counts as a st.)
The slanted edge is where Row 1 ends. You’ll decrease at that edge on every row.
Row 2: Ch 2 (doesn’t count as a st). Skip the first st, dc in each remaining st. Turn. (7 sts)
Row 3: Ch 3 (counts as a dc). Dc in each st to the last 2 sts, then dc2tog. Turn. (6 sts)
Rows 4–7: Rep Rows 2 and 3 twice more. (Row 4: 5 sts. Row 5: 4 sts. Row 6: 3 sts. Row 7: 2 sts.)
Row 8: Ch 2 (doesn’t count), dc in the last st. (1 st) Don’t fasten off.
Checkpoint: The body should measure about 2.4 in (6.1 cm) across the base and 4.7 in (11.9 cm) tall.
Edging round: Ch 1. Work sc around all 3 edges, with 3 sc at each corner:
- 19 sc evenly along the slanted edge (2 sc in each row end, plus 3 extra sc spaced along the edge)
- 8 sc along the foundation chain
- 16 sc along the straight edge (2 sc in each row end)
Sl st to the first sc. (52 sc total.)
Counted from corner stitch to corner stitch, the slanted edge has 23 sc, the base has 12 sc, and the straight edge has 20 sc. The slanted edge matches a full triangle side exactly.
Checkpoint: After the edging, the base is 3 in (7.6 cm), the straight edge is 5.2 in (13.2 cm), and the slanted edge is 6 in (15.2 cm).
For the right-hand end of each band, flip the half triangle over to make a mirror image. The stitches look almost the same on both sides.
Make All Pieces
For one panel:
- Olive full triangles: 72
- Cream full triangles: 72
- Olive half triangles: 16
- Cream half triangles: 16
For a pair: 144 of each full triangle and 32 of each half triangle.
Layout grid (G = olive pointing down, C = cream pointing up, g / c = half triangles):
Band 1 (top):  c G C G C G C G C G c
Band 2:        g C G C G C G C G C g
Band 3:        c G C G C G C G C G c
Band 4:        g C G C G C G C G C g
... continue alternating ...
Band 15:       c G C G C G C G C G c
Band 16:       g C G C G C G C G C g
Odd bands have 5 G, 4 C, and 2 c. Even bands have 5 C, 4 G, and 2 g. Every band has 11 pieces.
Joining
Sew the pieces together with cream yarn and a tapestry needle. Use a whipstitch through the outer loops only. With the RS facing up, this leaves a fine ridge on the front.
Step 1 – Join the pieces within each band. Each band has 10 diagonal seams. On every seam, two 23-stitch edges meet. Match corner stitch to corner stitch, then sew 1 stitch to 1 stitch for all 23 stitches.
Checkpoint: Each finished band should measure 30 in (76.2 cm) along its top and bottom edges, and 5.2 in (13.2 cm) tall.
Step 2 – Join the bands. Lay out the bands in order and sew each band to the one below it.
The bottom edge of an odd band has 4 cream bases of 23 sts each, plus 2 half-triangle bases of 12 sts each. That’s 4 x 23 + 2 x 12 = 116 sts. The top edge of the even band below matches piece for piece: 4 olive tops of 23 sts plus 2 half tops of 12 sts, also 116 sts. Because of the half-triangle offset, every piece sits directly on a partner piece of the same width. Sew 1 stitch to 1 stitch, matching each corner.
Joining an even band to the odd band below it works the same way. This time 5 cream bases of 23 sts each (115 sts) meet 5 olive tops of 23 sts each (115 sts).
Tension: Sew firmly enough to close the seam but loosely enough that the seam stays as flat as the motifs. Pull the yarn snug every few stitches, then smooth the seam out flat.
Size checkpoints:
- 4 bands: 20.8 in (52.8 cm) tall
- 8 bands: 41.6 in (105.7 cm) tall
- All 16 bands: 30 in x 83.2 in (76.2 cm x 211.3 cm)
Border
Border gauge: 23 sc = 6 in (15.2 cm), which is the same as the motif edges.
Starting counts:
- Top edge: Band 1 has 5 olive tops. 5 x 23 = 115 sts.
- Bottom edge: Band 16 has 5 cream bases. 5 x 23 = 115 sts.
- Each side: 16 half-triangle straight edges. 16 x 20 = 320 sts.
Corner stitches are already included in these counts, and no stitches are added at the seams.
Rnd 1: With RS facing and cream, join at the top-right corner. Ch 1, then sc in each st along all 4 edges. At each of the 4 panel corners, ch 2 between the last st of one edge and the first st of the next. Sl st to the first sc.
(Top 115 sc, each side 320 sc, bottom 115 sc, plus 4 corner ch-2 sps. 870 sc total.)
Rnd 2: Ch 1. Sc in each sc, and work (sc, ch 2, sc) in each corner ch-2 sp. Sl st to the first sc.
(115 + 320 + 320 + 115 sc worked 1 per stitch, plus 4 corners x 2 new sc = 878 sc total. Counted from corner sc to corner sc on each side, the top and bottom have 117 sc each and each side has 322.)
Fasten off.
Why the math works: The border starts with exactly 1 sc per edge stitch. The motifs were made at 23 sts per 6 in (15.2 cm), and the border uses the same gauge, so it can’t pull in or ruffle. The 2 rounds add 0.5 in (1.3 cm) on each side. The finished panel is 31 in x 84.2 in (78.7 cm x 213.9 cm).
Tabs (Make 6)
With RS facing and olive, work each tab into Rnd 2 along the top edge. Count the 117 top-edge sts from right to left, starting at the corner sc. Each tab uses 6 sts:
- Tab 1: sts 1–6
- Tab 2: sts 22–27
- Tab 3: sts 45–50
- Tab 4: sts 68–73
- Tab 5: sts 91–96
- Tab 6: sts 112–117
The 4 middle tabs are centered over the points where the olive triangles meet. The gaps between tabs are 15, 17, 17, 17, and 15 sts, so the spacing is symmetrical.
Rows 1–18: Ch 1, sc in each of the 6 sts. Turn. (6 sc per row.)
Fasten off, leaving a 12 in (30.5 cm) tail. Each tab is 1.6 in (4.1 cm) wide and about 4.5 in (11.4 cm) long. Fold the tab to the WS and sew its last row to Rnd 1 of the border. This makes a loop about 2 in (5.1 cm) deep, which fits a rod up to 1.5 in (3.8 cm) thick.
Final Blocking
- Wet the panel in cool water and gently squeeze out the water. Don’t wring it.
- Roll it in towels to remove more moisture.
- Lay it flat on blocking mats or on a clean sheet over carpet.
- Pin the 4 corners to 31 in x 84.2 in (78.7 cm x 213.9 cm).
- Pin along the edges every 3 in (7.6 cm).
- Pin the points of a few triangles in the middle of the panel so the seams run in straight lines.
- Let it dry completely, then unpin.
Final Quality-Control Checklist
- Every full triangle measures 6 in (15.2 cm) per side.
- Every band has 11 pieces and is 30 in (76.2 cm) wide.
- The olive triangles point down and the cream triangles point up.
- Each band is offset by half a triangle from the band above it.
- All seams are flat, with matching corners.
- The border has 115 starting sts on the top and bottom and 320 on each side.
- The 6 tabs are evenly spaced and securely sewn.
- All yarn ends are woven in and trimmed.
Troubleshooting
The triangles cup. Your Rnd 6 stitches are too tight. Loosen your tension or go up half a hook size for that round only.
The triangle points are rounded. Make sure each corner has exactly 3 sc, and pin the points sharply when blocking.
A seam won’t match up. Count both edges. Each one should have 23 sts. Redo the edging on whichever piece has the wrong count.
The panel leans. You may have forgotten to flip the right-hand half triangles. Check them against the layout grid.
The border ruffles. Make sure you worked exactly 1 sc in each edge stitch on Rnd 1.
The tabs sag. Sew the tab ends more firmly, through both the WS loops and the border.
Care
Hand wash or machine wash on a gentle cycle in cool water inside a laundry bag. Reshape the panel and dry it flat. Don’t hang it to dry while it’s wet.
Final Notes
The sizes in this pattern build on each other. Each full triangle has 23 sts and measures 6 in (15.2 cm) per side. Eleven pieces make a band 30 in (76.2 cm) wide. Sixteen bands make a panel 83.2 in (211.3 cm) tall. Two border rounds bring the panel to 31 in x 84.2 in (78.7 cm x 213.9 cm). If you check your size at each step, the panel will hang straight.
Happy crocheting!