

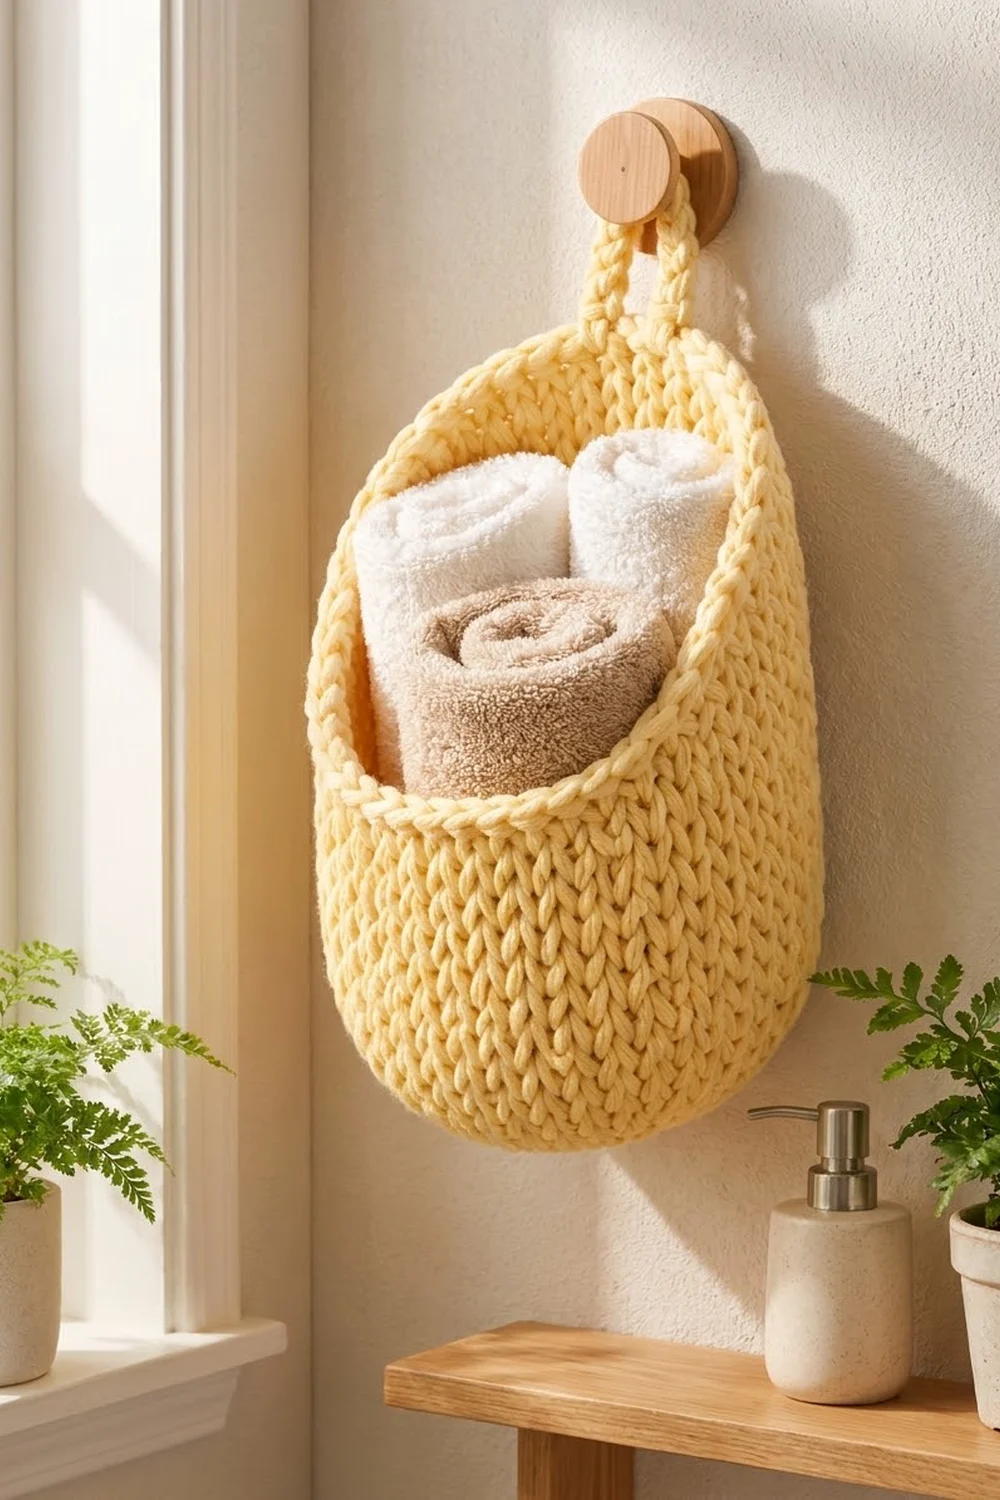
The Buttercup Hanging Wall Basket is a soft, sturdy wall pocket with a knit-look surface. It has a flat oval base, straight sides, a taller rounded back panel, and a thick rolled rim. A short corded loop at the top lets it hang from a peg or hook. It’s a good size for rolled hand towels, washcloths, or small supplies.
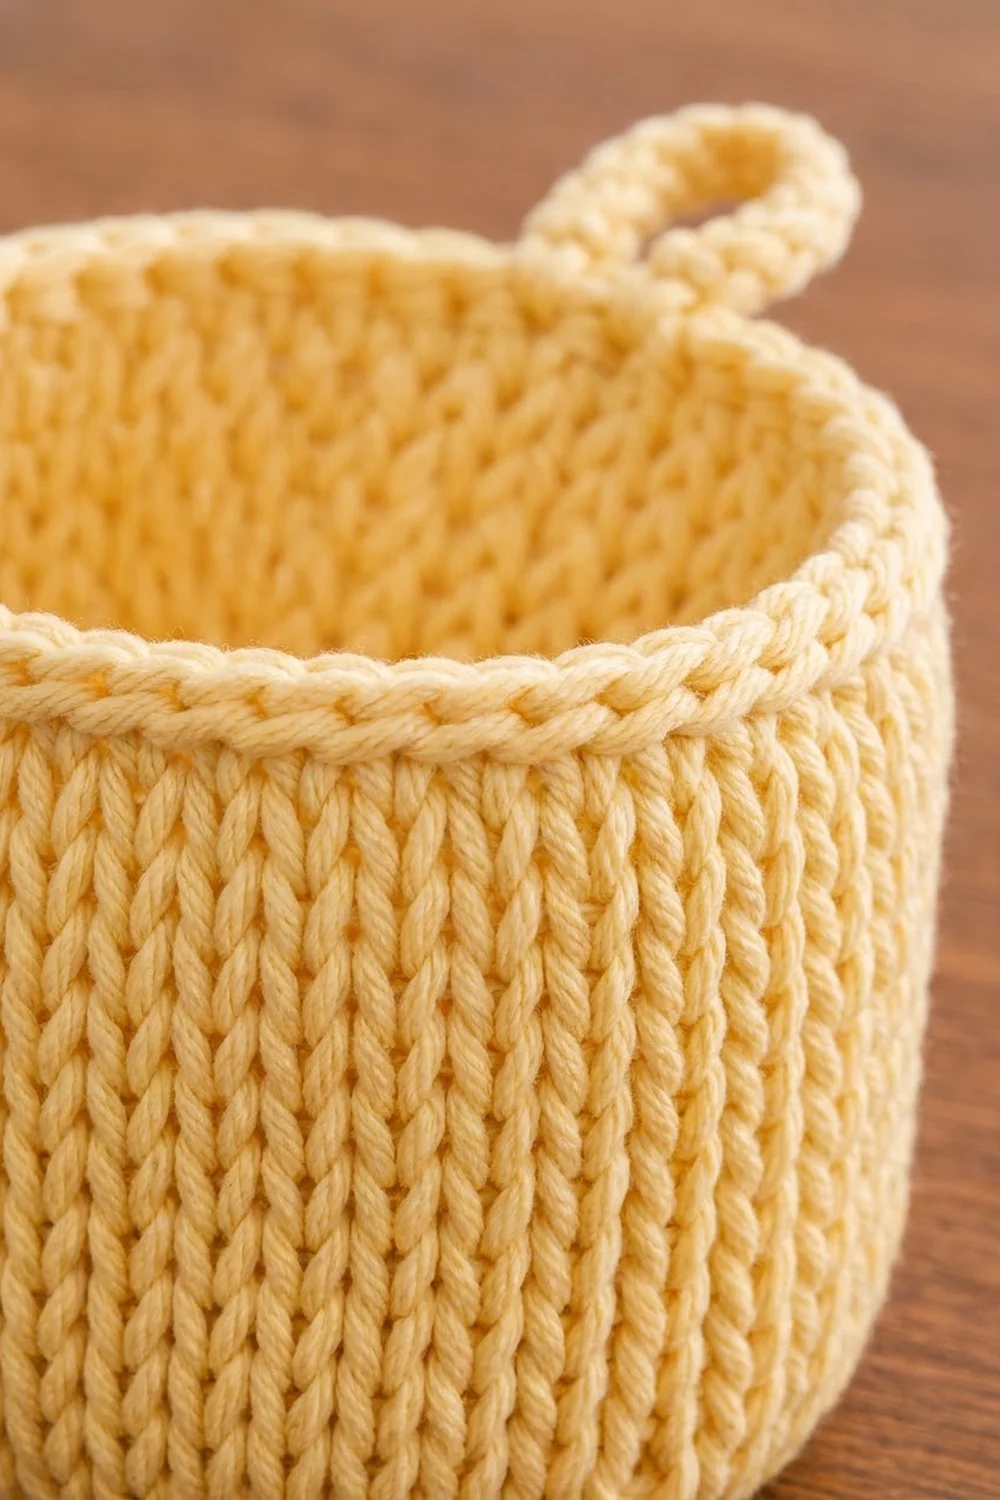
The whole basket is worked in one butter-yellow color. The knit-look texture comes from the center single crochet, also called the waistcoat stitch. It makes neat columns of V’s that look like stockinette knitting and gives a firm, dense fabric that holds its shape without any stiffener.
This pattern uses US crochet terms. The finished basket is about 8 in (20.3 cm) wide, 4 in (10.2 cm) deep, and 10.25 in (26.0 cm) tall at the back. The loop adds another 2.25 in (5.7 cm).
You’ll make it in four stages:
1. Work an oval base in joined rounds.
2. Work the walls straight up from the base.
3. Work the back panel in rows over half the stitches and shape it into a rounded top.
4. Finish the opening with a two-round rolled edging, then sew on a separate corded strap for hanging.
Finished Size and Construction
- Finished size: 8 in (20.3 cm) wide x 4 in (10.2 cm) deep x 10.25 in (26.0 cm) tall at the back
- Front wall height: 5.5 in (14.0 cm)
- Skill level: Intermediate
- Terminology: US crochet terms
- Yarn weight: Bulky (#5), cotton or cotton blend
- Hook: 6.0 mm (US J-10)
- Number of pieces: 1 basket body plus 1 small hanging strap
- Layout: Single basket, no assembly grid
- Base size: 8 x 4 in (20.3 x 10.2 cm), 62 stitches around
- Size before edging: 9.75 in (24.8 cm) tall at the back
- Edging depth: About 0.5 in (1.3 cm), a two-round rolled rim
Materials
Yarn: Use a smooth bulky cotton or cotton-blend yarn. Cotton gives the best stitch definition and keeps the walls upright. Avoid fuzzy or very stretchy acrylic, because the basket will sag when it’s full.
- Butter yellow: 200 g, about 260 m (284 yd)
Tools:
- 6.0 mm (US J-10) crochet hook
- 4 locking stitch markers
- Tapestry needle
- Scissors
- Measuring tape
- Rustproof pins and a spray bottle for blocking
The yarn amount includes a margin of about 25%. The waistcoat stitch uses more yarn than plain single crochet, so don’t cut it close.
Abbreviations (US Terms)
- ch – chain
- sl st – slip stitch
- sc – single crochet
- csc – center single crochet (waistcoat stitch)
- sc2tog – single crochet 2 together
- rev sc – reverse single crochet (crab stitch)
- BLO – back loop only
- st(s) – stitch(es)
- rnd(s) – round(s)
- RS / WS – right side / wrong side
Special stitch – Center single crochet (csc): Look at the stitch below from the front and you’ll see a V. Insert your hook through the center of that V, between its two legs, not under the top loops. Yarn over, pull up a loop, yarn over, and pull through both loops on the hook. Keep your loops a little loose, because this stitch tightens quickly.
2 csc in next st: Work 2 csc into the center of the same stitch.
Gauge and Checkpoints
Gauge: 12 csc and 13 rnds = 4 in (10.2 cm), worked in the round.
The basket base works as your gauge swatch. Make it first and measure it before you start the walls.
Checkpoint 1, after Rnd 6: The oval should measure 8 x 4 in (20.3 x 10.2 cm) with 62 sts. The outer edge should measure about 20.7 in (52.6 cm) around.
Checkpoint 2, after Rnd 24: The walls should be 5.5 in (14.0 cm) high above the base ridge and rise straight up.
Checkpoint 3, after Row 14: The back panel should measure 4.25 in (10.8 cm) above the wall. The top should be about 3.7 in (9.4 cm) wide across its 11 sts.
Too big? If the base is longer than 8.5 in (21.6 cm) or the walls lean outward, go down to a 5.5 mm hook and start again.
Too small? If the base is shorter than 7.5 in (19.1 cm) or the fabric feels board-stiff, go up to a 6.5 mm hook.
If only the height is off, add or remove wall rnds to reach 5.5 in (14.0 cm). Always keep 62 sts.
Base
Work in joined rnds. At the end of each rnd, sl st to the first st. Each rnd starts with ch 1, which doesn’t count as a stitch. Keep the RS facing you throughout.
Ch 16.
Rnd 1: Sc in 2nd ch from hook, sc in next 13 ch, 3 sc in last ch. Rotate the work to crochet along the other side of the chain. Sc in next 13 ch, then 2 sc in the same ch as the first sc. Join. (32 sts)
Each end of the oval now has 3 curved sts, and each long side has 13 straight sts. From Rnd 2 on, work every stitch as csc.
Rnd 2: Ch 1, 2 csc in first st, csc in next 13, 2 csc in each of next 3, csc in next 13, 2 csc in each of last 2. Join. (38 sts)
Rnd 3: Ch 1, [csc in next, 2 csc in next] once, csc in next 13, [csc in next, 2 csc in next] 3 times, csc in next 13, [csc in next, 2 csc in next] twice. Join. (44 sts)
Rnd 4: Ch 1, [csc in next 2, 2 csc in next] once, csc in next 13, [csc in next 2, 2 csc in next] 3 times, csc in next 13, [csc in next 2, 2 csc in next] twice. Join. (50 sts)
Rnd 5: Ch 1, [csc in next 3, 2 csc in next] once, csc in next 13, [csc in next 3, 2 csc in next] 3 times, csc in next 13, [csc in next 3, 2 csc in next] twice. Join. (56 sts)
Rnd 6: Ch 1, [csc in next 4, 2 csc in next] once, csc in next 13, [csc in next 4, 2 csc in next] 3 times, csc in next 13, [csc in next 4, 2 csc in next] twice. Join. (62 sts)
Each rnd adds 6 sts, 3 at each curved end. The straight sides stay at 13 sts, which keeps the oval twice as long as it is wide. Check your base against Checkpoint 1.
Walls
Rnd 7 (base ridge): Ch 1, sc in BLO of each st around. Join. (62 sts)
Working in the back loops leaves a ridge that turns the fabric upward, so the base gets a crisp edge.
Rnds 8–24: Ch 1, csc in each st around. Join. (62 sts)
Counting Rnd 7, that’s 18 wall rnds, or about 5.5 in (14.0 cm). Don’t increase in these rnds. Even one extra stitch per rnd will make the walls flare.
Mark the back half: Flatten the basket so the long straight sides become the front and back. Place a marker at each folded end. Count 31 sts along the back and 31 along the front, and adjust the markers if needed. Fasten off.
Back Panel
Work in turned rows over the 31 back sts only. Each row starts with ch 1, which doesn’t count as a stitch. Use plain sc here, because plain sc stays flat in rows and matches the height of the csc rnds closely.
Row 1 (RS): With the RS facing, join yarn in the first back st at the right-hand marker. Ch 1, sc in each of the 31 back sts. (31 sts)
Rows 2–7: Ch 1, turn, sc in each st across. (31 sts)
Row 8: Ch 1, turn, sc2tog, sc in each st to last 2 sts, sc2tog. (29 sts)
Row 9: Repeat Row 8. (27 sts)
Row 10: Repeat Row 8. (25 sts)
Row 11: Repeat Row 8. (23 sts)
Row 12: Ch 1, turn, [sc2tog] twice, sc in each st to last 4 sts, [sc2tog] twice. (19 sts)
Row 13: Repeat Row 12. (15 sts)
Row 14: Repeat Row 12. (11 sts)
Don’t fasten off. Rows 1–7 build straight height. Rows 8–14 round off the top: the single decreases form gentle shoulders, and the double decreases close the arch. The final 11 sts make a short crown where the loop attaches. Check the panel against Checkpoint 3.
Hanging Strap
Ch 22.
Row 1: Sc in 2nd ch from hook and in each ch across. (21 sts)
Row 2: Ch 1, turn, sc in each st across. (21 sts)
Fold the strip in half lengthwise. Sl st through both layers along the long edge to close it into a round cord (21 sl sts). Fasten off, leaving a 12 in (30.5 cm) tail. The cord is about 7 in (17.8 cm) long. Set it aside until after blocking.
Rolled Rim Edging
Edging gauge: Work 1 sc per stitch along the front rim and the panel top, and 1 sc per row end along the panel sides. The sc rows run at 13 rows per 4 in (10.2 cm), so 1 sc per row end matches the fabric, and the sides won’t ruffle or pull in.
Edging Rnd 1: Keep working from the last st of Row 14 with the RS facing. Ch 1, turn, and work around the whole opening as follows:
- Panel top: sc in each st across (11 sts)
- Left panel side: working down, 1 sc in each row end (14 sts)
- Front rim: sc in each of the 31 front sts of Rnd 24 (31 sts)
- Right panel side: working up, 1 sc in each row end (14 sts)
Join to the first sc. (70 sts)
Edging Rnd 2: Ch 1. Don’t turn. Working from left to right, rev sc in each st around. Join. (70 sts)
Fasten off and weave in the ends.
Why the math works:
– The front rim has the same 31 sts as the front half of the wall, so it lies flat without gathering.
– Each panel side gets 1 sc per row, so its 14 rows become 14 sts.
– The top keeps its 11 sts.
That gives 11 + 14 + 31 + 14 = 70 sts. The rev sc round keeps all 70 and twists each stitch into a corded bead. That makes the thick rolled rim and firms up the front edge.
Final Blocking
- Fill the basket firmly with a rolled towel so the walls stand straight.
- Mist the outside evenly until it’s damp but not soaked.
- Flatten the base and shape it to 8 x 4 in (20.3 x 10.2 cm).
- Smooth the walls upward until the front wall measures 5.5 in (14.0 cm).
- Pin the back panel into an even arch. The total back height should be 10.25 in (26.0 cm).
- Roll the rev sc rim between your fingers so it sits evenly.
- Let the basket dry completely (about 24 hours), then remove the filling.
- Fold the strap in half to make a loop. Pin both ends inside the panel top, centered, overlapping the top 1.25 in (3.2 cm) of the panel. Sew through both layers several times. The loop should stand 2.25 in (5.7 cm) above the rim.
Final Quality-Control Checklist
- Base has 62 sts and measures 8 x 4 in (20.3 x 10.2 cm)
- The Rnd 7 ridge shows all the way around
- Walls are 5.5 in (14.0 cm) high and straight
- V-columns line up vertically
- Back panel ends at 11 sts and the arch is symmetrical
- Edging Rnd 1 has 70 sts: 11 top, 14 per side, 31 front
- Rev sc rim is even, with no gaps
- Strap is centered and sewn securely
- Back height is 10.25 in (26.0 cm), plus a 2.25 in (5.7 cm) loop
- All ends are woven in
Troubleshooting
Walls flare: You probably worked into the joining sl st. Recount to 62, or go down a hook size for the walls.
Base cups or ripples: If it cups, loosen your tension on the increases. If it ripples, go down a hook size.
csc is hard to work: Pull each loop up slightly taller before the final yarn over.
Round seam drifts: Always start each rnd in the same st as the join.
Arch is lopsided: Check that both ends of each row in Rows 8–14 have the same decreases.
Rim waves: Rework the panel sides with exactly 14 sc each.
Basket tips forward: Sew the strap ends lower on the inside of the panel.
Care
Hand wash in cool water with mild soap, press out the water in a towel, and reshape. Dry flat over a filled form so the walls keep their shape.
Final Notes
Each measurement builds on the one before it:
– A gauge of 12 csc x 13 rnds = 4 in (10.2 cm) gives a 62-st base measuring 8 x 4 in (20.3 x 10.2 cm).
– 18 straight wall rnds give a 5.5 in (14.0 cm) front wall.
– The 31-st back panel adds 4.25 in (10.8 cm) and ends at 11 sts.
– A 70-st rolled rim brings the back to 10.25 in (26.0 cm).
– The 2.25 in (5.7 cm) loop hangs it on a peg.
Check each measurement as you go and the basket will come out true.
Happy crocheting!