

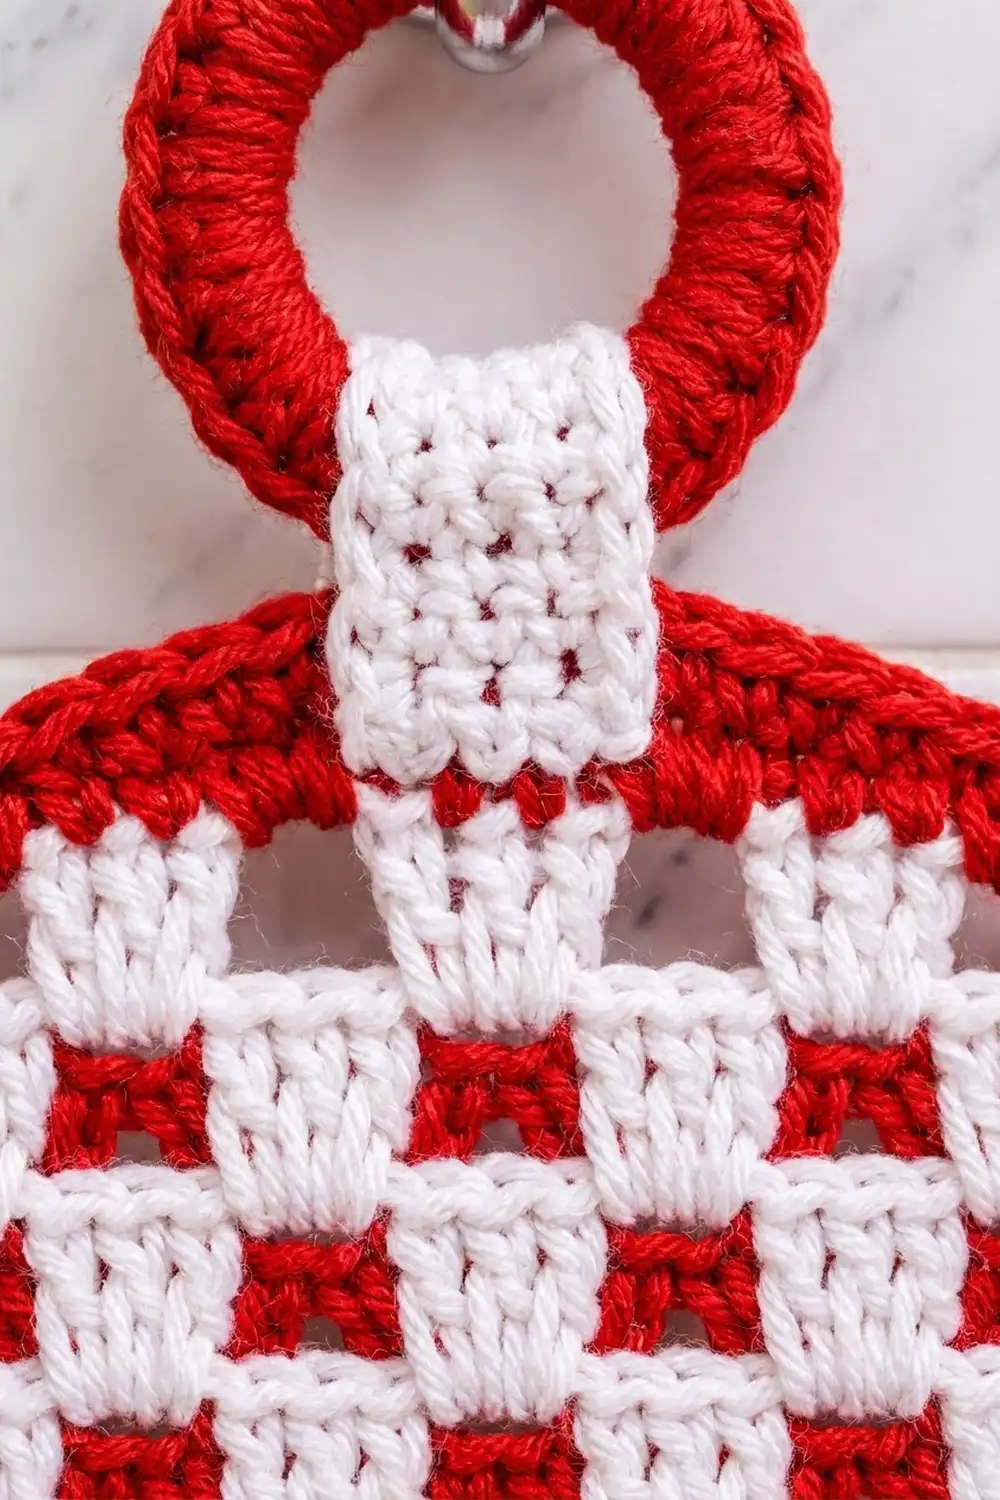
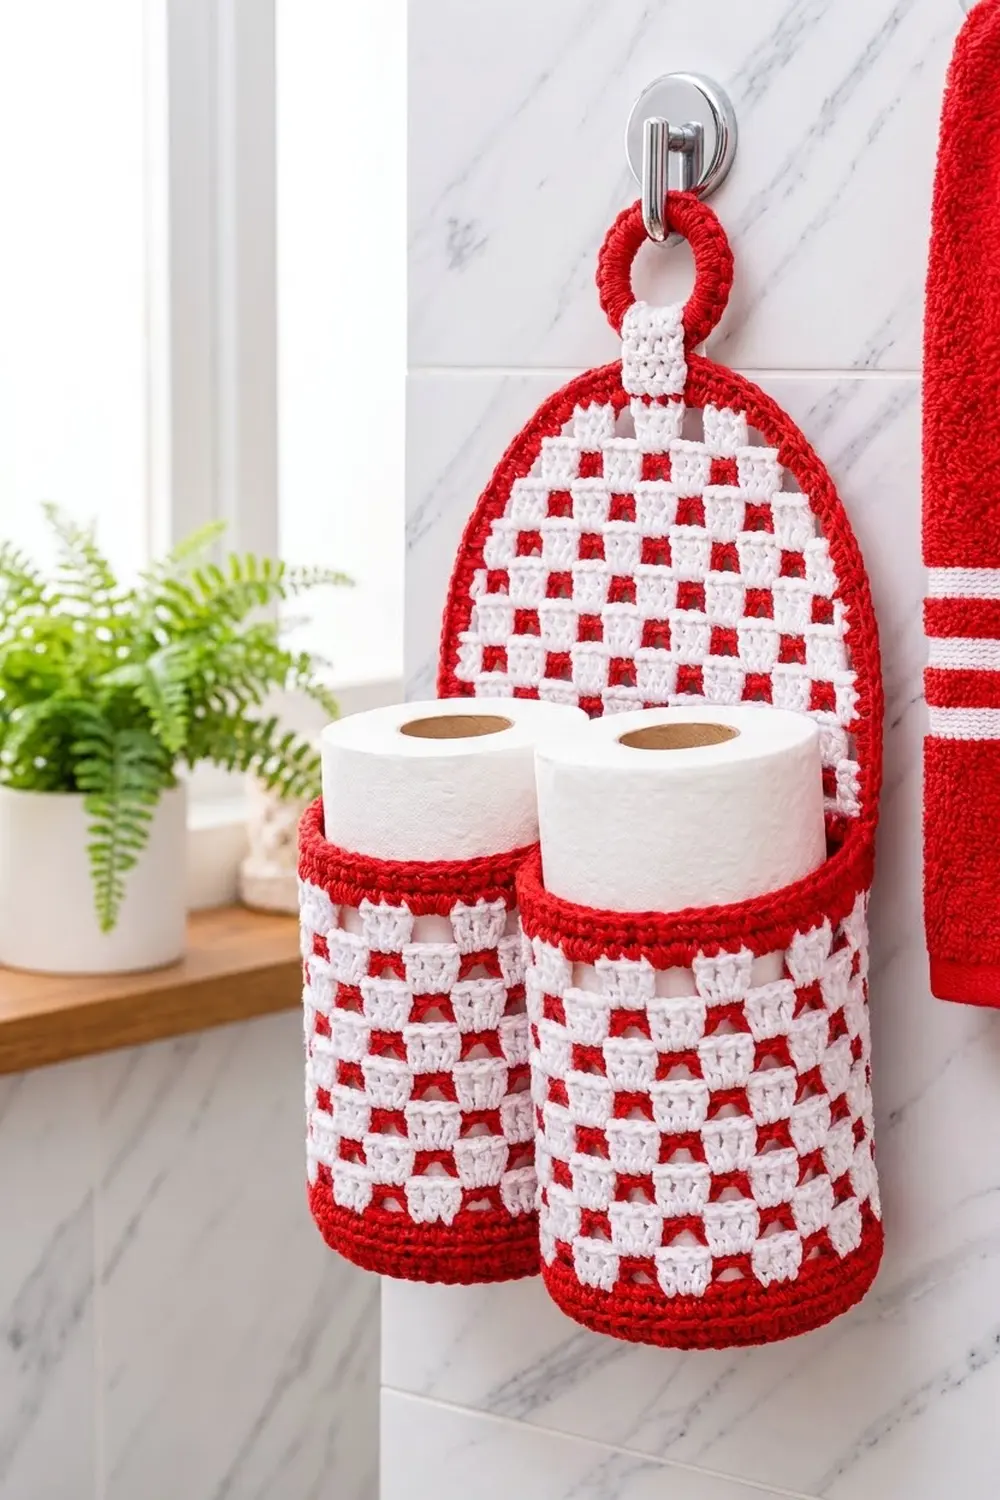
This hanging holder is a cheerful bathroom organizer in bright red and crisp white. The arched back panel and both roll pockets carry the same checkerboard of small double crochet blocks. Solid red edging frames every edge, and a covered ring on a short white tab lets the holder hang from a towel hook.
The style is graphic and a little retro, like a picnic tablecloth folded into something useful. With only two colors, it suits farmhouse, cottage, and bright modern bathrooms alike.
The pattern uses US crochet terms. The finished back panel measures 10 in (25.4 cm) wide by 12.75 in (32.4 cm) tall. Each pocket is a cylinder about 4.75 in (12.1 cm) across and 3.75 in (9.5 cm) tall and holds one standard roll. With the hanger, the total height is about 16.25 in (41.3 cm).
You crochet five pieces: an arched panel worked flat in rows, two pockets worked in the round from a flat base, a covered ring, and a tab. The checkerboard is tapestry crochet, so the unused color is carried inside the stitches. You sew the pockets to the panel and then sew on the hanger.
Finished Size and Construction
- Finished size: panel 10 in x 12.75 in (25.4 cm x 32.4 cm); total height with hanger about 16.25 in (41.3 cm)
- Skill level: Intermediate (tapestry color changes, simple shaping)
- Terminology: US
- Yarn weight: Worsted (#4) cotton
- Hook: 4.0 mm (US G-6)
- Number of pieces: 5 (1 panel, 2 pockets, 1 ring, 1 tab)
- Layout: the two pockets sit side by side across the lower panel, and the hanger is centered on top of the arch
- Pocket size: 4.75 in (12.1 cm) diameter x 3.75 in (9.5 cm) tall
- Panel size before border: 9 in x 11.75 in (22.9 cm x 29.8 cm)
- Border depth: 2 rounds of sc, 0.5 in (1.3 cm)
Materials
Use a smooth, firm worsted-weight yarn in 100% cotton or a cotton blend. Cotton holds its shape in a humid bathroom and keeps the checkerboard crisp. Avoid fuzzy acrylic, which blurs the blocks.
- Red: 160 g, about 245 m (268 yd)
- White: 90 g, about 140 m (153 yd)
Both amounts include a margin of roughly 15%. Tapestry crochet uses more yarn than single-color work because a second strand is carried through every stitch.
Tools:
- 4.0 mm (US G-6) crochet hook
- One 1.5 in (3.8 cm) plastic or metal ring
- Stitch markers
- Tapestry needle
- Scissors
- Measuring tape
- Blocking mats and rust-proof pins
Abbreviations (US Terms)
- ch: chain
- sl st: slip stitch
- sc: single crochet
- dc: double crochet
- BLO: back loop only
- st(s): stitch(es)
- W: white
- R: red
- RS / WS: right side / wrong side
Tapestry dc (special technique): Lay the unused color along the tops of the stitches you are working into. Work each dc over it so the carried strand stays hidden inside. To change color, work the last dc of a block until 2 loops remain, then pull the new color through to finish the stitch. Every color block is 3 dc wide.
Turning chain: In every dc row and round, the ch 2 does not count as a stitch.
Gauge and Checkpoints
- Tapestry dc: 16 sts and 8 rows = 4 in (10.2 cm), or 4 sts and 2 rows per inch
- Single crochet: 16 sts and 16 rows = 4 in (10.2 cm), or 4 sts and 4 rows per inch
Before anything else, make one pocket base (Rounds 1-5) as your test piece. It should lie flat and measure 4.75 to 5 in (12.1 to 12.7 cm) across.
Checkpoints:
- Pocket base after Round 5: 4.75 in (12.1 cm) across
- Pocket after Round 12: 3.25 in (8.3 cm) tall from the base ridge
- Panel after Row 9 (8 checker rows): 9 in (22.9 cm) wide, 4.25 in (10.8 cm) tall
- Panel after Row 24: 11.75 in (29.8 cm) tall
If your pieces are too big, go down 0.5 mm. If they are too small, go up 0.5 mm. Tapestry crochet tends to tighten, so measure gauge on the checker rows, not on the plain rows.
Pockets (Make 2)
Each pocket starts as a flat red base, and the walls rise from a BLO ridge.
Base
With R, make a magic ring.
Rnd 1: ch 2, 12 dc in ring, sl st to first dc. (12 sts)
Rnd 2: ch 2, 2 dc in each st around, sl st to first dc. (24 sts)
Rnd 3: ch 2, *dc in next st, 2 dc in next st; rep from * around, sl st to first dc. (36 sts)
Rnd 4: ch 2, *dc in next 2 sts, 2 dc in next st; rep from * around, sl st to first dc. (48 sts)
Rnd 5: ch 2, *dc in next 3 sts, 2 dc in next st; rep from * around, sl st to first dc. (60 sts)
Checkpoint: the base measures 4.75 in (12.1 cm) across when laid flat.
Walls
Rnd 6: ch 1, sc in BLO of each st around, sl st to first sc. (60 sts) The unused front loops form a crisp ridge where the base turns up into the wall.
Join W and carry it along the stitch tops.
Rnd 7: ch 2, *3 W tapestry dc, 3 R tapestry dc; rep from * 9 more times, sl st to first dc. (60 sts: 10 white blocks, 10 red blocks)
Rnd 8: ch 2, *3 R tapestry dc, 3 W tapestry dc; rep from * 9 more times, sl st to first dc. (60 sts)
Rnds 9-12: Repeat Rnds 7 and 8 twice more. (60 sts each; 6 checker rounds in total)
Each round has 20 blocks, so starting the next round with the other color puts white over red and red over white. That offset is what creates the checkerboard. Cut W after Rnd 12.
Rnds 13-14: With R only, ch 1, sc in each st around, sl st to first sc. (60 sts each)
Fasten off and weave in the ends. The wall is 3.75 in (9.5 cm) tall: 0.25 in (0.6 cm) for Rnd 6, 3 in (7.6 cm) of checker rounds, and a 0.5 in (1.3 cm) rim. The 60 stitches measure 15 in (38.1 cm) around, which gives a diameter of 4.75 in (12.1 cm).
Back Panel
The panel is worked flat from the bottom up: 16 straight checker rows first, then 7 shaped rows for the arch.
Straight Section
With R, ch 37.
Row 1: sc in 2nd ch from hook and in each ch across, turn. (36 sts)
Join W and carry it from here on.
Rows 2-17: ch 2, *3 W tapestry dc, 3 R tapestry dc; rep from * 5 more times, turn. (36 sts each: 6 white blocks, 6 red blocks)
Every row reads the same, but turning the work reverses the block order. Each white block lands over a red block, so the checkerboard forms automatically. Checkpoint after Row 17: 9 in (22.9 cm) wide and 8.25 in (21.0 cm) tall.
Arch Shaping
Beginning decrease of n: sl st in the first n sts, ch 2, then begin the row in the next st. Work the sl sts in R while carrying W.
End decrease of n: leave the last n sts unworked.
The stitch columns stay aligned with the rows below, so every block stays in its grid position. Only the edge blocks get shorter.
Row 18: dec 1, 2 W, *3 R, 3 W; rep from * 4 more times, 2 R, dec 1, turn. (34 sts)
Row 19: dec 1, 1 W, *3 R, 3 W; rep from * 4 more times, 1 R, dec 1, turn. (32 sts)
Row 20: dec 1, *3 R, 3 W; rep from * 4 more times, dec 1, turn. (30 sts)
Row 21: dec 1, 2 R, *3 W, 3 R; rep from * 3 more times, 2 W, dec 1, turn. (28 sts)
Row 22: dec 2, *3 W, 3 R; rep from * 3 more times, dec 2, turn. (24 sts)
Row 23: dec 2, 1 W, *3 R, 3 W; rep from * 2 more times, 1 R, dec 2, turn. (20 sts)
Row 24: dec 3, 1 R, 3 W, 3 R, 3 W, 3 R, 1 W, dec 3. (14 sts)
Fasten off both colors. Each side loses 11 stitches (1+1+1+1+2+2+3), and 36 – 22 = 14. Checkpoint: the panel is 11.75 in (29.8 cm) tall, and the arch rises 3.5 in (8.9 cm) above Row 17.
Make All Pieces
Totals:
- Pockets: 2 (red bases and rims; red-and-white walls)
- Back panel: 1 (red and white)
- Covered ring: 1 (red)
- Tab: 1 (white)
Covered Ring
With R, attach the yarn to the ring with a sl st. Work 32 sc tightly around the ring, adding a few if needed to cover it completely. Sl st to the first sc and fasten off. The covered ring measures about 2 in (5.1 cm) across.
Tab
With W, ch 7.
Row 1: sc in 2nd ch from hook and in each ch across, turn. (6 sts)
Rows 2-10: ch 1, sc in each st across, turn. (6 sts each)
Fasten off, leaving a 12 in (30.5 cm) tail. The tab measures 1.5 in x 2.5 in (3.8 cm x 6.4 cm).
Layout (front view):
            ( O )        <- covered ring
            [ T ]        <- white tab
        /‾‾‾‾‾‾‾‾‾‾‾\
       /  checkered  \
      |  arch panel   |
      |  ___    ___   |
      | |   |  |   |  |
      | | P |  | P |  |  <- two pockets
      | |___|  |___|  |
       ‾‾‾‾‾‾‾‾‾‾‾‾‾‾‾
Border
Add the border to the panel before joining. Border gauge is 4 sc per inch, and each round adds 0.25 in (0.6 cm) on every edge.
Border Rnd 1: With RS facing, join R at the bottom right corner, in the underside of the foundation chain. Work 3 sc in the corner ch, sc in the next 34 ch, then 3 sc in the last ch (corner). Continue around the panel:
- Left straight side: 2 sc in each row-end of Rows 2-17. (32 sts)
- Left arch edge: 2 sc in each row-end of Rows 18-24, plus 1 sc in each exposed decreased st. (14 + 11 = 25 sts)
- Top of Row 24: 1 sc in each st. (14 sts)
- Right arch edge: work as for the left arch edge. (25 sts)
- Right straight side: work as for the left straight side. (32 sts)
Sl st to the first sc. Total: 168 sts (34 bottom + 6 corner + 64 straight sides + 64 arch).
Border Rnd 2: ch 1, sc in each st around, working 3 sc in the center st of each bottom corner group. Sl st to the first sc and fasten off. Total: 172 sts (168 + 2 per corner).
Why the math works: Each dc row is 0.5 in (1.3 cm) tall. Two sc per row-end at 4 sc per inch covers exactly 0.5 in. Along the bottom and top, 1 sc per stitch matches the panel’s 4 sts per inch, so the edges neither ruffle nor pull in. The two rounds add 0.5 in (1.3 cm) on each side: 9 in (22.9 cm) becomes 10 in (25.4 cm), and 11.75 in (29.8 cm) becomes 12.75 in (32.4 cm).
Joining
Use whipstitch with a long R tail and a tapestry needle.
Pockets to panel: Place both pockets side by side on the RS of the panel, with their bases flush with the bottom edge. They touch at the center and leave a 0.25 in (0.6 cm) margin at each side: 2 x 4.75 in = 9.5 in (24.1 cm) on a 10 in (25.4 cm) panel. Mark two vertical lines on the back of each pocket, 6 sts (1.5 in / 3.8 cm) apart. Whipstitch along each line from Rnd 6 to Rnd 14.
Stitch-to-stitch logic: Each pocket dc round is 0.5 in (1.3 cm) tall, the same as one panel dc row. Take 2 whipstitches per dc round and 1 per sc round, so each seam is exactly as long as the pocket wall.
Pockets to each other: Where the pockets touch, tack the rims (Rnds 13-14) together with 3 stitches, then do the same at the base ridges (Rnd 6).
Hanger: Fold the top 2 rows of the tab over the ring and sew them down, leaving 2 in (5.1 cm) of tab visible. Center the bottom 0.5 in (1.3 cm) of the tab over the top border on the front of the panel and whipstitch around its edges.
Tension: Keep the stitches snug but not tight. Pulled seams pucker the panel.
Size checkpoint: The joined holder measures 10 in (25.4 cm) wide and about 16.25 in (41.3 cm) from the bottom edge to the top of the ring.
Final Blocking
- Lightly mist the holder with water, or steam it with the iron held above the fabric.
- Pin the panel flat at 10 in x 12.75 in (25.4 cm x 32.4 cm).
- Ease the arch into a smooth curve, pinning every 1 in (2.5 cm).
- Put a rolled towel or a spare roll in each pocket to round it out.
- Let everything dry completely, which takes 12 to 24 hours.
- Unpin and measure again.
Final Quality-Control Checklist
- The checkerboard alternates cleanly, with no two same-color blocks stacked.
- No carried strands show on the RS.
- The pocket bases lie flat with a crisp ridge.
- The arch is symmetrical.
- The border lies flat without ruffling.
- The pockets are level and touch at the center.
- The tab is centered and the ring is fully covered.
- All ends are woven in securely.
Troubleshooting
- Carried yarn peeks through: Hold the carried strand tight against the stitch tops.
- Pocket flares outward: The checker rounds are too loose. Go down 0.5 mm for the walls.
- Base cups: Your dc is tight. Go up 0.5 mm for the base, or block it flat under weight.
- Panel narrows: You are skipping the last stitch. Count 36 stitches in every straight row.
- Arch looks stepped: On Border Rnd 1, work 1 extra sc in each outer step corner.
- Border ripples: Work 2 sc per row-end, not 3.
Care
Hand wash in cool water with mild soap and lay flat to dry. While the pockets are still damp, reshape them around a roll.
Final Notes
The measurement chain is short. At a gauge of 4 dc per inch, 60 stitches make a 4.75 in (12.1 cm) pocket and 36 stitches make a 9 in (22.9 cm) panel. The two-round border brings the panel to 10 in x 12.75 in (25.4 cm x 32.4 cm). The hanger adds 3.5 in (8.9 cm), for a total height of 16.25 in (41.3 cm). Check gauge early and count every row.
Happy crocheting!