

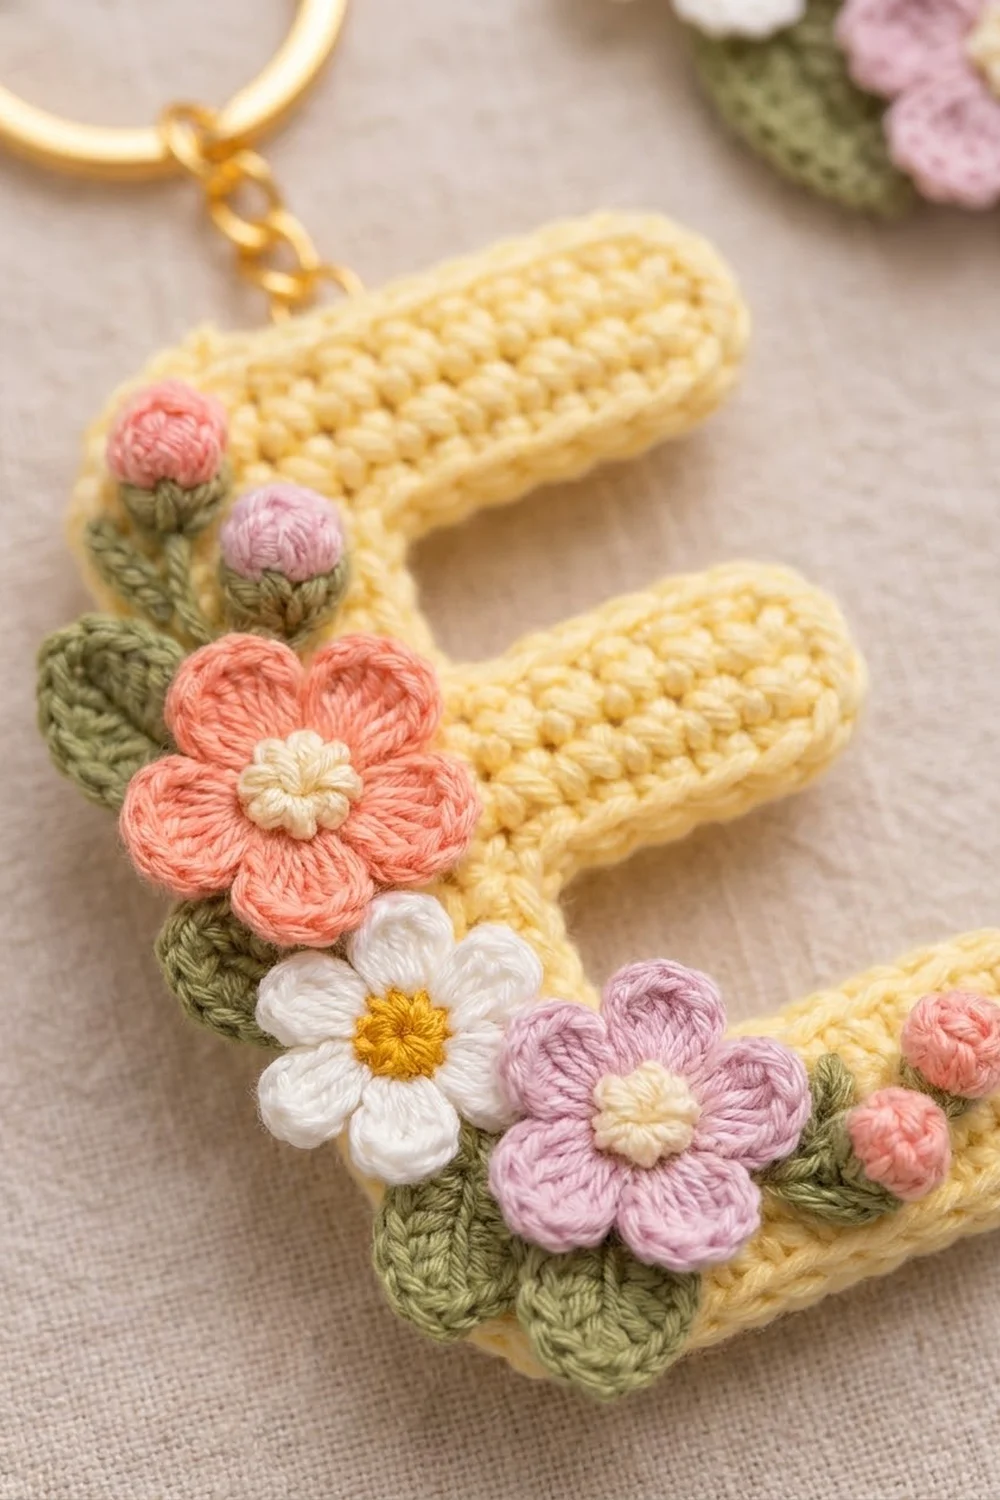
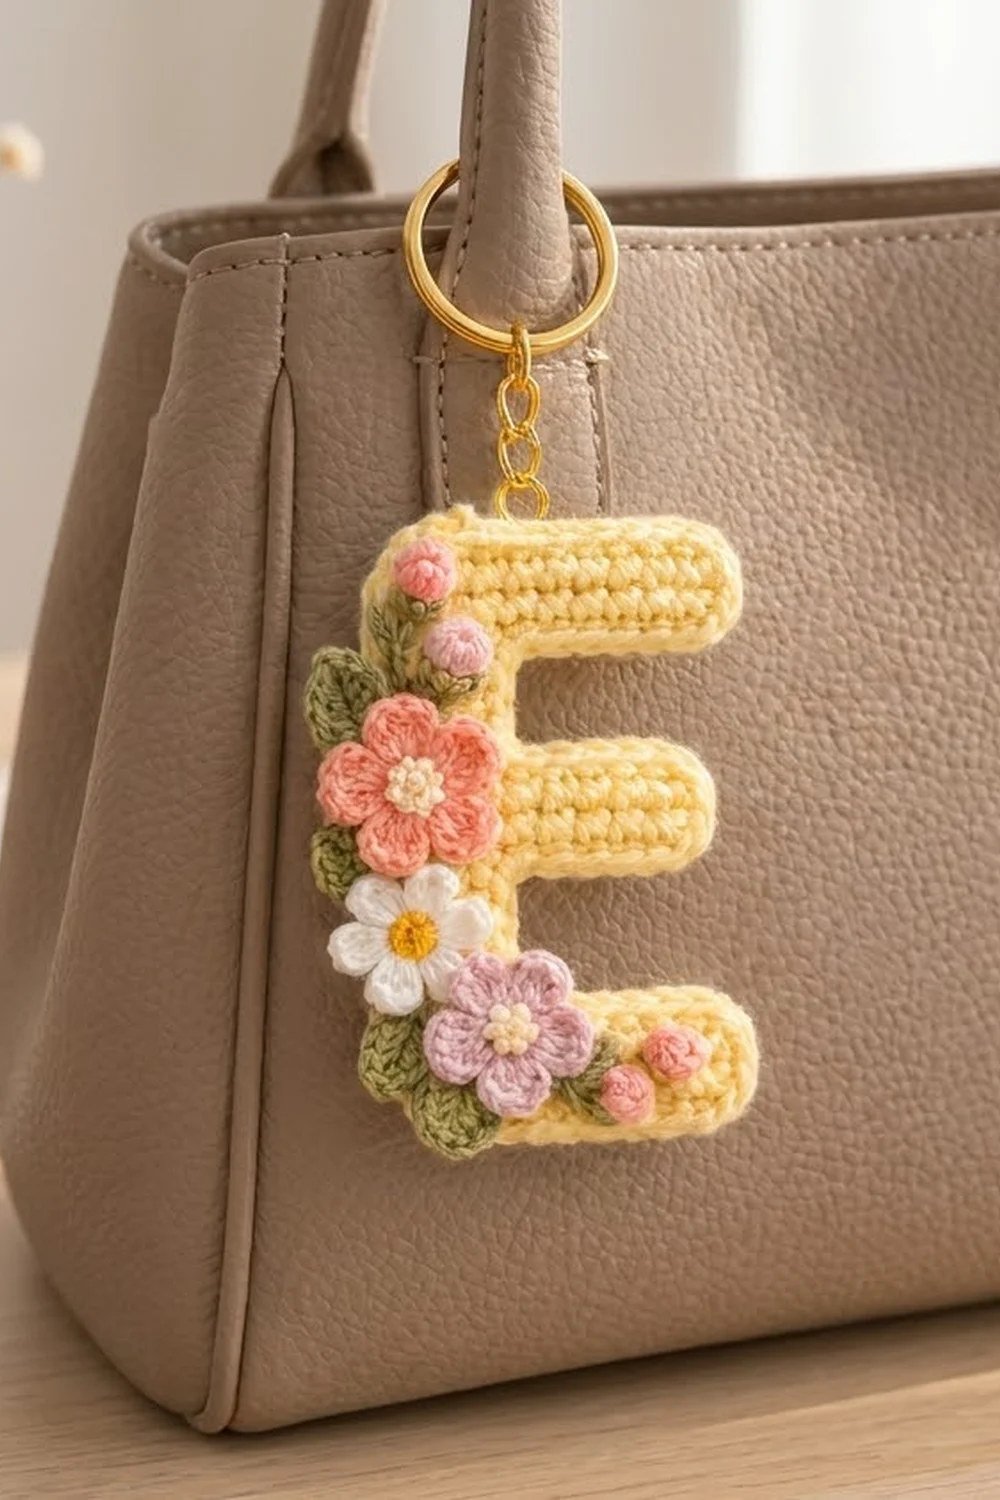
This Spring Posy Letter E is a small, flat monogram keychain worked in soft butter-yellow cotton. The letter has a firm single crochet fabric, gently rounded corners, and a neat raised edge around the whole outline. A small posy of flowers runs down the left side of the spine and wraps onto the bottom arm.
The flowers use a soft pastel palette: one coral flower and one lilac-pink flower with cream centers, a white daisy with a golden center, four tiny pink buds, and five sage-green leaves. A gold split ring on a short chain attaches at the top-left corner, ready for a bag handle or a set of keys.
The pattern uses US crochet terms. With the border, the finished letter measures 2.75 in wide x 4.25 in tall (7.0 cm x 10.8 cm).
Construction is simple. You work the letter flat in rows from the bottom up, adding chains to build the middle and top arms. One round of single crochet goes around the whole shape. Then you make the small flowers, buds, and leaves separately and sew them along the spine.
Finished Size and Construction
- Finished size: 2.75 in x 4.25 in (7.0 cm x 10.8 cm)
- Skill level: Easy
- Terminology: US crochet terms
- Yarn weight: DK / light (#3) cotton
- Hook: 2.75 mm (US C-2)
- Number of pieces: 1 letter + 12 small appliqués (3 flowers, 4 buds, 5 leaves)
- Layout: One single letter, not part of a larger joined project
- Letter size before border: 2.5 in x 4 in (6.4 cm x 10.2 cm)
- Border depth: 1 round of sc, about 0.125 in (0.3 cm) on each side
Materials
Use a smooth, soft or mercerized DK-weight cotton of about 120 m per 50 g. Cotton gives crisp stitches and keeps the letter flat. Avoid fuzzy yarns, because they blur the outline.
- Color A, butter yellow (letter): 10 g / 24 m
- Color B, coral (large flower): 3 g / 7 m
- Color C, lilac pink (second flower): 2 g / 5 m
- Color D, white (daisy petals): 2 g / 5 m
- Color E, light pink (buds): 2 g / 5 m
- Color F, sage green (leaves): 3 g / 7 m
- Color G, cream (flower centers): 1 g / 2 m
- Color H, golden yellow (daisy center): 1 g / 2 m
All quantities include a margin for a gauge swatch and sewing tails.
Tools:
– 2.75 mm (US C-2) crochet hook
– Tapestry needle with a sharp tip
– Gold split key ring, 1 in (2.5 cm), with a 0.4 in (1.0 cm) chain and a jump ring
– 2 pairs of small pliers
– Stitch markers
– Blocking mat, rustproof pins, and a spray bottle
– Ruler or tape measure
Abbreviations (US Terms)
- ch – chain
- sl st – slip stitch
- sc – single crochet
- hdc – half double crochet
- dc – double crochet
- sc2tog – single crochet 2 together
- MR – magic ring
- st(s) – stitch(es)
- RS – right side
Special stitch – sc2tog across a corner: Insert the hook in the first position named, yarn over, and pull up a loop. Insert the hook in the second position, yarn over, and pull up a loop. Yarn over and draw through all 3 loops. In the border, the two positions are a stitch and a row end, so one sc2tog turns an inner corner neatly.
Gauge and Checkpoints
Gauge: 6 sc and 7 rows = 1 in (2.5 cm) in sc worked in rows.
Make a test piece first: ch 19, then work 14 rows of 18 sc. It should measure 3 in x 2 in (7.6 cm x 5.1 cm). Rows 1–7 of the letter make a plain rectangle, so you can use them as a second check.
Checkpoints:
- After Row 7: 2.5 in wide x 1 in tall (6.4 cm x 2.5 cm)
- After Row 12: about 1.7 in (4.3 cm) total height; the spine is 0.8 in (2.0 cm) wide
- After Row 17: about 2.4 in (6.1 cm) total height; the middle arm is 2.2 in (5.6 cm) long
- After Row 22: about 3.1 in (7.9 cm) total height
- After Row 28: 2.5 in x 4 in (6.4 cm x 10.2 cm)
- After the border: 2.75 in x 4.25 in (7.0 cm x 10.8 cm)
If your piece is too big, try a 2.5 mm hook. If it is too small, try a 3.0 mm hook. Change the hook rather than the stitch counts, because the border math depends on the exact counts.
Letter E
Work with Color A. The turning ch 1 does not count as a stitch. The letter is worked from bottom to top. The edge where you started (the slipknot side) becomes the left spine edge of the E.
Bottom Arm
Row 1: Ch 16. Sc in 2nd ch from hook and in each ch across. (15 sts)
Rows 2–7: Ch 1, turn. Sc in each st across. (15 sts)
Row 7 ends at the slipknot edge, which is the spine edge.
Lower Spine Gap
Row 8: Ch 1, turn. Sc in next 5 sts. Leave the remaining 10 sts unworked. (5 sts)
Rows 9–12: Ch 1, turn. Sc in each st across. (5 sts)
Row 12 ends at the inner edge of the spine, ready for the middle arm.
Middle Arm
Row 13: Ch 9. Sc in 2nd ch from hook and in next 7 ch (8 sc). Sc in each of the 5 spine sts. (13 sts: 8 new + 5 spine)
Rows 14–17: Ch 1, turn. Sc in each st across. (13 sts)
Row 17 ends at the spine edge.
Upper Spine Gap
Row 18: Ch 1, turn. Sc in next 5 sts. Leave the remaining 8 sts unworked. (5 sts)
Rows 19–22: Ch 1, turn. Sc in each st across. (5 sts)
Top Arm
Row 23: Ch 11. Sc in 2nd ch from hook and in next 9 ch (10 sc). Sc in each of the 5 spine sts. (15 sts: 10 new + 5 spine)
Rows 24–28: Ch 1, turn. Sc in each st across. (15 sts)
Row 28 ends at the top-right corner. Do not fasten off. The letter now measures 2.5 in x 4 in (6.4 cm x 10.2 cm). The bottom arm is 1 in (2.5 cm) tall, the middle arm 0.7 in (1.8 cm), the top arm 0.9 in (2.3 cm), and each gap 0.7 in (1.8 cm).
Border
The border is one round of sc. It smooths the edges, rounds the outer corners, and gives the letter its slightly raised outline.
Border gauge: Work 1 sc in every stitch or chain loop along the horizontal edges (6 per in). Work 1 sc in every row end along the vertical edges (7 per in, matching the row gauge). This keeps every edge flat.
Corner rules:
– Outer (convex) corners, 8 total: Work 2 sc in the corner stitch. Two stitches instead of the usual three give a soft, rounded corner instead of a square point.
– Inner (concave) corners, 4 total: Work sc2tog across the last position of one edge and the first position of the next.
Round 1: Ch 1, do not turn. Rotate to work down the right end of the top arm, then continue around:
- Top arm end (Rows 28–23 row ends): 1 sc in each. (6 sc)
- Top arm underside (chain loops of Row 23): 2 sc in first loop (corner), sc in next 8 loops. (10 sc, 9 loops used)
- Inner corner: sc2tog over the last chain loop and the Row 22 row end. (1 st)
- Upper gap (Rows 21–19 row ends): 1 sc in each. (3 sc)
- Inner corner: sc2tog over the Row 18 row end and the first exposed st of Row 17. (1 st)
- Top of middle arm (Row 17): sc in next 6 sts, 2 sc in last st (corner). (8 sc, 7 sts used)
- Middle arm end (Rows 17–13 row ends): 1 sc in each. (5 sc)
- Middle arm underside (chain loops of Row 13): 2 sc in first loop (corner), sc in next 6 loops. (8 sc, 7 loops used)
- Inner corner: sc2tog over the last chain loop and the Row 12 row end. (1 st)
- Lower gap (Rows 11–9 row ends): 1 sc in each. (3 sc)
- Inner corner: sc2tog over the Row 8 row end and the first exposed st of Row 7. (1 st)
- Top of bottom arm (Row 7): sc in next 8 sts, 2 sc in last st (corner). (10 sc, 9 sts used)
- Bottom arm end (Rows 7–1 row ends): 1 sc in each. (7 sc)
- Bottom edge (foundation loops): 2 sc in first loop, sc in next 13 loops, 2 sc in last loop. (17 sc)
- Left spine edge (Rows 1–28 row ends): 1 sc in each. (28 sc)
- Top edge (Row 28): 2 sc in first st, sc in next 13 sts, 2 sc in last st. (17 sc)
Sl st to the first sc. (126 sts) Fasten off and weave in the ends.
Why the math works: The letter has 122 edge positions: 6 + 10 + 5 + 8 + 5 + 8 + 5 + 10 + 7 + 15 + 28 + 15. Each of the 8 outer corners adds 1 stitch (+8). Each of the 4 inner corners merges 2 positions into 1 (−4). So 122 + 8 − 4 = 126, which matches the sum of the step totals above.
Flowers, Buds, and Leaves
Leave a 6 in (15.2 cm) tail on every piece for sewing.
Coral Flower (make 1)
Rnd 1 (Color G): 5 sc in MR. Pull closed. Sl st to first sc. Fasten off. (5 sts)
Rnd 2 (Color B): Join in any sc. In each sc around: (sl st, ch 2, 3 dc, ch 2, sl st). (5 petals)
Fasten off. Size: about 1 in (2.5 cm) across.
Lilac Flower (make 1)
Rnd 1 (Color G): 5 sc in MR. Sl st to first sc. Fasten off. (5 sts)
Rnd 2 (Color C): Join in any sc. In each sc around: (sl st, ch 1, hdc, dc, hdc, ch 1, sl st). (5 petals)
Size: about 0.9 in (2.3 cm) across.
White Daisy (make 1)
Rnd 1 (Color H): 5 sc in MR. Sl st to first sc. Fasten off. (5 sts)
Rnd 2 (Color D): Join in any sc. In each sc around: (sl st, ch 1, 3 hdc, ch 1, sl st). (5 petals)
Size: about 0.8 in (2.0 cm) across.
Buds (make 4)
Rnd 1 (Color E): 6 sc in MR. Do not join. (6 sts)
Rnd 2: Sc2tog 3 times. (3 sts)
Tuck the starting tail inside as filling, then close the hole with the working tail. Each bud is about 0.3 in (0.8 cm) across.
Leaves (make 5)
With Color F, ch 6. Sc in 2nd ch from hook, hdc in next ch, dc in next ch, hdc in next ch, then (sc, ch 2, sc) in the last ch for the pointed tip. Working along the opposite side of the chain: hdc in next ch, dc in next ch, hdc in next ch, sc in next ch. Sl st to the first sc. (10 sts + ch-2 tip)
Each leaf is about 0.8 in (2.0 cm) long.
Attaching the Posy and Ring
Lay the letter RS up with the spine on the left. Pin all the pieces before sewing:
- Top-left corner: Place 1 bud on the corner and a second bud just below and to its right. Tuck 2 leaves behind them, pointing out past the left edge.
- Upper spine: Center the coral flower on the spine, level with the upper gap. Tuck 1 leaf behind its left side.
- Lower spine: Place the white daisy just below the coral flower, slightly overlapping its lower petal.
- Bottom-left corner: Place the lilac flower so it overlaps onto the bottom arm. Tuck 2 leaves behind the daisy and the lilac flower.
- Bottom arm: Place 2 buds side by side, to the right of the lilac flower.
Sew the leaves first, then the flowers, then the buds, so each layer sits on top of the one before. Stitch through the center ring and a few points on each petal. Keep the stitches small and hidden. Don’t pull the thread too tight, or the letter will pucker.
Open the jump ring with two pliers. Pass it through the border at the top-left corner, between the 2 corner sc. Add the chain and split ring, then close the jump ring fully.
Final Blocking
- Mist the letter lightly until it is damp, not soaked.
- Pin the letter RS up on the mat, spine on the left.
- Measure and pin to 2.75 in x 4.25 in (7.0 cm x 10.8 cm).
- Pin each arm tip so the arm edges run straight and parallel.
- Press the outer corners gently into soft curves with your fingertip.
- Leave the flowers unpinned so they stay dimensional.
- Let it dry completely, about 6–8 hours.
- Unpin and check the measurements again.
Final Quality-Control Checklist
- Letter sections have 15, 5, 13, 5, and 15 sts
- Border total is exactly 126 sts
- Size is 2.75 in x 4.25 in (7.0 cm x 10.8 cm)
- All 8 outer corners are rounded and all 4 inner corners are crisp
- The arms are parallel and the spine is straight
- 3 flowers, 4 buds, and 5 leaves are sewn on securely
- No sewing stitches show on the front
- The jump ring is fully closed with no gap
- All ends are woven in and trimmed
Troubleshooting
Letter is wider than 2.5 in (6.4 cm): Your tension is loose. Go down one hook size.
Border ruffles: You probably added extra sts along an edge. Recount each edge against the step totals.
Border pulls in: Check that you worked into every row end and skipped none.
Outer corners look pointed: Use 2 sc, not 3, in each corner stitch.
Inner corners gape: Make sure each sc2tog spans both the stitch and the row end.
Letter curls: Block it again, pinning firmly along every edge.
Flowers flop forward: Add 2–3 tacking stitches through each petal.
Care
Hand wash in cool water with mild soap and lay flat to dry. Cover the metal ring while washing to protect its finish.
Final Notes
The whole design follows one measurement chain. A gauge of 6 sc and 7 rows per inch gives a body of 15 sts x 28 rows, or 2.5 in x 4 in (6.4 cm x 10.2 cm). The 126-st border adds 0.125 in (0.3 cm) on each side, so the finished letter is 2.75 in x 4.25 in (7.0 cm x 10.8 cm). The posy sits along the spine without changing the outline.
Check your gauge, count each section, and the border will come out right.
Happy crocheting!