

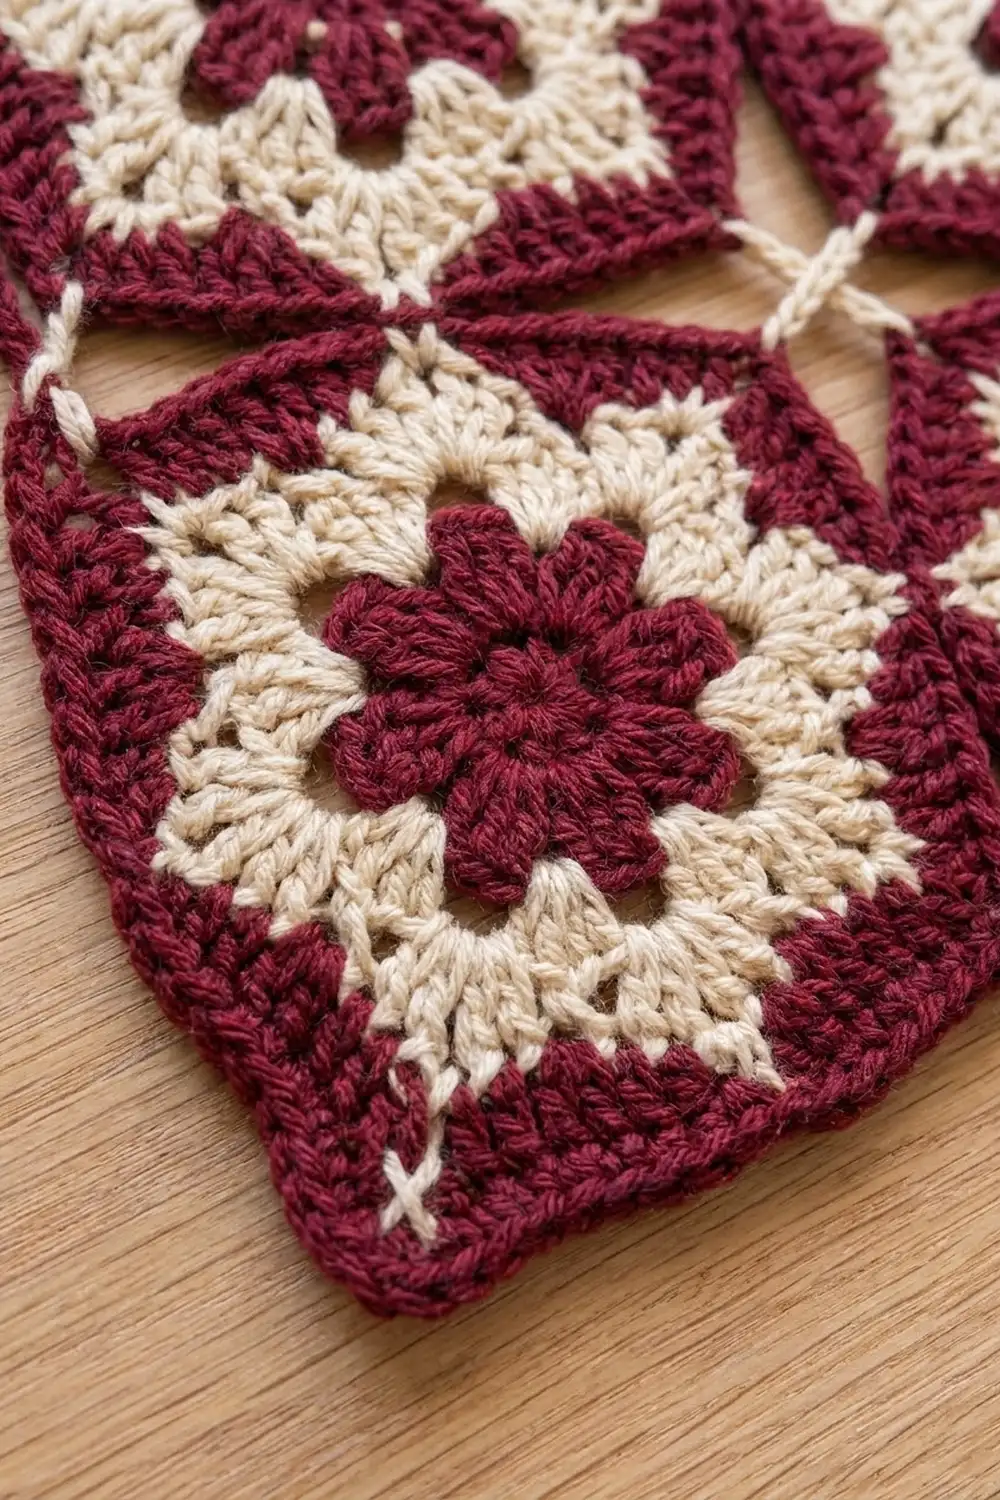
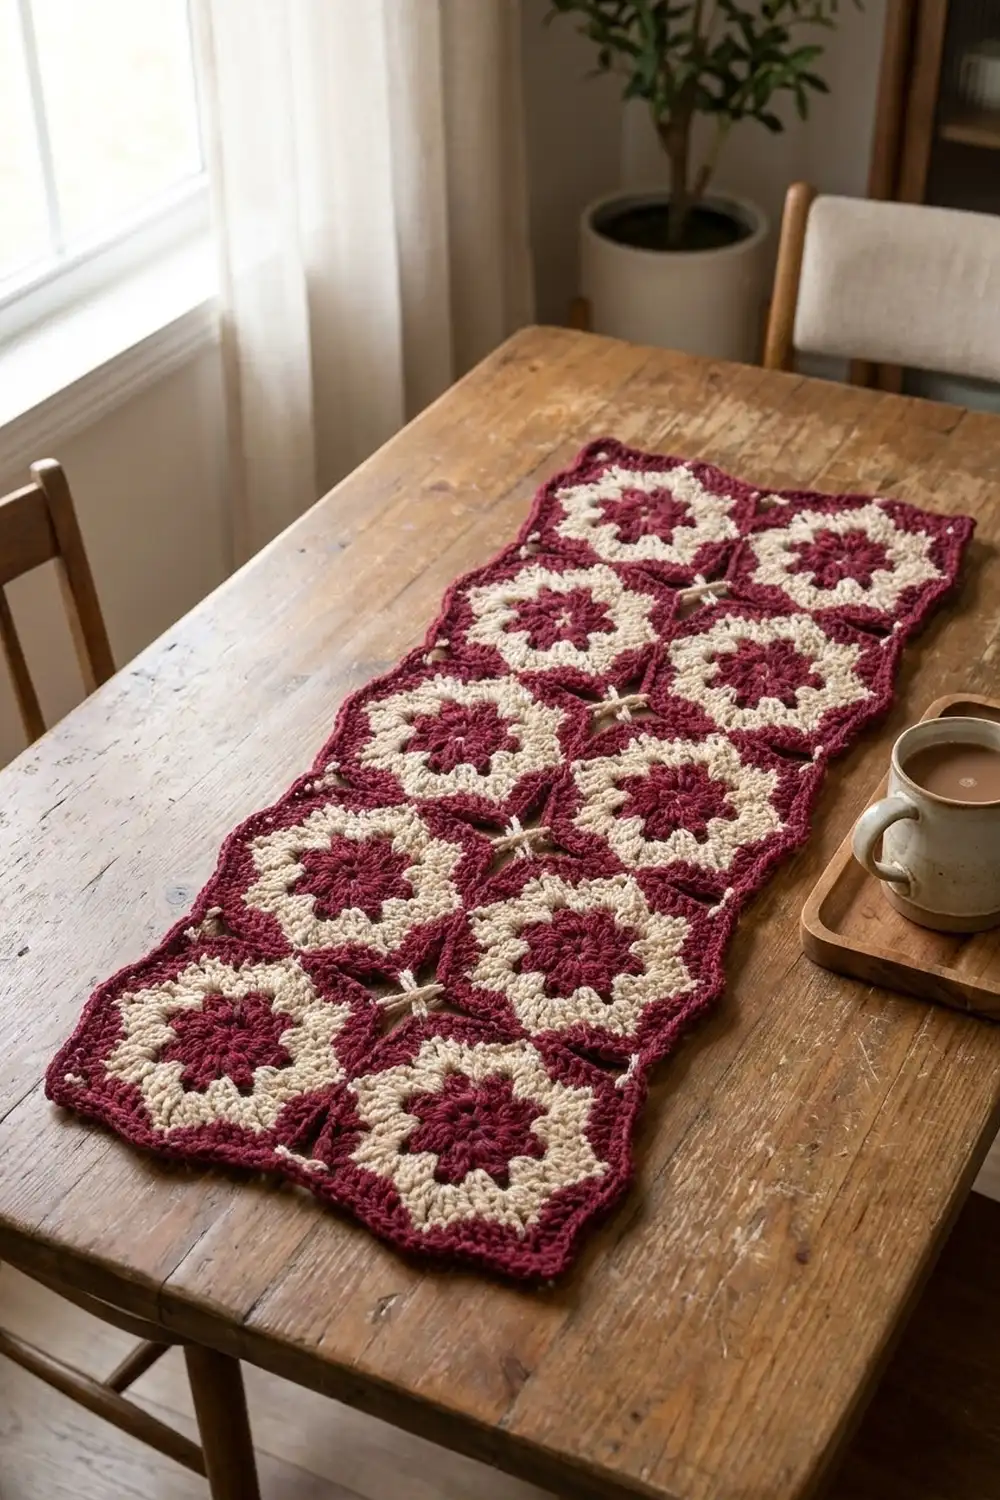
The Burgundy Starbloom Panel is a flat rectangle of twelve granny squares joined in a 3 x 4 grid. Each square has a deep burgundy eight-petal flower at its center, with a creamy star-shaped ring around it. A solid burgundy frame then pulls the motif into a softly curved square.
Where four squares meet, a cream “X” crosses a small opening. These crosses give the panel a tidy lattice rhythm. The two-color palette looks warm and classic, so the panel works as a table mat, a chair-back panel, or a wall piece.
This pattern uses US crochet terms. After blocking, the finished panel measures 15.5 x 20.5 in (39.4 x 52.1 cm), including a narrow rope-edge border.
How it’s made: crochet twelve identical 5-round squares and slip-stitch them into four rows of three. Then embroider cream crosses at the inner junctions and work a two-round border around the panel.
Finished Size and Construction
- Finished size: 15.5 x 20.5 in (39.4 x 52.1 cm)
- Skill level: Easy-intermediate (clusters, crab stitch)
- Terminology: US crochet terms
- Yarn weight: Worsted (#4), smooth cotton or cotton blend
- Hook: 5 mm (H-8)
- Number of pieces: 12 identical squares
- Layout: 3 squares wide x 4 squares tall
- Single square size: 5 x 5 in (12.7 x 12.7 cm)
- Size before border: 15 x 20 in (38.1 x 50.8 cm)
- Border depth: 0.25 in (0.6 cm) on each side
Materials
Choose a smooth worsted cotton or cotton-acrylic blend with good stitch definition. Fuzzy yarn will blur the petals. The amounts below assume a yarn of roughly 190 m per 100 g.
- Burgundy (Color B): 100 g, about 190 m (centers, frames, joining, border)
- Cream (Color C): 70 g, about 133 m (star rings, junction crosses)
The quantities include a margin of roughly 15-20% for swatching and differences in tension.
Tools:
- 5 mm (H-8) crochet hook
- Tapestry needle
- Scissors
- Stitch markers
- Measuring tape
- Blocking mat, rust-proof pins, spray bottle
Abbreviations (US Terms)
- ch – chain
- sl st – slip stitch
- sc – single crochet
- hdc – half double crochet
- dc – double crochet
- tr – treble crochet
- sp – space
- st(s) – stitch(es)
- sk – skip
- rev sc – reverse single crochet (crab stitch)
- RS / WS – right side / wrong side
Special stitches:
- 3-dc cluster (cl): *Yarn over, insert hook in st, pull up a loop, yarn over, pull through 2 loops; repeat from * 2 more times in the same st (4 loops on hook), yarn over, pull through all 4 loops.
- Beginning cluster (beg cl): Ch 2, then work a 2-dc cluster in the same st. The ch-2 acts as the first leg.
- Reverse single crochet (rev sc): Working from left to right (if you crochet right-handed), insert the hook in the next st to the right, pull up a loop, yarn over, and pull through both loops.
Gauge and Checkpoints
Before anything else, make one complete square and block it lightly. This square is your gauge swatch.
Target: one square = 5 x 5 in (12.7 x 12.7 cm), measured edge to edge across the middle. Along Round 5, 21 hdc should span 5 in (12.7 cm), which is 4.2 hdc per inch.
Checkpoints (laid flat):
- After Round 1: 1.5 in (3.8 cm)
- After Round 2: 2.75 in (7.0 cm)
- After Round 3: 3.5 in (8.9 cm)
- After Round 4: 4.25 in (10.8 cm), now square
- After Round 5: 5 in (12.7 cm)
A tolerance of 1/8 in (0.3 cm) per square is fine. Across three squares, that adds up to 3/8 in (1.0 cm).
If your square is too big, go down to a 4.5 mm hook. If it is too small, go up to a 5.5 mm hook. Change the hook, not the stitch counts, so the joining and border math still works.
Square Pattern (Make 12)
Round 1 (Color B)
Make a magic ring. Ch 3 (counts as dc), then work 15 dc into the ring. Pull the ring closed and join with a sl st to the top of the beginning ch-3.
Count: 16 dc.
Round 2 (Color B) – Flower Petals
Beg cl in the same st as the join, ch 3, sk next st. *3-dc cl in next st, ch 3, sk next st; repeat from * 6 more times. Join with a sl st to the top of the beg cl. Fasten off Color B.
Count: 8 clusters and 8 ch-3 sps.
These eight clusters form the burgundy petals of the center flower.
Round 3 (Color C) – Star Points
Join Color C with a sl st in any ch-3 sp. Ch 3 (counts as dc), then work (dc, ch 2, 2 dc) in the same sp. *(2 dc, ch 2, 2 dc) in next ch-3 sp; repeat from * 6 more times. Join with a sl st to the top of the beginning ch-3.
Count: 32 dc and 8 ch-2 sps.
Each group sits between two petals, so the cream ring forms an eight-point star.
Round 4 (Color C) – Squaring Round
Sl st in the next dc, then sl st into the ch-2 sp. Ch 4 (counts as tr), then work (2 tr, ch 2, 3 tr) in the same sp. This is the first corner.
*Dc in each of the next 4 dc, 3 hdc in the next ch-2 sp, dc in each of the next 4 dc, (3 tr, ch 2, 3 tr) in the next ch-2 sp; repeat from * 2 more times.
Dc in each of the next 4 dc, 3 hdc in the next ch-2 sp, then dc in each of the last 4 dc. These last 4 dc include the 2 sts you slipped across at the start. Join with a sl st to the top of the beginning ch-4. Fasten off Color C.
Count per side (between corner ch-2 sps): 3 tr + 4 dc + 3 hdc + 4 dc + 3 tr = 17 sts.
Total: 68 sts and 4 corner ch-2 sps.
The tall tr corners and short hdc mid-sides create the gentle inward curve of the frame.
Round 5 (Color B) – Frame
Join Color B with a sl st in any corner ch-2 sp. Ch 2 (does not count as a st), then work (2 hdc, ch 2, 2 hdc) in the same sp.
*Hdc in each of the next 17 sts, (2 hdc, ch 2, 2 hdc) in the next corner ch-2 sp; repeat from * 2 more times. Hdc in each of the last 17 sts. Join with a sl st to the first hdc. Fasten off, leaving a 6 in (15.2 cm) tail.
Count per side: 2 + 17 + 2 = 21 hdc between corner ch-2 sps.
Total: 84 hdc and 4 corner ch-2 sps.
Definition: “21 hdc per side” already includes the 2 hdc at each end of the side, next to the corners. The corner ch-2 sps are not part of that number. The joining and border handle them separately.
Make All Pieces
Make 12 squares, all with the same color order:
- Rounds 1-2: Color B (12 centers)
- Rounds 3-4: Color C (12 star rings)
- Round 5: Color B (12 frames)
Lay the squares out RS up:
[ 1 ] [ 2 ] [ 3 ]
[ 4 ] [ 5 ] [ 6 ]
[ 7 ] [ 8 ] [ 9 ]
[10 ] [11 ] [12 ]
The layout is 3 squares across and 4 squares down, with 6 inner junctions where four corners meet.
Joining
Method: Slip stitch join on the RS, through the inside loops, using Color B.
Place two squares side by side, RS up, with the edges touching. Insert the hook through the inside loop of a st on the first square and the inside loop of the matching st on the second square, then sl st.
Stitch-to-stitch logic for one seam:
- 1 sl st through both corner ch-2 sps
- 21 sl st, one through each matching pair of hdc
- 1 sl st through both corner ch-2 sps at the far end
Total: 23 sl st per square-to-square seam. Both squares have exactly 21 hdc per side, so every stitch has a partner and nothing is skipped or added.
Order:
- Join each row of three. That is 2 seams per row x 4 rows = 8 short seams.
- Join the rows along their long edges. That is 3 long seams, each running across 3 squares, for 3 x 23 = 69 sl st per long seam.
Tension: Keep your sl sts as loose as the hdc they join. Tight sl sts pucker the seams and narrow the panel. If you crochet tightly, use a hook one size larger for joining only.
Size checkpoint: A joined row of three should measure 15 in (38.1 cm) wide. Before the border, the joined panel should measure 15 x 20 in (38.1 x 50.8 cm).
Cream Junction Crosses
At each of the 6 inner junctions, there is a small opening where four corner ch-2 sps meet. Thread a tapestry needle with a 15 in (38.1 cm) length of Color C.
Bring the needle up through the tr corner of one square. Cross the opening diagonally and go down through the tr corner of the opposite square. Repeat across the other diagonal to make an X about 0.5 in (1.3 cm) wide. Secure the ends on the WS and weave them in.
Border
Border gauge: The border matches the Round 5 gauge of 4.2 sts per inch. Each short edge has 3 x 21 = 63 hdc, which is 15 in (38.1 cm). Each long edge has 4 x 21 = 84 hdc, which is 20 in (50.8 cm).
Border Round 1 (Color B) – Single Crochet
Join Color B in any outer panel corner ch-2 sp. Ch 1, then work (sc, ch 2, sc) in the same sp.
Sc in each hdc along the edge. At each seam, skip the joined corner ch-2 sps and go straight from the last hdc of one square to the first hdc of the next. At each outer panel corner, work (sc, ch 2, sc) in the corner ch-2 sp. Join with a sl st to the first sc.
Counts per side (between panel corner ch-2 sps):
- Short sides: 1 + 63 + 1 = 65 sc each
- Long sides: 1 + 84 + 1 = 86 sc each
Total: 302 sc and 4 corner ch-2 sps.
No stitches are added at the seams. Each edge holds exactly (squares along that side) x 21 sts. The only extra stitches are 1 sc on each side of the 4 outer corner spaces.
Border Round 2 (Color B) – Crab Stitch
Do not turn. Ch 1, then rev sc in each sc around, working 2 rev sc in each corner ch-2 sp. Join with a sl st to the first rev sc. Fasten off.
Counts: 65 rev sc on each short side, 86 rev sc on each long side, and 2 rev sc in each of the 4 corners.
Total: 2 x 65 + 2 x 86 + 8 = 310 rev sc.
Why the math works: At 4.2 sts per inch, 63 sts make 15 in (38.1 cm) and 84 sts make 20 in (50.8 cm). These widths exactly match the joined panel, so the border lies flat without ruffling or cupping. The two rounds add 0.25 in (0.6 cm) per side, bringing the panel to 15.5 x 20.5 in (39.4 x 52.1 cm).
Final Blocking
- Weave in every remaining tail.
- Lay the panel RS up on a blocking mat.
- Pin the four outer corners to 15.5 x 20.5 in (39.4 x 52.1 cm).
- Pin along each edge, with a pin at every seam to keep the grid lines straight.
- Gently open the cream crosses so each junction sits square.
- Mist the panel thoroughly with water.
- Let it dry completely, at least 12 hours, before unpinning.
Final Quality-Control Checklist
- Every square has 16 dc / 8 clusters / 32 dc / 68 sts / 84 hdc at the end of Rounds 1-5.
- Every square measures 5 in (12.7 cm), within 1/8 in (0.3 cm).
- Each square-to-square seam has 23 sl sts and lies flat.
- All 6 inner junctions have a centered cream X.
- Border Round 1 has 65 sc on each short side and 86 sc on each long side.
- The crab-stitch edge is even, with no gaps at the seams.
- The blocked panel measures 15.5 x 20.5 in (39.4 x 52.1 cm).
Troubleshooting
The petals look flat. Close each cluster by pulling through all 4 loops at once, and keep the ch-3 sps loose.
The center cups. Your Round 3 is too tight. Use a 5.5 mm hook for Rounds 3-4 only.
The edges ruffle. Recount Round 5 for 21 hdc between corners on each side.
The corners are rounded. Make sure you worked 3 tr, not dc, on each side of the Round 4 corners.
The seams pucker. Your join is too tight. Use a larger hook for joining.
The border ripples. Recount Border Round 1. Extra sts at the seams are the usual cause.
The border pulls in. Work the crab stitch more loosely, or use a 5.5 mm hook for Round 2.
Care
Hand wash in cool water with a mild detergent, press out the water gently, and dry flat. While it is damp, reshape the panel to 15.5 x 20.5 in (39.4 x 52.1 cm).
Final Notes
The whole panel depends on one simple measurement chain. Each square grows from 16 to 84 sts and measures 5 in (12.7 cm), with 21 hdc per side.
Three squares across give 15 in (38.1 cm), and four squares down give 20 in (50.8 cm). A two-round border adds 0.25 in (0.6 cm) per side, for a finished panel of 15.5 x 20.5 in (39.4 x 52.1 cm).
If your first square hits every checkpoint, the rest of the project will fall into place.
Happy crocheting!