

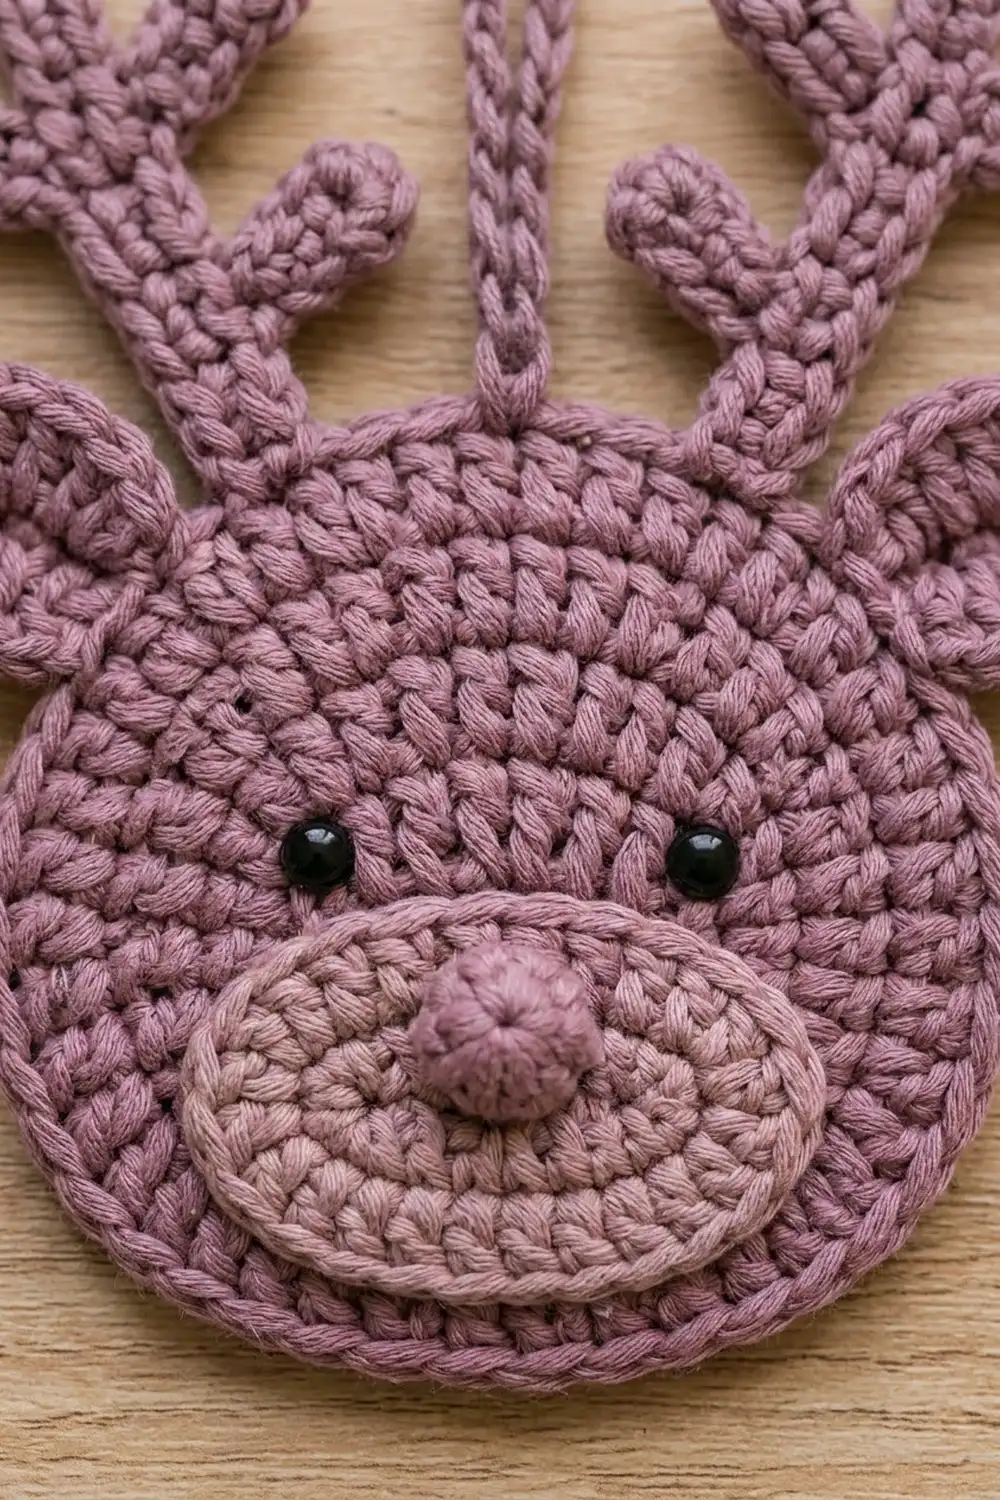
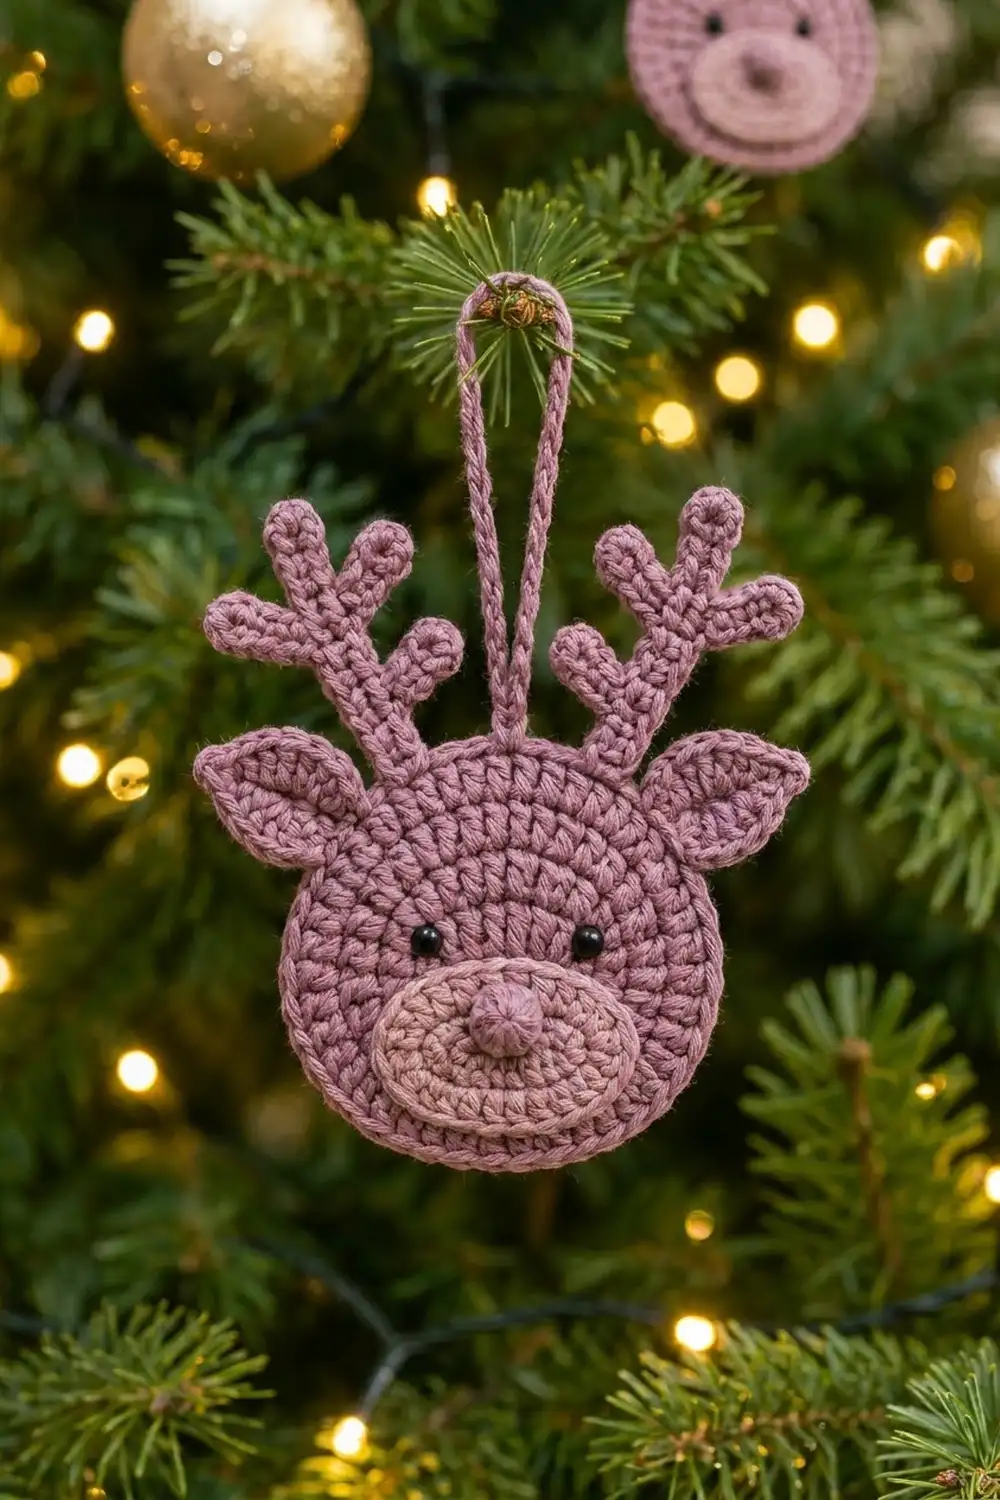
This little reindeer is a flat Christmas ornament. It has a round mauve face, two branched antlers with knobby tips, pointed leaf-shaped ears, and a soft rose oval muzzle with a puffy nose. Two small black eyes and a chain hanging loop finish it, so it is ready for the tree as soon as you weave in the last end.
The colors are quiet and modern: dusty mauve for the head, ears, antlers, nose, and loop, and a lighter rosy mauve for the muzzle. It suits a neutral or vintage-style tree. It also works as a gift-tag topper or a small present on its own.
The pattern uses US crochet terms throughout. The finished head is 4 in (10.2 cm) across. With ears and antlers, the ornament is about 5.5 in (14.0 cm) wide and 6 in (15.2 cm) tall, not counting the hanging loop.
Construction is simple. You work the head as a flat circle in single crochet and finish it with a two-round border that ends in reverse single crochet for a rope-like rim. Then you make a small oval muzzle, a bobble nose, two ears, two antlers, and a hanging loop, and sew everything together into one ornament. Every part is small, so one ornament takes an evening.
Finished Size and Construction
- Finished head size: 4 in (10.2 cm) diameter
- Overall size: about 5.5 in (14.0 cm) wide x 6 in (15.2 cm) tall, plus loop
- Skill level: Easy to intermediate
- Terminology: US crochet terms
- Yarn weight: Worsted (#4), cotton or cotton blend
- Hook: 4.0 mm (G-6)
- Number of pieces: 1 finished ornament, built from 8 small parts (head, muzzle, nose, 2 ears, 2 antlers, loop)
- Layout: One flat piece with sewn-on appliqué parts; no joining of motifs
- Head size before border: 3.5 in (8.9 cm) diameter
- Border depth: 0.25 in (0.6 cm) on every side
Materials
Choose a smooth worsted cotton or cotton blend. Cotton keeps the stitches crisp, holds the antler tines in shape, and shows the reverse single crochet rim clearly. Avoid fuzzy or loosely plied yarn, because the small parts lose their definition.
- Color A, dusty mauve: 15 g / 25 m (head, nose, ears, antlers, loop)
- Color B, light rose mauve: 5 g / 9 m (muzzle)
- Black: two 6 mm safety eyes, or a short length of black yarn for French knot eyes
Tools:
- 4.0 mm (G-6) crochet hook
- Tapestry needle
- Stitch marker
- Scissors
- Pins
- Spray bottle and blocking mat
All yarn amounts include a margin of about 30 percent, so one small ball of each color is plenty for one ornament.
Abbreviations (US Terms)
- ch – chain
- sl st – slip stitch
- sc – single crochet
- hdc – half double crochet
- dc – double crochet
- sc2tog – single crochet 2 together
- inc – 2 sc in the same stitch
- rev sc – reverse single crochet (crab stitch)
- MR – magic ring
- st(s) – stitch(es)
- rnd(s) – round(s)
Special stitch – Knob Tine: Ch 4. In the 2nd ch from the hook, [yarn over, insert hook, pull up a loop] 3 times, then yarn over and pull through all 7 loops on the hook (a small hdc cluster). Sc in each of the next 2 ch. You are now back at the base of the tine. A Knob Tine is not counted in the stitch counts.
Reverse sc: Work from left to right (if you are right-handed). Insert the hook into the next st to the right, pull up a loop, then yarn over and pull through both loops.
Gauge and Checkpoints
Gauge: 16 sc and 18 rnds = 4 in (10.2 cm) in sc worked in the round.
Since this is a single ornament, the head is your test piece. Measure it at each checkpoint before you go on.
- After Rnd 4: circle measures 1.75 in (4.4 cm) across.
- After Rnd 8: circle measures 3.5 in (8.9 cm) across.
- After border: head measures 4 in (10.2 cm) across.
If the circle is too big, change to a 3.75 mm (F-5) hook. If it is too small, change to a 4.5 mm (7) hook. If the circle ruffles, you are crocheting loosely for this yarn, so go down a hook size. If it cups, go up a hook size. Every small part is sized against the head, so getting the head right keeps the whole reindeer in proportion.
Head
Work in continuous spiral rounds. Place a marker in the first st of each round and move it up as you go.
With Color A, make a MR.
Rnd 1: 6 sc in MR. (6 sts)
Rnd 2: Inc in each st around. (12 sts)
Rnd 3: [Sc in next st, inc] 6 times. (18 sts)
Rnd 4: [Sc in next 2 sts, inc] 6 times. (24 sts)
Checkpoint: 1.75 in (4.4 cm) across.
Rnd 5: [Sc in next 3 sts, inc] 6 times. (30 sts)
Rnd 6: [Sc in next 4 sts, inc] 6 times. (36 sts)
Rnd 7: [Sc in next 5 sts, inc] 6 times. (42 sts)
Rnd 8: [Sc in next 6 sts, inc] 6 times. (48 sts)
Checkpoint: 3.5 in (8.9 cm) across, lying flat. Do not fasten off; the border comes next. If you are using safety eyes, put them in now (see Assembly, step 1), because the backs must go on before the head is finished.
Border
Border gauge: the border uses the same gauge as the head, 16 sc = 4 in (10.2 cm). Each sc round adds about 0.2 in (0.5 cm) to the radius, and the rev sc rim adds a little more.
Rnd 9: [Sc in next 7 sts, inc] 6 times. (54 sts)
This is a growth round. Each of the 6 wedges now has 9 sts, for 54 sts in total.
Rnd 10: Rev sc in each st around. (54 sts = 54 worked 1-per-st + 0 extra)
This is a trim round, so no stitches are added. Sl st to the first rev sc and fasten off, leaving a 6 in (15.2 cm) tail to weave in.
Why the math works: a flat sc circle stays flat when each round adds 6 sts, one per wedge. Rnd 8 has 48 sts (8 per wedge). Rnd 9 adds one inc per wedge, giving 9 per wedge and 54 in total. Rev sc needs no extra stitches because it lies along the edge rather than building outward. The two border rounds add 0.25 in (0.6 cm) on each side, taking the head from 3.5 in (8.9 cm) to 4 in (10.2 cm).
Muzzle
With Color B, ch 6.
Rnd 1: Sc in 2nd ch from hook, sc in next 3 ch, 3 sc in last ch. Turn to work along the other side of the foundation chain: sc in next 3 ch, then 2 sc in the last ch (the same ch as the first sc). (12 sts)
Rnd 2: Inc, sc in next 3 sts, inc in each of next 3 sts, sc in next 3 sts, inc in each of next 2 sts. (18 sts)
Rnd 3: Sc in next st, inc, sc in next 3 sts, [sc in next st, inc] 3 times, sc in next 3 sts, [sc in next st, inc] 2 times. (24 sts)
Sl st in the next st. Fasten off, leaving a 12 in (30.5 cm) tail for sewing.
Checkpoint: the oval is 2.25 in (5.7 cm) wide x 1.25 in (3.2 cm) tall. All the increases are at the two short ends, so the long sides stay straight and the ends stay round.
Nose
With Color A, make a MR.
Rnd 1: 6 sc in MR. (6 sts)
Rnd 2: Inc in each st around. (12 sts)
Rnd 3: Sc in each st around. (12 sts)
Rnd 4: Sc2tog 6 times. (6 sts)
Tuck the starting tail inside for a little padding. Fasten off, leaving an 8 in (20.3 cm) tail. Weave the tail through the front loops of the last 6 sts and pull it closed. Checkpoint: about 0.75 in (1.9 cm) across.
Ears (Make 2)
With Color A, ch 6.
Rnd 1: Sc in 2nd ch from hook, hdc in next ch, dc in next 2 ch, then (hdc, ch 2, hdc) in the last ch for the pointed tip. Working along the other side of the chain, dc in next 2 ch, hdc in next ch, sc in last ch. Sl st to the first sc. (10 sts plus 1 ch-2 tip)
Fasten off, leaving an 8 in (20.3 cm) tail. The sc end is the narrow base that goes behind the head. The ch-2 end is the outer point. Because the dc stitches sit in the middle, the ear is widest at its center, which gives the leaf shape.
Checkpoint: 1.25 in (3.2 cm) long x 0.75 in (1.9 cm) wide.
Antlers (Make 2)
With Color A, ch 10. The chain next to the hook is the top of the antler; the first chain you made is the base.
Side 1 (outer edge, working from top to base): In the 2nd ch from hook, work (sc, Knob Tine, sc). Sc in next 2 ch, Knob Tine, sc in next 3 ch, Knob Tine, sc in next 2 ch, then 2 sc in the last ch (the base).
Side 2 (inner edge, working from base to top): Working along the other side of the chain, sc in next 5 ch, Knob Tine, sc in next 2 ch. Sl st to the first sc. (18 sc plus 4 Knob Tines)
Count check: Side 1 uses all 9 working chains (1 + 2 + 3 + 2 + 1) and makes 11 sc (2 + 2 + 3 + 2 + 2). Side 2 works the other side of the 7 middle chains (5 + 2) and makes 7 sc. The top and base chains are worked on Side 1 only. That gives 11 + 7 = 18 sc.
Fasten off, leaving an 8 in (20.3 cm) tail. Make both antlers the same way. When you place them, flip one over so that each antler’s single inner tine faces the center.
Checkpoint: about 2.75 in (7.0 cm) long, with each tine about 0.5 in (1.3 cm) long.
Hanging Loop
With Color A, ch 36. Sl st in the 2nd ch from hook and in each ch across. (35 sl st) Fasten off, leaving a 6 in (15.2 cm) tail at each end. The sl st row firms up the chain into a neat cord that won’t stretch on the branch.
Assembly
- Eyes: With the right side of the head facing you, put the safety eyes between Rnds 4 and 5, about 1.1 in (2.8 cm) apart and centered above the middle of the head. Snap on the backs. For embroidered eyes, work a French knot in the same places after the border is done.
- Muzzle: Pin the muzzle on the lower half of the head so its top edge sits just below the center ring. Whipstitch around its edge with the Color B tail.
- Nose: Sew the nose on the upper middle of the muzzle, slightly above the muzzle’s center.
- Ears: Place the ears at about 10 and 2 o’clock, with 0.25 in (0.6 cm) of each base tucked behind the head and the tips pointing up and out. Sew them on from the back.
- Antlers: Place the antlers at about 11 and 1 o’clock, between the ears and the top center, with 0.75 in (1.9 cm) of each base behind the head. About 2 in (5.1 cm) of each antler shows above the rim. Sew them on from the back.
- Loop: Fold the loop in half and sew both ends to the back at the top center, so that 3 in (7.6 cm) of loop sticks up above the head.
When sewing parts to the back, catch only the back loops of the head so no stitching shows on the front.
Final Blocking
- Weave in all remaining ends on the back.
- Lay the ornament face down on the blocking mat.
- Mist it lightly until damp, not soaked.
- Turn it face up and shape the head into a 4 in (10.2 cm) circle.
- Pin the ear tips outward and spread the antler tines so each one stands apart.
- Gently push the nose into a rounded shape.
- Let it dry completely, at least 6 hours, before taking out the pins.
Final Quality-Control Checklist
- The head measures 4 in (10.2 cm) and lies flat, with no cupping or ruffling.
- Rnd 9 has 54 sts, and the rev sc rim is even all the way around.
- The muzzle is 2.25 x 1.25 in (5.7 x 3.2 cm) and centered.
- The eyes are level and evenly spaced.
- The ears and antlers are mirror images of each other.
- Each antler has 4 rounded tines.
- The loop is sewn on securely at the top center.
- No sewing shows on the front, and all ends are woven in.
Troubleshooting
Head cups: you are crocheting too tightly. Go up a hook size or loosen your tension on the increase stitches.
Head ruffles: you are crocheting too loosely, or an extra increase slipped in. Count each round against the totals given.
Rev sc rim flares: work Rnd 10 with a smaller hook, such as 3.75 mm (F-5).
Antler tines curl: pin them flat while blocking, or pull the Knob Tine cluster a little tighter.
Muzzle looks pointed: make sure the increases sit right at the tips of the oval, exactly as written.
Eyes sink into the head: use 6 mm eyes with backs, and place them between rounds rather than through a single stitch.
Care
Spot clean with a damp cloth and mild soap, then lay flat to dry. Store the ornament flat in tissue paper so the antlers keep their shape.
Final Notes
The whole ornament depends on one chain of measurements. A gauge of 16 sc = 4 in (10.2 cm) gives a 1.75 in (4.4 cm) circle at Rnd 4 and a 3.5 in (8.9 cm) circle at Rnd 8. The 0.25 in (0.6 cm) border brings the head to 4 in (10.2 cm). The muzzle, ears, and antlers are all sized against that head, for a finished ornament about 5.5 in (14.0 cm) wide and 6 in (15.2 cm) tall. Check each stage and your reindeer will come out right every time.
Happy crocheting!