

This Sunny Lemon Slice Panel is a small rectangle of eight round lemon-slice motifs, joined two across and four down. Each motif has a bright yellow center split into eight wedges by raised white spokes, plus a crisp white rind. Tiny white chain stars fill the diamond gaps between the circles. The outer edge keeps its scalloped shape and gets a rope-like crab-stitch finish.
The palette is just two colors, sunshine yellow and white, so the panel looks fresh and summery. Use it as a table mat, a tray liner, or a sampler before you take the motif on to bigger projects.
This pattern uses US crochet terms. The finished panel measures about 8.75 x 16.75 in (22.2 x 42.5 cm) after blocking.
Construction is simple. You crochet eight yellow half double crochet discs, add white surface slip-stitch spokes, and finish each disc with two white rind rounds. Then you sew the motifs together at their touching points, add three chain-star fillers, and work a two-round border around the whole panel.
Finished Size and Construction
- Finished size: 8.75 x 16.75 in (22.2 x 42.5 cm)
- Skill level: Easy intermediate
- Terminology: US crochet terms
- Yarn weight: Worsted (#4), cotton or cotton blend
- Hook: US H-8 (5.0 mm)
- Number of pieces: 8 circular motifs plus 3 small chain-star fillers
- Layout: 2 motifs across x 4 motifs down
- Motif size: 4 in (10.2 cm) diameter
- Size before border: 8 x 16 in (20.3 x 40.6 cm)
- Border depth: 3/8 in (1.0 cm) on every side
Materials
Pick a smooth worsted-weight cotton. It shows the spokes clearly, blocks flat, and holds up on a table. Acrylic also works, but it will lie a little softer.
- Yellow: 50 g, about 100 m (109 yd)
- White: 70 g, about 140 m (153 yd)
These quantities include a margin of about 25% over what the pattern actually uses.
Tools:
- US H-8 (5.0 mm) crochet hook
- Tapestry needle
- 4 locking stitch markers per motif (16 is plenty)
- Scissors
- Blocking mats and rust-proof pins
- Spray bottle
- Ruler or tape measure
Abbreviations (US Terms)
- ch – chain
- sl st – slip stitch
- sc – single crochet
- hdc – half double crochet
- sc2tog – single crochet 2 together
- rev sc – reverse single crochet (crab stitch)
- st(s) – stitch(es)
- rep – repeat
Special stitches
Surface slip stitch: Hold the yarn behind the work. Insert the hook from front to back through the fabric, pull up a loop, then pull that loop through the loop on the hook. This makes a raised chain line on the front.
Reverse single crochet (rev sc): Work from left to right (right to left if you crochet left-handed). Insert the hook into the next stitch to the right, yarn over, pull up a loop, then yarn over and pull through both loops. Keep the loops relaxed.
Gauge and Checkpoints
Make one complete motif before you start the rest. Measure it flat, without stretching.
- After Rnd 1: about 1 in (2.5 cm) across
- After Rnd 5 (yellow disc): 3 in (7.6 cm) across
- After Rnd 7 (finished motif): 4 in (10.2 cm) across
If your motif is larger than 4 in (10.2 cm), go down half a hook size. If it is smaller, go up half a hook size. A difference of just 1/8 in (0.3 cm) per motif adds up to 1/2 in (1.3 cm) over the panel length, so it’s worth checking.
The disc should lie completely flat. If it ruffles, your hdc are too loose for the increases, so go down a hook size. If it cups, go up one.
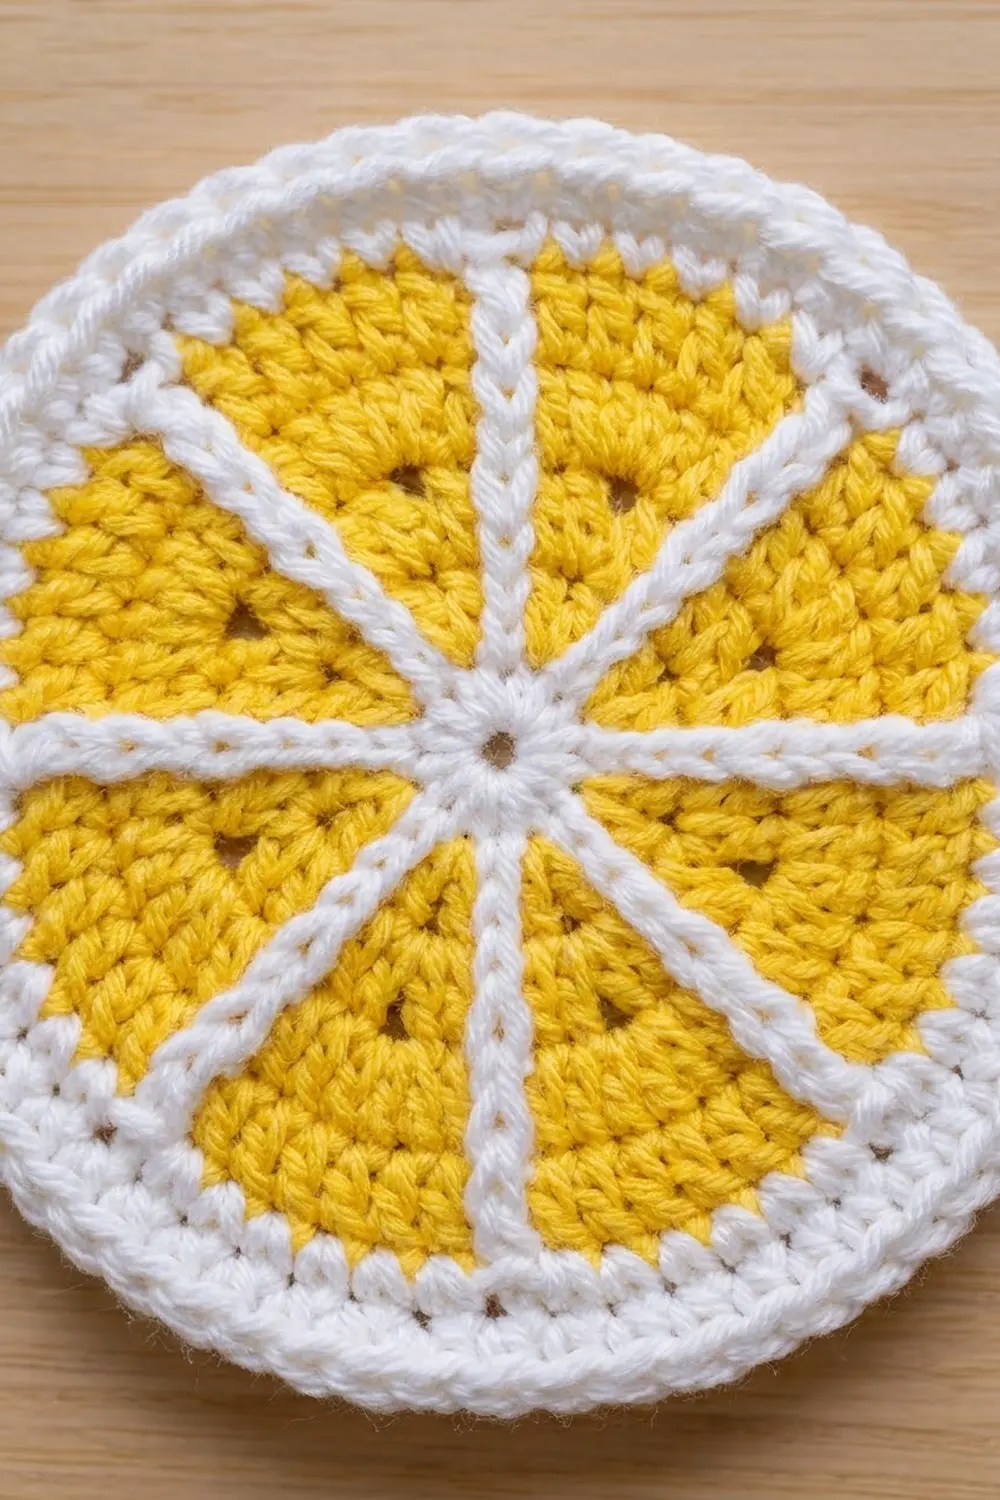
Lemon Slice Motif (make 8)
Yellow Disc
Use yellow.
Rnd 1: Make a magic ring, ch 2 (doesn’t count as a st), work 8 hdc in the ring. Pull the ring tight. Sl st to the first hdc to join. (8 hdc)
Rnd 2: Ch 2 (doesn’t count here or in later rounds), 2 hdc in each st around, sl st to the first hdc. (16 hdc)
Rnd 3: Ch 2, hdc in next st, 2 hdc in next st; rep from * 7 more times, sl st to the first hdc. (24 hdc)*
Rnd 4: Ch 2, hdc in each of next 2 sts, 2 hdc in next st; rep from * 7 more times, sl st to the first hdc. (32 hdc)*
Rnd 5: Ch 2, hdc in each of next 3 sts, 2 hdc in next st; rep from * 7 more times, sl st to the first hdc. (40 hdc)*
Fasten off yellow, leaving a 4 in (10.2 cm) tail.
Stack the increases in the same place every round. The disc will then show eight faint straight lines running from the center to the edge. These are your spoke guides, and each wedge between them has 5 sts in Rnd 5.
White Spokes
Use white. Work 8 spokes, one on each increase line.
- With the yarn behind the work, insert the hook through the center of the magic ring and pull up a loop.
- Work 5 surface sl sts outward along one increase line, one sl st into each round (Rnds 1 to 5). End at the outer edge of Rnd 5.
- Cut the yarn and pull the tail to the back. Leave a 3 in (7.6 cm) tail.
Repeat for all 8 increase lines. The 8 spokes meet at the magic ring, which creates the small white center dot. Keep the sl sts as loose as the fabric. Tight spokes will pull the disc out of shape.
White Rind
Rnd 6: Join white with a sl st in any st of Rnd 5, at the end of a spoke. Ch 1, sc in each of next 4 sts, 2 sc in next st; rep from * 7 more times, sl st to the first sc. (48 sc)* As you go, work over the yellow tail and the spoke tails on the back to hide them.
Rnd 7: Ch 1, sc in each of next 5 sts, 2 sc in next st; rep from * 7 more times, sl st to the first sc. (56 sc)*
Fasten off, leaving a 12 in (30.5 cm) tail for sewing.
Mark the tangent points. Number the Rnd 7 sts 1 to 56, starting from the first sc. Place markers in sts 1, 15, 29, and 43. Each marker shows where this motif will touch a neighbor. There are exactly 13 unmarked sts between each pair of markers (4 x 13 + 4 = 56).
Checkpoint: the motif measures 4 in (10.2 cm) across.
Make All Pieces
- Motifs: 8 total. Each uses yellow for Rnds 1 to 5 and white for the spokes and Rnds 6 to 7.
- Chain-star fillers: 3 total, all in white, worked directly onto the joined panel.
Layout (A = motif):
A  A
A  A
A  A
A  A
That’s 2 columns x 4 rows. The three fillers sit in the diamond gaps at the center line, between rows 1–2, 2–3, and 3–4.
Joining
Method: Whipstitch the motifs together at their tangent points with white yarn.
Stitch logic: Each join uses 3 sts from each motif: the marked st and the st on each side of it. Lay two motifs side by side, right side up, with their markers facing each other. Whipstitch through the outer loops of the 3 matching sts, working 3 stitches stitch-to-stitch. Secure the yarn and weave in the end.
Number of joins:
- Horizontal joins (column 1 to column 2): 4
- Vertical joins (between rows, in each column): 3 x 2 = 6
- Total: 10 joins
Once joined, each motif shows these free arcs:
- Corner motifs (4): 2 joins (6 sts used). One 11-st inner arc faces the gap. 39 sts face outward. (6 + 11 + 39 = 56)
- Middle motifs (4): 3 joins (9 sts used). Two 11-st inner arcs face the gaps. 25 sts face outward. (9 + 22 + 25 = 56)
Each 11-st inner arc is the 13 sts between two markers minus the 1 st each join takes at either end.
Tension: Pull each whipstitch just snug, so the motifs touch without bunching. If the joins are too tight, the circles tilt upward. If they are too loose, gaps open up.
Chain-Star Fillers (make 3)
Each center gap is surrounded by four inner arcs. The center st of each arc is its 6th st.
With white, ch 4 and sl st to the first ch to form a ring. *Ch 3, sl st in the center st of the next inner arc, sl st in each of the 3 ch back toward the ring, sl st in the ring. Rep from * 3 more times, so there is one arm to each of the four surrounding motifs. Fasten off and weave in.
The distance from the gap’s center to each circle edge is about 0.83 in (2.1 cm). That’s why 3 ch plus the ring reach without stretching.
Size checkpoint: The joined panel measures 8 x 16 in (20.3 x 40.6 cm).
Border
Border gauge: One round of sc plus one round of rev sc adds 3/8 in (1.0 cm) on each side.
Corner stitches. On each corner motif, find the outer marked st that sits on the long side. Count 7 sts past it, moving toward the short end. That st is the corner st, at the diagonal point of the corner motif. It leaves 19 free outward sts on the long side and 19 on the short side (19 + 1 + 19 = 39).
Valleys. A valley is where two motifs meet on the outer edge. The long sides have 3 valleys each and the short ends have 1 each, for 8 valleys in total.
Rnd 1 (sc): Join white in the st right after any corner st. Ch 1. Sc in each free outward st. At each valley, sc2tog using the last free st of one motif and the first free st of the next. Work 3 sc in each corner st. Sl st to the first sc.
Counts for Rnd 1:
- Each long side: 19 + 25 + 25 + 19 = 88 free sts, minus 3 (one per valley sc2tog) = 85 sts
- Each short side: 19 + 19 = 38 free sts, minus 1 (valley) = 37 sts
- Each corner: 1 corner st worked as 1 + 2 extra = 3 sts
- Total: (2 x 85) + (2 x 37) + (4 x 3) = 170 + 74 + 12 = 256 sts
Rnd 2 (rev sc): Ch 1, rev sc in each st around. Sl st to the first st and fasten off. (256 rev sc)
Why the math works: The 8 motifs show a total of (4 x 39) + (4 x 25) = 156 + 100 = 256 outward sts. That number includes the 4 corner sts. The 8 valley decreases remove 8 sts and the 4 corners add 8, so Rnd 1 ends where it started, at 256. The decreases let the border dip into each valley, and the corner increases let it turn around the corners, so the scallops stay crisp and the edge stays flat.
Final Blocking
- Weave in all remaining ends on the back, following the white rind wherever you can.
- Pin the panel face up to a blocking mat at 8.75 x 16.75 in (22.2 x 42.5 cm).
- Pin each motif at its center and at 4 points around its rind so it stays round.
- Pin the arm tips of each chain star so the arms lie straight.
- Spray until damp, not soaked.
- Gently press the spokes flat with your fingers so they stay straight.
- Let it dry completely, 12 to 24 hours, before unpinning.
Final Quality-Control Checklist
- Every motif measures 4 in (10.2 cm) across.
- Each motif has 8 straight spokes meeting at a white center.
- Rnd 7 has 56 sts on every motif.
- There are 10 tangent joins, each 3 sts wide.
- There are 3 chain stars, each with 4 arms attached.
- Border Rnd 1 counts 85 / 37 / 85 / 37 sts, plus 3 at each corner (256 total).
- The panel measures 8.75 x 16.75 in (22.2 x 42.5 cm).
- No visible tails on the front.
Troubleshooting
- Disc ruffles: Your hdc are loose. Go down a hook size, or check that you made exactly 8 increases per round.
- Disc cups: Go up a hook size, and check that you didn’t skip an increase.
- Spokes wander: Re-stack the increases in the same place each round, or follow the increase line with your eye as you slip stitch.
- Spokes pucker: Work the surface sl sts looser, or use a hook one size larger just for the spokes.
- Motifs tilt at the joins: Undo the join and whipstitch with less tension.
- Border waves: Your rev sc is too loose. Pull it slightly snugger, or go down a hook size for Rnd 2.
- Border flattens the valleys: Check that you worked the sc2tog at all 8 valleys.
Care
Hand wash or machine wash cold on a gentle cycle, then reshape and dry flat. Cotton can be pressed lightly with a warm iron under a cloth.
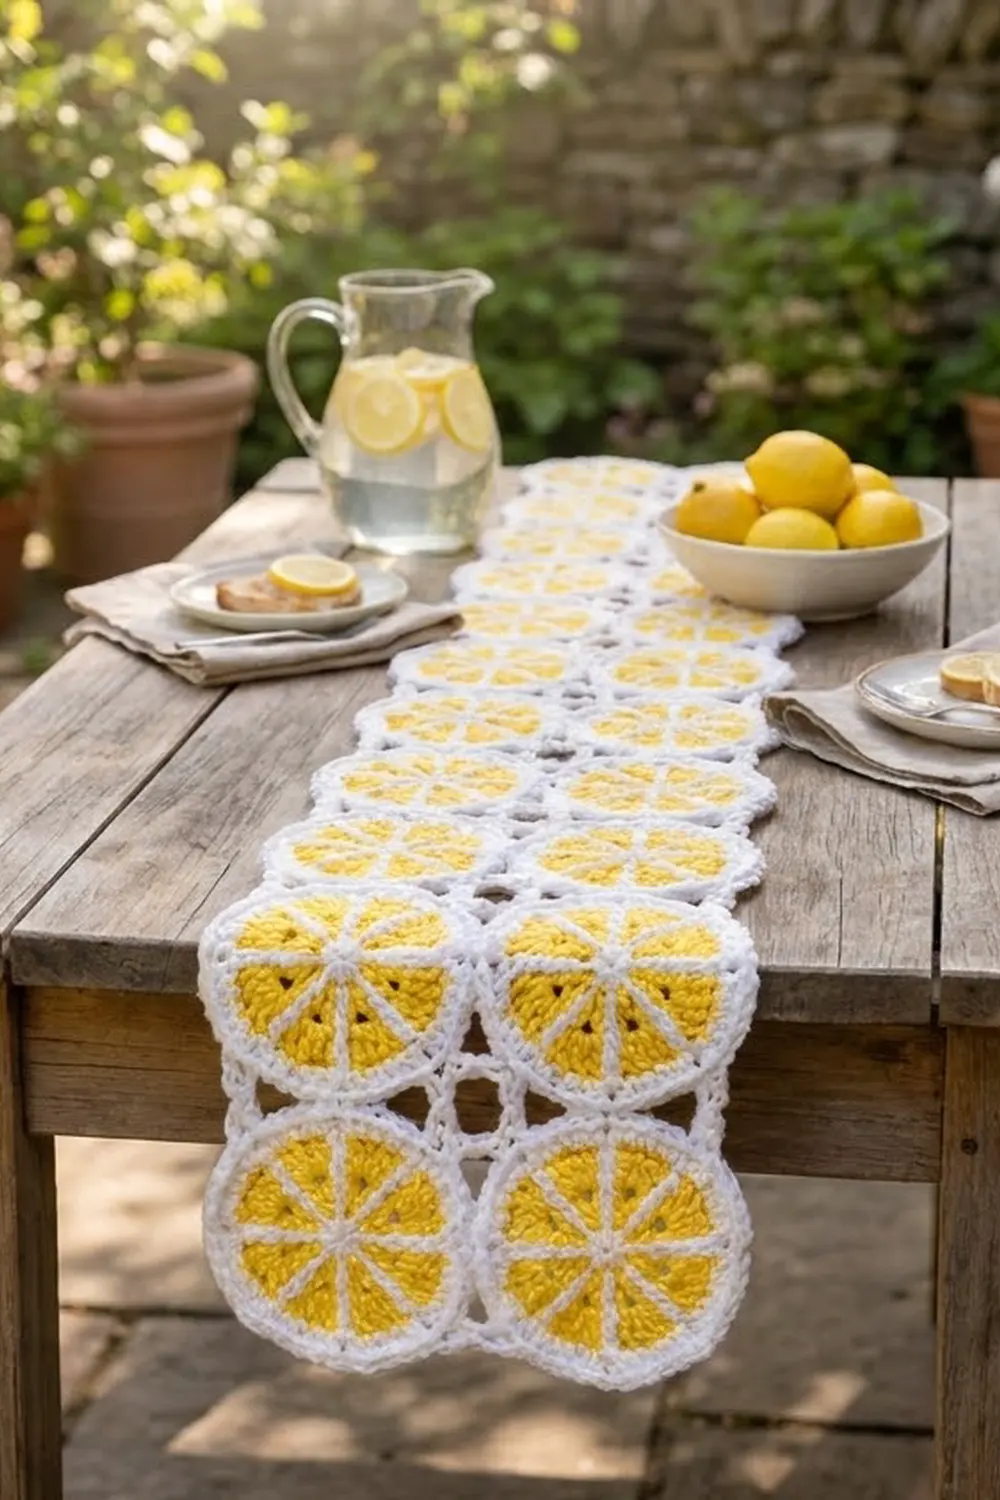
Final Notes
The measurement chain is short. A 3 in (7.6 cm) yellow disc becomes a 4 in (10.2 cm) motif. Eight motifs make an 8 x 16 in (20.3 x 40.6 cm) panel, and the 3/8 in (1.0 cm) border brings it to 8.75 x 16.75 in (22.2 x 42.5 cm). Check each step and the finished panel will match.
Happy crocheting!