

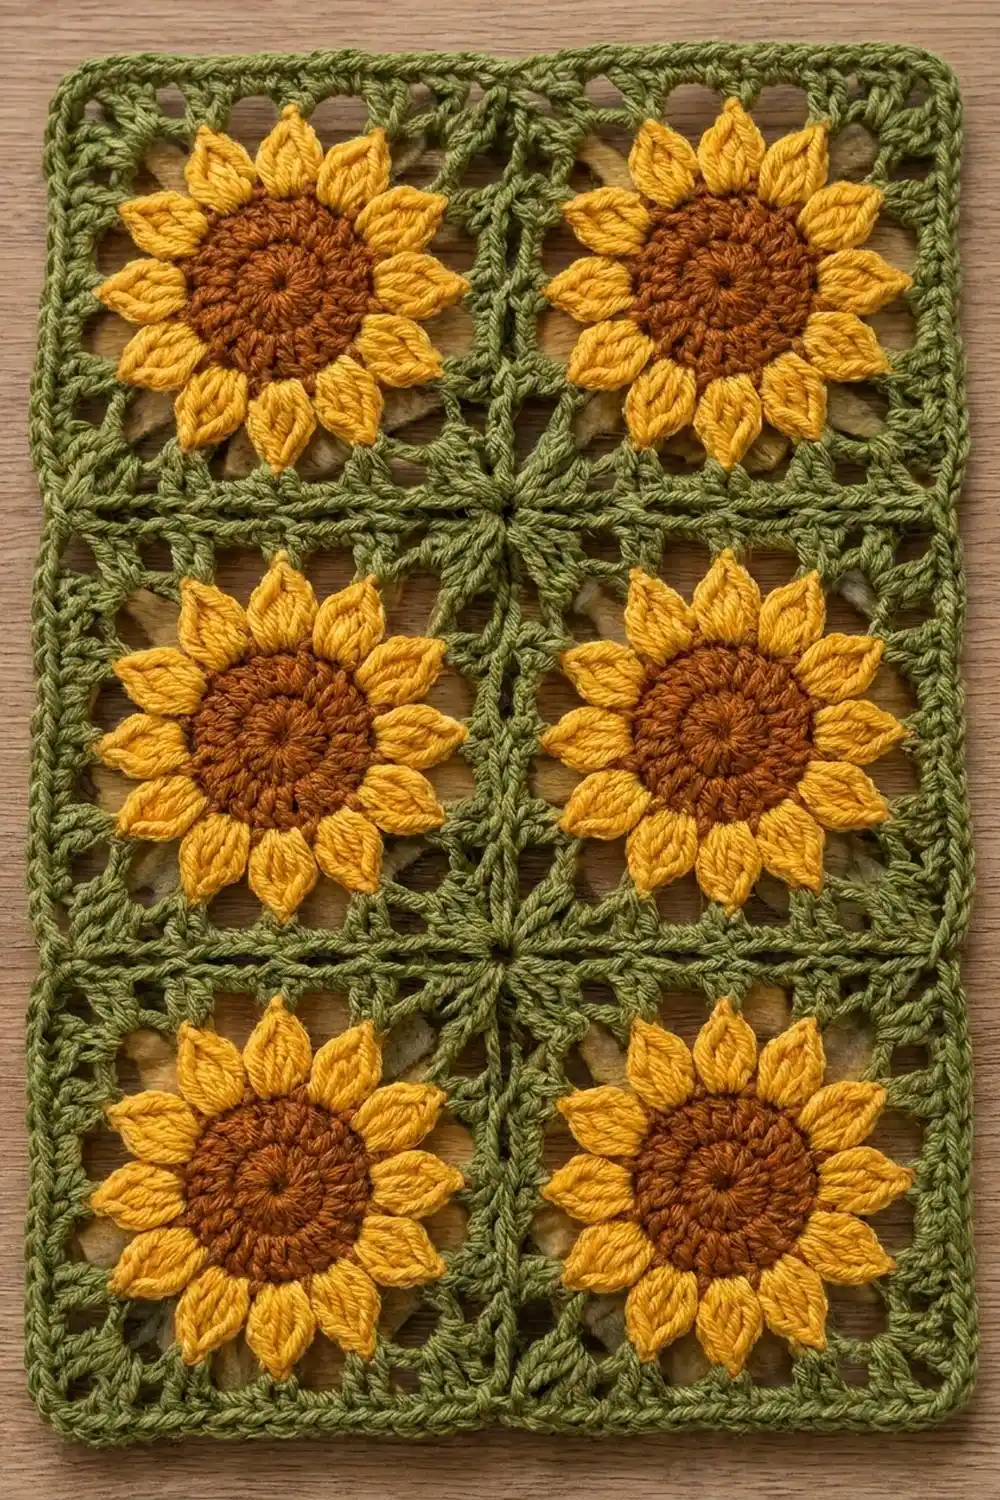
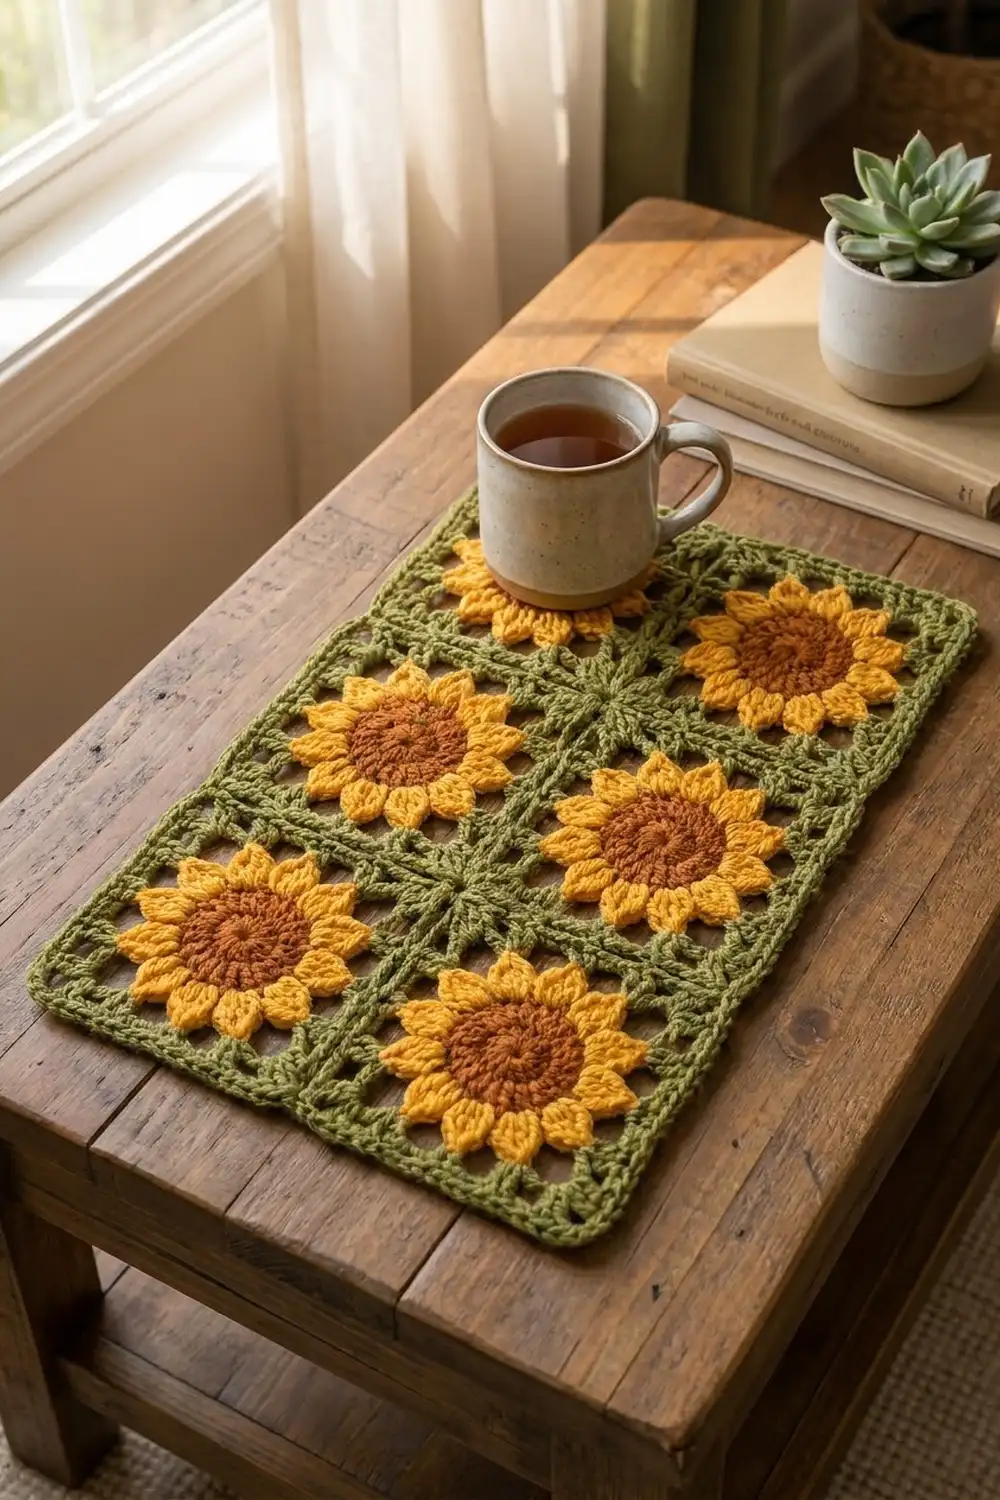
The Golden Meadow Panel is made of six sunflower granny squares joined into a small rectangle, two squares wide and three squares tall. Each square has a rust-brown center, a ring of pointed golden-yellow petals and an olive green granny frame that squares off the flower. A narrow green border goes around the outside edge.
The palette is warm and earthy: rust brown, golden yellow and olive green. The petals sit slightly raised over the green. The chain loops behind them leave small openings, so the squares look light and a little lacy rather than solid.
This pattern uses US crochet terms. Each square measures 5 in (12.7 cm). The joined panel measures 10 x 15 in (25.4 x 38.1 cm) before the border and 11 x 16 in (27.9 x 40.6 cm) after it.
The construction is simple. You crochet six identical squares in the round, join them flat with slip stitches through the back loops, then work three border rounds around the whole panel. The border starts from the squares’ own edge stitches, with no extra stitches added at the seams.
Finished Size and Construction
- Finished size: 11 x 16 in (27.9 x 40.6 cm)
- Skill level: Easy-intermediate
- Terminology: US crochet terms
- Yarn weight: Worsted (#4)
- Hook: US H-8 (5.0 mm)
- Number of pieces: 6 sunflower squares
- Layout: 2 squares wide x 3 squares tall
- Square size: 5 x 5 in (12.7 x 12.7 cm)
- Size before border: 10 x 15 in (25.4 x 38.1 cm)
- Border depth: 0.5 in (1.3 cm) on each edge
Materials
Yarn: Use a smooth worsted weight yarn with good stitch definition. Cotton or a cotton-acrylic blend gives crisp petals and a firm frame. Fuzzy or loosely plied yarn will blur the petal tips.
- Color A, rust brown (centers): 25 g, about 50 m
- Color B, golden yellow (petals): 35 g, about 70 m
- Color C, olive green (frames, joining, border): 85 g, about 170 m
These quantities include a margin of about 20 percent, so you have enough for a test square and a few ripped-back rounds.
Tools:
- US H-8 (5.0 mm) crochet hook
- Tapestry needle
- Scissors
- Stitch markers
- Tape measure
- Blocking mat and rust-proof pins
- Spray bottle with water
Abbreviations (US Terms)
- ch: chain
- sl st: slip stitch
- sc: single crochet
- hdc: half double crochet
- dc: double crochet
- sp: space
- st(s): stitch(es)
- RS: right side
Special stitches:
- Picot: ch 2, sl st in 2nd ch from hook. This forms the small pointed tip of each petal.
- Petal: (hdc, dc, picot, dc, hdc) all in the same st.
Gauge and Checkpoints
Make one complete square before you start the rest. You check gauge by measuring the square at each stage, not with a separate swatch.
Checkpoints for one square:
- After Round 1: center 1 in (2.5 cm) across
- After Round 2: center 1.75 in (4.4 cm) across
- After Round 3: 3.5 in (8.9 cm) from one petal tip to the opposite tip
- After Round 4: 3.75 in (9.5 cm) across
- After Round 5: 4 in (10.2 cm) side to side
- After Round 6: 4.6 in (11.7 cm) side to side
- After Round 7: 5 in (12.7 cm) side to side
The final round has 23 sts per side, so the edge gauge is 23 sts over 5 in (12.7 cm), which is 4.6 sts per inch (2.5 cm).
If your square is too big: Go down one hook size to 4.5 mm and remake it. If only the petal round is too large, tighten your hdc and dc in Round 3.
If your square is too small: Go up one hook size to 5.5 mm. If the square cups after Round 5, your chains are too tight, so loosen the ch-1 spaces slightly.
Fix any size difference now. Being off by 0.25 in (0.6 cm) on each square adds up to 0.5 in (1.3 cm) across the panel’s width and 0.75 in (1.9 cm) along its length.
Sunflower Square (Make 6)
Center
Round 1 (Color A, RS): Make a magic ring. Ch 3 (counts as dc), then work 11 dc in the ring. Join with sl st to the top of the beginning ch-3 and pull the ring closed. (12 dc)
Round 2 (Color A): Ch 3 (counts as dc), dc in the same st, then 2 dc in each st around. Join with sl st to the top of the beginning ch-3. (24 dc) Fasten off Color A.
Petals
Round 3 (Color B): Join Color B with sl st in any dc. Work a Petal in the next dc, sl st in the next dc. Repeat from * around, ending with a Petal in the last dc. Join with sl st to the first sl st. (12 petals, 12 sl sts)* Fasten off Color B.
Each Petal sits in one dc, and each sl st anchors the gap between two petals. The picot gives each petal a pointed tip, so the petals stand slightly apart like the raised sunflower petals in the photo.
Green Frame
Round 4 (Color C): Join Color C with sc in the picot tip of any petal. Ch 4, sc in the picot tip of the next petal. Repeat from * around, ending with ch 4. Join with sl st to the first sc. (12 sc, 12 ch-4 sps)*
The ch-4 loops pass behind the petals and leave the small openings between the flower and the frame.
Round 5 (Color C): Sl st into the next ch-4 sp. Ch 3 (counts as dc) and work (2 dc, ch 2, 3 dc) in the same sp for the first corner. *[Ch 1, 3 dc in the next ch-4 sp] twice, ch 1, (3 dc, ch 2, 3 dc) in the next ch-4 sp for a corner. Repeat from * twice more. [Ch 1, 3 dc in the next ch-4 sp] twice, ch 1. Join with sl st to the top of the beginning ch-3.
Stitch count: 48 dc, 12 ch-1 sps and 4 corner ch-2 sps. Each side has 12 dc and 3 ch-1 sps (15 sts) between the corner ch-2 sps.
The 12 loops divide into 4 sides of 3 loops each: one corner loop and two side loops per side.
Round 6 (Color C): Sl st in the next 2 dc and into the corner ch-2 sp. Ch 3 (counts as dc) and work (2 dc, ch 2, 3 dc) in the same sp. *[Ch 1, 3 dc in the next ch-1 sp] 3 times, ch 1, (3 dc, ch 2, 3 dc) in the next corner ch-2 sp. Repeat from * twice more. [Ch 1, 3 dc in the next ch-1 sp] 3 times, ch 1. Join with sl st to the top of the beginning ch-3.
Stitch count: 60 dc, 16 ch-1 sps and 4 corner ch-2 sps. Each side has 15 dc and 4 ch-1 sps (19 sts) between the corner ch-2 sps.
Round 7 (Color C): Ch 1. Sc in the same st, then sc in each dc and each ch-1 sp around, working 3 sc in each corner ch-2 sp. Join with sl st to the first sc.
Stitch count: This is a trim round. It works 1 sc into each of the 76 existing dc and ch-1 sps (4 x 19), plus 3 sc into each of the 4 corner sps (12), for 88 sc total.
The middle sc of each 3-sc corner group is the corner stitch. Counting from one corner stitch to the next and including both, each side has 23 sts: 1 corner + 1 + 19 + 1 + 1 corner. To check: 4 sides x 23 = 92, minus 4 shared corners = 88.
Fasten off and weave in all ends on the wrong side. Each side of the square should measure 5 in (12.7 cm).
Make All Pieces
Make 6 sunflower squares in total, all with the same color order.
Approximate yarn per square:
- Color A: 3 g (Rounds 1-2)
- Color B: 4 g (Round 3)
- Color C: 8 g (Rounds 4-7)
For all 6 squares: 18 g of Color A, 24 g of Color B and 48 g of Color C. The rest of Color C goes to the joining and the border.
Layout (2 wide x 3 tall):
+--------+--------+
|   S1   |   S2   |
+--------+--------+
|   S3   |   S4   |
+--------+--------+
|   S5   |   S6   |
+--------+--------+
Lay all squares RS up with the same orientation. Lightly block all six squares to 5 x 5 in (12.7 x 12.7 cm) before joining, so the seams line up stitch for stitch.
Joining
Method: Flat slip stitch join through the back loops, using Color C.
Place two squares side by side, RS up, with the edges touching. Insert the hook through the back loop of the corner st on the first square, then through the back loop of the matching corner st on the second square, and sl st. Continue along the edge, working 1 sl st through each matching pair of back loops.
Stitch-to-stitch logic: Each side has 23 sts, so every seam pairs 23 sts with 23 sts, from corner to corner. You should finish exactly at the opposite pair of corner stitches. If you have a stitch left over, you skipped or doubled a pair, so pull back and recount.
Order:
- Join the short vertical seams first: S1 to S2, S3 to S4 and S5 to S6. This gives three 2-square rows.
- Join the rows with horizontal seams: the bottom edge of the S1-S2 row to the top edge of the S3-S4 row, then the S3-S4 row to the S5-S6 row. Work across both squares in one pass, so the 46 sts of one row’s edge meet the 46 sts of the next.
Tension: Keep the slip stitches as loose as the sc in Round 7. A tight join puckers the seams and makes the panel shorter. If needed, use a 5.5 mm hook for the joining only.
The unused front loops form neat raised ridges on the RS, matching the green grid lines between the squares.
Size checkpoint: The flat join adds no measurable width. The joined panel should measure 10 x 15 in (25.4 x 38.1 cm).
Border
Border gauge: The border keeps the same edge gauge as the squares, 4.6 sts per inch (2.5 cm), so it lies flat without ruffling or pulling in.
Starting counts: Each short edge has 2 squares x 23 sts = 46 sts. Each long edge has 3 squares x 23 sts = 69 sts. These counts already include each square’s corner stitches, and no stitches are added at the seams. At a seam, the two neighboring corner stitches each get their own border stitch.
Total existing edge sts: (2 x 46) + (2 x 69) − 4 shared outer corners = 226 sts.
Border Round 1 (Color C, sc): Join Color C with sc in the st after any outer corner. Sc in each st around, working 3 sc in each of the 4 outer corner sts. Join with sl st to the first sc.
Count: 226 sc worked 1 per existing st + 8 extra corner sts (2 at each corner) = 234 sc. Per side, including both corner stitches: 48 on each short edge and 71 on each long edge. To check: (2 x 48) + (2 x 71) − 4 = 234.
Border Round 2 (Color C, hdc): Ch 1 (does not count as a st). Hdc in each st around, working 3 hdc in each corner st (the middle sc of each corner group). Join with sl st to the first hdc.
Count: 234 worked 1 per st + 8 extra = 242 hdc. Per side: 50 on each short edge and 73 on each long edge. To check: (2 x 50) + (2 x 73) − 4 = 242.
Border Round 3 (Color C, sc): Ch 1. Sc in each st around, working 3 sc in each corner st. Join with sl st to the first sc.
Count: 242 worked 1 per st + 8 extra = 250 sc. Per side: 52 on each short edge and 75 on each long edge. To check: (2 x 52) + (2 x 75) − 4 = 250.
Fasten off and weave in the end.
Why the math works: Each side gains exactly 2 sts per round, one at each corner. That turns the corner without adding fullness along the edge. Together, the three rounds add 0.5 in (1.3 cm) to each edge, so the panel grows from 10 x 15 in (25.4 x 38.1 cm) to 11 x 16 in (27.9 x 40.6 cm).
Final Blocking
- Weave in all remaining ends before blocking, following the direction of the stitches.
- Lay the panel RS up on a blocking mat.
- Spray it evenly with water until it is damp but not soaked.
- Pin the four outer corners to 11 x 16 in (27.9 x 40.6 cm).
- Pin along each edge every 1 in (2.5 cm), keeping the edges straight.
- Pin the seam intersections so the grid lines run straight and square.
- Lift and shape each petal with your fingers so the picot tips point outward.
- Let the panel dry completely, at least 12 hours, before you unpin it.
Final Quality-Control Checklist
- Each square has 12 petals, each with a visible picot tip.
- Round 7 of each square has 88 sts, with 23 sts per side.
- Each square measures 5 x 5 in (12.7 x 12.7 cm).
- All squares face the same way, and none is turned over.
- Every seam pairs 23 sts with 23 sts and ends at a corner.
- The seam ridges sit on the RS and run straight.
- Border Round 3 has 250 sts: 52 on each short edge and 75 on each long edge.
- The panel measures 11 x 16 in (27.9 x 40.6 cm) after blocking.
- All ends are woven in securely, with none showing on the RS.
Troubleshooting
Petals curl or ruffle: The Round 2 circle is too small for 12 petals. Check that it has 24 dc, or go up a hook size for Round 3 only.
Square cups in the middle: The ch-4 loops in Round 4 are too tight. Chain more loosely, or work ch 5 instead while keeping all other counts the same.
Square waves at the edges: The dc in Rounds 5 and 6 are too loose. Go down a hook size for the green rounds.
Seam has a leftover stitch: One side was miscounted. Recount Round 7 on both squares; each side should have 23 sts.
Panel pulls in at the seams: The joining sl sts are too tight. Rework them with a larger hook.
Border ruffles: Check that you worked 3 sts only in the 4 outer corners and not at the seams.
Border corners pull in: Make sure each corner stitch is the middle stitch of the previous round’s 3-st group.
Care
Hand wash in cool water with a mild detergent, gently press out the water and dry flat. Reshape the petals while the panel is still damp.
Final Notes
The measurement chain for this panel is short and easy to check. Each square grows from 12 dc to 24 dc, then 12 petals and 12 loops, and finishes with 88 sts and 23 per side, making a 5 in (12.7 cm) square. Joining six squares 2 x 3 gives a 10 x 15 in (25.4 x 38.1 cm) panel, with 46 border sts on each short edge and 69 on each long edge. Each of the three border rounds adds 2 sts per side, and the finished panel measures 11 x 16 in (27.9 x 40.6 cm).
If your first square hits every checkpoint, the rest of the panel will too.
Happy crocheting!