

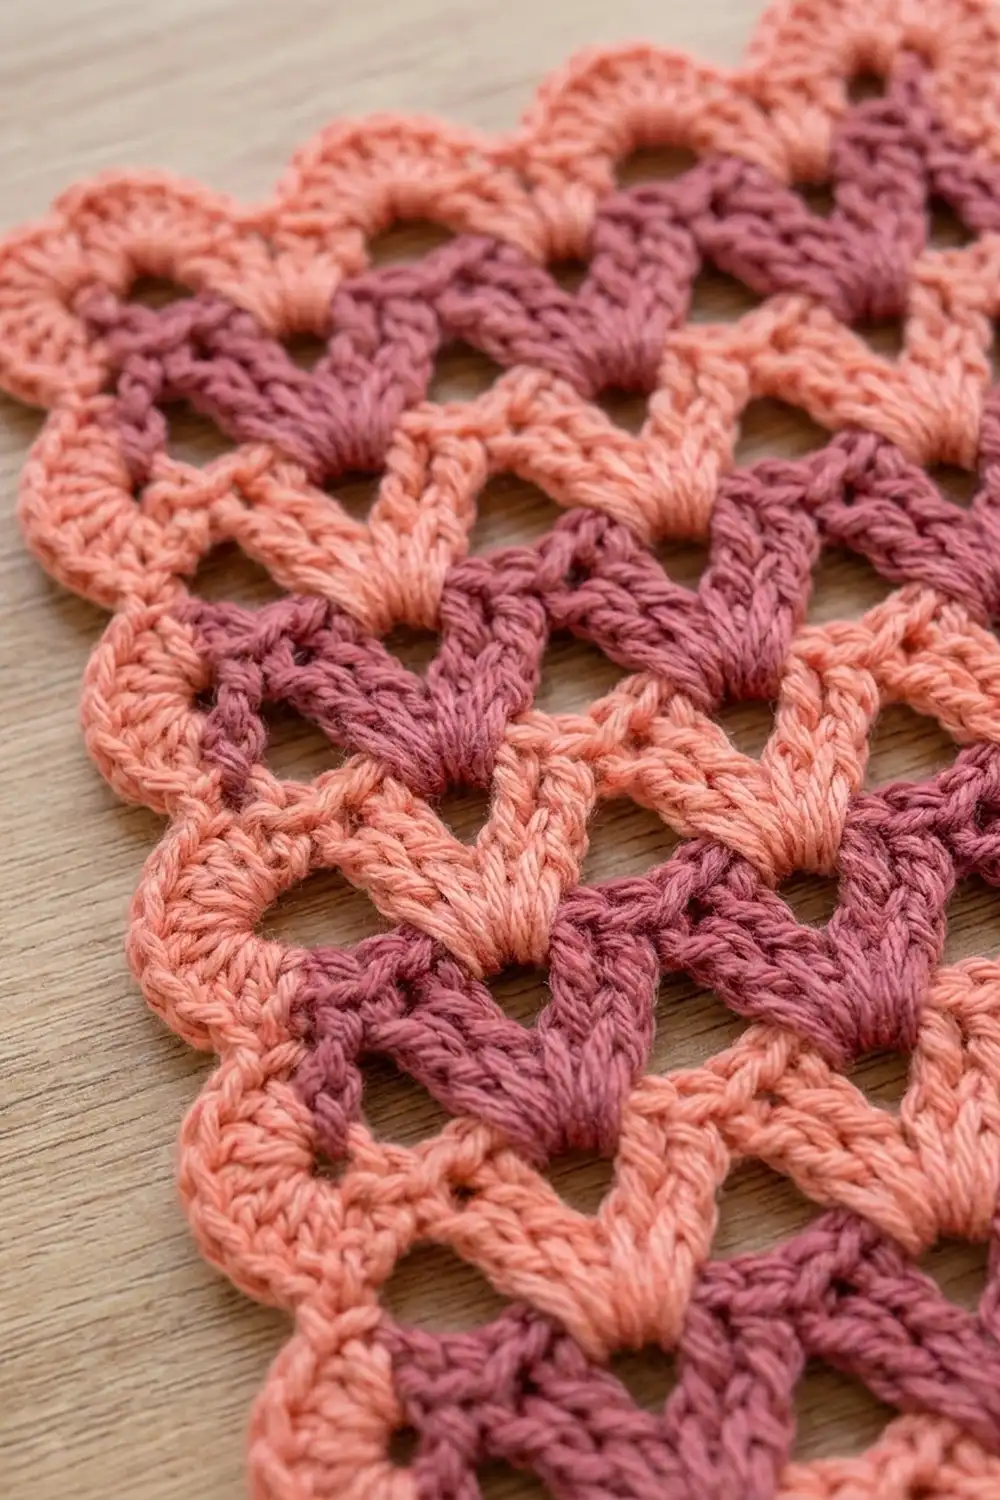
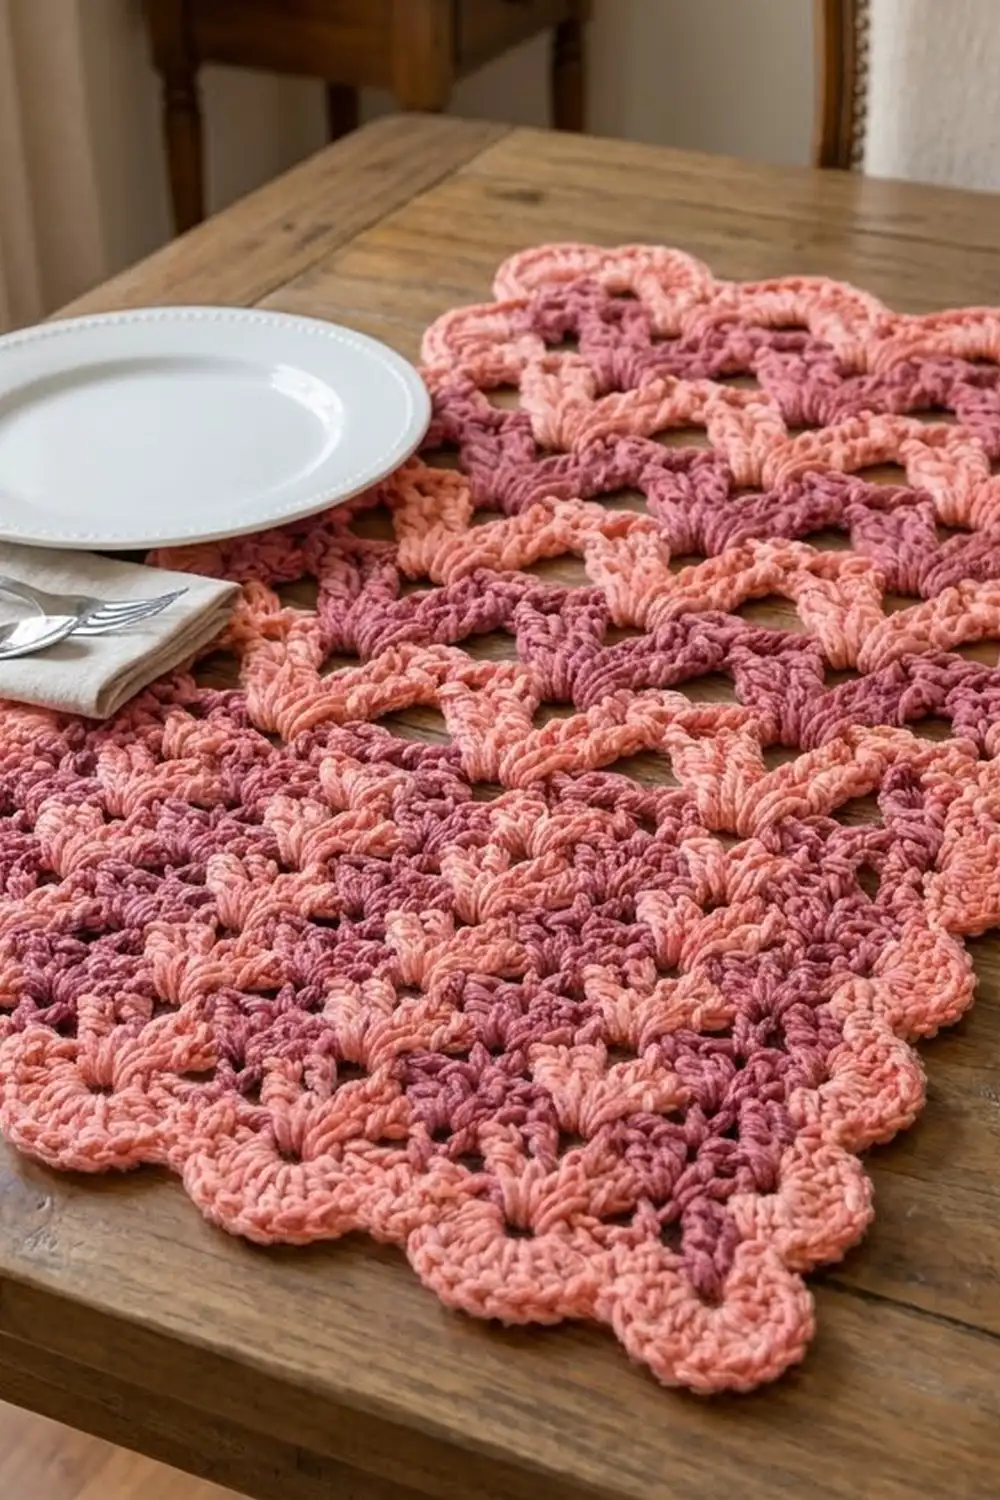
The Coral Blush Fan Stripe Mat is a single rectangle of nesting fan stitches in two warm pinks. Every row is a line of chunky five-stitch fans that open upward like little “V” shapes. Each row of fans tucks neatly between the fans of the row below.
The colors alternate every row: a bright coral and a deeper dusty rose. That one-row stripe gives the piece its rippled, almost woven look. A coral border of single crochet and rounded shell scallops frames the whole thing, with wider scallops fanning around each corner.
This pattern uses US crochet terms. After blocking, the mat measures 10 x 17.75 in (25.4 x 45.1 cm). You can use it as a table mat, a dresser runner or a sampler swatch for the stitch.
Construction is simple. You work one flat body in rows, changing color at the start of every row. Then you add a two-round border all the way around. There is no joining and no seaming.
Finished Size and Construction
- Finished size: 10 x 17.75 in (25.4 x 45.1 cm)
- Skill level: Easy-intermediate
- Terminology: US crochet terms
- Yarn weight: Worsted weight (#4)
- Hook: 5.0 mm (US H-8)
- Number of pieces: 1
- Layout: One rectangle, worked flat in rows, portrait orientation
- Piece size before border: 8 x 15.75 in (20.3 x 40.0 cm)
- Border depth: 1 in (2.5 cm) on every side
- Body: 21 rows, 4 fans wide, 25 stitches per row
Materials
Choose a smooth worsted weight cotton or cotton blend for crisp fans and good stitch definition. A soft acrylic also works if the mat won’t go under hot dishes. Avoid fuzzy or highly textured yarns, because they hide the open gaps between the fans.
Pick two shades that contrast in lightness, not just in color. The coral should look clearly lighter than the dusty rose. Otherwise the stripes blur together from a distance.
- Color A, coral: 60 g / 110 m (120 yd)
- Color B, dusty rose: 40 g / 75 m (82 yd)
Color A covers 11 body rows plus both border rounds. Color B covers 10 body rows. These amounts include a margin of about 15 percent for your gauge swatch and weaving in.
Tools:
- 5.0 mm (US H-8) crochet hook
- Tapestry needle
- Scissors
- Stitch markers (4)
- Tape measure
- Blocking mat, rustproof pins and a spray bottle
Abbreviations (US Terms)
- ch: chain
- sc: single crochet
- dc: double crochet
- sl st: slip stitch
- sk: skip
- st(s): stitch(es)
- sp: space
- rep: repeat
- RS / WS: right side / wrong side
Special stitches:
- Fan: 5 dc in the same stitch.
- Half fan: 3 dc in the same stitch, used at row edges. When a row starts with a half fan, the ch 3 counts as the first dc.
- Standing sc: With a slip knot on the hook, insert the hook into the stitch, yarn over, pull up a loop, yarn over and pull through both loops.
Gauge and Checkpoints
Gauge: In pattern, 2 fan repeats (12 sts) = 4 in (10.2 cm) across, and 4 rows = 3 in (7.6 cm) tall.
Work Rows 1–4 first as your test piece. Lay them flat without stretching and measure. Measure across the widest point of the fans, not across the sc dips.
Checkpoints:
- After Row 1: width 8 in (20.3 cm)
- After Row 4: height 3 in (7.6 cm)
- After Row 12: height 9 in (22.9 cm)
- After Row 21: 8 x 15.75 in (20.3 x 40.0 cm)
- After Border Round 1: 8.5 x 16.25 in (21.6 x 41.3 cm)
- After Border Round 2: 10 x 17.75 in (25.4 x 45.1 cm)
If your piece is too big, go down to a 4.5 mm (US 7) hook. If it is too small, go up to a 5.5 mm (US I-9) hook. Change the hook, not the stitch count. The border math depends on 25 stitches per row and 21 rows.
Body
The body is worked in rows. Fasten off at the end of every row and join the new color for the next row. Work odd rows in Color A and even rows in Color B. Odd rows are RS rows.
Every row has 25 stitches. Odd rows have 4 full fans and 5 sc. Even rows have 3 full fans, 2 half fans and 4 sc.
Foundation: With Color A, ch 26.
Row 1 (RS, A): Sc in 2nd ch from hook, sk 2 ch, fan in next ch, sk 2 ch, sc in next ch; rep from * 3 more times. Fasten off. (4 fans, 5 sc = 25 sts)*
Each repeat uses 6 chains. The first sc plus 4 repeats use all 25 working chains.
Row 2 (WS, B): Turn. Join B in the first st (the last sc of Row 1). Ch 3 (counts as dc), 2 dc in same st (half fan made). Sc in center dc of next fan, fan in next sc; rep from * 2 more times. Sc in center dc of last fan, 3 dc in last sc (half fan made). Fasten off. (3 fans, 2 half fans, 4 sc = 25 sts)*
Check the count: 15 dc in full fans + 6 dc in half fans + 4 sc = 25.
Row 3 (RS, A): Turn. Join A with a standing sc in the first st (top of ch 3). Fan in next sc, sc in center dc of next fan; rep from * 3 more times, working the final sc into the last dc of the half fan. Fasten off. (4 fans, 5 sc = 25 sts)*
On the last repeat, treat the half fan’s outer edge stitch as its “center dc”. This keeps the final sc lined up with the edge.
Row 4 (WS, B): Work as Row 2. (25 sts)
Rows 5–21: Repeat Rows 3 and 4 in turn, ending with a Row 3 in Color A. Row 21 is the 11th Color A row. (25 sts in every row)
Each fan sits centered on an sc in the row below, and each sc is anchored in the center of a fan below. This is what makes the fans nest into “V” shapes and leaves small open gaps between them.
Reading your rows: In a Color A row, the fans line up between the dusty rose fans below it, with a single sc at each edge. In a Color B row, a half fan starts and ends the row. If you lose your place, count the fans: 4 full fans means an odd row.
Tension tip: Keep the sc snug and the dc relaxed. Tight sc pull the fan bases together and make the “V” crisp. Relaxed dc let each fan spread fully.
Ends: Each row leaves 2 tails, 42 in total. Leave each one about 4 in (10.2 cm) long and lay it along the side edge. You’ll crochet over the tails in Border Round 1 and trim them later.
Border
Work the border in Color A in two rounds.
Border gauge: About 3.1 sc per inch (1.2 sc per cm) on every side. The short edges have 25 sc over 8 in (20.3 cm), and the long sides have 49 sc over 15.75 in (40.0 cm). The two match.
In this pattern, the corners are ch-2 spaces and are not counted in the side stitch counts. Each side count is sc only.
Round 1 (RS): With RS facing, join A with a standing sc in the first st of Row 21 at the top right corner.
- Top edge: Sc in each of the next 24 sts. (25 sc)
- Corner: Ch 2.
- Left side: Work into the row ends, crocheting over the tails. Work 2 sc, 2 sc, 3 sc into each group of 3 row ends, 7 times. (49 sc)
- Corner: Ch 2.
- Bottom edge: Sc into the free loop of each of the 25 foundation chains (the same chains Row 1 was worked into). (25 sc)
- Corner: Ch 2.
- Right side: Work as the left side. (49 sc)
- Corner: Ch 2, sl st to first sc.
(Round 1 total: 148 sc + 4 ch-2 sps)
Side math: 7 groups x (2 + 2 + 3) = 7 x 7 = 49 sc. The 21 row ends divide into exactly 7 groups of 3.
Place a marker in each ch-2 corner space.
Round 2, scallops: Sl st into the top right corner ch-2 sp. Ch 3 (counts as dc), 6 dc in same sp (corner fan, 7 dc).
- Each top and bottom edge: Sc in first sc, sk 2 sc, fan in next sc, sk 2 sc, sc in next sc; rep from * 3 more times. (4 fans, 5 sc; uses all 25 sc)*
- Each long side: Sc in first sc, sk 2 sc, fan in next sc, sk 2 sc, sc in next sc; rep from * 7 more times. (8 fans, 9 sc; uses all 49 sc)*
- Each remaining corner: 7 dc in the ch-2 sp.
Work around in this order: left side, corner, bottom, corner, right side, corner, top edge. Then sl st to the top of the beginning ch 3 and fasten off.
(Round 2 total: 24 fans x 5 dc = 120 dc, 4 corners x 7 dc = 28 dc, 28 sc = 176 sts)
Why the math works: Each scallop repeat uses 6 stitches. Starting with one sc and then working a multiple of 6 lets every side start and end on an sc: 25 = 1 + (6 x 4), and 49 = 1 + (6 x 8). The corner fans sit in the ch-2 spaces, so no side stitches are lost or doubled at the corners. The 4 scallops on each short edge also echo the 4 fans across each body row.
Final Blocking
- Weave in the 2 border tails, then trim the body tails close to the border sc.
- Lay the mat RS up on a blocking mat.
- Mist with water until it is evenly damp but not dripping. For acrylic, steam lightly instead, holding the iron above the fabric.
- Pat the body inside the border to 8 x 15.75 in (20.3 x 40.0 cm).
- Pin each corner so the full piece measures 10 x 17.75 in (25.4 x 45.1 cm).
- Pin the tip of every scallop so each one curves out evenly.
- Gently open the gaps between the fans with your fingertips.
- Leave it to dry completely, then unpin.
Final Quality-Control Checklist
- Every body row has 25 stitches.
- Odd rows have 4 full fans. Even rows have 3 full fans and 2 half fans.
- Colors alternate every row: 11 coral rows and 10 dusty rose rows.
- The fans in each row sit centered between the fans of the row below.
- Border Round 1 has 25 sc on each short edge and 49 sc on each long side.
- Each corner has a 7-dc fan.
- Each short edge shows 4 scallops and each long side shows 8.
- The finished size is 10 x 17.75 in (25.4 x 45.1 cm).
- No tails show on the RS.
Troubleshooting
Fans lean or drift sideways. Make sure each fan goes into an sc of the row below, and each sc goes into the 3rd dc of a fan.
Edges are uneven. This is normal before the border. The half fans and edge sc of alternating rows even out once you work Round 1.
Side edges ruffle after Round 1. Keep the 49 sc count, but rework Round 1 with a 4.5 mm (US 7) hook so the sc sit tighter.
Side edges pull in. Keep the count, but use a 5.5 mm (US I-9) hook for Round 1 only, or loosen your sc.
Scallops cup. Block firmly and pin each scallop tip. If the cupping is strong, use a slightly looser yarn over when you work the fans.
Body is too long or too short. Check your row height against the gauge of 3 in (7.6 cm) per 4 rows. Change the hook size rather than adding or removing rows.
Color joins show. Make the first stitch of each new color tight, and give the tail a gentle tug before you work over it in the border.
Care
Hand wash in cool water with mild soap, press the water out in a towel and dry flat to shape. You can lightly steam cotton versions to refresh the scallops.
Final Notes
The measurements build on each other. Row 1 sets the width at 25 stitches, or 8 in (20.3 cm). At 3 in (7.6 cm) per 4 rows, 21 rows bring the body to 15.75 in (40.0 cm). Border Round 1 locks in 25 and 49 sc per side. The 1 in (2.5 cm) scallop border then brings the mat to 10 x 17.75 in (25.4 x 45.1 cm).
Check your gauge early, count every row and let blocking finish the shape. Happy crocheting!