

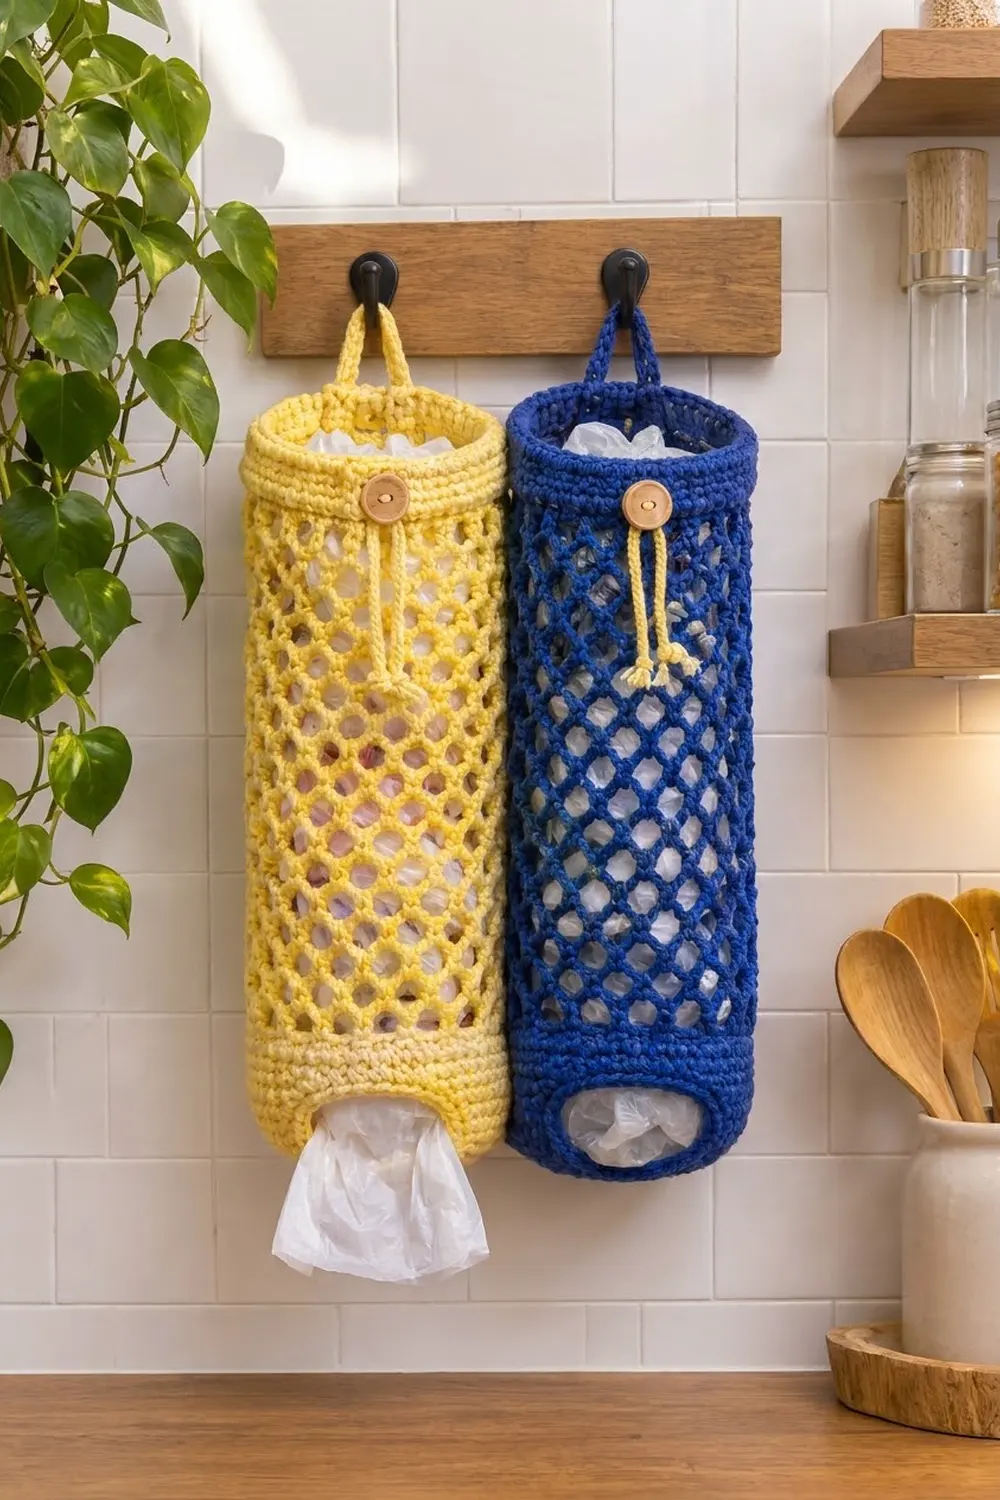
This hanging plastic bag dispenser is a tall mesh tube. It stores your bags where you can see them and lets you pull them out from the bottom. A solid single crochet band frames each end, a diamond net fills the middle, and a narrow arched handle at the back lets it hang from any hook or peg.
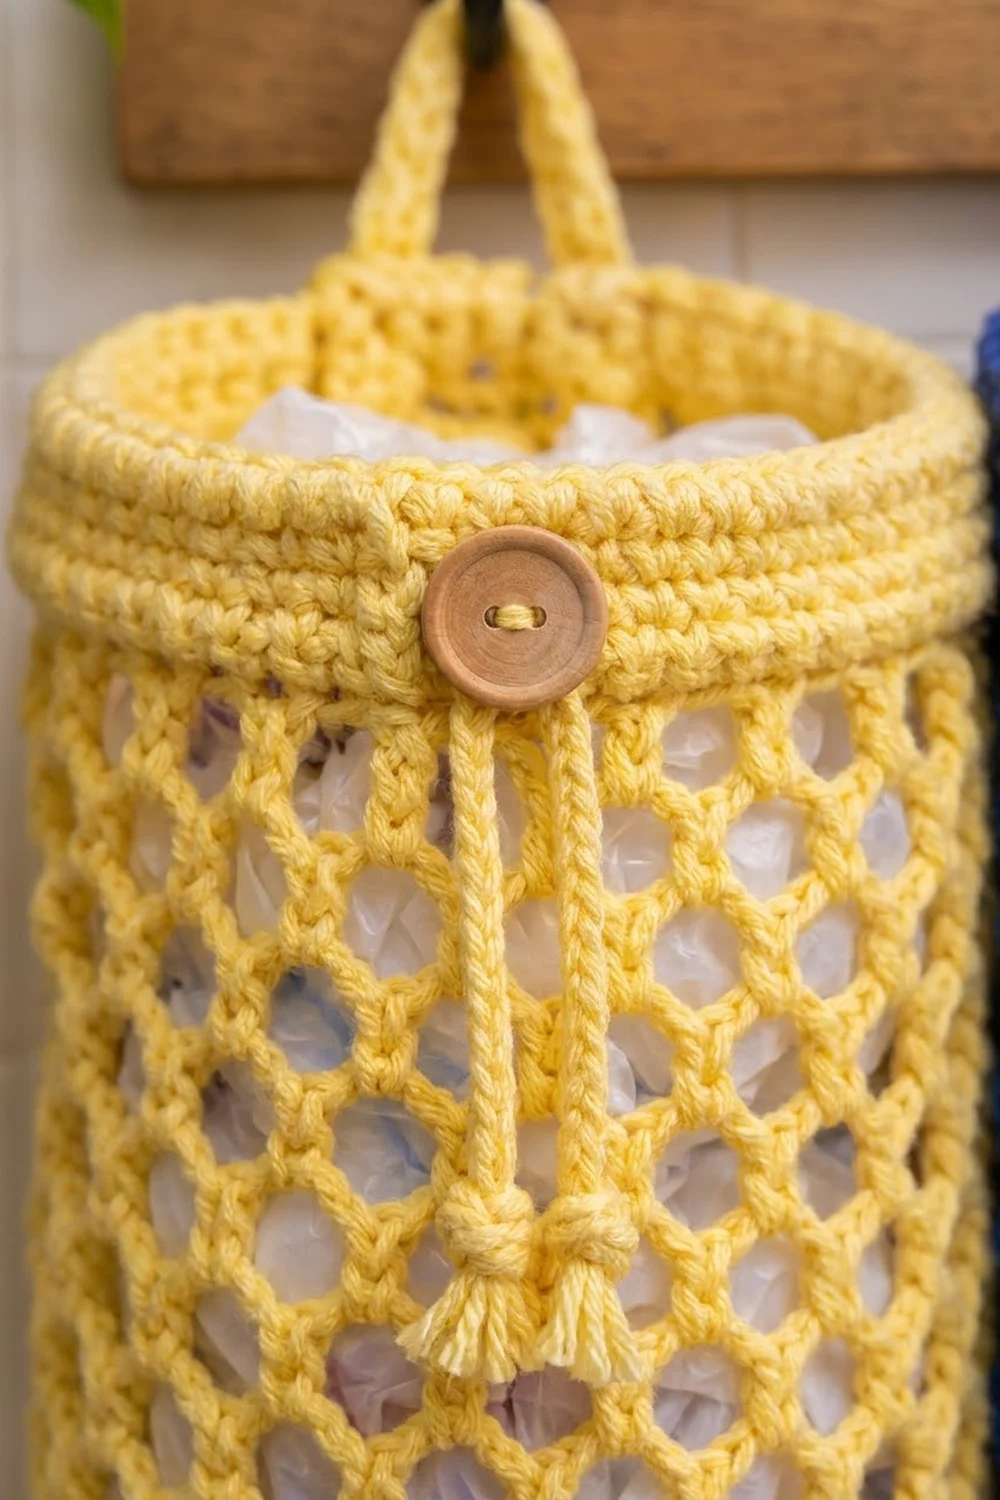
The sample is shown in two colorways: soft butter yellow and deep royal blue. Each dispenser uses one color only. It’s finished with a natural wooden button on the front of the top band and a short slip-stitch cord with knotted, tasseled ends hanging below it. The look is fresh and practical, a little like a market bag.
The pattern uses US crochet terms. The finished dispenser measures about 5.5 in (14.0 cm) across and 17 in (43.2 cm) around. It’s about 18.5 in (47.0 cm) tall, or 21 in (53.3 cm) including the handle. The bottom opening is about 2.25 in (5.7 cm) wide.
The whole dispenser is one continuous piece, worked in joined rounds from the bottom up. Start with a chain ring that becomes the dispensing hole. Increase into a flat ring-shaped base, then turn the corner with a back-loop round and work the lower band. Switch to chain-5 mesh, convert back to solid stitches for the top band, and build the handle into the last rounds.
Finished Size and Construction
- Finished size: 5.5 in (14.0 cm) diameter x 18.5 in (47.0 cm) tall; 21 in (53.3 cm) with handle
- Skill level: Easy / advanced beginner
- Terminology: US crochet terms
- Yarn weight: Worsted (#4), cotton or cotton blend
- Hook: 5.0 mm (H-8)
- Number of pieces: 1 crocheted body with built-in handle, plus 1 small cord and 1 button
- Layout: Single vertical tube, hung from the back handle
- Piece size: 60 stitches around, 54 rounds tall
- Size before border: 16 in (40.6 cm) tall after the mesh section (base, lower band, and mesh)
- Border depth: The top band and rim add about 2.5 in (6.4 cm)
Materials
Choose a smooth worsted-weight cotton. Cotton holds its shape when the tube is full of bags and doesn’t stretch out the way acrylic can. A yarn of about 85 m per 50 g (93 yd per 50 g) is ideal.
- Main color (yellow OR blue): 75 g, about 130 m (142 yd)
- 5.0 mm (H-8) crochet hook
- 1 wooden button, 1 in (2.5 cm) diameter
- Tapestry needle
- Stitch marker
- Scissors
- Measuring tape
- Sewing thread to match the button (optional, for extra security)
The quantities include a margin of about 20 percent for the gauge check, cord, and tassels. To make the pair shown, buy 75 g of each color.
Abbreviations (US Terms)
- ch – chain
- sl st – slip stitch
- sc – single crochet
- dc – double crochet
- sk – skip
- st(s) – stitch(es)
- BLO – back loop only
- rnd(s) – round(s)
- inc – 2 sc in the same st
Mesh loop: Ch 5, then sc in the next ch-5 loop. This makes 1 mesh loop.
Closing loop: Ch 2, dc in the first sc of the round. This counts as a full ch-5 loop and leaves your hook in the center of that loop, so the next round starts in the right place.
Gauge and Checkpoints
Solid gauge: 14 sc and 16 rnds = 4 in (10.2 cm).
Mesh gauge: 2 mesh rnds = 1 in (2.5 cm) when lightly stretched lengthwise.
The tube itself is your best gauge test. Work Rnds 1–7 and check the base before going further.
- After Rnd 7: The base lies flat. Outer diameter is about 5.5 in (14.0 cm) and the opening is about 2.25 in (5.7 cm).
- After Rnd 15: The lower band is 2 in (5.1 cm) tall.
- After Rnd 25: The mesh measures about 5 in (12.7 cm).
- After Rnd 43: The mesh measures about 14 in (35.6 cm). Total height is about 16 in (40.6 cm).
- After Rnd 54: Total height is about 18.5 in (47.0 cm).
If your base is too big or ruffles, go down to a 4.5 mm hook and restart. If it cups upward or is too small, go up to a 5.5 mm hook. Don’t fix the diameter by changing stitch counts, because the mesh math depends on exactly 60 stitches.
If the mesh is too short or too long, change the number of plain mesh rounds (Rnds 17–42), not the loop count.
Base
The base is a flat ring. The starting chain becomes the hole the bags come out of.
Rnd 1: Ch 24, sl st in first ch to form a ring, being careful not to twist. Ch 1, sc in each ch around, sl st in first sc. (24 sc)
Place a marker in the first st of each round and move it up as you go. Don’t turn at the end of rounds.
Rnd 2: Ch 1, sc in next 3 sts, inc in next st; repeat from * 6 times total, sl st in first sc. (30 sc)
Rnd 3: Ch 1, sc in next 4 sts, inc; repeat 6 times, sl st. (36 sc)
Rnd 4: Ch 1, sc in next 5 sts, inc; repeat 6 times, sl st. (42 sc)
Rnd 5: Ch 1, sc in next 6 sts, inc; repeat 6 times, sl st. (48 sc)
Rnd 6: Ch 1, sc in next 7 sts, inc; repeat 6 times, sl st. (54 sc)
Rnd 7: Ch 1, sc in next 8 sts, inc; repeat 6 times, sl st. (60 sc)
Checkpoint: A flat ring, 5.5 in (14.0 cm) across, with a 2.25 in (5.7 cm) opening.
Lower Band
Rnd 8: Ch 1, sc BLO in each st around, sl st in first sc. (60 sc)
The unused front loops form a neat ridge where the base turns up into the wall.
Rnds 9–15: Ch 1, sc in each st around, sl st in first sc. (60 sc each round)
Checkpoint: The lower band is 2 in (5.1 cm) tall, measured from the ridge.
Mesh Body
The mesh has 15 loops around: 60 sts ÷ 4 sts per loop = 15 loops.
Rnd 16 (set-up): Ch 1, sc in first st, ch 5, sk 3 sts, sc in next st; repeat from * 14 times, ch 2, sk last 3 sts, dc in first sc. (15 sc, 15 loops)
Check: The first sc plus 14 repeats uses 57 sts. The last 3 sts are skipped under the closing loop, and 57 + 3 = 60.
Rnd 17: Ch 1, sc in the closing loop (under the dc), ch 5, sc in next ch-5 loop; repeat from * 14 times, ch 2, dc in first sc. (15 loops)
Rnds 18–42: Repeat Rnd 17. (15 loops each round)
Each sc lands in the center of a loop below. This shifts the loops by half a loop every round, which creates the diamond lattice.
Rnd 43 (final mesh): Ch 1, sc in closing loop, ch 5, sc in next ch-5 loop; repeat from * 14 times, ch 5, sl st in first sc. (15 sc, 15 full ch-5 loops)
That makes 28 mesh rounds (Rnds 16–43). Checkpoint: The mesh is about 14 in (35.6 cm) tall when gently stretched lengthwise.
Top Band and Rim (Border)
Border gauge: Same as the solid gauge, 14 sc = 4 in (10.2 cm). At 60 sts the band is about 17 in (43.2 cm) around. That matches the lower band, so the tube stays straight instead of flaring or pulling in.
Think of the round as two halves. The front half is sts 1–15 and 46–60, centered on the round join. The back half is sts 16–45. Each half holds 30 sts. The button sits at front center and the handle at back center.
Rnd 44 (conversion): Ch 1, sc in next sc, 3 sc in next ch-5 loop; repeat from * 15 times, sl st in first sc. (15 sc worked 1 per existing sc + 45 sc worked into loops = 60 sc)
Front half: 30 sc. Back half: 30 sc.
Rnds 45–51: Ch 1, sc in each st around, sl st in first sc. (60 sc each round)
Checkpoint: Rnds 44–51 form an 8-round band, 2 in (5.1 cm) tall.
Rnd 52 (handle opening): Ch 1, sc in first 25 sts, ch 20, sk next 10 sts, sc in last 25 sts, sl st in first sc. (50 sc + 1 ch-20)
The 10 skipped sts are sts 26–35. They’re centered on the back, directly opposite the round join at front center.
Rnd 53: Ch 1, sc in next 25 sc, sc in each of the 20 ch, sc in last 25 sc, sl st in first sc. (25 + 20 + 25 = 70 sc)
Rnd 54: Sl st in each st around. (70 sl st) Fasten off.
Why the math works: The band stays at exactly 60 sts, the same as the lower band, so both ends are the same width. The handle round skips 10 rim sts and adds a 20-st chain. The rim stays at 50 sts, and the 20 new sts all sit in the arch. A 20-st chain is about 5.7 in (14.5 cm) long. Spanning a 10-st gap of about 2.9 in (7.4 cm), it makes an arch about 2.5 in (6.4 cm) high.
Cord, Tassels, and Button
Cord: Ch 36. Sl st in the back bump of the 2nd ch from hook and in each ch across. (35 sl st) Fasten off, leaving a 3 in (7.6 cm) tail at each end. The cord is about 10 in (25.4 cm) long.
Tassels (make 2): Cut 4 strands, each 3 in (7.6 cm) long. Fold them through the last stitch at one end of the cord. Wrap a cord tail tightly around them twice, just below the fold, and knot. Trim the tassel to about 1 in (2.5 cm). Repeat at the other end.
Attach: Fold the cord in half. Lay the fold at front center on Rnd 48, directly above the round join. Sew the button through the fold and the band so the button holds the cord in place. Let both halves hang evenly, about 5 in (12.7 cm) each. Tie an overhand knot in each half about 1 in (2.5 cm) above the tassel.
Final Blocking
- Weave in all ends inside the tube, along the solid bands and never across the mesh.
- Soak the dispenser in cool water for 10 minutes, then gently press out the water in a towel. Don’t wring it.
- Roll a towel into a tube about 5.5 in (14.0 cm) across, or use a large bottle, and slide the dispenser over it.
- Pull the mesh lengthwise until it measures 14 in (35.6 cm) and the diamonds look even all the way around.
- Flatten the base ring with your fingers and round out the opening to 2.25 in (5.7 cm).
- Pin the handle into an arch, or hang the dispenser from a hook while it dries.
- Let it dry completely, for at least 24 hours.
Final Quality-Control Checklist
- The base lies flat with a clean, round 2.25 in (5.7 cm) opening.
- The back-loop ridge is visible all the way around the bottom edge.
- The lower and top bands are both 60 sts and 2 in (5.1 cm) tall.
- Every mesh round has exactly 15 loops, with no doubled or missing diamonds.
- Total height is about 18.5 in (47.0 cm), or 21 in (53.3 cm) with the handle.
- The handle sits at back center, directly opposite the button.
- The button is sewn through the cord fold and feels secure.
- Both cord tails hang evenly, with the knots and tassels at the same height.
- All ends are woven into solid areas.
Troubleshooting
The base cups like a bowl. Your increases are too tight. Go up a hook size for Rnds 1–7 only.
The base ruffles. Your stitches are loose. Go down a hook size.
The mesh leans or twists. Start each round with the sc in the closing loop, not in the top of the dc.
The loop count changes. Count the 15 sc every few rounds. An extra or missing loop is usually at the round join.
Bags fall out too easily. Tighten the opening by working 1 round of sc into the free loops of the starting chain. (24 sc)
Bags are hard to pull out. Restart and work only the Rnd 1 chain with a 6.0 mm hook. This widens the opening without changing any counts.
The handle stretches. Work a row of sl st along the underside of the chain.
The mesh is too short. Add more plain mesh rounds before Rnd 43. Each round adds about 0.5 in (1.3 cm).
Care
Hand wash in cool water with mild soap, then lay flat or hang to dry. Cotton can be gently reshaped while damp.
Final Notes
Everything in this dispenser depends on one number: 60 stitches. A 24-stitch ring grows to 60 by Rnd 7, giving a 5.5 in (14.0 cm) base. The lower band holds 60 sts for 2 in (5.1 cm). The mesh divides those 60 sts into 15 loops for 14 in (35.6 cm). The top band turns the 15 loops back into 15 + 45 = 60 sts for another 2 in (5.1 cm), and the rim adds the handle without changing the tube’s width. That brings the dispenser to 18.5 in (47.0 cm) tall, or 21 in (53.3 cm) with the handle.
Make one in sunny yellow, one in royal blue, or one for every room that collects bags.
Happy crocheting!