

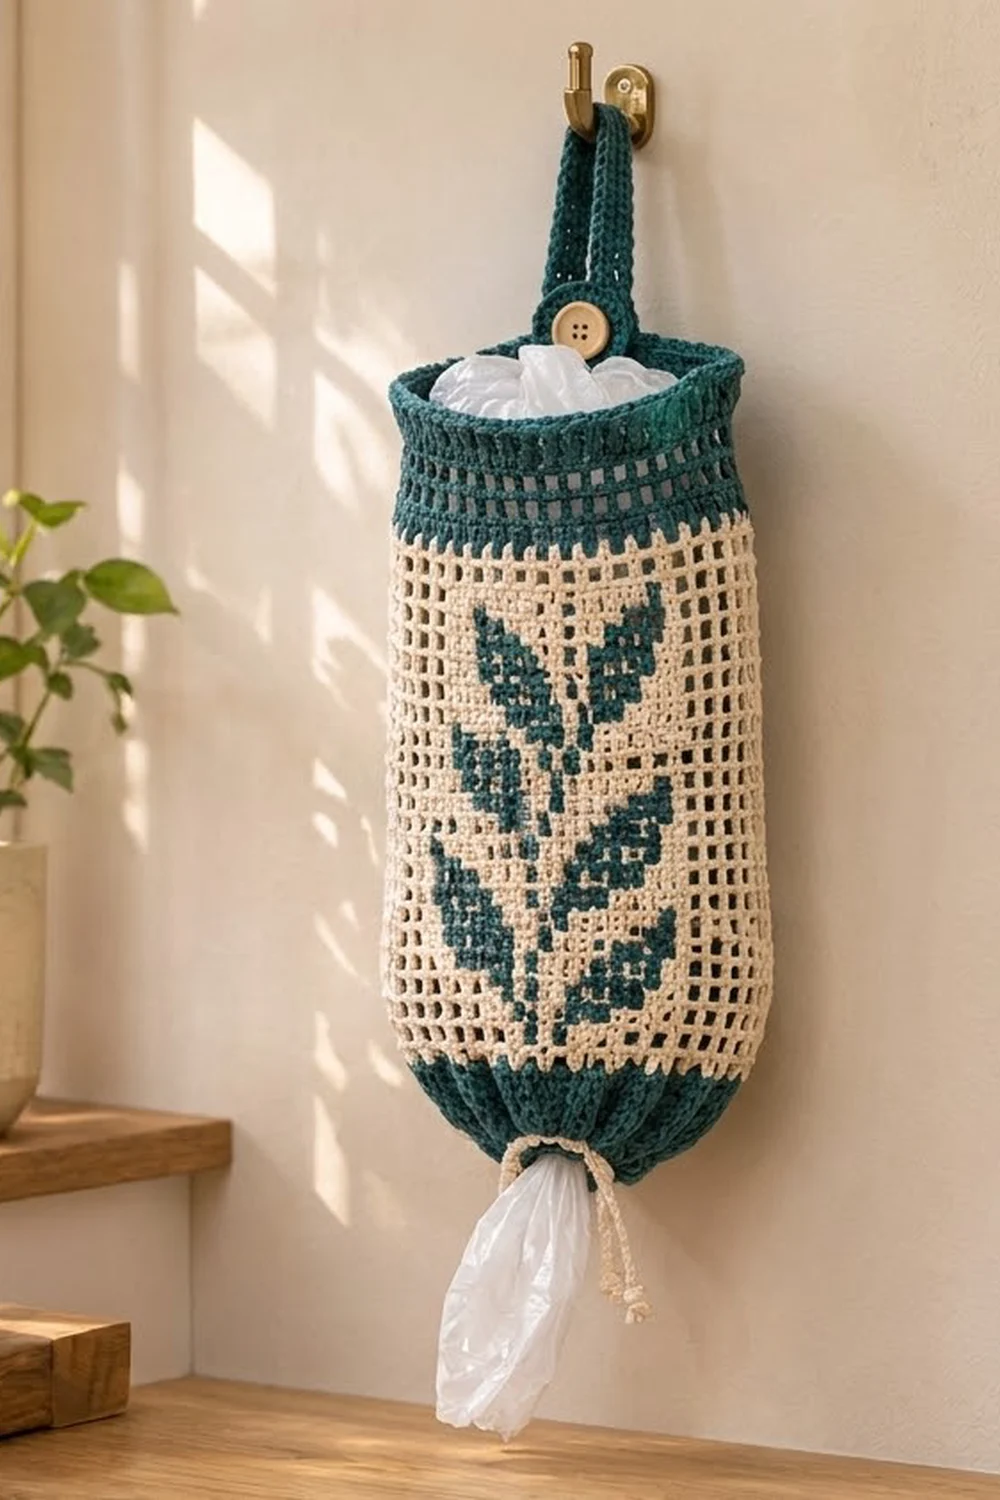
This hanging bag dispenser keeps plastic grocery bags tidy and easy to reach. You stuff bags in at the top and pull them out one at a time through the gathered opening at the bottom. The tube is open cream filet mesh with a teal leafy sprig on the front, between a solid teal rim and a ribbed teal base.
The colors are deep teal and natural cream, which suit a farmhouse or Scandinavian-style kitchen. The mesh stays airy, so bags are easy to see and grab.
This pattern uses US crochet terms. The finished dispenser measures 7.5 in (19.1 cm) wide laid flat, 15 in (38.1 cm) around and 19.75 in (50.2 cm) tall, not counting the strap.
You work it top-down in one piece. First comes a foundation ring and the top band. Then you work turned mesh rounds with the motif charted in, and finally the ribbed bottom band with a drawstring eyelet round. A short strap is worked straight off the rim, and a crocheted cord gathers the bottom.
Finished Size and Construction
- Finished size: 7.5 in (19.1 cm) wide flat × 19.75 in (50.2 cm) tall
- Circumference: 15 in (38.1 cm), 60 stitches
- Skill level: Intermediate (filet mesh plus simple two-color blocks)
- Terminology: US
- Yarn weight: Worsted (#4) cotton or cotton blend
- Hook: US H-8 (5 mm)
- Number of pieces: 1 tube with built-in strap, plus 1 drawstring cord
- Layout: A single vertical tube; the motif is centered on the front
- Piece size before border: 16.75 in (42.5 cm) tall
- Border (bottom band) depth: 3 in (7.6 cm)
Materials
Choose a smooth, firm worsted-weight cotton. Cotton holds the mesh open and doesn’t stretch much under the weight of the bags. Avoid fuzzy yarns, because they blur the filet squares.
- Teal (Color A): 100 g / about 180 m (197 yd)
- Cream (Color B): 75 g / about 135 m (148 yd), including the cord
These quantities include roughly a 15% margin.
Tools:
– US H-8 (5 mm) hook
– 4 locking stitch markers
– One 1 in (2.5 cm) wooden button
– Tapestry needle
– Sewing needle and matching thread
– Measuring tape
– Rust-proof pins
Abbreviations (US Terms)
- ch – chain
- sl st – slip stitch
- sc – single crochet
- dc – double crochet
- fsc – foundation single crochet
- FPdc – front post double crochet
- BPdc – back post double crochet
- sk – skip
- sp – space
- st(s) – stitch(es)
- rnd – round
- RS / WS – right side / wrong side
Special stitches:
- Open square: dc in the next st, ch 1, sk the next st or ch-sp. This uses 2 stitches of width.
- Filled square (teal): in Color A, dc in the next st, then dc in the next st or ch-sp. This also uses 2 stitches of width. The dc that starts the following square is worked in the color that square calls for.
Gauge and Checkpoints
- Single crochet gauge: 16 sc × 16 rnds = 4 in (10.2 cm)
- Mesh gauge: 8 squares × 8 rnds = 4 in (10.2 cm), which is the same 16 stitches across
- One sc round is 0.25 in (0.6 cm) tall; one mesh or dc round is 0.5 in (1.3 cm) tall.
Since this is a single piece, your first few rounds act as the gauge swatch. Check these measurements as you go:
- After Rnd 5: the ring measures 15 in (38.1 cm) around, or 7.5 in (19.1 cm) laid flat.
- After Rnd 9: the top band is 2.75 in (7.0 cm) tall.
- After Rnd 17: 8 mesh rounds measure 4 in (10.2 cm) tall.
- After Rnd 37: the piece is 16.75 in (42.5 cm) tall.
- After Rnd 44: the piece is 19.75 in (50.2 cm) tall.
If the ring is too big, go down half a hook size; if it’s too small, go up half a size. If the width matches but the mesh rounds are too short, pull up a slightly taller loop on each dc instead of changing hooks.
Part 1: Top Band (Color A)
Rnd 1: With Color A, fsc 60. Join with a sl st to the first fsc, taking care not to twist. (60 sts)
Rnds 2–5: Ch 1, sc in each st around, sl st to the first sc. (60 sts)
Check: the ring is 15 in (38.1 cm) around.
Rnd 6 (mesh): Ch 4 (counts as dc + ch 1), sk 1, dc in the next st, ch 1, sk 1; rep from * around. Sl st to the 3rd ch of the beginning ch-4. (30 dc + 30 ch-1 sps = 60 sts, 30 squares)*
Rnd 7: Ch 1, sc in each dc and each ch-1 sp around, sl st to the first sc. (30 + 30 = 60 sts)
Rnd 8 (mesh): Repeat Rnd 6. (60 sts, 30 squares)
Rnd 9: Repeat Rnd 7. (60 sts) Fasten off Color A.
Check: the band is 2.75 in (7.0 cm) tall, with two rows of teal windows.
Part 2: Filet Body (Color B with Color A Motif)
The body is worked in joined, turned rounds. Turning keeps the seam straight and leaves the teal yarn on the correct side of the motif for each new round, so you never strand it all the way around the tube.
Mark the beginning-of-round seam as the center back; the strap will sit above it later.
Rnd 10 (RS): Join Color B at the seam. Ch 4 (counts as dc + ch 1), sk 1, dc in the next st, ch 1, sk 1; rep from * around. Sl st to the 3rd ch of the ch-4, then turn. (30 squares, 60 sts)*
Number the squares 1–30 from the seam. Place one marker in the dc that starts square 11 and another in the dc that starts square 22. The 11 squares between the markers (squares 11–21) are the motif zone, centered on the front. Move the markers up as you work.
Rnds 11–12: Ch 4, dc in the next dc, ch 1, sk the ch-sp; rep from * around, ending with a sl st to the 3rd ch, then turn. (30 open squares each)*
Rnds 13–34 (chart rounds): Work all squares outside the motif zone as open squares in Color B. Inside the zone, follow the chart below, one chart row per round.
- Chart row 1 is the top of the sprig and goes with Rnd 13; row 22 goes with Rnd 34.
- X = filled square in Color A; . = open square in Color B.
- The motif is symmetrical, so you can read every row in either direction.
Row  1  . . . . . X . . . . .
Row  2  . . . . X X X . . . .
Row  3  . . . . X X X . . . .
Row  4  . . . . . X . . . . .
Row  5  X . . . . X . . . . X
Row  6  X X . . . X . . . X X
Row  7  . X X X . X . X X X .
Row  8  . . X X X X X X X . .
Row  9  . . . . . X . . . . .
Row 10  X . . . . X . . . . X
Row 11  X X . . . X . . . X X
Row 12  . X X X . X . X X X .
Row 13  . . X X X X X X X . .
Row 14  . . . . . X . . . . .
Row 15  X . . . . X . . . . X
Row 16  X X . . . X . . . X X
Row 17  . X X X . X . X X X .
Row 18  . . X X X X X X X . .
Row 19  . . . . . X . . . . .
Row 20  . . . . . X . . . . .
Row 21  . . . . . X . . . . .
Row 22  . . . . . X . . . . .
The chart is 11 squares wide and 22 rows tall. Because you work top-down, the chart is shown as the piece hangs: the bud is at the top, and each leaf tip sits higher than the point where it meets the stem.
Color changes:
- Join Color A at the first X in Rnd 13.
- Change colors on the last yarn-over of the stitch before the new color.
- Across the motif zone, carry the color you’re not using along the top of the previous round and work over it with your dc.
- Where an open square interrupts teal blocks, let the teal run along the inside of the tube. The longest gap is 4 squares, or 2 in (5.1 cm).
- At the zone edge, drop Color A on the inside. After you turn, it will be waiting on the correct side for the next round.
- Fasten off Color A after Rnd 34.
Every chart round still has 30 squares, which is 60 sts.
Rnds 35–37: Repeat Rnd 11 in Color B. (30 open squares each) Turn at the end of Rnd 37 so the RS faces you. Fasten off Color B.
You turned after each of Rnds 10–37, which is 28 turns in all. Because that’s an even number, the RS faces outward again.
Check: the body is 14 in (35.6 cm), and the whole piece is 16.75 in (42.5 cm) tall. The motif is 5.5 in (14.0 cm) wide and 11 in (27.9 cm) tall.
Part 3: Hanging Strap (Color A)
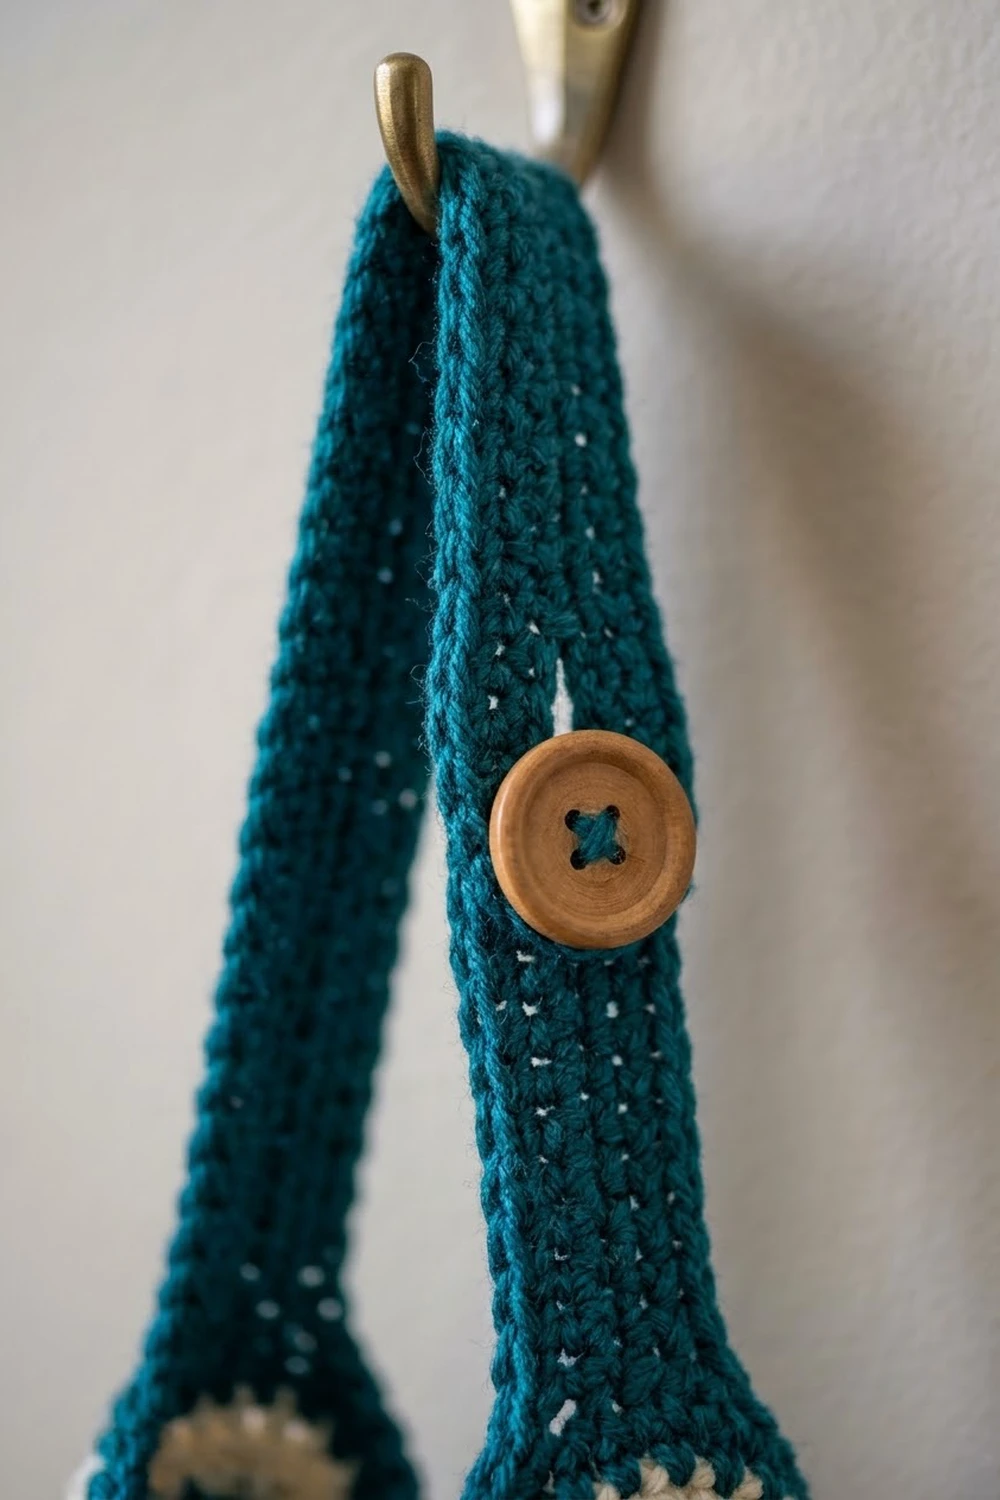
Work the strap into the remaining loops of the Rnd 1 foundation edge, centered over the seam.
Row 1: Join Color A 3 sts to the right of the seam. Ch 1, sc in the next 6 sts, turn. (6 sts)
Rows 2–36: Ch 1, sc in each st, turn. (6 sts)
Row 37: Ch 1, sc 2, ch 2, sk 2, sc 2, turn. (4 sc + ch-2 sp)
Row 38: Ch 1, sc 2, 2 sc in the ch-2 sp, sc 2, turn. (2 + 2 + 2 = 6 sts)
Rows 39–40: Ch 1, sc in each st, turn. (6 sts) Fasten off.
The strap is 1.5 in (3.8 cm) wide and 10 in (25.4 cm) long.
Sew the button to the outside of the strap at Row 4, about 1 in (2.5 cm) above the rim. To hang the dispenser, pass the strap over the hook, fold the tip down and fasten the buttonhole over the button.
Border: Bottom Drawstring Band (Color A)
Border gauge: the band uses the body’s 60-stitch circumference. Think of it as two “sides” of 30 sts each, front and back, with no corners on a tube. Dc rounds measure 0.5 in (1.3 cm) and sc rounds measure 0.25 in (0.6 cm).
Rnd 38: Join Color A at the seam. Ch 1, sc in each dc and each ch-1 sp around, sl st to the first sc. (30 + 30 = 60 sts; 30 per side)
Rnd 39: Ch 2 (doesn’t count as a st), dc in each st around, sl st to the first dc. (60 sts; 30 per side)
Rnds 40–42: Ch 2, FPdc around the next st, BPdc around the next st; rep from * around, sl st to the first st. (30 FPdc + 30 BPdc = 60 sts; 15 ribs per side)*
Rnd 43 (eyelets): Ch 4 (counts as dc + ch 1), sk 1, dc in the next st, ch 1, sk 1; rep from * around, sl st to the 3rd ch. (30 dc + 30 ch-1 sps = 60 sts; 15 eyelets per side)*
Rnd 44: Ch 1, sc in each dc and each ch-1 sp, sl st to the first sc. (30 + 30 = 60 sts) Fasten off.
Why the math works:
- Every round has 60 sts, matching the body’s 30 squares × 2 sts.
- 60 is even, so the FPdc/BPdc ribbing repeats cleanly.
- 30 eyelets let the cord weave over and under in equal steps.
- The band depth is 0.25 + 0.5 + 1.5 + 0.5 + 0.25 = 3 in (7.6 cm), so the total height is 16.75 + 3 = 19.75 in (50.2 cm).
Drawstring:
- With Color B, chain until the cord measures 24 in (61.0 cm).
- Turn and sl st into the back bump of each chain to firm it up.
- Weave the cord through the Rnd 43 eyelets, going over 2 and under 2, starting and ending at the center front.
- Tie an overhand knot about 1 in (2.5 cm) from each end, and trim the tails.
- Pull the cord until the opening is about 1.5 in (3.8 cm) across, then tie a bow.
Final Blocking
- Weave in all ends along stitch posts on the inside, following the same color.
- Wet the piece in cool water, then gently press out the water in a towel. Don’t wring it.
- Slide a rolled towel or a 4.75 in (12.1 cm) wide bottle inside so the tube holds its 15 in (38.1 cm) circumference.
- Pin the mesh so the squares are straight and the rounds are level. Check the width at 7.5 in (19.1 cm).
- Pin the strap flat at 1.5 in × 10 in (3.8 cm × 25.4 cm).
- Let it dry completely before you thread or tighten the cord.
Final Quality-Control Checklist
- [ ] Every round has 60 sts and every mesh round has 30 squares
- [ ] The seam runs straight up the center back
- [ ] The motif is centered on the front, 11 squares wide and 22 rounds tall
- [ ] No teal strands show through the open squares outside the motif
- [ ] The finished piece is 7.5 in (19.1 cm) wide and 19.75 in (50.2 cm) tall
- [ ] The strap buttons easily and holds without strain
- [ ] The cord moves freely and its knots are secure
Troubleshooting
- The tube flares or narrows: count the squares; you skipped or added one. Each mesh round needs exactly 30.
- The seam spirals: you forgot a turn. Turn after every body round, Rnds 10–37.
- The teal shows through the squares: carry it on the inside and keep floats loose but short.
- The motif looks lopsided: recheck the marker positions at squares 11 and 22.
- The ribbing curls: work the post stitches with a slightly looser tension.
- Bags fall out: pull the drawstring tighter so the opening is about 1 in (2.5 cm).
Care
Hand wash or machine wash cool on a gentle cycle, then reshape and lay flat to dry. Take out the drawstring before washing so it doesn’t tangle.
Final Notes
The measurement chain is simple to follow:
- 60 sts make a 15 in (38.1 cm) ring.
- The top band adds 2.75 in (7.0 cm).
- 28 mesh rounds add 14 in (35.6 cm), for 16.75 in (42.5 cm) in all.
- The bottom band adds 3 in (7.6 cm), for a finished 19.75 in (50.2 cm).
If you hit each checkpoint along the way, the sprig will sit centered and the dispenser will hang straight and neat.
Happy crocheting!