

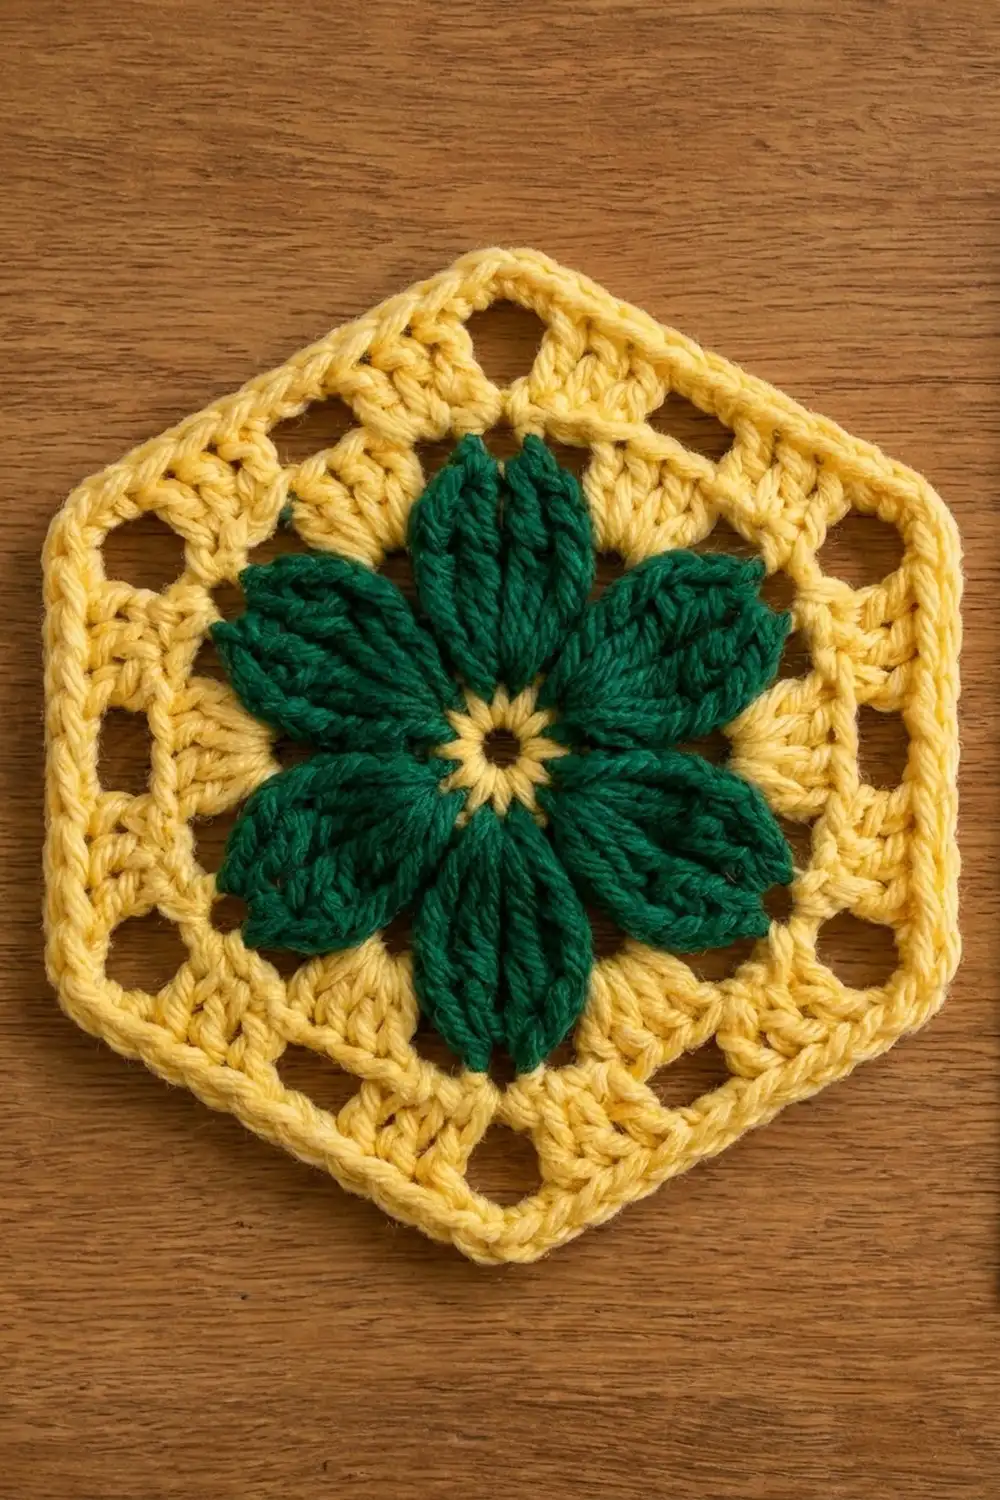
The Meadow Star Flower Hexagon is a single crochet motif. It has a bold six-petal flower in deep forest green, set inside a sunny butter-yellow hexagon frame. The petals are long, plump and pointed, and each one has a small split at the tip that looks like a center vein. A small yellow ring shows at the heart of the flower.
The yellow frame around the flower is open and airy. A round of chain “windows” circles the petals and is followed by a solid double crochet band. A second round of small square windows sits near the edge, and two rounds of single crochet give the hexagon a firm, neat outline.
This pattern uses US crochet terms. The finished motif measures 6.5 in (16.5 cm) from flat side to flat side and 7.5 in (19.1 cm) from corner to corner. In DK yarn it takes about an hour.
The construction is simple. You start with a yellow magic-ring center and work two green rounds for the flower. Four yellow rounds then turn the round flower into a six-sided frame, the last two of which form the single crochet border. You make one piece in the round, with no sewing.
Finished Size and Construction
- Finished size: 6.5 in (16.5 cm) flat to flat; 7.5 in (19.1 cm) corner to corner
- Skill level: Easy-intermediate
- Terminology: US crochet terms
- Yarn weight: DK (#3)
- Hook: 3.75 mm (F-5)
- Number of pieces: 1
- Layout: single hexagon motif, worked in the round, right side facing throughout
- Piece size: side length about 3.75 in (9.5 cm)
- Size before border: 5.7 in (14.5 cm) flat to flat (after Rnd 6)
- Border depth: 2 rounds of sc, about 0.4 in (1.0 cm) per edge
Materials
Choose a smooth DK yarn with good stitch definition. Cotton or a cotton blend gives crisp petals and a flat frame. Soft acrylic also works and is a little more forgiving of uneven tension. Aim for a yarn with about 230 m per 100 g.
- Color A (Butter Yellow): 12 g, about 28 m
- Color B (Forest Green): 6 g, about 14 m
These amounts include a small margin for a test motif and for weaving in ends.
Tools:
- 3.75 mm (F-5) crochet hook
- Tapestry needle
- Scissors
- Stitch marker
- Ruler or tape measure
- Blocking mat, rustproof pins and a spray bottle
Abbreviations (US Terms)
- ch – chain
- sl st – slip stitch
- sc – single crochet
- hdc – half double crochet
- dc – double crochet
- tr – treble crochet
- dtr – double treble crochet
- sk – skip
- sp(s) – space(s)
- st(s) – stitch(es)
- rnd – round
Special stitch – double treble crochet (dtr): Yarn over 3 times, insert the hook in the stitch, yarn over and pull up a loop (5 loops on hook). [Yarn over, pull through 2 loops] 4 times.
Petal: Work into one ch-5 loop: (sc, hdc, 2 dc, tr, ch 2, tr, 2 dc, hdc, sc). This makes 10 stitches plus a ch-2 tip.
Standing sc: With a slip knot on the hook, insert the hook in the stitch, pull up a loop and finish as a normal sc.
Gauge and Checkpoints
For this motif, you check gauge by measuring the piece at each stage instead of making a flat swatch. Make one motif as your test piece and compare it with these numbers:
- After Rnd 1: yellow ring about 0.75 in (1.9 cm) across
- After Rnd 3: flower about 3.75 in (9.5 cm) from one petal tip to the opposite tip
- After Rnd 4: about 4.3 in (10.9 cm) flat to flat
- After Rnd 5: about 5.0 in (12.7 cm) flat to flat
- After Rnd 6: about 5.7 in (14.5 cm) flat to flat
- After Rnd 8: 6.5 in (16.5 cm) flat to flat
Border gauge: about 5.6 sc per inch, so the 21 sc of one finished side measure about 3.75 in (9.5 cm).
If your motif is too big: go down to a 3.5 mm (E-4) hook. If it is too small: go up to a 4.0 mm (G-6) hook.
If only the flower is off, check your petal trebles. Tall stitches change the flower size more than anything else, so make sure they are not pulled tight. Measure flat on a table, without stretching, and fix the size at the first checkpoint that misses rather than at the end.
Pattern
Rnd 1 – Center Ring (Color A)
With Color A, make a magic ring.
Ch 1 and work 12 sc into the ring. Pull the ring closed, leaving a small hole in the center. Join with a sl st to the first sc. (12 sc)
Fasten off Color A, leaving a 4 in (10.2 cm) tail.
Rnd 2 – Petal Loops (Color B)
Join Color B with a standing sc in any sc.
Ch 5, sk 1 sc, sc in next sc, ch 5, sk 1 sc; repeat from * 4 more times. Join with a sl st to the first sc. (6 sc, 6 ch-5 loops)*
The loops should lie flat and be spaced evenly around the ring. Don’t pull the chains tight. These loops set the length of the petals.
Rnd 3 – Petals (Color B)
Sl st into the first ch-5 loop.
In the ch-5 loop, work 1 Petal: (sc, hdc, 2 dc, tr, ch 2, tr, 2 dc, hdc, sc). Sl st in the next sc of Rnd 2; repeat from * 5 more times. Work the last sl st into the joining sc. (6 petals; 60 sts plus 6 ch-2 tips)*
The tr, ch 2, tr at the top of each petal makes the pointed tip with a small split down the middle. As you build each petal, the stitches get taller toward the tip and shorter again, which gives the petal its plump shape. Use your fingers to shape each petal so it points straight out. Fasten off Color B.
Rnd 4 – Window Round (Color A)
In this round, each petal tip becomes a hexagon corner.
Join Color A with a standing sc in the ch-2 tip of any petal. Ch 3 and work a sc in the same tip (first corner made).
*Ch 3, dtr in the sl st between petals (insert the hook under the sl st and the Rnd 2 sc it sits on), ch 3. (Sc, ch 3, sc) in the ch-2 tip of the next petal; repeat from * 4 more times. Ch 3, dtr between the last 2 petals, ch 3. Join with a sl st to the first sc.
(12 sc, 6 dtr, 6 corner ch-3 sps, 12 side ch-3 sps)
The dtr anchors the frame deep between the petals. The ch-3 spaces on either side of it open into the windows that circle the flower.
Rnd 5 – Solid Band (Color A)
Sl st into the next corner ch-3 sp. Ch 3 (counts as dc), then work (dc, ch 2, 2 dc) in the same sp.
*Dc in next sc, 3 dc in next ch-3 sp, dc in next dtr, 3 dc in next ch-3 sp, dc in next sc. Work (2 dc, ch 2, 2 dc) in the next corner ch-3 sp; repeat from * 4 more times. Dc in next sc, 3 dc in next ch-3 sp, dc in next dtr, 3 dc in next ch-3 sp, dc in next sc. Join with a sl st to the top of the beginning ch-3.
(78 dc: 4 dc per corner x 6 = 24, plus 9 dc per side x 6 = 54; 6 corner ch-2 sps)
Between each pair of corner ch-2 spaces there are now 13 dc: 2 from one corner, 9 along the side and 2 from the next corner.
Rnd 6 – Outer Windows (Color A)
Sl st in the next dc and into the corner ch-2 sp. Ch 3 (counts as dc), then work (dc, ch 2, 2 dc) in the same sp.
*Dc in next dc, [ch 2, sk 2 dc, dc in next dc] 4 times. Work (2 dc, ch 2, 2 dc) in the next corner ch-2 sp; repeat from * 4 more times. Dc in next dc, [ch 2, sk 2 dc, dc in next dc] 4 times. Join with a sl st to the top of the beginning ch-3.
(54 dc, 24 ch-2 windows, 6 corner ch-2 sps)
To check the side math: the repeat starts on the 1st of the 13 side stitches and ends on the 13th (1 + 4 x 3 = 13). Each side now has 9 dc (2 + 5 + 2) and 4 windows between the corner spaces.
Checkpoint: 5.7 in (14.5 cm) flat to flat.
Border
The border is two rounds of sc in Color A. It firms up the open frame and sharpens the six points.
Border gauge: about 5.6 sc per inch. Each sc round adds about 0.2 in (0.5 cm) to every edge.
Rnd 7 – Border Round 1
Sl st in the next dc and into the corner ch-2 sp. Ch 1, then work (sc, ch 2, sc) in the same sp.
*Sc in each of next 3 dc, [2 sc in next ch-2 window, sc in next dc] 4 times, sc in each of next 2 dc. Work (sc, ch 2, sc) in the next corner ch-2 sp; repeat from * 4 more times. Sc in each of next 3 dc, [2 sc in next ch-2 window, sc in next dc] 4 times, sc in each of next 2 dc. Join with a sl st to the first sc.
(114 sc: 19 sc per side x 6; 6 corner ch-2 sps)
This is a conversion round. The 9 dc of each side get 1 sc each, and 2 sc go into each of the 4 windows (8 more), which gives 17 sc. Add 1 corner sc at each end and you have 19 sc per side. The 2 corner sc are included in the 19. The ch-2 at each point is a space, not a stitch.
Rnd 8 – Border Round 2
Sl st into the corner ch-2 sp. Ch 1, then work (sc, ch 2, sc) in the same sp.
*Sc in each of next 19 sc. Work (sc, ch 2, sc) in the next corner ch-2 sp; repeat from * 4 more times. Sc in each of next 19 sc. Join with a sl st to the first sc.
(126 sc: 21 sc per side x 6; 6 corner ch-2 sps)
This is also a trim round: 19 sc worked 1 per stitch, plus 2 new corner sc, for 21 per side. Fasten off and weave in all ends.
Why the Math Works
Every (sc, ch 2, sc) corner adds one sc to each of the two sides next to it, so each border round grows every side by exactly 2 stitches. The 17 side stitches from Rnd 6 become 19 in Rnd 7 and 21 in Rnd 8.
As a hexagon grows outward, each side needs a little more length. The ch-2 corners take up any extra, so the points stay sharp and the edges don’t cup or ruffle. At 5.6 sc per inch, 21 sc gives a side of 3.75 in (9.5 cm). The two border rounds add 0.2 in (0.5 cm) each per edge, taking the motif from 5.7 in (14.5 cm) to 6.5 in (16.5 cm) flat to flat.
Final Blocking
- Weave in all ends on the wrong side through stitches of the same color, so green doesn’t show through yellow.
- Lay the motif right side up on a blocking mat.
- Measure flat to flat across all three pairs of opposite sides. Gently ease each pair to 6.5 in (16.5 cm).
- Pin the 6 corner ch-2 points so each one measures 7.5 in (19.1 cm) to the opposite point.
- Pin the middle of each side so it runs straight between its two corners.
- Shape each green petal so it points directly at a corner, and open the split at each petal tip slightly.
- Mist with water until damp, not soaked.
- Let it dry completely before unpinning.
Final Quality-Control Checklist
- Rnd 1 has 12 sc, and the center ring is closed with only a small hole.
- There are 6 petals, all the same length, each with a ch-2 split tip.
- Each petal tip sits under a hexagon corner.
- Rnd 5 has 13 dc between each pair of corner spaces.
- Rnd 6 has 4 open windows on every side.
- Rnd 7 has 19 sc on every side, 114 sc in total.
- Rnd 8 has 21 sc on every side, 126 sc in total.
- The motif measures 6.5 in (16.5 cm) flat to flat and 7.5 in (19.1 cm) corner to corner.
- The motif lies flat with no ruffles or cupping.
- All ends are woven in and trimmed.
Troubleshooting
Petals curl or flip forward: The ch-5 loops are too short or too tight. Chain more loosely in Rnd 2, or add 1 chain to each loop.
The center won’t close: Pull the magic-ring tail before you join Rnd 1, then secure it firmly when you weave it in.
The frame pulls the petals toward the center: The dtr is too short or too tight. Pull up each loop fully and keep the ch-3 spaces relaxed.
The hexagon cups: Check that each corner has a full ch-2 (or ch-3 in Rnd 4). If it still cups, go up half a hook size for the yellow rounds.
The edge ruffles: Recount Rnd 7. There should be 2 sc in each window, not 3. If the count is right, change the border corners to (sc, ch 1, sc).
Green shows through the yellow: Weave the green ends only through the green petals before starting Rnd 4.
The corners look rounded: Pin the ch-2 points firmly when blocking. At the start of each round, don’t skip the sl st into the corner space.
Care
Hand wash in cool water with mild soap, roll in a towel to press out the water and dry flat. Reshape the corners and petals while the motif is damp.
Final Notes
Here is the full measurement chain for this motif:
- 0.75 in (1.9 cm) ring
- 3.75 in (9.5 cm) flower
- 4.3 in (10.9 cm) after the window round
- 5.0 in (12.7 cm) after the solid band
- 5.7 in (14.5 cm) before the border
- 6.5 in (16.5 cm) flat to flat when finished
If you hit each checkpoint, the stitch counts will line up and the hexagon will block cleanly to 21 sc per side.
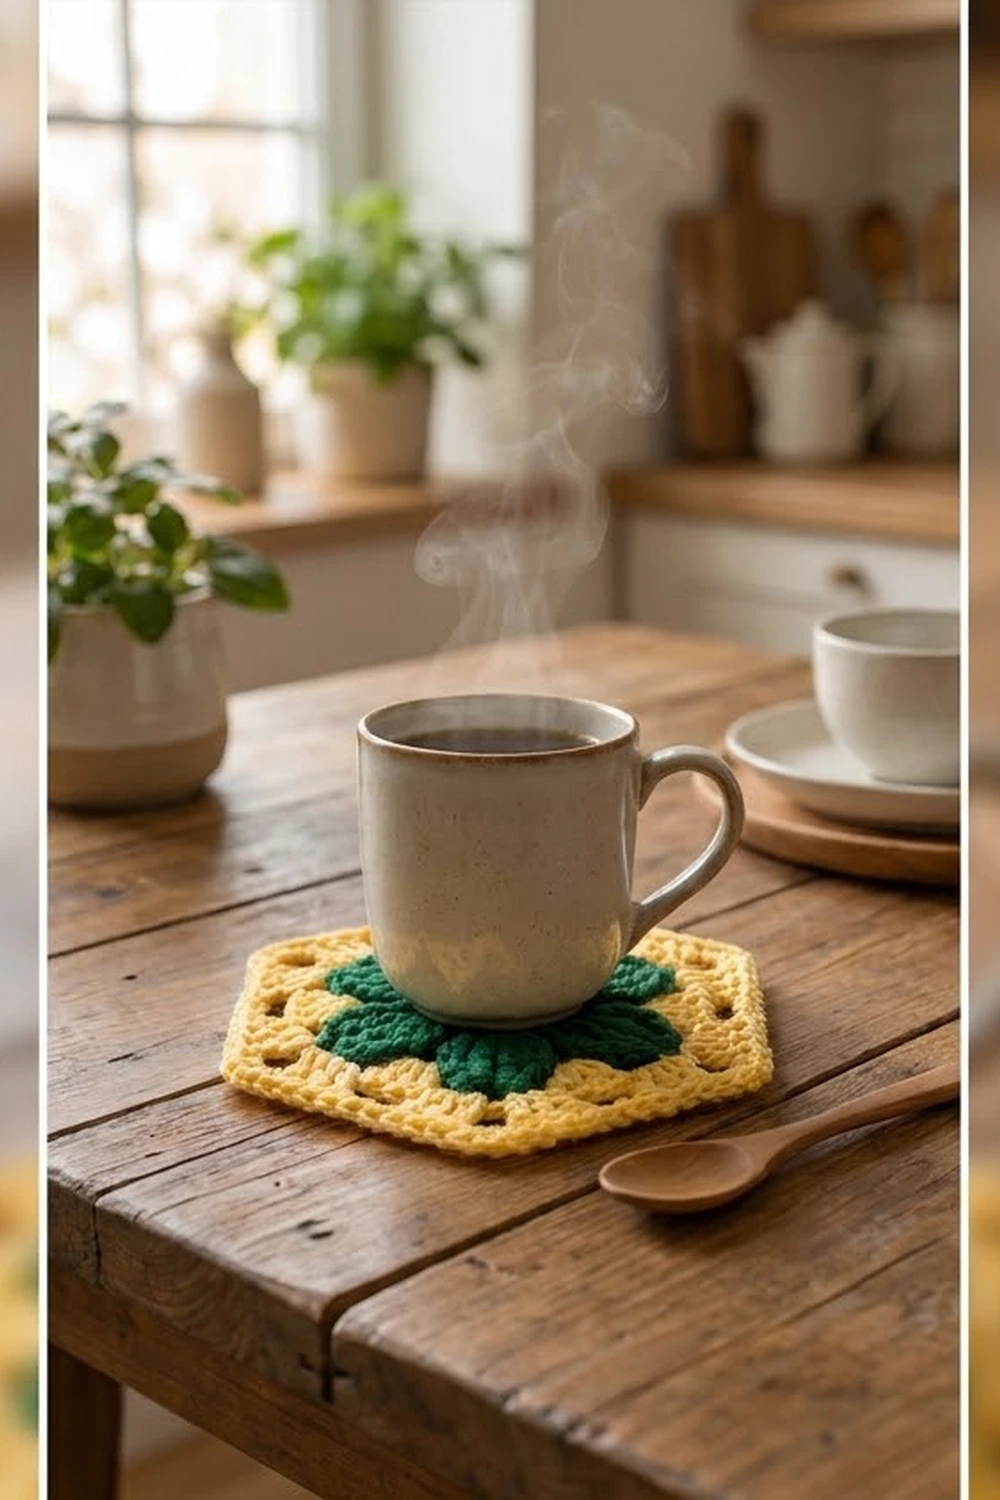
Make one, check it against these numbers and enjoy your bright green-and-yellow flower.
Happy crocheting!