

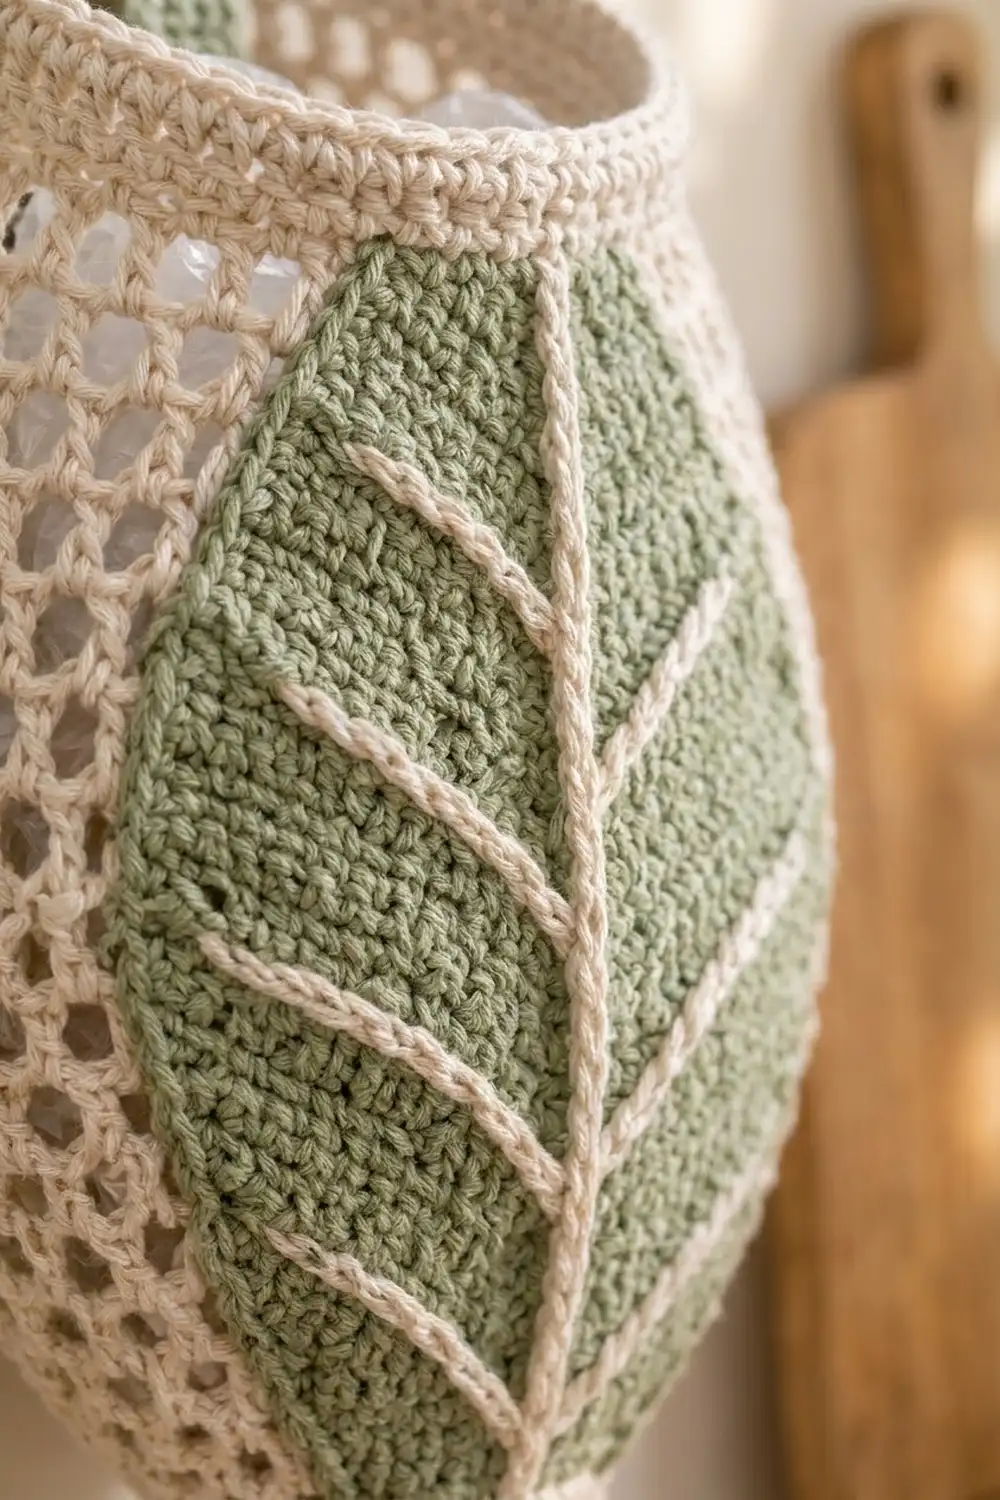
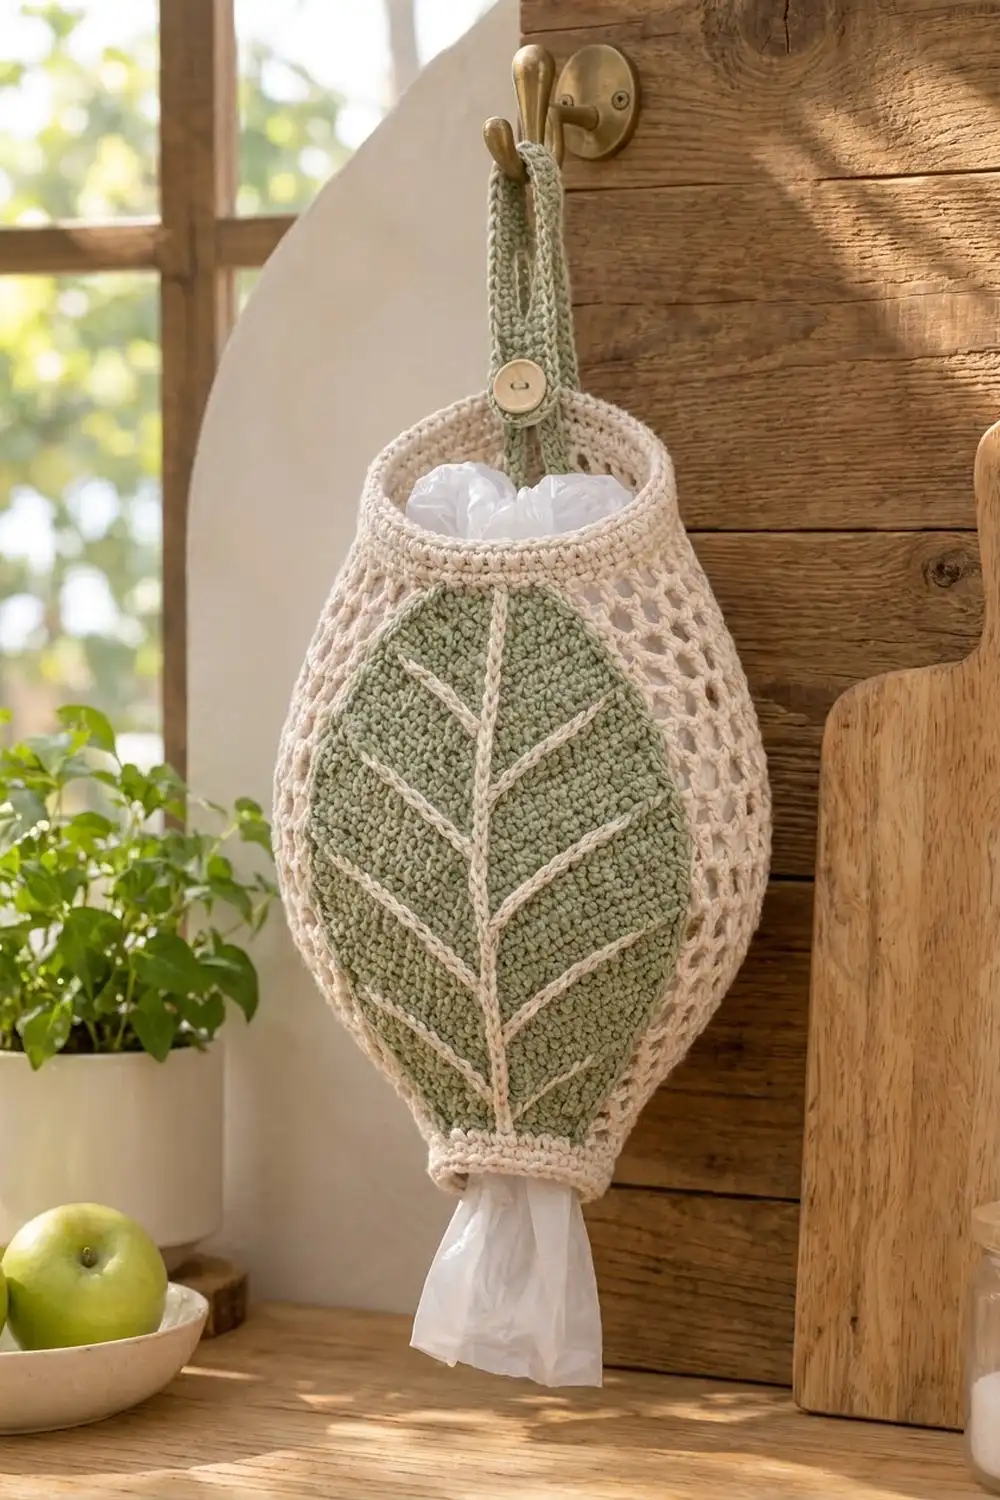
This hanging bag dispenser keeps your plastic grocery bags out of sight and easy to reach. The body is a cream honeycomb mesh with a teardrop shape. A solid sage-green leaf sits on the front, with cream veins worked in surface slip stitch. You stuff bags in through the wide top opening and pull them out one at a time through the narrow cuff at the bottom.
The colors are calm and natural: cream mesh and trim, a sage leaf and strap, and a wooden button. It suits a farmhouse or Scandinavian kitchen and looks tidy hanging from a hook or a rail.
This pattern uses US crochet terms. Laid flat, the finished dispenser measures 9 in (22.9 cm) wide at its widest point and 15.5 in (39.4 cm) tall, not counting the strap.
Construction is simple. You start with the bottom cuff, work the mesh body upward in joined rounds, and finish with a solid top band. The leaf is worked flat in rows, edged, decorated with surface veins, and sewn to the front. Last, you make a strap that is sewn inside the back of the band and buttons onto the front.
Finished Size and Construction
- Finished size: 9 in (22.9 cm) wide flat × 15.5 in (39.4 cm) tall
- Skill level: Intermediate
- Terminology: US
- Yarn weight: Worsted (#4) cotton
- Hook: 5.0 mm (H-8); 4.0 mm (G-6) for the surface veins
- Number of pieces: One dispenser, made from 3 components (body, leaf, strap)
- Layout: Leaf centered on the front; strap centered at the back and front
- Leaf size: 5.5 × 11 in (14.0 × 27.9 cm) before edging
- Body size before top band: 9 × 13.5 in (22.9 × 34.3 cm)
- Top band depth: 2 in (5.1 cm)
Materials
Use a smooth worsted-weight cotton or cotton blend. Cotton keeps the mesh crisp and holds up to washing. Acrylic also works, but the mesh will stretch more.
- Cream: 130 g, about 200 m (219 yd), for the body, cuff, top band and veins
- Sage green: 60 g, about 92 m (101 yd), for the leaf and strap
These quantities include a margin of about 15%.
Tools:
– 5.0 mm (H-8) crochet hook
– 4.0 mm (G-6) crochet hook
– One 3/4 in (1.9 cm) wooden button
– Tapestry needle
– Stitch markers
– Rust-proof pins
– Measuring tape
– Scissors
Abbreviations (US Terms)
- ch – chain
- sl st – slip stitch
- sc – single crochet
- dc – double crochet
- sp – space
- sc2tog – single crochet 2 together
- st(s) – stitch(es)
- rnd(s) – round(s)
Special stitches:
- Mesh repeat: dc in the next ch-2 sp, ch 2. Each repeat is 1 dc plus 1 ch-2 sp, which is 3 sts wide.
- Mesh increase (inc): (dc, ch 2) twice in the same ch-2 sp. This turns 1 sp into 2 repeats.
- Mesh decrease (dec): Yarn over, insert the hook in the next ch-2 sp, pull up a loop, yarn over and pull through 2 loops. Yarn over, insert the hook in the following ch-2 sp, pull up a loop, yarn over and pull through 2 loops. Yarn over and pull through all 3 loops, then ch 2. This turns 2 sps into 1 repeat.
- Surface slip stitch: Hold the yarn behind the work. Insert the hook from front to back, pull up a loop, and pull it through the loop on your hook.
Gauge and Checkpoints
Sc gauge (5.0 mm hook): 16 sts × 16 rnds = 4 in (10.2 cm).
Mesh gauge: 4 repeats = 3 in (7.6 cm); 6 rnds = 4 in (10.2 cm).
The leaf makes the best gauge test. Work Rows 1–21, then measure: Row 21 should have 22 sts and be 5.5 in (14.0 cm) wide. If it is too wide, go down a hook size. If it is too narrow, go up a hook size.
Checkpoints:
– Cuff: 7.5 in (19.1 cm) around, 3.75 in (9.5 cm) wide flat, 1.5 in (3.8 cm) tall
– After mesh Rnd 4: 18 in (45.7 cm) around, 9 in (22.9 cm) wide flat
– After mesh Rnd 18: the mesh is 12 in (30.5 cm) tall and the body is 13.5 in (34.3 cm) tall
– Top band: 13.5 in (34.3 cm) around, 6.75 in (17.1 cm) wide flat
– Finished body: 15.5 in (39.4 cm) tall
If the mesh is too big, use a 4.5 mm hook for the mesh only and keep the 5.0 mm hook for the cuff. If it is too small, use a 5.5 mm hook. Your stitch counts stay the same either way.
Body
Bottom Cuff
With cream and the 5.0 mm hook, ch 30. Join with a sl st to the first ch to form a ring, taking care not to twist the chain.
Rnd 1: Ch 1, sc in each ch around, join with a sl st to the first sc. (30 sc)
Rnds 2–6: Ch 1, sc in each st around, join. (30 sc)
Checkpoint: The cuff is 7.5 in (19.1 cm) around and 1.5 in (3.8 cm) tall.
Mesh Body
From Rnd 2 on, each mesh rnd starts with a sl st into the first ch-2 sp and ch 5. The ch 5 counts as 1 dc and 1 ch-2 sp. Join each rnd with a sl st to the 3rd ch of the starting ch-5. You work each dc into a space, so every rnd sits offset from the one below it. That offset creates the honeycomb look.
Rnd 1 (conversion): Ch 5 (counts as dc, ch 2), skip next 2 sc, dc in next sc, ch 2, skip next 2 sc 9 times, join. You now have 10 dc + 10 ch-2 sps (10 dc + 20 ch = 30 sts, the same as the cuff’s 30 sc). (10 repeats)
Rnd 2 (growth): Sl st into the first sp, ch 5, dc in same sp, ch 2 (inc made), dc in next sp, ch 2; inc in next sp, dc in next sp, ch 2 4 times, join. (15 repeats)
Rnd 3 (growth): Sl st into the first sp, ch 5, dc in same sp, ch 2 (inc made), (dc in next sp, ch 2) twice; inc in next sp, (dc in next sp, ch 2) twice 4 times, join. (20 repeats)
Rnd 4 (growth): Sl st into the first sp, ch 5, dc in same sp, ch 2 (inc made), (dc in next sp, ch 2) 4 times; inc in next sp, (dc in next sp, ch 2) 4 times 3 times, join. (24 repeats)
Checkpoint: The body is 18 in (45.7 cm) around and 9 in (22.9 cm) wide when laid flat.
Rnds 5–15: Sl st into the first sp, ch 5, dc in next sp, ch 2 23 times, join. (24 repeats)
Rnd 16 (decrease): Sl st into the first sp, ch 5, (dc in next sp, ch 2) 5 times, dec; (dc in next sp, ch 2) 6 times, dec twice, join. (21 repeats)
Rnd 17 (decrease): Sl st into the first sp, ch 5, (dc in next sp, ch 2) 4 times, dec; (dc in next sp, ch 2) 5 times, dec twice, join. (18 repeats)
Rnd 18: Sl st into the first sp, ch 5, dc in next sp, ch 2 17 times, join. (18 repeats)
Checkpoint: The mesh is 12 in (30.5 cm) tall and the body is 13.5 in (34.3 cm) tall. Do not fasten off. Continue with the top band in the Border section.
Leaf Appliqué
With sage and the 5.0 mm hook, work in rows. Ch 1 and turn at the end of every row; the ch 1 does not count as a stitch. In this section, “inc” means 2 sc in the same st.
Row 1: Ch 3, sc in 2nd ch from hook and in next ch. (2 sc)
Row 2: 2 sc in each st. (4 sc)
Row 3: Sc in each st. (4 sc)
Row 4: Inc in first st, sc to last st, inc in last st. (6 sc)
Rows 5–20: Repeat Rows 3–4 eight more times. Each even row has 2 more sts than the row before it: Row 6 (8), Row 8 (10), and so on up to Row 20 (22 sc).
Rows 21–24: Sc in each st. (22 sc)
Checkpoint: The leaf is 5.5 in (14.0 cm) wide and 6 in (15.2 cm) long.
Row 25: Sc2tog, sc to last 2 sts, sc2tog. (20 sc)
Row 26: Sc in each st. (20 sc)
Rows 27–43: Repeat Rows 25–26, ending with a Row 25 repeat. Each odd row has 2 fewer sts: Row 27 (18), Row 29 (16), and so on down to Row 43 (2 sc).
Row 44: Sc2tog. (1 sc)
The leaf is now 11 in (27.9 cm) long.
Edging Rnd: Do not turn. Ch 1, work 44 sc evenly down the first side (1 sc per row end), 3 sc in the Row 1 tip, 44 sc up the second side, 3 sc in the Row 44 tip, join. (94 sc)
Fasten off, leaving a 40 in (101.6 cm) tail for sewing. With the edging, the leaf is about 6 × 11.5 in (15.2 × 29.2 cm).
Veins
With cream and the 4.0 mm hook, work surface slip stitch on the right side. Row 1 is the bottom tip.
Center vein: Start at the Row 1 tip and work 1 sl st per row straight up the middle of the leaf to the Row 44 tip. On the wide rows, the center falls between sts 11 and 12. Fasten off.
Side veins: Each side vein starts on the center vein and runs up and out at 45 degrees, moving 1 st outward for each row it climbs. For each pair, work one vein on each side of the center:
- Pair 1: start at Row 10, work 6 rows (to Row 16)
- Pair 2: start at Row 16, work 7 rows (to Row 23)
- Pair 3: start at Row 22, work 6 rows (to Row 28)
- Pair 4: start at Row 28, work 4 rows (to Row 32)
- Pair 5: start at Row 34, work 2 rows (to Row 36)
Every vein stops 3–4 sts from the edge. Weave in all ends on the wrong side.
Strap
With sage and the 5.0 mm hook, ch 7.
Row 1: Sc in 2nd ch from hook and in each ch across. (6 sc)
Rows 2–51: Ch 1, turn, sc in each st. (6 sc)
Row 52 (buttonhole): Ch 1, turn, sc in next 2 sts, ch 2, skip 2, sc in last 2 sts. (4 sc + ch-2 sp)
Row 53: Ch 1, turn, sc in next 2 sts, 2 sc in ch-2 sp, sc in last 2 sts. (6 sc)
Rows 54–56: Ch 1, turn, sc in each st. (6 sc)
Fasten off. The strap measures 1.5 × 14 in (3.8 × 35.6 cm).
Border
The border is the solid top band plus a firm edge around both openings.
Border gauge: 16 sc = 4 in (10.2 cm).
Continue from mesh Rnd 18 with cream.
Top Band Rnd 1 (conversion): Ch 1, sc in each dc and 2 sc in each ch-2 sp around, join. (18 sc in dc + 36 sc in sps = 54 sc)
Rnds 2–8: Ch 1, sc in each st around, join. (54 sc)
Rnd 9: Sl st loosely in each st around. (54 sl st) Fasten off.
Laid flat, the band has 27 sts on the front and 27 on the back. It is 2 in (5.1 cm) deep.
Bottom edge: Join cream to the foundation chain of the cuff. Sl st loosely in each foundation ch around. (30 sl st) Fasten off.
Why the math works: Each mesh repeat is 3 sts wide (1 dc + 2 ch), which is 0.75 in (1.9 cm) at sc gauge. 18 repeats × 3 = 54 sts, so the band matches the mesh exactly and will not ruffle or pull in: 54 sts ÷ 4 sts per inch = 13.5 in (34.3 cm). The bottom works the same way: the cuff’s 30 sc became 10 repeats × 3 = 30 sts.
Assembly
- Lay the body flat with the join seam at the center back.
- Pin the leaf to the center front. Place the Row 1 tip 0.25 in (0.6 cm) above the cuff and the Row 44 tip 0.25 in (0.6 cm) below the top band.
- With the sage tail, whipstitch through the back loop of each edging sc and the nearest dc or ch of the mesh. Keep the leaf slightly relaxed so the mesh can curve behind it.
- Sew the first 6 rows (1.5 in, 3.8 cm) of the strap to the inside of the back band, centered.
- Sew the button to the center front of the band, 1 in (2.5 cm) below the rim.
- Bring the strap up over your hook and button it.
Final Blocking
- Wet the dispenser in cool water and press out the extra water with a towel.
- Stuff it lightly with a rolled towel to fill out the teardrop shape.
- Check that it is 9 in (22.9 cm) wide and 15.5 in (39.4 cm) tall.
- Pat the leaf flat and straighten the veins with your fingers.
- Pin the strap flat at 1.5 in (3.8 cm) wide.
- Let it dry completely before you hang it.
Final Quality-Control Checklist
- Cuff is 30 sc and 7.5 in (19.1 cm) around
- Mesh Rnds 4–15 have 24 repeats; Rnd 18 has 18 repeats
- Top band is 54 sc and 2 in (5.1 cm) deep
- Leaf is 22 sts at its widest and 44 rows long
- Edging has 94 sc with no puckers at the tips
- Five pairs of side veins are symmetrical
- Button fits snugly through the buttonhole
- All ends are woven in on the wrong side
Troubleshooting
Mesh flares too much: Your dc are too tall. Go down a hook size or make each dc a little shorter.
Mesh looks like a grid, not a honeycomb: Make sure each dc goes into a ch-2 sp, not into the dc below.
Top band ruffles: Check that you worked exactly 2 sc in each sp and 1 sc in each dc.
Leaf curls: Block it flat before sewing, and keep your edging tension relaxed.
Veins pucker: Switch to a larger hook or make your sl st loops longer.
Bags won’t feed through: Stretch the cuff gently during blocking, or leave off the bottom sl st edge.
Care
Hand wash in cool water and lay flat to dry. You can also machine wash cotton on a gentle cycle in a mesh bag, then reshape it and let it air-dry.
Final Notes
The measurement chain is simple. A 30-sc cuff, 7.5 in (19.1 cm) around, grows to 24 mesh repeats at 18 in (45.7 cm) around, then narrows to 18 repeats. Those 18 repeats become a 54-sc top band that is 13.5 in (34.3 cm) around. The body finishes at 9 × 15.5 in (22.9 × 39.4 cm), and the 5.5 × 11 in (14.0 × 27.9 cm) leaf fits neatly between the cuff and the band. Check your gauge first, and every stage will follow.
Happy crocheting!