

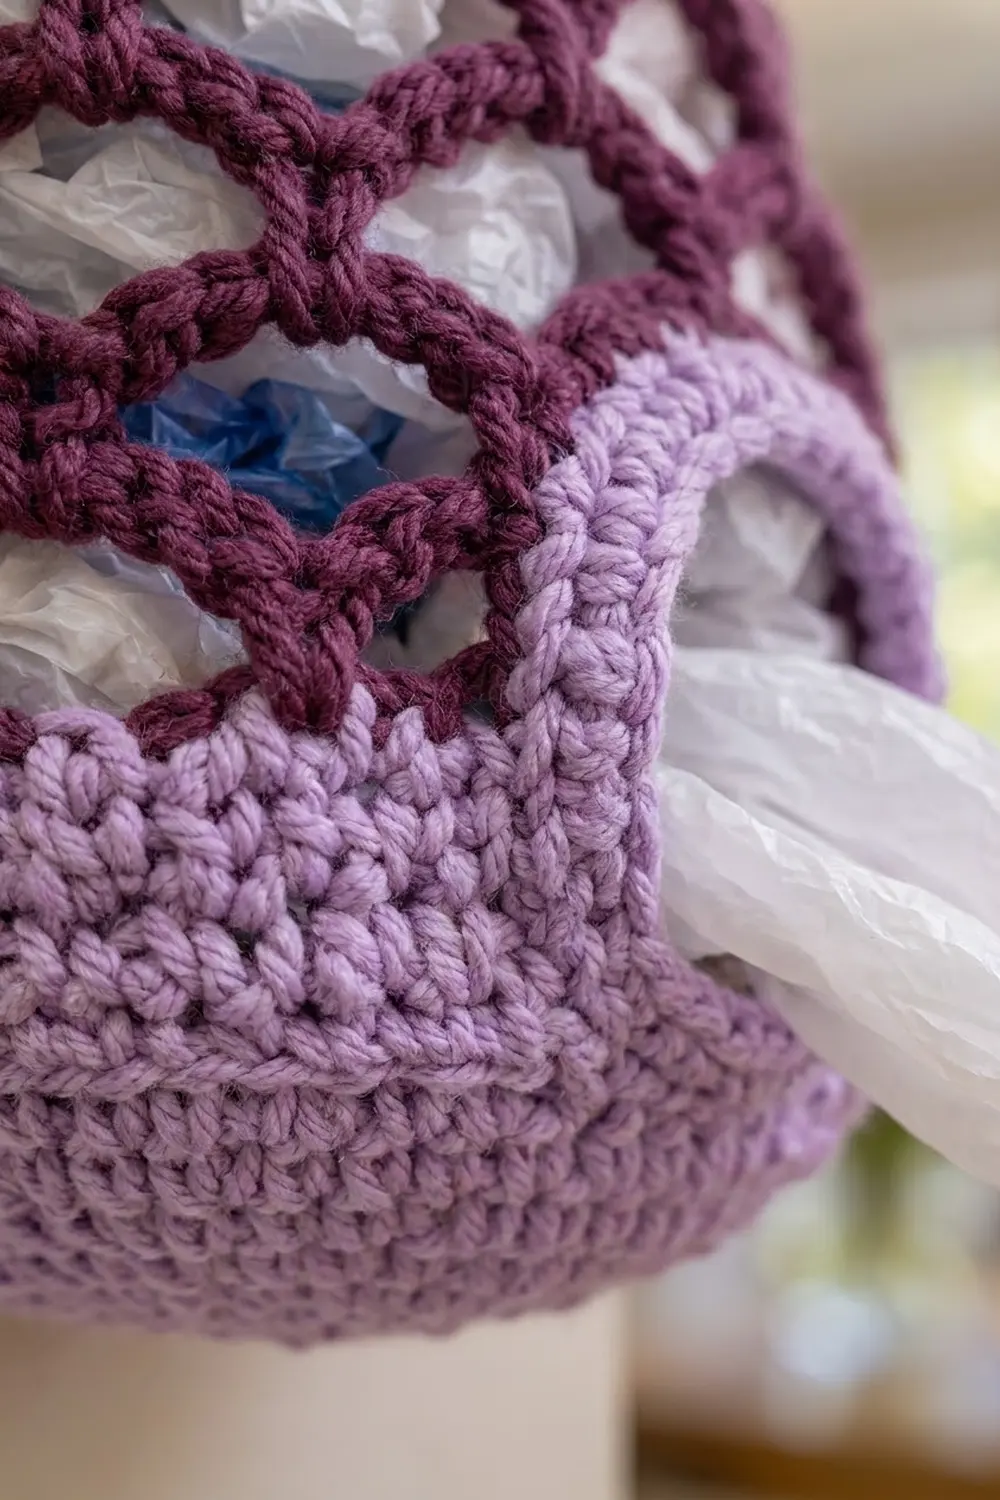
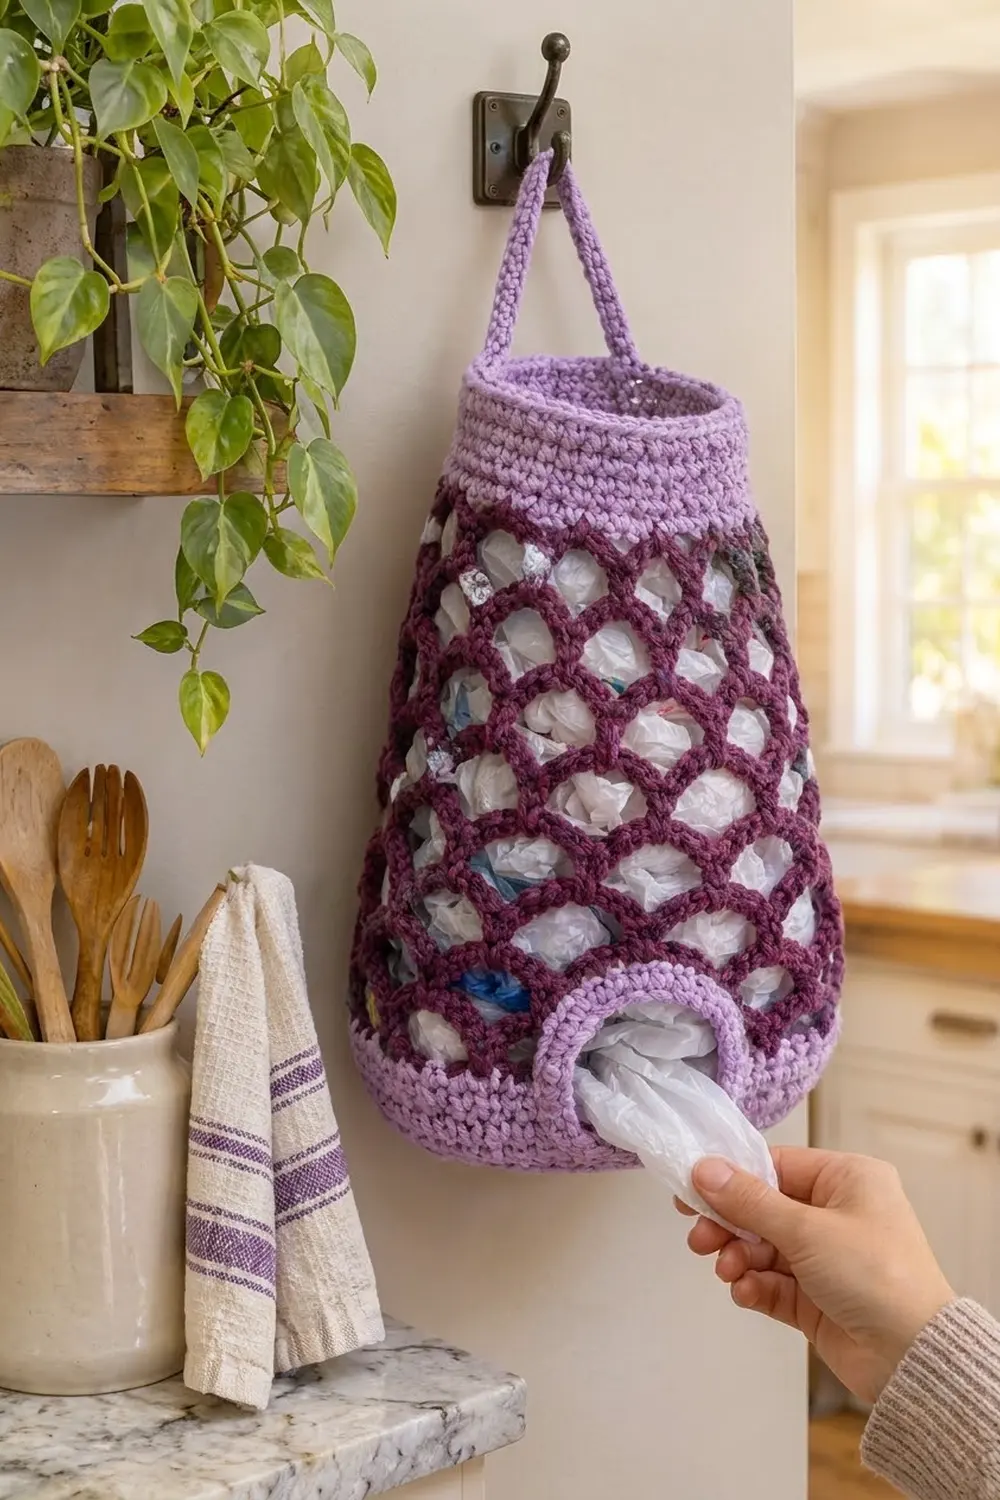
This hanging bag holder brings a bit of color to a kitchen wall. It has a lavender base and rim, and its deep plum fishnet body shows the bags tucked inside. You push bags in through the top opening and pull them out one at a time through a round, framed hole near the bottom.
The look is clean and homey. Solid lavender bands frame an open diamond-loop lattice, and the plum mesh tapers gently from a wide bottom to a narrower neck. The lavender handle hangs from any hook or cabinet knob.
The pattern uses US crochet terms. The finished body is about 13.75 in (34.9 cm) tall, 7 in (17.8 cm) across at the base, and 5 in (12.7 cm) across at the top. With the handle loop, it hangs about 17.75 in (45.1 cm) long.
The holder is worked in one piece from the bottom up. You start with a flat double-crochet circle, turn the work upward into a solid lower band, then work the plum mesh with the dispensing hole built into its first round. A lavender top band, a corded rim, a strap handle, and an edging around the hole finish the piece.
Finished Size and Construction
- Finished size: 13.75 in (34.9 cm) tall body; about 17.75 in (45.1 cm) tall including the handle
- Base diameter: 7 in (17.8 cm)
- Top opening diameter: 5 in (12.7 cm)
- Skill level: Easy-intermediate
- Terminology: US
- Yarn weight: Worsted (#4)
- Hook: US H-8 (5.0 mm)
- Number of pieces: 1 (handle and edging are worked directly onto the body)
- Layout: Tube worked in joined rounds from the base up
- Size before the top band (base, lower band, and mesh): about 12 in (30.5 cm) tall
- Top band depth: 1.75 in (4.4 cm)
Materials
Use a smooth worsted-weight yarn. Acrylic is light and washable. Cotton holds its shape well and feels slightly firmer. Avoid fuzzy yarns, because they hide the lattice.
- Color A, light lavender: 70 g, about 140 m (153 yd)
- Color B, deep plum: 50 g, about 100 m (109 yd)
These quantities include a margin of about 20%.
Tools:
– US H-8 (5.0 mm) crochet hook
– 4 stitch markers
– Tapestry needle
– Scissors
– Measuring tape
– Spray bottle and pins for blocking
Abbreviations (US Terms)
- ch: chain
- sl st: slip stitch
- sc: single crochet
- dc: double crochet
- BLO: back loop only
- sk: skip
- sp: space
- st(s): stitch(es)
- rev sc: reverse single crochet (crab stitch)
Special stitch: rev sc. Work from left to right (or right to left if you crochet left-handed). Insert the hook into the next stitch to the right, yarn over, pull up a loop, then yarn over and pull through both loops on the hook. It makes a rounded, corded edge.
Gauge and Checkpoints
- Double crochet gauge: 15 dc and 8 rounds = 4 in (10.2 cm). One round is 0.5 in (1.3 cm) tall.
- Single crochet gauge: 16 sc and 16 rounds = 4 in (10.2 cm). One round is 0.25 in (0.6 cm) tall.
Use the base as your gauge test. Work Rounds 1–3, then measure.
Checkpoints:
– After base Round 3: 3 in (7.6 cm) across.
– After base Round 7: 7 in (17.8 cm) across.
– After the lower band: the wall is 2 in (5.1 cm) tall.
– After Mesh Round 4: the mesh is about 4 in (10.2 cm) tall.
– After Mesh Round 8: the mesh is about 7.5 in (19.1 cm) tall.
– After Mesh Round 12: the mesh is about 10 in (25.4 cm) tall when lightly stretched.
– After the top band: the opening is 5 in (12.7 cm) across.
If your base is too big, go down to a 4.5 mm hook. If it is too small, go up to a 5.5 mm hook. Correct the gauge before you continue, because every later count depends on the 84-stitch base.
Base (Color A)
Work in joined rounds. The starting ch 3 counts as the first dc of each round.
Round 1: Make a magic ring. Ch 3, then work 11 dc in the ring. Pull the ring closed and sl st to the top of the ch-3. (12 dc)
Round 2: Ch 3, dc in the same st, then work 2 dc in each st around. Sl st to join. (24 dc)
Round 3: Ch 3, 2 dc in the next st, dc in the next st, 2 dc in the next st around. Join. (36 dc)
Round 4: Ch 3, dc in the next st, 2 dc in the next st, dc in each of the next 2 sts, 2 dc in the next st around. Join. (48 dc)
Round 5: Dc in each of the next 3 sts, 2 dc in the next st around. Join. (60 dc)
Round 6: Dc in each of the next 4 sts, 2 dc in the next st around. Join. (72 dc)
Round 7: Dc in each of the next 5 sts, 2 dc in the next st around. Join. (84 dc)
Check: 84 dc at 3.75 dc per inch is 22.4 in (56.9 cm) around, which gives a diameter of about 7 in (17.8 cm). The base should lie flat.
Lower Band (Color A)
Round 8: Ch 3, then dc in the BLO of each st around. Join. (84 dc) The unused front loops leave a crisp ridge, and the work starts to turn upward.
Rounds 9–11: Ch 3, dc in each st around. Join. (84 dc each round)
Number the stitches of Round 11 from 1 to 84, starting with the ch-3 as st 1. Place markers in st 70 and st 80. These mark where the dispensing hole will go.
Fasten off Color A. The band is 4 rounds × 0.5 in = 2 in (5.1 cm) tall.
Mesh Body (Color B)
The plum mesh has 21 loops in every round. Shortening the loops from ch 5 to ch 4 to ch 3 creates the taper without any decreases.
Mesh Round 1 (with the dispensing hole): Join Color B in st 1. Ch 1, sc in st 1.
– Ch 5, sk 3 sts, sc in the next st. Repeat 17 times. Your last sc lands in st 69.
– Hole: Ch 17, then sk sts 70–80 (11 sts) and sc in st 81.
– Ch 5, sk sts 82–84, and sl st to the first sc.
This gives 19 anchor sc and 19 chain spaces: 18 ch-5 loops plus 1 ch-17 hole chain. The hole chain spans 12 stitches, the same width as 3 normal loops, so it counts as 3 loops. The total is 18 + 3 = 21 loop positions.
Mesh Round 2: Sl st in each of the next 2 ch, ch 1, sc in the same ch-5 sp.
– Ch 5, sc in the next ch-5 sp. Repeat 16 times.
– Ch 5, sc in the 3rd ch of the hole chain.
– Ch 5, sc in the 9th ch.
– Ch 5, sc in the 15th ch.
– Ch 5, sc in the last ch-5 sp.
– Ch 5, sl st to the first sc.
(21 sc, 21 ch-5 loops)
Mesh Rounds 3–4: Sl st in the next 2 ch, ch 1, sc in the same sp, ch 5, sc in the next ch-5 sp around, ending ch 5, sl st to the first sc. (21 ch-5 loops each round)
Mesh Rounds 5–8: Sl st in the next 2 ch, ch 1, sc in the same sp, ch 4, sc in the next sp around, ending ch 4, sl st to join. (21 ch-4 loops each round)
Mesh Rounds 9–12: Sl st in the next 2 ch (or 1 ch on Round 10 onward, so you land at the loop center), ch 1, sc in the same sp, ch 3, sc in the next sp around, ending ch 3, sl st to join. (21 ch-3 loops each round)
Fasten off Color B.
Approximate heights:
– Rounds 1–4 (ch-5): about 1 in (2.5 cm) each
– Rounds 5–8 (ch-4): about 0.875 in (2.2 cm) each
– Rounds 9–12 (ch-3): about 0.625 in (1.6 cm) each
Total mesh height: about 10 in (25.4 cm).
Border: Top Band, Rim, Handle, and Hole Edging (Color A)
Border gauge: 16 sc = 4 in (10.2 cm).
Top Band
Round 1 (conversion): Join Color A in any sc of Mesh Round 12. Ch 1. Sc in the sc, 2 sc in the next ch-3 sp around, then sl st to the first sc.
Count: 21 sc (1 per existing sc) + 42 sc (2 per space) = 63 sc.
Rounds 2–6: Ch 1, sc in each st around, then join. (63 sc each round)
Round 7: Ch 1, rev sc in each st around, then join. (63 rev sc)
The band is 7 rounds × 0.25 in = 1.75 in (4.4 cm) deep.
Why the math works: 63 sc ÷ 4 sc per inch = 15.75 in (40.0 cm) around. Divided by π, that is a 5 in (12.7 cm) opening. That is 2 in narrower than the 7 in (17.8 cm) base, and it matches the taper.
Handle
Flatten the holder with the hole at front center. Place one marker at each side fold in Round 6 of the top band.
- Join Color A at the first marker. Ch 1, then sc in 4 sts (centered on the fold). Turn.
- Rows 2–40: Ch 1, sc in each st, then turn. (4 sc each row)
The strap is 4 sc wide, or 1 in (2.5 cm), and 40 rows long, or 10 in (25.4 cm).
Check that the strap is not twisted. Sew the last row to 4 sts centered on the second marker, just below the rim. It forms a loop that rises about 4 in (10.2 cm) above the top.
Dispensing-Hole Edging
Round 1: Join Color A in st 70 of the lower band.
– Sc in each of sts 70–80. (11 sc)
– 1 sc in the side of the plum anchor sc at st 81.
– 17 sc into the free underside loops of the ch-17 hole chain.
– 1 sc in the side of the anchor sc at st 69.
– Sl st to join.
Count: 11 + 1 + 17 + 1 = 30 sc.
Round 2: Ch 1, sc in each st around, then join. (30 sc) Fasten off.
The opening is about 3.2 in (8.1 cm) of stitch width before edging, and the edging closes it to about 2.5 in (6.4 cm). The thick lavender ring keeps it round.
Final Blocking
- Weave in all ends inside the solid lavender areas. Avoid weaving them into the mesh.
- Mist the holder evenly until it is damp, but not wet.
- Stuff it firmly with plastic bags or a rolled towel to open up the mesh.
- Pat the base flat and round to 7 in (17.8 cm).
- Shape the hole ring into a circle.
- Pin the top band open to 5 in (12.7 cm) across, or stand a jar of that size inside it.
- Hang the holder by its handle and let it dry completely.
Final Quality-Control Checklist
- [ ] The base lies flat and measures 7 in (17.8 cm).
- [ ] The lower band has 84 dc and is 2 in (5.1 cm) tall.
- [ ] Every mesh round has 21 loops.
- [ ] The hole sits at front center, and its ring has 30 sc.
- [ ] The top band has 63 sc and measures 5 in (12.7 cm) across.
- [ ] The handle is untwisted, sewn securely, and placed at the side folds.
- [ ] No ends are visible in the mesh.
Troubleshooting
- The base cups: Your tension is too tight or you are missing increases. Recount each round, or go up one hook size.
- The base ruffles: You have extra stitches. Recount; Round 7 must have exactly 84.
- The mesh twists in a spiral: Always anchor in the loop center, and remember to sl st into the loop before each round.
- The hole sags: Work the edging firmly. If needed, add a third round of sc with 2 decreases at the top.
- The top is too wide: Rework the conversion round with 1 sc in each ch-3 sp on 3 evenly spaced loops.
- The handle stretches: Use cotton, or work a sl st row along both long edges.
Care
Hand wash in cool water and lay flat to dry. Reshape the holder over bags or a towel while it is damp.
Final Notes
The measurements build on each other:
– The 84-dc base gives a 7 in (17.8 cm) diameter.
– The 2 in (5.1 cm) band carries the same 84 stitches.
– 21 mesh loops taper the body over about 10 in (25.4 cm).
– The 63-sc top band gives a 5 in (12.7 cm) opening.
– The finished body is about 13.75 in (34.9 cm) tall.
If you match gauge at the base and recount at each checkpoint, the holder will hang straight and dispense neatly. Happy crocheting!