
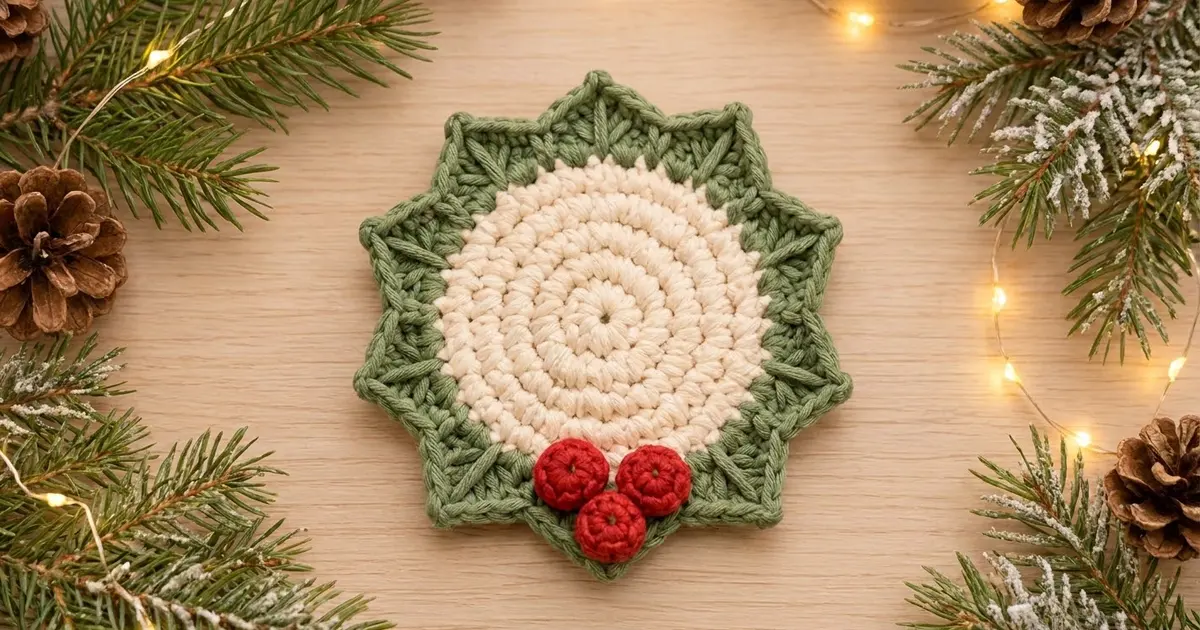
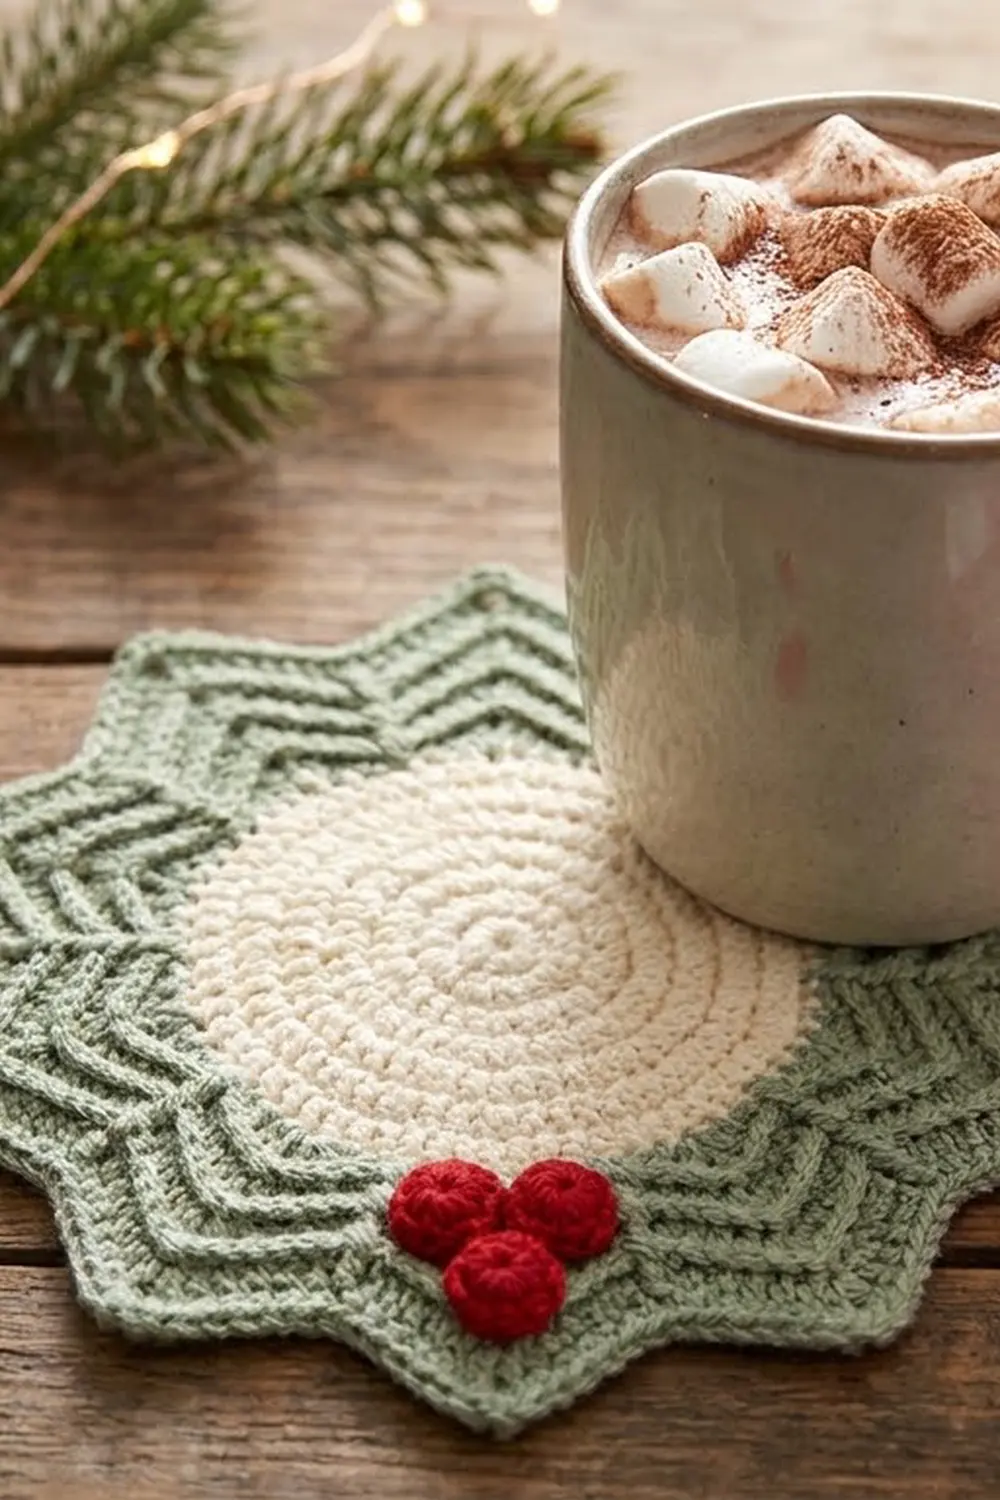
This little coaster is a quick holiday make. It has a soft cream center, a sage-green star of 12 leaf points, and a cluster of three plump red berries. It looks like a tiny holly wreath, and it is sturdy enough to sit under a hot mug of cocoa all season.
The palette is simple and cozy: cream, sage green and berry red. The style is clean and graphic. A smooth spiral of single crochet in the middle sets off the textured star border, where graduated stitches make raised V-lines down each point.
The pattern uses US crochet terms. The finished coaster measures 5.5 in (14.0 cm) from point to point and 4.75 in (12.1 cm) between opposite valleys. Each berry is about 0.75 in (1.9 cm) across.
Construction is simple. You crochet the cream center in a spiral, then add the green border in three joined rounds. Next you make three small stuffed berries and sew them over the color change at the bottom. Everything is one coaster plus three appliqués, so there is no joining of pieces.
Finished Size and Construction
- Finished size: 5.5 in (14.0 cm) point to point; 4.75 in (12.1 cm) valley to valley
- Skill level: Easy / advanced beginner
- Terminology: US crochet terms
- Yarn weight: Worsted weight (#4) cotton
- Hook: 4.0 mm (US G-6)
- Number of pieces: 1 coaster + 3 berry appliqués
- Layout: Single round motif with a 12-point star edge
- Cream center size (before border): 3.75 in (9.5 cm) diameter
- Border depth: 0.875 in (2.2 cm) at the points; 0.5 in (1.3 cm) at the valleys
- Berry size: 0.75 in (1.9 cm) each; the cluster is about 1.5 in (3.8 cm) wide
Materials
Use 100% cotton or a cotton blend in worsted weight. Cotton soaks up drips, handles heat, and shows the stitch texture clearly. Avoid acrylic for coasters because it can feel slick and may go shiny under a hot mug.
Yarn:
– Cream (center): 15 g / 28 m
– Sage green (star border): 10 g / 19 m
– Red (berries): 4 g / 8 m
All quantities include a margin for your gauge swatch, yarn tails and stuffing the berries with red scraps.
Tools:
– 4.0 mm (US G-6) crochet hook
– Locking stitch marker
– Tapestry needle
– Scissors
– Ruler or tape measure
– Rustproof pins and a blocking mat or folded towel
– Spray bottle with water
Abbreviations (US Terms)
- MR – magic ring
- ch – chain
- sl st – slip stitch
- sc – single crochet
- hdc – half double crochet
- dc – double crochet
- tr – treble crochet (yarn over twice, insert hook, pull up a loop, [yarn over, pull through 2 loops] 3 times)
- sc2tog – single crochet 2 together
- st(s) – stitch(es)
- sp – space
- * * – repeat the instructions between asterisks as directed
Special stitch – (tr, ch 2, tr): In the same stitch, work 1 treble, chain 2, then work another treble. This makes the sharp tip of each holly point.
Gauge and Checkpoints
Gauge matters, because a coaster that grows too big will ruffle and one that is too small will cup. Your first coaster is your gauge test, so check it at each stage below before going on.
Base gauge: Rounds 1–4 of the cream center = 1.5 in (3.8 cm) diameter.
Checkpoints:
– After Round 4: 1.5 in (3.8 cm)
– After Round 8: 3 in (7.6 cm)
– After Round 10: 3.75 in (9.5 cm). The circle should lie completely flat.
– After Round 11 (green hdc): 4.25 in (10.8 cm)
– After Round 12 (points): 5.25 in (13.3 cm) point to point
– After Round 13 (edging): 5.5 in (14.0 cm) point to point, 4.75 in (12.1 cm) valley to valley
Measurements within 1/8 in (0.3 cm) are fine.
If your circle is too big (Round 4 over 1.6 in / 4.1 cm), switch to a 3.5 mm hook and restart.
If your circle is too small (Round 4 under 1.4 in / 3.6 cm), switch to a 4.5 mm hook.
If the circle cups (edges curl up), your tension is too tight. Relax your grip or go up a hook size.
If the circle ruffles (wavy edge), your tension is too loose or you have extra stitches. Recount the round.
Cream Center
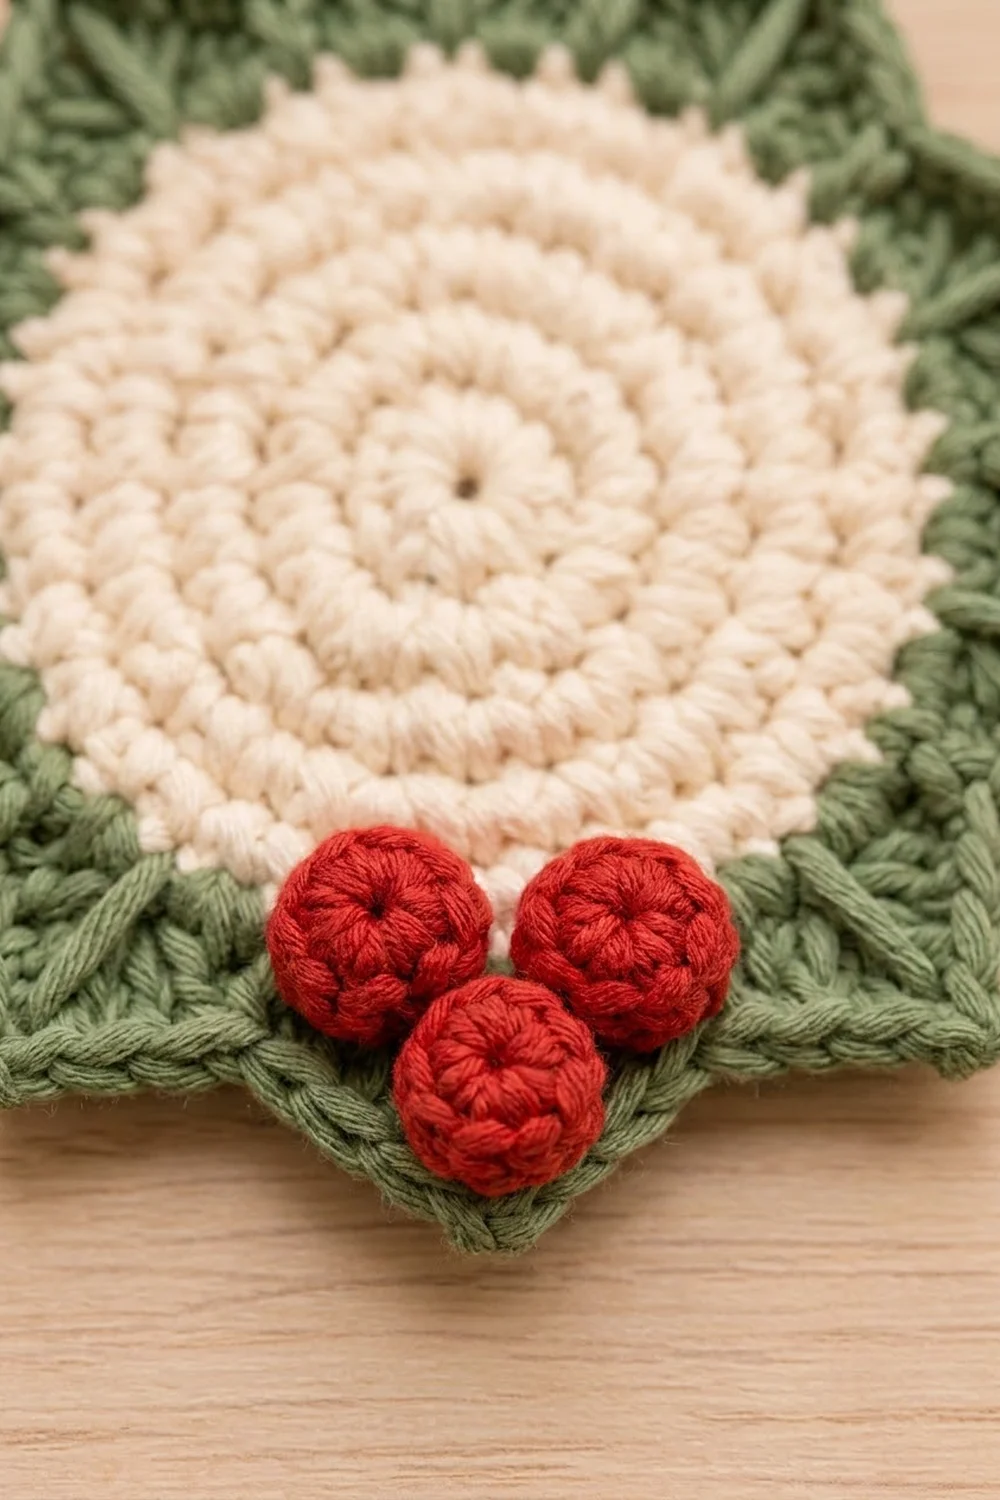
Work the center in a continuous spiral; do not join rounds. Place the locking marker in the last stitch of each round and move it up as you go.
With cream:
Round 1: Make a MR, 6 sc in ring. Pull the ring closed. (6 sts)
Round 2: 2 sc in each st around. (12 sts)
Round 3: *Sc in next st, 2 sc in next st* 6 times. (18 sts)
Round 4: *Sc in next 2 sts, 2 sc in next st* 6 times. (24 sts)
Checkpoint: 1.5 in (3.8 cm) across.
Round 5: *Sc in next 3 sts, 2 sc in next st* 6 times. (30 sts)
Round 6: *Sc in next 4 sts, 2 sc in next st* 6 times. (36 sts)
Round 7: *Sc in next 5 sts, 2 sc in next st* 6 times. (42 sts)
Round 8: *Sc in next 6 sts, 2 sc in next st* 6 times. (48 sts)
Checkpoint: 3 in (7.6 cm) across.
Round 9: *Sc in next 7 sts, 2 sc in next st* 6 times. (54 sts)
Round 10: *Sc in next 8 sts, 2 sc in next st* 6 times. (60 sts)
Sl st in the next st to smooth the end of the spiral. This sl st does not count as a stitch. Fasten off and weave in the cream tail on the back.
Checkpoint: 3.75 in (9.5 cm) across, completely flat.
Tip: If the increases start stacking into a hexagon shape, move them around. On every other round, work half of the plain stitches before the first increase, then finish the round with the other half. The count stays the same.
Holly Star Border
The border is worked in joined rounds with green. It has three rounds: a solid hdc round, a point round, and a sc edging. Together they make the star shape and the green trim seen around the cream center.
Round 11 – Green Base (conversion round)
Join green with a sl st in any sc of Round 10. Ch 2 (does not count as a st).
Hdc in the same st as the join, hdc in next 3 sts, 2 hdc in next st, *hdc in next 4 sts, 2 hdc in next st* 11 times. Sl st to the first hdc to join.
Count: 60 hdc (1 per existing st) + 12 extra hdc (increases) = 72 sts.
An hdc round is about twice as tall as a sc round. A flat sc circle needs 6 increases per round, so this taller round gets 12 increases (2 × 6) to stay flat. It also gives a total that divides evenly by 12.
Checkpoint: 4.25 in (10.8 cm) across and flat.
Round 12 – Holly Points (growth round)
Each point uses 6 stitches of Round 11: 72 ÷ 12 = 6.
Ch 1 (does not count). Sc in the same st as the join, hdc in next st, dc in next st, (tr, ch 2, tr) in next st, dc in next st, hdc in next st.
*Sc in next st, hdc in next st, dc in next st, (tr, ch 2, tr) in next st, dc in next st, hdc in next st* 11 times.
Sl st to the first sc to join.
Count: 12 points × 7 sts each (1 sc, 2 hdc, 2 dc, 2 tr) = 84 sts, plus 12 ch-2 tip spaces.
The sc forms the valley between points. The stitches climb (hdc, dc, tr) toward the tip, then step back down (tr, dc, hdc). Each point is symmetrical, and the tall stitches make the radiating V-lines you see on the green leaves.
Checkpoint: 5.25 in (13.3 cm) from point to point. Each point stands about 0.5 in (1.3 cm) beyond Round 11.
Round 13 – Edging (trim round)
Ch 1 (does not count). For each point:
Sc in the sc, sc in the hdc, sc in the dc, sc in the tr, (sc, ch 2, sc) in the ch-2 sp, sc in the tr, sc in the dc, sc in the hdc.
Repeat for all 12 points. Sl st to the first sc to join. Fasten off and weave in the ends.
Count: 84 sc (1 per existing st) + 24 sc (2 per ch-2 tip) = 108 sc, plus 12 ch-2 tips.
That works out to 9 sc per point.
Why the Math Works
- The cream center ends at 60 sts: 10 rounds × 6, the standard flat circle.
- Round 11 adds 12 increases to reach 72 sts. That divides into 12 points of exactly 6 sts each, with nothing left over.
- Round 12 turns each 6-stitch section into 7 sts plus 1 tip space, so the tips flare out while the valleys stay anchored.
- Round 13 works 1 sc into each of the 84 sts and adds only 2 sc at each tip. This sharpens the points without ruffling the valleys.
Final checkpoint: 5.5 in (14.0 cm) point to point and 4.75 in (12.1 cm) valley to valley.
Berries (Make 3)
With red:
Round 1: Make a MR, 6 sc in ring. Pull closed. (6 sts)
Round 2: 2 sc in each st around. (12 sts)
Round 3: Sc in each st around. (12 sts)
The piece will cup into a small bowl. Push a tiny wad of red yarn scraps inside so no other color shows through.
Round 4: Sc2tog 6 times. (6 sts)
Fasten off, leaving a 10 in (25.4 cm) tail. Thread the tail onto the tapestry needle and weave it through the front loops of the last 6 sts. Pull tight to close. Keep this tail for sewing.
Checkpoint: each berry is about 0.75 in (1.9 cm) across and firmly domed.
Attaching the Berries
- Pick one point to be the bottom of the coaster.
- Place the first two berries side by side, touching, centered over the line where cream meets green. They should sit across Rounds 10 and 11.
- Place the third berry centered below them, nestled into the base of the bottom point.
- Sew each berry with small stitches around its base, through the coaster but not all the way to the back if you can avoid it.
- Knot the tails on the back and weave them in under the cream stitches.
The cluster should be about 1.5 in (3.8 cm) wide.
Final Blocking
- Lightly spray the coaster with water until it is damp, not dripping.
- Lay it face up on a blocking mat or folded towel.
- Pin the center circle flat, checking that it measures 3.75 in (9.5 cm).
- Pin each of the 12 ch-2 tips outward so the points measure 5.5 in (14.0 cm) across.
- Check that the valleys sit evenly at 4.75 in (12.1 cm) across.
- Gently shape the berries with your fingers so they stay round. Do not flatten them.
- Let the coaster dry completely, about 6–12 hours, before removing the pins.
Final Quality-Control Checklist
- [ ] The center has 10 rounds and ends with 60 sts.
- [ ] The cream circle measures 3.75 in (9.5 cm) and lies flat.
- [ ] Round 11 has 72 hdc.
- [ ] There are exactly 12 points, evenly spaced.
- [ ] Every point has a (tr, ch 2, tr) tip and a sc valley.
- [ ] Round 13 has 108 sc plus 12 ch-2 tips.
- [ ] The coaster is 5.5 in (14.0 cm) point to point.
- [ ] Three berries are firmly stuffed and closed.
- [ ] The berries sit in a triangle (two above, one below) over the color change.
- [ ] All ends are woven in securely on the back.
- [ ] The coaster lies flat on the table, with no cupping or waving.
Troubleshooting
The center cups. Your tension is too tight or you missed increases. Count each round; go up a hook size if the count is correct.
The center ruffles. You have extra stitches or loose tension. Recount, or go down a hook size.
The points are uneven. Recount Round 11. If it isn’t exactly 72, the 6-stitch repeat will drift. Fix Round 11 before redoing the points.
The points curl forward. Block firmly by pinning each tip. If they still curl, your tr stitches may be tight; loosen them slightly.
The valleys pucker. Make sure each valley sc in Round 12 goes into one stitch only, and don’t add extra sc in Round 13.
Stuffing shows through the berries. Use only red scraps for stuffing, and keep the Round 3 stitches snug.
The berries flop or tilt. Sew around the whole base of each berry, not just one spot.
The color change shows a jog. Join the green just after the sl st that finishes the spiral, and weave the cream tail across the join on the back.
Care
Hand wash in cool water with mild soap, press out the water in a towel, and reshape flat to dry. Avoid the dryer so the points stay crisp and the berries keep their shape.
Final Notes
Here is the measurement chain to follow: the first 4 rounds measure 1.5 in (3.8 cm). The cream center grows to 3.75 in (9.5 cm) with 60 sts. The green hdc round brings it to 4.25 in (10.8 cm) with 72 sts. The 12 points reach 5.25 in (13.3 cm), and the edging finishes the coaster at 5.5 in (14.0 cm) point to point. If you check each stage before moving on, your coaster will lie flat, the points will stay even, and the berries will sit neatly in place.
Happy crocheting!