

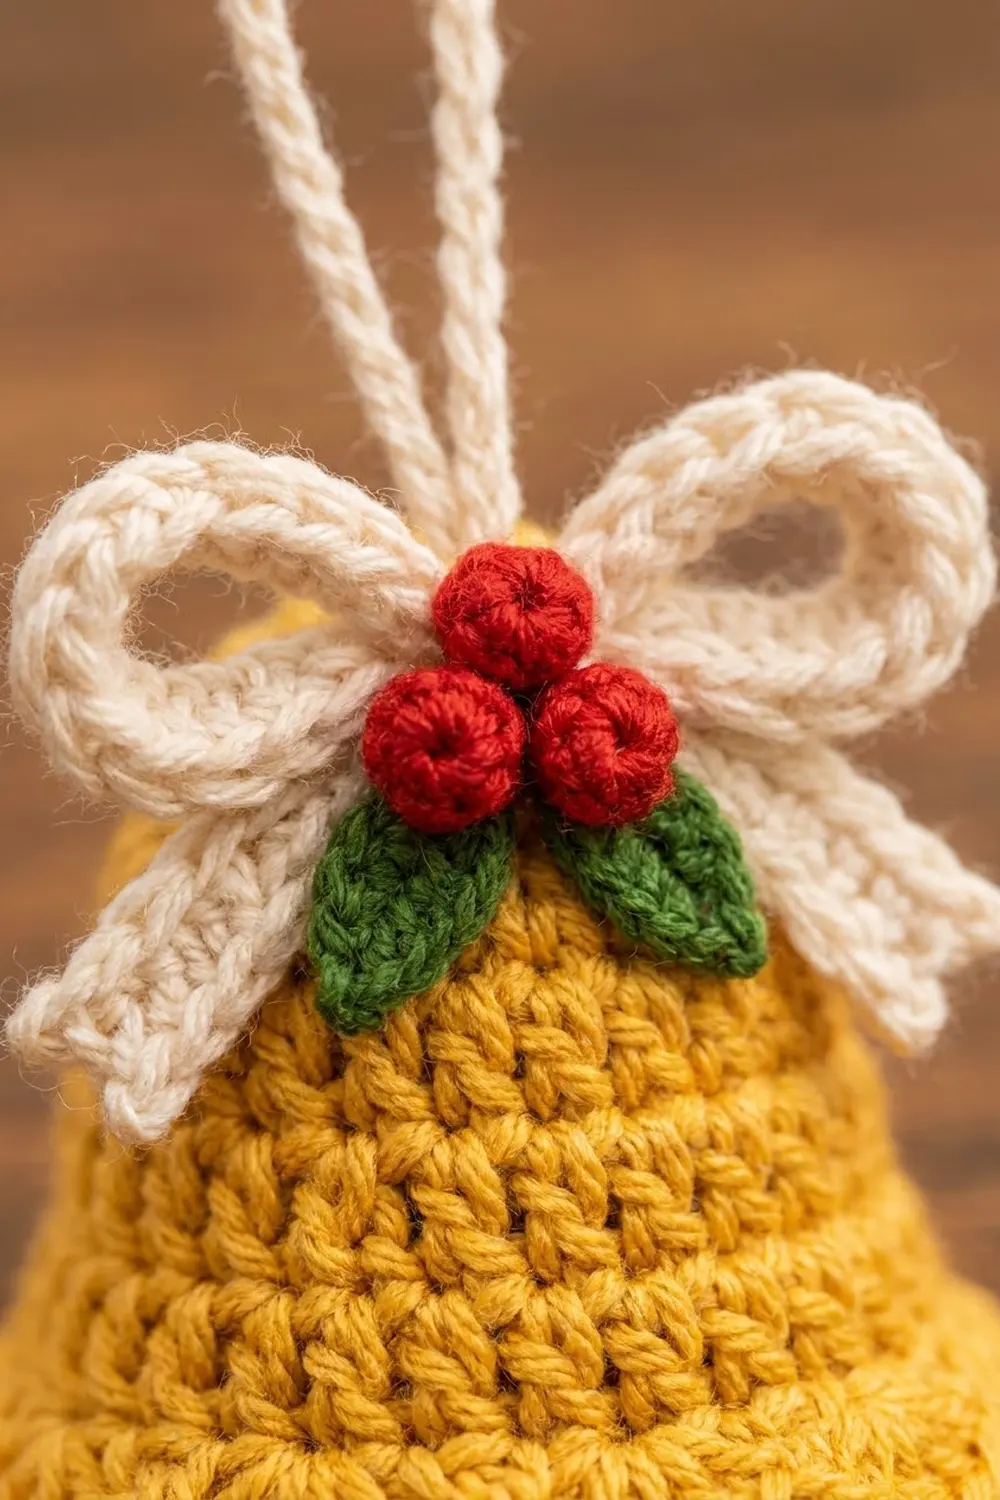
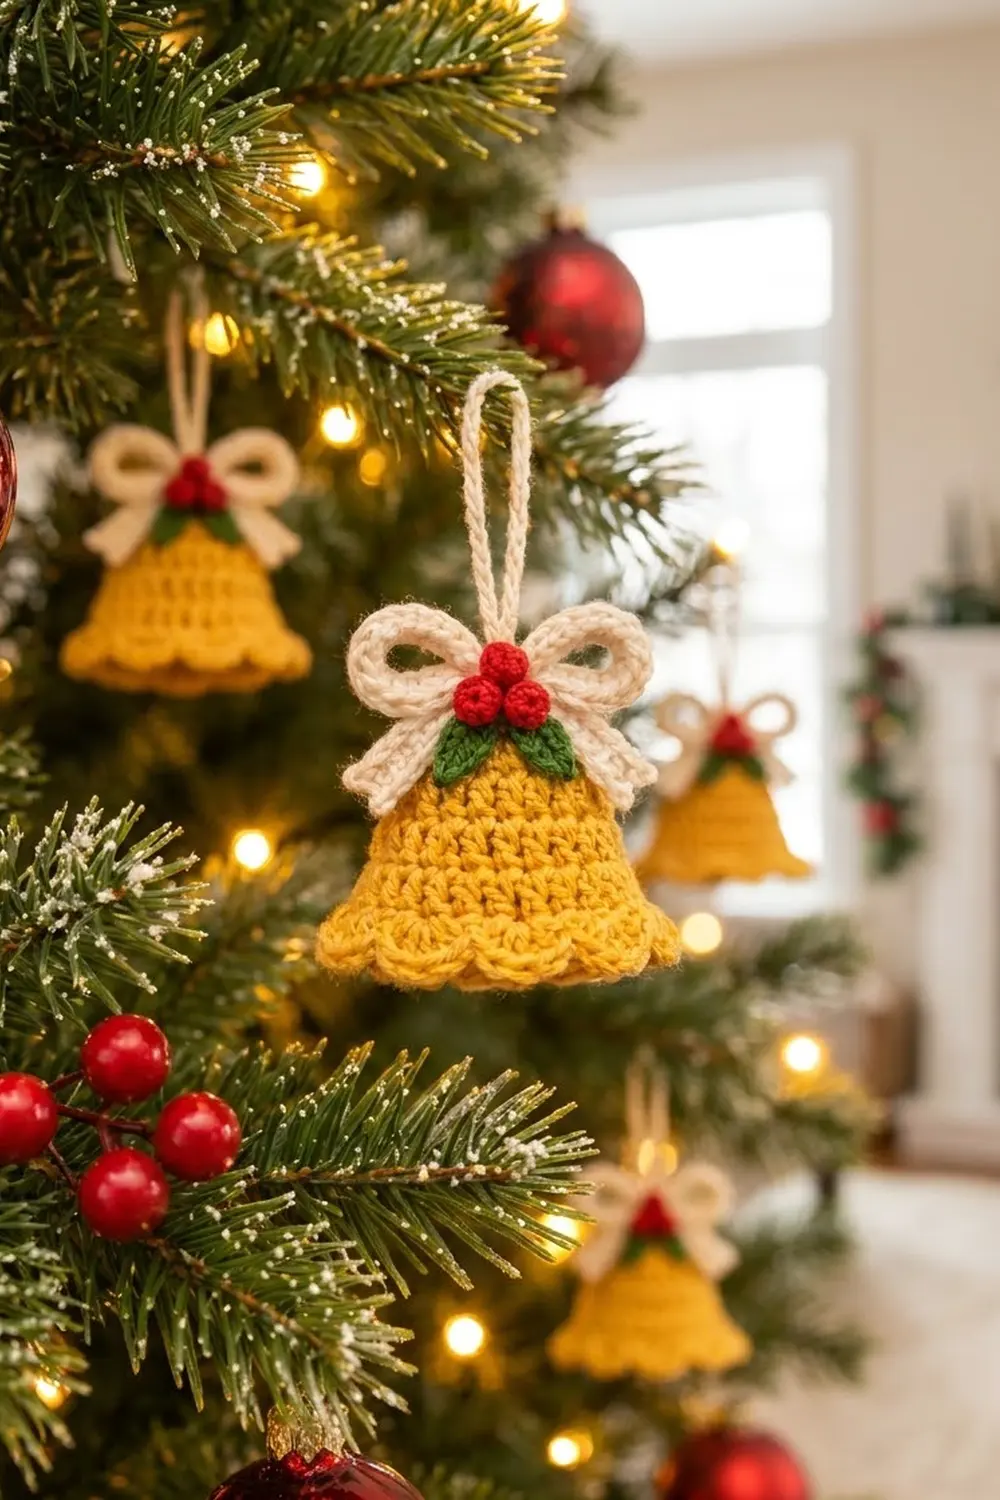
This little golden bell is a Christmas ornament with some weight to it. The body is mustard-gold double crochet with a flat round top, gently sloping sides, a flared hem, and a soft scalloped edge. A cream bow sits at the top of the bell. Three round red berries cluster at the bow’s center, with two small green holly leaves tucked underneath, and a sturdy cream cord loop is attached for hanging.
The palette is warm and traditional: honey gold, creamy white, berry red, and leaf green. The style is cottage and handmade, so it looks right on a real tree, a wreath, a gift package, or a door knob.
This pattern uses US crochet terms. The finished bell body measures about 3 in (7.6 cm) tall and 3.5 in (8.9 cm) across at the scalloped hem. With the hanging loop it measures about 5.5 in (14.0 cm) from the top of the loop to the bottom of the scallops.
Construction is simple. You crochet the bell top down in joined rounds. First comes a flat circle, then a back-loop round that turns the edge downward, then increase rounds for the flare, and a final scallop round. The bow loops, bow tails, cord loop, berries, and leaves are made separately and sewn on.
Finished Size and Construction
- Finished size (bell body): 3 in (7.6 cm) tall x 3.5 in (8.9 cm) wide at the scallops
- Overall height with loop: about 5.5 in (14.0 cm)
- Skill level: Easy / advanced beginner
- Terminology: US crochet terms
- Yarn weight: Worsted (weight 4), cotton or cotton blend
- Hook: 4.0 mm (G-6)
- Number of pieces: 1 bell body plus 8 small appliqué parts (1 bow strip, 1 tail strip, 1 cord loop, 3 berries, 2 leaves), assembled into one ornament
- Layout: Single ornament, no joining of motifs
- Piece size: Top circle 1.9 in (4.8 cm) across; hem circumference 10 in (25.4 cm)
- Size before scallop edge: 2.5 in (6.4 cm) tall, 10 in (25.4 cm) around the hem
- Scallop (border) depth: 0.5 in (1.3 cm)
Materials
Use a smooth worsted cotton or cotton blend. Cotton keeps its shape well, so the bell holds a crisp outline and the scallops stay defined. Acrylic also works but gives a softer, slightly floppier bell. For the body, pick a warm mustard or honey gold rather than a bright lemon yellow; it reads as “brass bell” from across the room. Amounts below assume about 1.8 m of yarn per gram.
- Color A, mustard gold (bell body): 15 g / 27 m
- Color B, cream (bow, tails, hanging loop): 6 g / 11 m
- Color C, berry red (berries): 3 g / 5 m
- Color D, leaf green (leaves): 2 g / 4 m
All quantities include a margin of about 20% for swatching and sewing tails.
Tools:
- 4.0 mm (G-6) crochet hook
- Tapestry needle
- Scissors
- 4 stitch markers (one to mark the start of each round)
- Small pinch of fiberfill (optional, for the berries)
- Fabric stiffener or starch spray (optional)
- Flexible tape measure
- Pins and a foam block or folded towel
Abbreviations (US Terms)
- ch – chain
- sl st – slip stitch
- sc – single crochet
- hdc – half double crochet
- dc – double crochet
- BLO – back loop only
- sc2tog – single crochet 2 together
- st(s) – stitch(es)
- rep – repeat
- MR – magic ring
Special stitch – Scallop: Work 5 dc in the same stitch.
Note: The beginning ch 2 of each dc round does not count as a stitch. Join every round with a sl st to the first dc, not to the ch 2.
Gauge and Checkpoints
Gauge is 16 dc and 8 rounds = 4 in (10.2 cm) in worsted yarn with a 4.0 mm hook. In practice, one dc is 0.25 in (0.6 cm) wide and one dc round is 0.5 in (1.3 cm) tall.
Rather than a separate swatch, test the first two rounds of the bell. That flat circle is your gauge piece.
Checkpoints:
- After Round 2: Flat circle measures 1.9 in (4.8 cm) across and 6 in (15.2 cm) around.
- After Round 4: Circumference measures 7 in (17.8 cm).
- After Round 6: Circumference measures 8 in (20.3 cm); bell height is 2 in (5.1 cm).
- After Round 7: Circumference measures 10 in (25.4 cm); height is 2.5 in (6.4 cm).
- After Round 8: Height is 3 in (7.6 cm); width across the scallops is 3.5 in (8.9 cm).
If your circle is too big (over 2 in / 5.1 cm), go down to a 3.5 mm (E-4) hook. If it is too small (under 1.75 in / 4.4 cm), go up to a 4.5 mm (7) hook. Change the hook before you continue. Do not change the stitch counts, because the shaping depends on them.
Bell Body (Color A)
Work in joined rounds with the right side facing you. Do not turn. Place a marker in the first dc of each round so the joins stay in a neat line at the back of the bell.
Round 1: MR, ch 2, 12 dc into the ring. Pull the ring tightly closed. Sl st to first dc. (12 dc)
Round 2: Ch 2, 2 dc in each st around. Sl st to first dc. (24 dc)
Check the circle against the gauge checkpoint. It must lie flat. If it cups, your tension is tight; if it ruffles, your tension is loose.
Round 3 (turning round): Ch 2, dc in BLO of each st around. Sl st to first dc. (24 dc)
Working in the back loops leaves a ridge of front loops on the outside. That ridge makes the crisp edge between the flat top and the sides, and the sides now start to fall downward.
Round 4: Ch 2, [dc in next 5 sts, 2 dc in next st] 4 times. Sl st to first dc. (28 dc)
Round 5: Ch 2, dc in each st around. Sl st to first dc. (28 dc)
Round 6: Ch 2, [dc in next 6 sts, 2 dc in next st] 4 times. Sl st to first dc. (32 dc)
Rounds 4–6 give the gently sloping shoulders of the bell. Only 4 sts are added at a time, so the sides stay nearly straight.
Round 7 (flare round): Ch 2, [dc in next 3 sts, 2 dc in next st] 8 times. Sl st to first dc. (40 dc)
This round adds 8 sts at once. The sudden increase makes the hem flare outward like a real bell. Check: the circumference should be 10 in (25.4 cm) and the height 2.5 in (6.4 cm).
Do not fasten off. Continue straight into the scallop edge in the Scallop Edge (Border) section below.
Bow and Trim Pieces
Bow Loop Strip (Color B)
Foundation: Ch 42.
Row 1: Hdc in 3rd ch from hook (the skipped 2 ch do not count) and in each ch across. (40 hdc)
Fasten off and leave a 6 in (15.2 cm) tail. The strip measures 10 in (25.4 cm) long.
To shape: Lay the strip flat. Bring both ends to the center so they overlap by about 0.5 in (1.3 cm). This makes two loops, each about 1.5 in (3.8 cm) wide. Pinch the center tightly. Wrap the tail around the pinch 4–5 times and secure it on the back. The finished bow loops measure about 3 in (7.6 cm) across.
Bow Tails (Color B)
Foundation: Ch 17.
Row 1: Sc in 2nd ch from hook and in each ch across. (16 sc)
Fasten off and leave a tail. The strip measures 4 in (10.2 cm). Fold it in half into an upside-down V, with each leg 2 in (5.1 cm) long. Sew the fold to the back of the bow center. Angle the legs out and down so they lie over the bell’s shoulders.
Hanging Loop (Color B)
Foundation: Ch 31.
Row 1: Sl st in 2nd ch from hook and in each ch across. (30 sl st)
Working sl sts back along the chain turns it into a firm round cord about 5 in (12.7 cm) long. Fold it in half to make a loop about 2.5 in (6.4 cm) tall. Leave long tails for sewing.
Berries (make 3, Color C)
Round 1: MR, ch 1, 6 sc into ring. Do not join; work in a spiral. (6 sc)
Round 2: 2 sc in each st around. (12 sc)
Round 3: Sc2tog 6 times. (6 sts)
Stuff the berry with the starting tail or a tiny pinch of fiberfill. Fasten off. Use the tail to weave through the front loops of the last 6 sts and pull tight. Each berry is a firm ball about 0.5 in (1.3 cm) across.
Holly Leaves (make 2, Color D)
Foundation: Ch 6.
Side 1: Sc in 2nd ch from hook, hdc in next ch, dc in next ch, hdc in next ch. In last ch work (sc, ch 2, sc) for the pointed tip.
Side 2: Rotate the piece and work along the opposite side of the foundation chain: hdc in next ch, dc in next ch, hdc in next ch, sc in last ch. Sl st to first sc. (10 sts plus 1 ch-2 tip)
Fasten off. Each leaf measures about 1.25 in (3.2 cm) long. If you like, embroider a center vein in a lighter green with one long straight stitch.
Scallop Edge (Border)
The scallop round is the border of this piece. It is worked directly into Round 7 with Color A.
Border gauge: Each scallop repeat uses 4 stitches of Round 7, which is 1 in (2.5 cm) of hem.
Round 8: Ch 1, sc in same st as join. Skip next st, scallop (5 dc) in next st, skip next st, sc in next st. Rep from * to * around, ending with skip next st, scallop in next st, skip last st. Sl st to first sc. (10 scallops and 10 sc)
Count by side: When you flatten the bell, each side (front and back) shows 20 sts of Round 7, or 5 scallops. Both sides together hold 40 sts, or 10 scallops.
Why the math works: Each repeat uses exactly 4 sts: 1 sc, 1 skip, 1 scallop, 1 skip. Round 7 has 40 sts, and 40 ÷ 4 = 10 repeats exactly, with no leftover stitches. The last repeat leaves out its final sc on purpose, because the sc that started the round fills that spot. The 5 dc of each scallop spread across 1 in (2.5 cm) of hem. That extra fullness makes the edge ripple outward. It raises the width across the bell from 3.2 in (8.1 cm) to about 3.5 in (8.9 cm) and adds 0.5 in (1.3 cm) of depth.
Fasten off and weave in all ends on the inside of the bell.
Assembly
- Leaves: Sew both leaves to the front of the bell, just below the Round 3 ridge. Angle them in a shallow V with the tips pointing down and out.
- Bow: Center the bow over the leaf bases and sew through the bow center into the bell. The bow should sit about 0.25 in (0.6 cm) above the top ridge, with the loops spreading past the shoulders.
- Berries: Sew the three berries in a tight triangle over the bow center, with two below and one above. Pass the needle through each berry twice so it can’t spin.
- Hanging loop: Thread both loop tails down through the center of the magic ring at the top of the bell. Tie them securely on the inside and weave the ends in.
Final Blocking
- Lightly mist the bell with water or spray starch until it is damp, not soaked.
- Stuff the bell firmly with plastic wrap or a small paper cone. This helps it hold a rounded bell shape.
- Stand the bell on its hem on a towel. Use your fingers to fan each scallop outward evenly.
- Pin the bow loops open so the center holes stay round and the loops lie flat against the top.
- Check the measurements: 3 in (7.6 cm) tall and 3.5 in (8.9 cm) across the scallops.
- Let it dry completely, usually 6–8 hours. Then remove the stuffing.
- For a firmer ornament, brush diluted fabric stiffener onto the inside only before drying.
Final Quality-Control Checklist
- Round 2 lies flat and measures 1.9 in (4.8 cm) across
- The Round 3 ridge forms a clean, even edge around the top
- Stitch counts for Rounds 1–7 are 12, 24, 24, 28, 28, 32, 40
- Round 8 has exactly 10 evenly spaced scallops
- The hem circumference is 10 in (25.4 cm) before the scallops flare
- The bow is centered, symmetrical, and about 3 in (7.6 cm) wide
- The berries are firm, round, and tightly clustered
- The hanging loop is secure and centered on the magic ring
- All ends are woven in on the inside
Troubleshooting
The top circle cups or ruffles. Cupping means your tension is too tight or your stitches are short; go up a hook size. Ruffling means your tension is loose; go down a hook size.
There is no defined edge at the top. You worked Round 3 in both loops. Rip it back and rework the round in the back loops only.
The bell is too straight or narrow. Count the Round 7 increases. There should be 8 of them, for a total of 40 sts.
There are 9 scallops, or there is a gap. Your Round 7 count is off. The scallop repeat needs exactly 40 sts.
The berries are floppy. Add more stuffing, and keep your Round 3 decreases tight.
The bow droops. Wrap the center tighter, or starch the loops.
The magic ring hole is visible. Pull the ring closed again before you weave in the tail, and run the tail around the ring once more.
Care
Spot clean with mild soap and cool water, then reshape the bell and let it dry standing on its hem. Store it in a box with a little tissue tucked inside so it keeps its shape.
Final Notes
The whole ornament comes from one measurement chain. A 1.9 in (4.8 cm) flat circle of 24 sts becomes a 7 in (17.8 cm) circumference at Round 4 and 8 in (20.3 cm) at Round 6. The flare at Round 7 takes it to 10 in (25.4 cm), 40 sts, and 2.5 in (6.4 cm) tall. Ten scallops then finish the bell at 3 in (7.6 cm) tall and 3.5 in (8.9 cm) wide. If you hit the gauge on Round 2, every later number falls into place. Make one bell, check it, and then make a whole set for the tree.
Happy crocheting!