
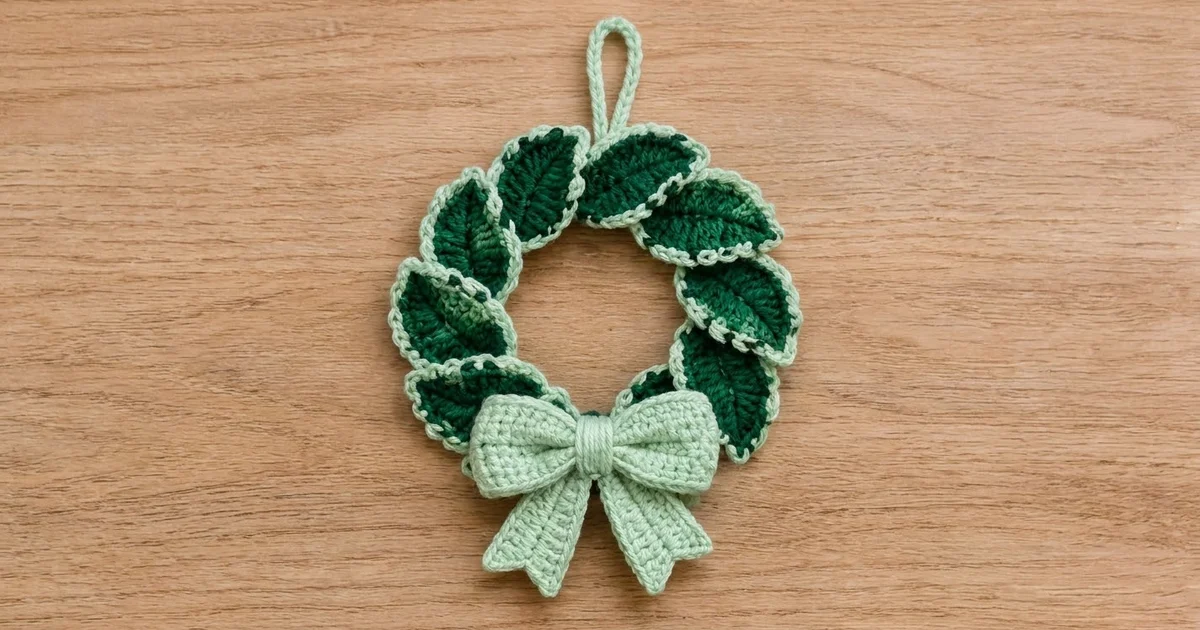
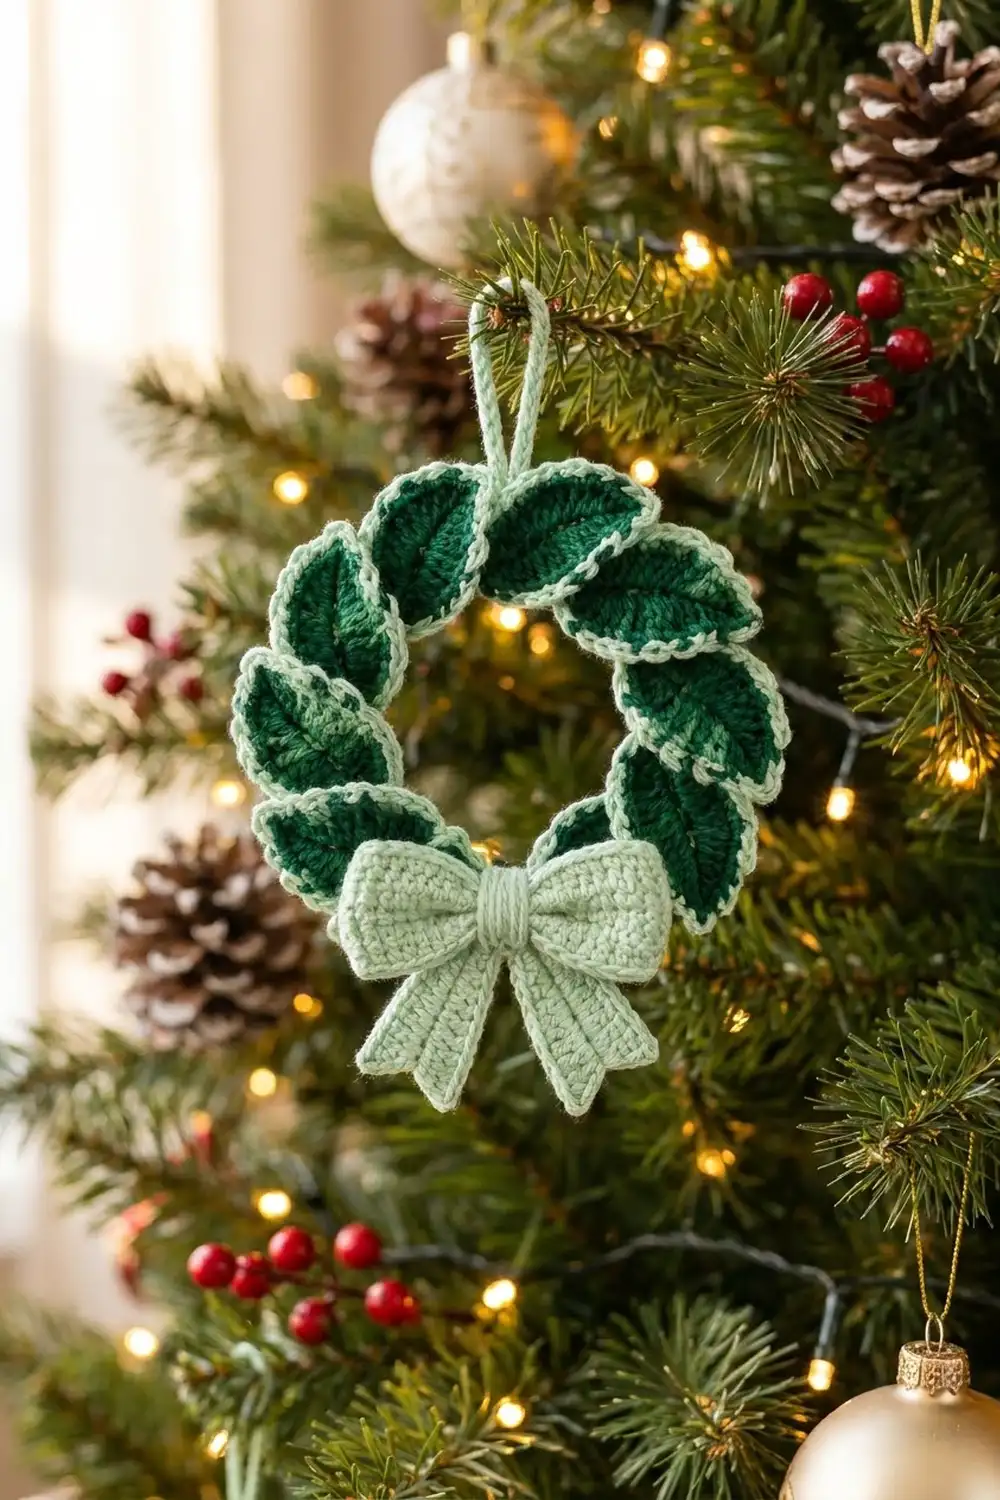
This small wreath ornament is a ring of twelve deep green almond-shaped leaves. Each leaf has a corded mint edge, and a soft mint bow sits at the bottom. A slim mint loop at the top lets it hang straight from a branch, a door knob, or a gift.
It uses two greens. A dark forest green makes the leaves and the hidden base ring. A pale mint makes the leaf edges, bow, and loop. The mint edge outlines every leaf, so the wreath is easy to see from across a room. If your dark green is slightly heathered, some leaves will show soft lighter patches, which adds depth.
The pattern uses US crochet terms. The finished wreath is 4.5 in (11.4 cm) across. From the top of the loop to the bottom of the bow tails it measures about 6.75 in (17.1 cm).
You make the ornament as separate small pieces: a two-round base ring, twelve leaves worked around a foundation chain, a bow body, two notched tails, a center knot strip, and a hanging loop. You sew the leaves onto the ring so they overlap clockwise, then add the bow and the loop.
Finished Size and Construction
- Finished size: 4.5 in (11.4 cm) wreath diameter; 6.75 in (17.1 cm) total height with loop and tails
- Skill level: Easy-intermediate
- Terminology: US
- Yarn weight: DK (#3)
- Hook: 3.0 mm
- Number of pieces: 18 (1 base ring, 12 leaves, 1 bow body, 2 bow tails, 1 knot strip, 1 hanging loop)
- Layout: 12 leaves around a ring, one at each clock position, tips pointing clockwise
- Leaf size: 2 in x 1.1 in (5.1 x 2.8 cm) finished
- Leaf size before edging: 1.5 in x 0.6 in (3.8 x 1.5 cm)
- Edging depth: 0.25 in (0.6 cm) on every side of each leaf
- Base ring: 2.75 in (7.0 cm) inner diameter, 3.5 in (8.9 cm) outer diameter
Materials
Choose a smooth DK yarn that shows stitches clearly. Cotton or a cotton blend gives crisp leaves and a firm bow. Acrylic also works and is a little softer. Avoid fuzzy yarns, because they blur the corded edge.
- Color A, dark forest green: 15 g, about 34 m (leaves and base ring)
- Color B, pale mint: 20 g, about 45 m (leaf edging, bow, tails, knot, loop)
These amounts include about 30 percent extra for a test leaf and sewing tails. One ornament uses only a small part of a standard ball, so leftover yarn works well.
Tools:
- 3.0 mm crochet hook
- Tapestry needle
- Scissors
- 6 locking stitch markers
- Rustproof pins and a foam blocking mat
- Spray bottle with water
Abbreviations (US Terms)
- ch – chain
- sl st – slip stitch
- sc – single crochet
- hdc – half double crochet
- dc – double crochet
- rev sc – reverse single crochet
- sp – space
- st(s) – stitch(es)
- rnd – round
Special stitch – Reverse single crochet (rev sc): Work from left to right (if you are right-handed). Insert the hook into the next stitch to the right, yarn over, pull up a loop, yarn over, and pull through both loops. This makes the twisted, corded edge on every leaf.
Gauge and Checkpoints
Gauge: 22 sc and 24 rows = 4 in (10.2 cm) in sc.
Gauge matters because twelve leaves must fit around a ring of fixed size. Make one complete leaf first and measure it before you make the rest.
Checkpoints:
- Leaf after Rnd 1: 1.5 in x 0.6 in (3.8 x 1.5 cm).
- Leaf after Rnd 3: 2 in x 1.1 in (5.1 x 2.8 cm).
- Base ring after Rnd 2: 3.5 in (8.9 cm) outer diameter, lying flat.
- Bow body: 2.2 in x 1.2 in (5.6 x 3.0 cm).
If your leaf is too big, change to a 2.75 mm hook. If it is too small, change to a 3.25 mm hook. Check the base ring too. If it ruffles, your tension is too loose. If it cups, your tension is too tight.
Base Ring
Use Color A.
Ch 48. Sl st to the first ch to join, without twisting the chain.
Rnd 1: Ch 1, sc in each ch around. Sl st to first sc. (48 sc)
Rnd 2: Ch 1, sc in next 3 sts, 2 sc in next st; repeat from * 12 times total. Sl st to first sc. (60 sc)*
Fasten off and weave in the ends.
Rnd 2 has twelve repeats, one for each leaf. Each leaf sits over 4 sts of Rnd 1 and 5 sts of Rnd 2. Place a marker in the first st of Rnd 1. This is the 12 o’clock point.
Checkpoint: The ring lies flat. Its inner diameter is 2.75 in (7.0 cm) and its outer diameter is 3.5 in (8.9 cm). The band is about 3/8 in (1.0 cm) wide.
Leaf (make 12)
Each leaf is worked around both sides of a foundation chain. The chain stays in the center and forms the vein. One end of the leaf is rounded (the base) and the other end is pointed (the tip).
Use Color A.
Ch 10.
Rnd 1: Sc in 2nd ch from hook, hdc in next ch, dc in next 4 ch, hdc in next ch, sc in next ch (8 sts, side A). Work 3 sc in last ch (base). Turn the work and continue along the other side of the foundation chain: sc in next ch, hdc in next ch, dc in next 4 ch, hdc in next ch, sc in next ch (8 sts, side B). Ch 2, sl st to first sc (tip). (19 sts + ch-2 tip sp)
The tall dc stitches in the middle of each side and the short sc stitches at each end make the almond shape. Count: 8 + 3 + 8 = 19.
Fasten off, leaving an 8 in (20.3 cm) tail of Color A for sewing.
Checkpoint: 1.5 in x 0.6 in (3.8 x 1.5 cm).
Leaf Edging (Border)
The mint edging is the border of each leaf.
Edging gauge: The two edging rounds (1 rnd of sc and 1 rnd of rev sc) add 0.25 in (0.6 cm) on every side.
Rnd 2: Join Color B with a sl st in the center sc of the 3-sc base group. Ch 1, 3 sc in same st. Sc in next sc. Sc in each of the 8 sts of side B. Work (sc, ch 1, sc) in the ch-2 tip sp. Sc in each of the 8 sts of side A. Sc in last sc of the base group. Sl st to first sc. (23 sc + ch-1 tip sp)
Counts per section:
- Base: 5 sc (1 + 3 + 1 across the 3-sc base group)
- Side B: 8 sc
- Tip: 2 sc + ch-1 sp
- Side A: 8 sc
- Total: 5 + 8 + 2 + 8 = 23 sc
Rnd 3: Ch 1. Working from left to right, rev sc in each of the 23 sc, plus 1 rev sc in the ch-1 tip sp. Sl st to first rev sc. (23 + 1 = 24 rev sc)
Fasten off Color B and weave in its ends. Keep the Color A tail for sewing.
Why the math works: Each side gets exactly 1 sc for each Rnd 1 stitch (8 per side), so the sides stay flat. The curved base gets 2 extra sc in its center stitch, so its 3 stitches become 5. The ch-1 sp gives the tip one turning point, which keeps it sharp. Rnd 3 adds no increases, so the corded edge sits close to the leaf and does not ruffle.
Checkpoint: 2 in x 1.1 in (5.1 x 2.8 cm).
Bow Pieces
Make all bow pieces in Color B.
Bow Body
Ch 13.
Row 1: Sc in 2nd ch from hook and each ch across. Turn. (12 sc)
Rows 2–7: Ch 1, sc in each st across. Turn. (12 sc)
Fasten off, leaving a 12 in (30.5 cm) tail.
Checkpoint: 2.2 in x 1.2 in (5.6 x 3.0 cm).
Bow Tails (make 2)
Ch 5.
Row 1: Sc in 2nd ch from hook and each ch across. Turn. (4 sc)
Rows 2–9: Ch 1, sc in each st across. Turn. (4 sc)
Row 10 (notch row): Ch 2 (counts as hdc), sl st in next 2 sts, hdc in last st. (4 sts)
The taller stitches at each edge and the low sl sts in the center make the notched end. Fasten off. Leave a 6 in (15.2 cm) tail at the Row 1 end.
Checkpoint: 0.7 in x 1.7 in (1.8 x 4.3 cm).
Knot Strip
Ch 4.
Row 1: Sc in 2nd ch from hook and each ch across. Turn. (3 sc)
Rows 2–7: Ch 1, sc in each st across. Turn. (3 sc)
Fasten off, leaving an 8 in (20.3 cm) tail.
Checkpoint: 0.5 in x 1.2 in (1.3 x 3.0 cm).
Hanging Loop
Use Color B.
Ch 17.
Row 1: Sc in 2nd ch from hook and each ch across. (16 sc)
Fasten off, leaving an 8 in (20.3 cm) tail.
Checkpoint: 2.9 in (7.4 cm) long.
Make All Pieces
Before you start assembly, check that you have:
- Color A: 1 base ring and 12 leaf centers (Rnd 1)
- Color B: 12 leaf edgings (Rnds 2–3), 1 bow body, 2 tails, 1 knot strip, 1 hanging loop
Leaf layout on the ring (Rnd 1 sts / Rnd 2 sts, seen from the front, tips pointing clockwise):
Leaf 1  12:00   R1 sts 1-4    R2 sts 1-5     (loop behind)
Leaf 2   1:00   R1 sts 5-8    R2 sts 6-10
Leaf 3   2:00   R1 sts 9-12   R2 sts 11-15
Leaf 4   3:00   R1 sts 13-16  R2 sts 16-20
Leaf 5   4:00   R1 sts 17-20  R2 sts 21-25
Leaf 6   5:00   R1 sts 21-24  R2 sts 26-30
Leaf 7   6:00   R1 sts 25-28  R2 sts 31-35   (bow centered here)
Leaf 8   7:00   R1 sts 29-32  R2 sts 36-40
Leaf 9   8:00   R1 sts 33-36  R2 sts 41-45
Leaf 10  9:00   R1 sts 37-40  R2 sts 46-50
Leaf 11 10:00   R1 sts 41-44  R2 sts 51-55
Leaf 12 11:00   R1 sts 45-48  R2 sts 56-60
12 leaves x 4 sts = 48 sts in Rnd 1, and 12 leaves x 5 sts = 60 sts in Rnd 2. Every stitch of the ring belongs to exactly one leaf.
Joining
Method: Whipstitch each leaf to the front of the base ring with its Color A tail.
Placement: Lay the leaf over its 4-st section of the ring. The vein should cross the band at a slight outward angle. The base sits on the inner edge of the band, and the tip points clockwise past the outer edge. Pin the leaf in place.
Stitch-to-stitch logic: On the back of the leaf, sew along the foundation chain (the vein). Take 1 stitch into the ring for each of the 4 Rnd 1 sts in that leaf’s section. Then take 1 stitch for each of its 5 Rnd 2 sts on the way back. That gives 9 anchoring stitches per leaf. Leave the mint edge unsewn so it lifts slightly.
Order: Sew Leaf 1 first, then work clockwise. Tuck the base of each new leaf under the tip of the leaf before it. For the last leaf, lift Leaf 1 and tuck Leaf 12’s tip under it.
Tension: Pull each stitch just snug. Stitches that are too tight pucker the ring. Stitches that are too loose let the leaves flop forward.
Hanging loop: Fold the loop strip in half. Sew both ends to the back of the ring over Rnd 2 sts 2–4, behind Leaf 1. About 1.25 in (3.2 cm) of loop should rise above the top edge.
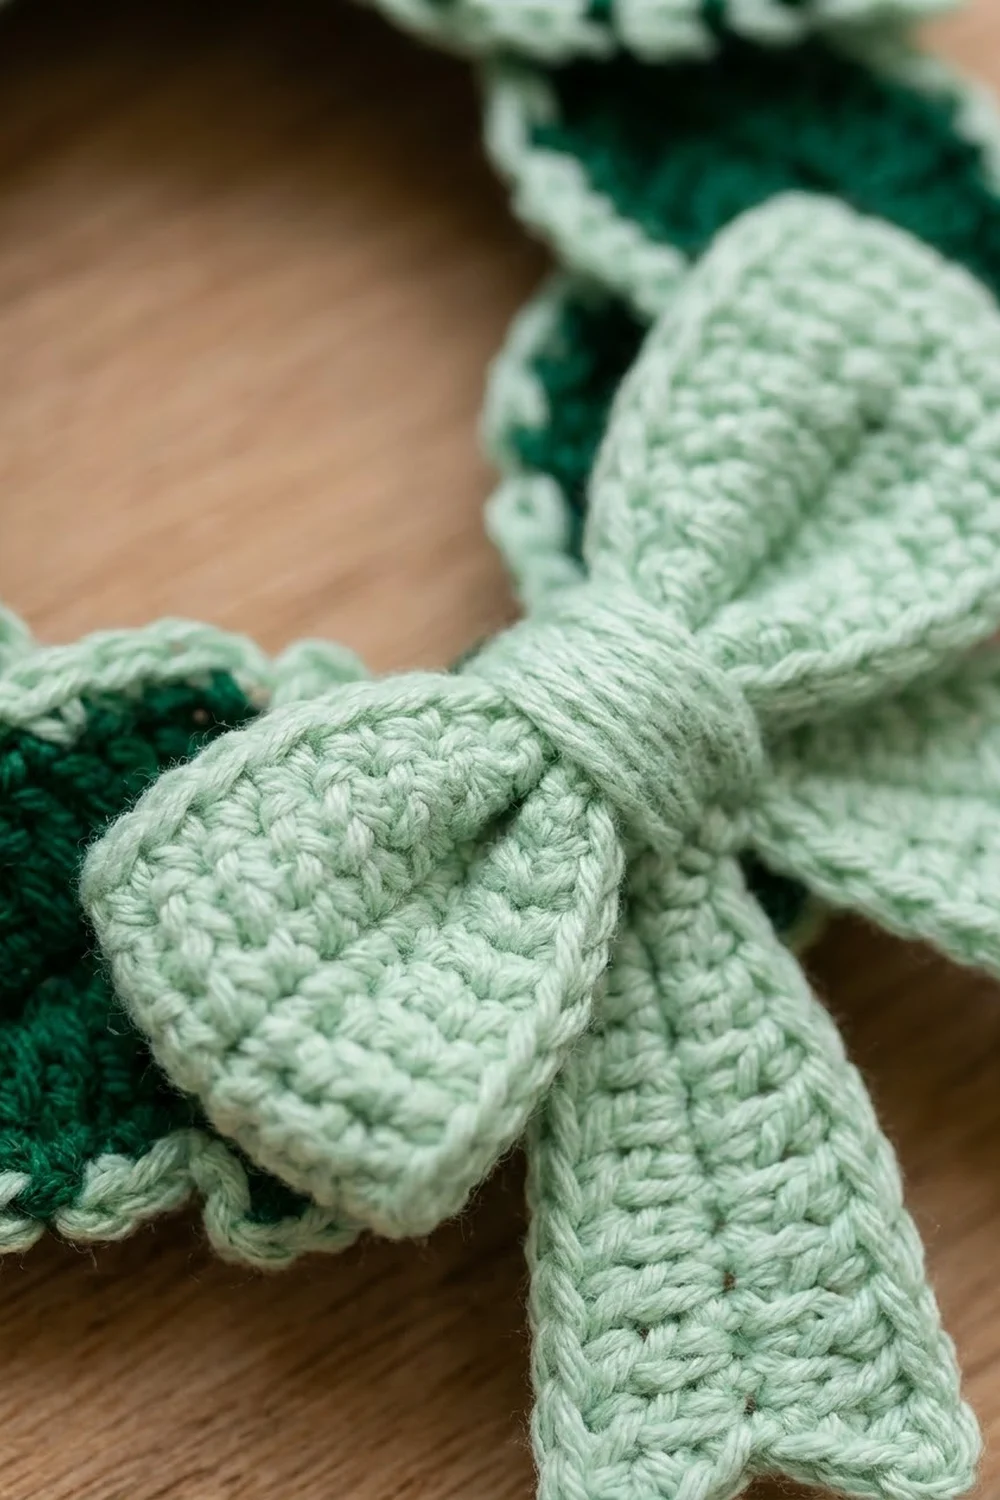
Bow assembly: Pinch the bow body at its center, between sts 6 and 7, to make two loops. Lay the two tails behind it in a V, with their Row 1 ends at the pinch. Wrap the knot strip around the pinch and sew its ends together at the back. Sew the bow over Leaf 7 at 6 o’clock, catching the ring behind it.
Size checkpoint: The wreath is 4.5 in (11.4 cm) across, with a 1.5 in (3.8 cm) center opening. The tails hang about 1 in (2.5 cm) below the bottom edge of the wreath.
Final Blocking
- Lightly mist the whole ornament until it is damp but not soaked.
- Lay it face up on the blocking mat.
- Pin the wreath into a 4.5 in (11.4 cm) circle, with one pin at each leaf tip.
- Shape each leaf tip into a point with your fingers.
- Pin the bow loops flat and open to 2.2 in (5.6 cm) wide.
- Pin each tail straight, with the notches square.
- Pin the loop upright.
- Let it dry completely, at least 8 hours, before you remove the pins.
Final Quality-Control Checklist
- 12 leaves, each 2 in x 1.1 in (5.1 x 2.8 cm)
- Each leaf has 23 sc in Rnd 2 and 24 rev sc in Rnd 3
- All leaf tips point clockwise and overlap evenly
- The base ring cannot be seen from the front
- The wreath is 4.5 in (11.4 cm) across and lies flat
- The bow is centered at 6 o’clock and both tails are the same length
- The loop is centered at 12 o’clock and the wreath hangs straight
- All ends are woven in securely
Troubleshooting
Leaves curl inward: Rnd 3 is too tight. Work the rev sc more loosely, or use a hook one size larger for that round only.
Leaf edge ruffles: Check the base for an extra sc. Rnd 2 must total 23 sc.
Leaf tips are rounded: Make sure you worked the ch-2 tip sp in Rnd 1 and the ch-1 in Rnd 2. Pin the tips firmly when you block.
Gap between two leaves: Sew the leaf again with its base tucked further under the tip of the leaf before it.
Ornament hangs crooked: The loop is off-center. Move it so it sits directly behind Leaf 1.
Ring cups or ruffles: Work Rnd 2 again with looser or tighter tension, keeping 60 sc.
Care
Hand wash in cool water with mild soap. Press out the extra water in a towel, then dry flat and reshape the leaves. Store the ornament flat or hanging, with nothing heavy pressing on it.
Final Notes
Each measurement leads to the next. One leaf is 1.5 in x 0.6 in (3.8 x 1.5 cm) after Rnd 1 and 2 in x 1.1 in (5.1 x 2.8 cm) after the edging. The base ring has 48 sts on the inside and 60 sts on the outside, so each of the 12 leaves gets exactly 4 and 5 sts. With the leaves overlapping clockwise, the wreath measures 4.5 in (11.4 cm). The 1.25 in (3.2 cm) loop and the bow tails bring the total height to about 6.75 in (17.1 cm).
Make one leaf first and check its size before you make the rest. Happy crocheting!