

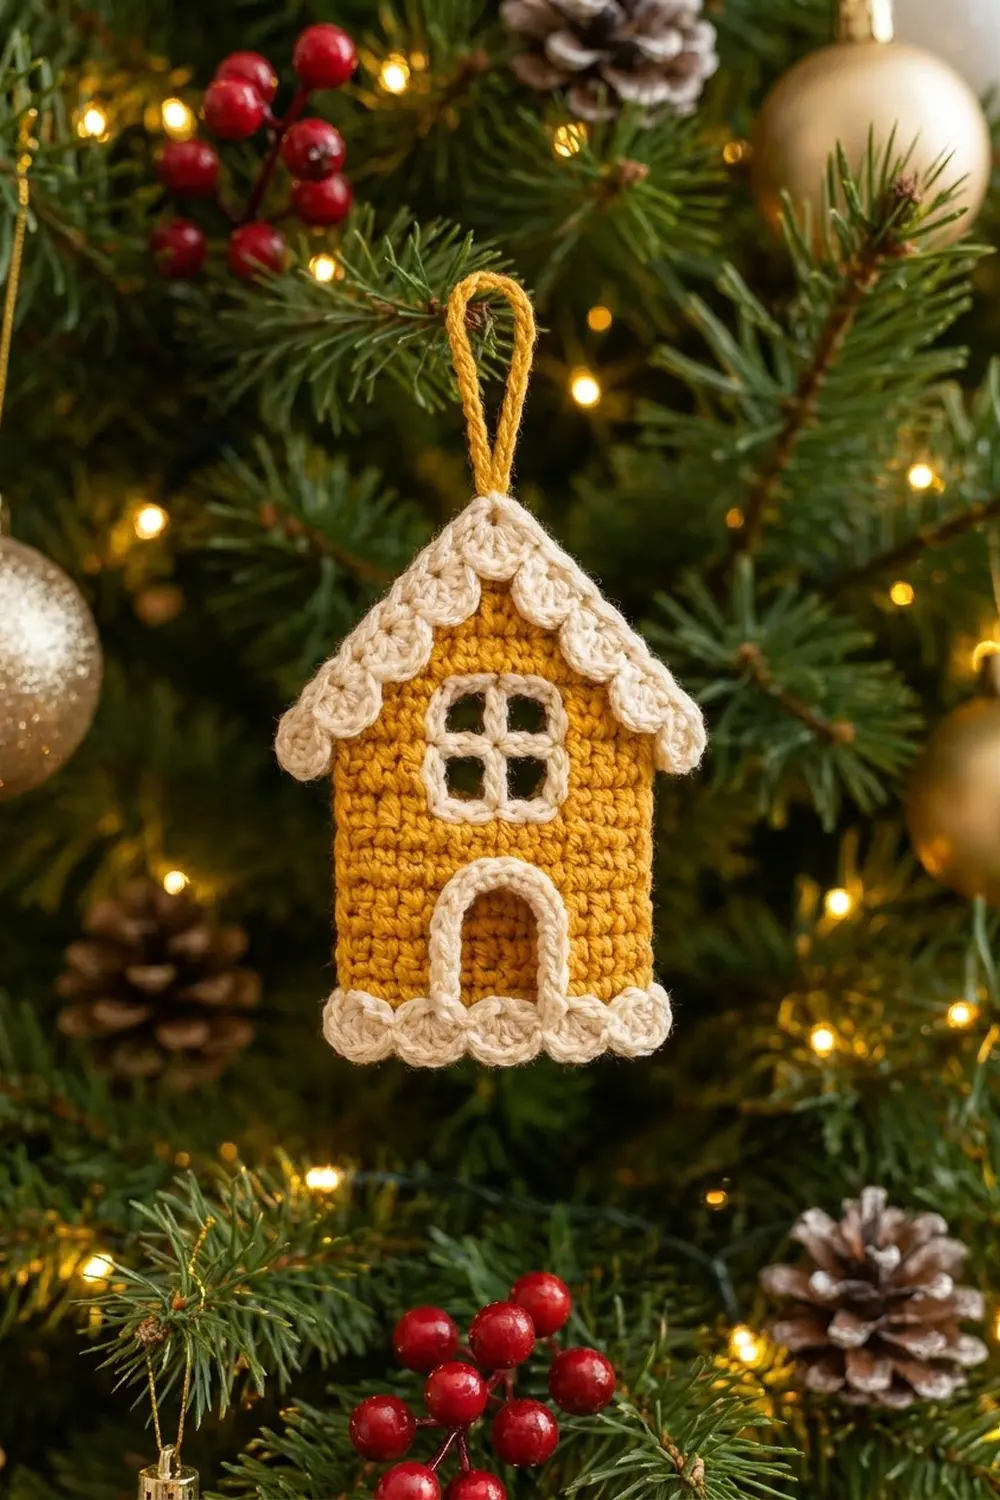
This little cottage is a flat, single-piece Christmas ornament with a honey-gold body and creamy “icing” details. A scalloped cream roof sits over the gable, and a cream window frame with a cross shows four small panes. A cream arch outlines the door, and round scallops finish the bottom edge. A golden chain loop at the peak makes it ready to hang.
It uses just two colors: warm mustard yellow for the house and soft cream for the trim. The style is classic gingerbread house, worked in crisp single crochet.
This pattern uses US crochet terms. The finished ornament measures about 4.25 in (10.8 cm) wide across the roof and 5.75 in (14.6 cm) tall from the bottom scallops to the peak, plus a 1.5 in (3.8 cm) hanging loop.
You work the body flat in rows of single crochet and shape the gable with decreases. A yellow edging round neatens every side and creates the loop. You work the cream bottom trim directly onto the edging, then sew on three small appliqués: the roof, window, and door.
Finished Size and Construction
- Finished size: 4.25 in (10.8 cm) wide at the roof x 5.75 in (14.6 cm) tall, not counting the loop
- Skill level: Easy
- Terminology: US crochet terms
- Yarn weight: Worsted (#4), cotton or cotton blend
- Hook: 4.0 mm (G-6)
- Number of pieces: 1 ornament (1 body plus 3 sewn appliqués)
- Layout: Single piece, no joining
- Size before border: 3.25 in (8.3 cm) wide x 4.5 in (11.4 cm) tall to the peak
- Size after edging: 3.75 in (9.5 cm) x 5 in (12.7 cm)
- Border depth: edging adds 0.25 in (0.6 cm) on each edge; bottom trim adds 0.75 in (1.9 cm)
Materials
Choose a smooth, firm worsted cotton. Cotton holds the scallops and the sharp roof point better than soft acrylic. Pick a true mustard or honey gold and a warm cream rather than a bright white.
Yarn (per ornament):
- Color A, honey yellow: 10 g, about 20 m (22 yd)
- Color B, cream: 6 g, about 12 m (13 yd)
These quantities include a margin of about 20% for swatching, tails, and sewing.
Tools:
- 4.0 mm (G-6) crochet hook
- Tapestry needle
- Scissors
- 2 stitch markers
- Ruler
- Pins and a blocking mat or folded towel
- Spray bottle
Abbreviations (US Terms)
- ch – chain
- sl st – slip stitch
- sc – single crochet
- hdc – half double crochet
- dc – double crochet
- sk – skip
- st(s) – stitch(es)
- sp – space
- sc2tog – (insert hook in next st, yo, pull up a loop) twice, yo, pull through all 3 loops
- sc3tog – (insert hook in next st, yo, pull up a loop) 3 times, yo, pull through all 4 loops
- RS / WS – right side / wrong side
Scallop: sk 1 st, 5 dc in next st, sk 1 st, sl st in next st. Uses 4 sts.
Mini scallop: 3 hdc in next st, sl st in next st. Uses 2 sts.
Gauge and Checkpoints
Gauge: 16 sc x 16 rows = 4 in (10.2 cm). That is 4 sc and 4 rows per 1 in (2.5 cm).
Make the body first and use it as your swatch. It only takes a few minutes to redo if needed.
Checkpoints:
- Row 1: 13 sc = 3.25 in (8.3 cm).
- Row 12: 3.25 in (8.3 cm) wide x 3 in (7.6 cm) tall.
- Row 18: 4.5 in (11.4 cm) to the peak; each gable slope is about 2.1 in (5.3 cm).
- Edging: 3.75 in (9.5 cm) x 5 in (12.7 cm).
- Trim: 5.75 in (14.6 cm) from the scallop tips to the peak.
Too big? Go down to a 3.75 mm (F-5) hook. Too small? Go up to a 4.5 mm (7) hook. Change the hook, not the stitch counts. The appliqués use the same gauge, so they will fit once the body is right.
House Body (Color A)
You work the body in rows, turning at the end of each row. The ch 1 at the start of a row doesn’t count as a stitch.
Row 1 (RS): With A, ch 14. Sc in 2nd ch from hook and in each ch across, turn. (13 sc)
Rows 2–12: Ch 1, sc in each st across, turn. (13 sc)
Check that the piece is 3.25 in (8.3 cm) x 3 in (7.6 cm). Mark the RS.
Gable shaping: each row loses 2 sts, one at each end.
Row 13: Ch 1, sc2tog, sc in next 9 sts, sc2tog, turn. (11 sc)
Row 14: Ch 1, sc2tog, sc in next 7 sts, sc2tog, turn. (9 sc)
Row 15: Ch 1, sc2tog, sc in next 5 sts, sc2tog, turn. (7 sc)
Row 16: Ch 1, sc2tog, sc in next 3 sts, sc2tog, turn. (5 sc)
Row 17: Ch 1, sc2tog, sc in next st, sc2tog, turn. (3 sc)
Row 18: Ch 1, sc3tog. (1 st)
Don’t fasten off. This single stitch is the peak. The gable rises 6 rows, or 1.5 in (3.8 cm), while each side moves in 6 sts, or 1.5 in (3.8 cm). That puts both slopes at about 45 degrees.
Roof Appliqué (Color B)
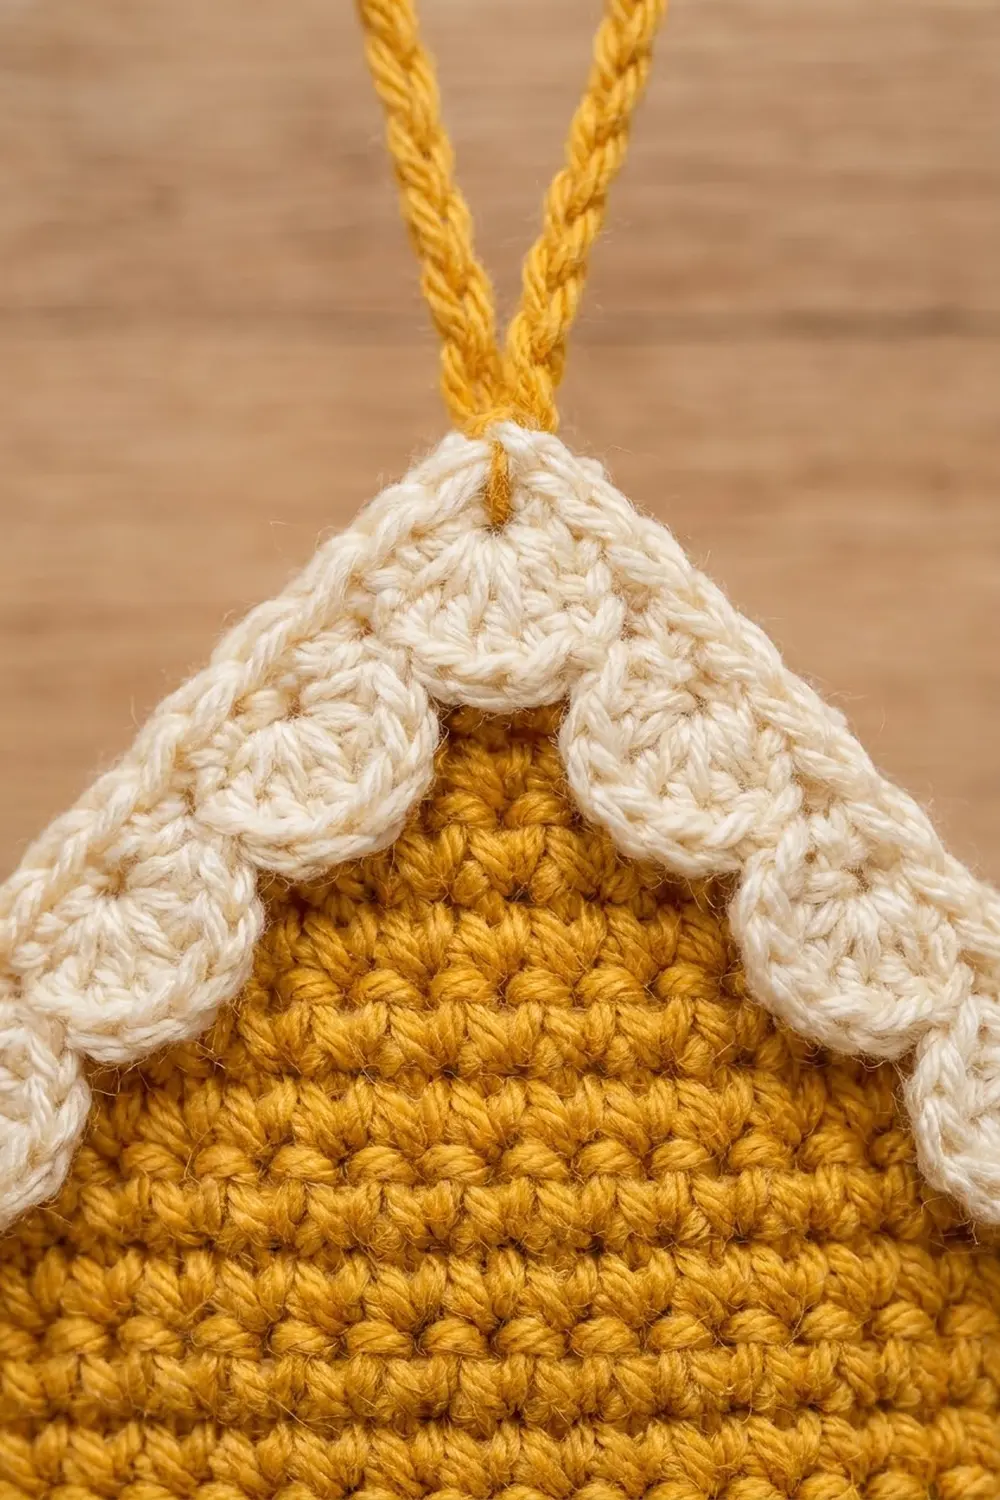
The roof is an inverted V. Row 1 is the top roofline, and the mini scallops hang down along the inside of the V like piped icing.
Row 1: With B, ch 24. Sc in 2nd ch from hook and in next 10 ch, 3 sc in next ch (peak), sc in last 11 ch. (25 sc: 11 + 3 + 11)
Don’t turn. Ch 1 and rotate the piece to work into the remaining foundation loops. There are 23 loops: 11 on each side plus 1 peak loop.
Row 2: Sl st in first loop, 5 mini scallops [loops 2–11], sl st in next 2 loops [peak and first loop of the second side], 5 mini scallops [last 10 loops]. (10 mini scallops: 30 hdc + 12 sl st)
Check: 1 + 10 + 2 + 10 = 23 loops. Fasten off, leaving a 12 in (30.5 cm) tail.
Each slope is about 3 in (7.6 cm) long, and the band is about 0.6 in (1.5 cm) deep. Folded to a right angle, the roof spans 4.25 in (10.8 cm), so it overhangs both walls.
Window Appliqué (Color B)
Row 1: With B, ch 6. Sc in 2nd ch from hook and in each ch across, turn. (5 sc)
Row 2: Ch 1, sc in first st, ch 1, sk 1, sc in next st, ch 1, sk 1, sc in last st, turn. (3 sc + 2 ch-1 sps = 5 sts)
Row 3: Ch 1, sc in each sc and ch-1 sp across, turn. (5 sc)
Row 4: Repeat Row 2. (5 sts)
Row 5: Repeat Row 3. (5 sc)
Fasten off, leaving a 12 in (30.5 cm) tail. The window is 1.25 in (3.2 cm) square. Rows 1, 3, and 5, plus the middle sc of Rows 2 and 4, form the frame and cross. The 4 ch-1 spaces are the panes.
Door Appliqué (Color B)
Row 1: With B, ch 12. Sc in 2nd ch from hook and in each ch across. (11 sc)
Fasten off, leaving a 12 in (30.5 cm) tail. The strip is 2.75 in (7.0 cm) long. Each leg of the arch takes about 1 in (2.5 cm), and the curve over the top takes 0.75 in (1.9 cm).
Border
Border gauge: 4 sc per 1 in (2.5 cm). On the straight walls, work 1 sc per row end, since the rows are also 4 per inch.
Edging Round (Color A)
Continue from the peak with A. Turn so the RS faces you.
- First slope (row ends of Rows 17 to 13): [sc in next row end, 2 sc in next row end] twice, sc in next row end. (7 sc)
- First wall (row ends of Rows 12 to 1): 1 sc in each row end. (12 sc)
- Bottom (foundation loops): 3 sc in first loop, sc in next 11 loops, 3 sc in last loop. (17 sc, both corners included)
- Second wall (Rows 1 to 12): 1 sc in each row end. (12 sc)
- Second slope (Rows 13 to 17): sc in next row end, [2 sc in next row end, sc in next row end] twice. (7 sc)
- Peak (in the Row 18 st): sc, ch 16, sc. Sl st to the first sc.
Total: 7 + 12 + 17 + 12 + 7 + 2 = 57 sc, plus the ch-16 loop. Fasten off A.
Why the math works: The bottom has 13 base sts plus 2 extra at each corner. From the center of one corner to the center of the other is 15 st widths, or 3.75 in (9.5 cm). That matches the edged width. A diagonal edge is longer than the rows it climbs, so each slope gets 7 sc over 5 row ends. The ch-16 folds into a loop about 1.5 in (3.8 cm) tall.
Bottom Scallop Trim (Color B)
Row 1: With the RS facing, join B in the center sc of the first bottom corner. Ch 1, sc in the same st and in each st across to the center sc of the second corner, working into that st too. Turn. (17 sc)
Row 2: Ch 1, sl st in first st, work 4 scallops. (1 + 4 x 4 = 17 sts)
Fasten off. The trim adds 0.75 in (1.9 cm), so the ornament is now 5.75 in (14.6 cm) tall. The trim starts and ends at the corner centers, so the end scallops wrap slightly around the corners.
Attaching the Appliqués
Sew with the tails, catching only the front layer of the body so no stitches show on the back.
- Roof: Center the 3-sc peak just below the loop. Lay the slopes along the edging with the scallops hanging over the yellow. Sew along Row 1 and tack down the scallop tips.
- Window: Center it over Rows 7–11. Sew only around the outer edge.
- Door: Bend the strip into a centered arch with the legs touching the bottom edging and the curve at about Row 5. Sew along both long edges.
Final Blocking
- Mist the ornament until it’s damp.
- Lay it RS up on a mat.
- Pin the bottom corners 3.75 in (9.5 cm) apart, with the walls straight.
- Pin the peak so the height is 5.75 in (14.6 cm) from the scallop tips.
- Pin each scallop into a round curve.
- Square the window to 1.25 in (3.2 cm) and smooth the door arch.
- Let it dry completely before unpinning.
Final Quality-Control Checklist
- Rows 1–12 have 13 sc, and the gable ends in a single stitch.
- The edging has 57 sc, with 17 along the bottom.
- The roof has 25 sc in Row 1 and 10 even mini scallops.
- All 4 window panes are open, and the cross is centered.
- The door arch is symmetrical and touches the edging.
- The bottom trim has 4 scallops over 17 sts.
- The ornament measures 4.25 in (10.8 cm) x 5.75 in (14.6 cm), plus a 1.5 in (3.8 cm) loop.
- All ends are woven in.
Troubleshooting
- Gable leans: Count the stitches on both sides of center in each decrease row.
- Slopes ripple: Work 1 sc per row end with no 2-sc increases.
- Slopes pucker: Add 1 sc to each slope, keeping the two slopes equal.
- Roof won’t point: Make sure the 3 sc went into one chain and that Row 2 has 2 sl sts at the peak.
- Scallops flare: Work the trim with a hook 0.5 mm smaller.
- Panes close up: Open them with the hook tip while blocking.
- Loop stretches: Sl st back along the ch-16 to make a firmer cord.
Care
Hand wash in cool water with mild soap, roll in a towel, and dry flat. Store flat so the scallops keep their shape.
Final Notes
At 4 sc per inch, the 13-st body is 3.25 in (8.3 cm) x 4.5 in (11.4 cm). The edging brings it to 3.75 in (9.5 cm) x 5 in (12.7 cm). The bottom trim adds 0.75 in (1.9 cm), for a total height of 5.75 in (14.6 cm), and the 4.25 in (10.8 cm) roof completes the cottage. Check each stage as you go, and every appliqué will fit.
Happy crocheting!