

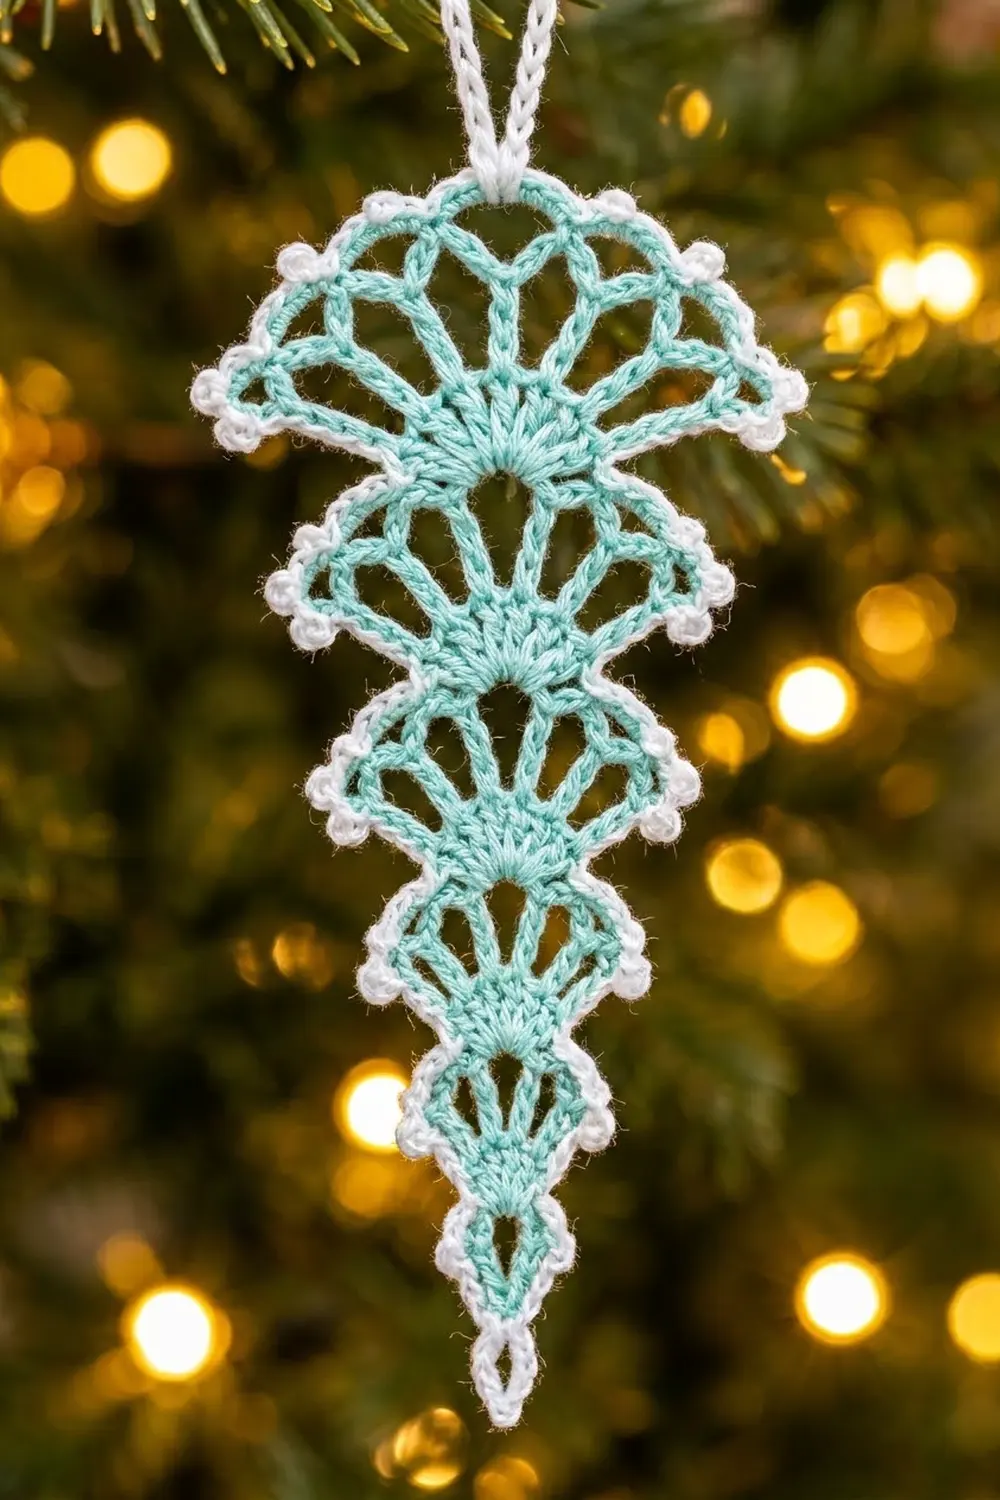
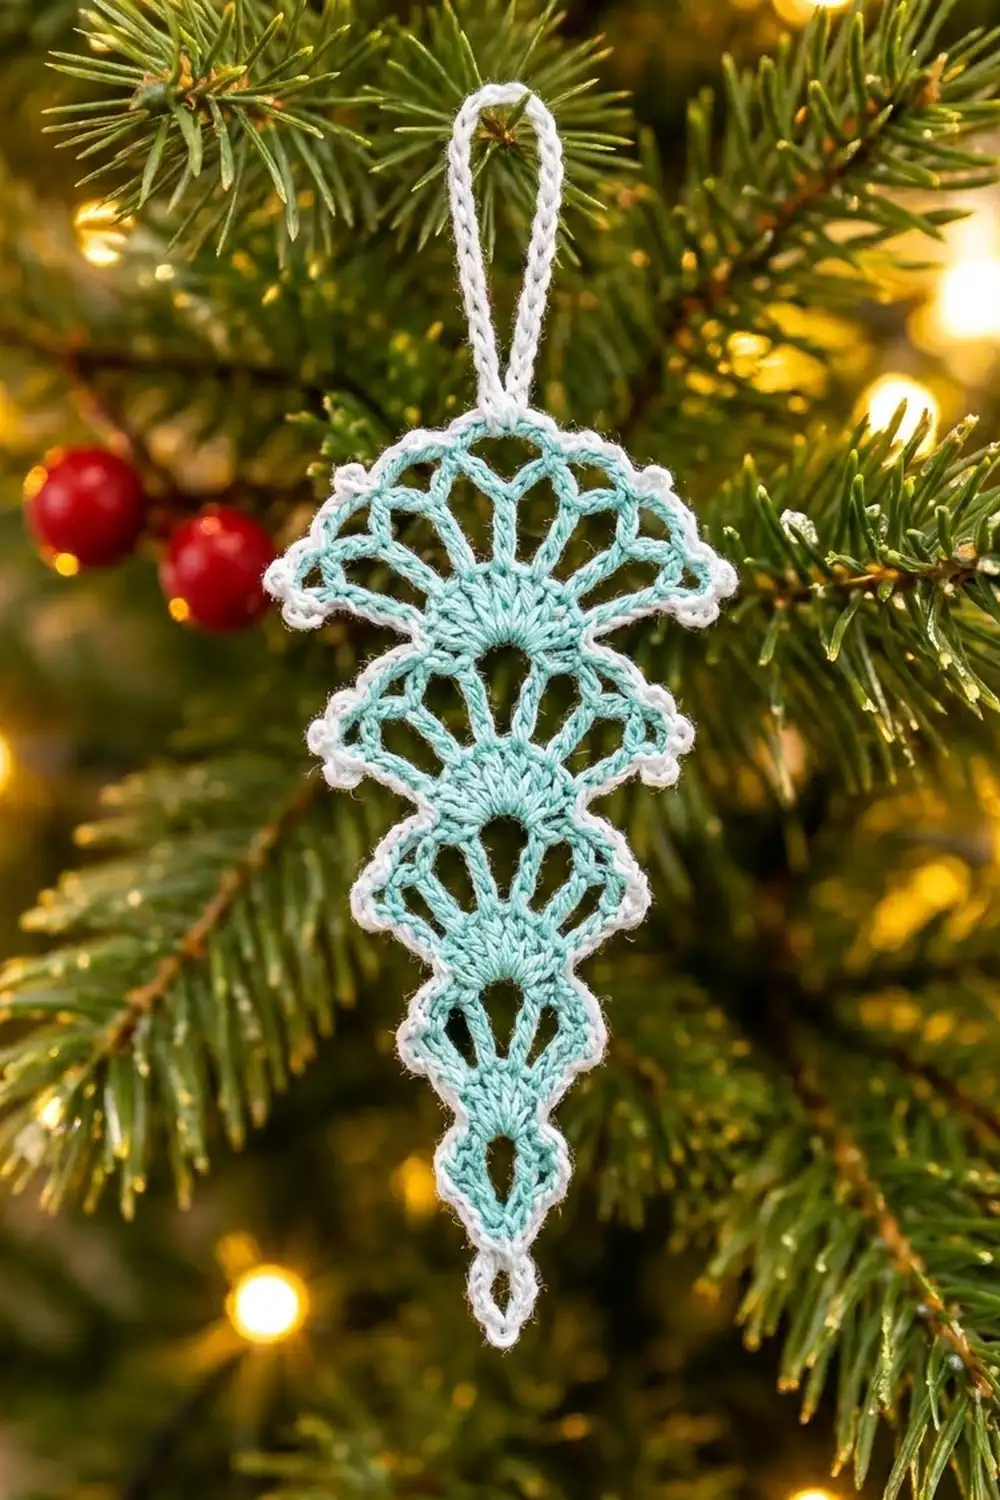
This lacy icicle ornament is made of five open fan tiers that get smaller toward a pointed teardrop tip. Each fan has a small solid center, spokes radiating out from it, and a scalloped edge of chain arches with a pointed loop at each corner.
The body is worked in a soft aqua cotton thread. A crisp white picot edging outlines every arch, corner, and flat edge, and a white hanging loop sits at the top center. The look is light and frosty, a bit like an icicle with a lace edge.
The pattern uses US crochet terms. The finished ornament measures 2.5″ (6.4 cm) wide at the top tier and 5″ (12.7 cm) tall, not counting the hanging loop. With the loop it’s 6.25″ (15.9 cm) long.
You work the ornament as one continuous piece from the bottom up. You start at the tip, then make the lower half of each tier and build the next tier on top of its center spoke. At the top tier you turn around and finish the second half of each tier on your way back down. After that comes one round of white border, with the hanging loop worked into it.
Finished Size and Construction
- Finished size: 2.5″ (6.4 cm) wide x 5″ (12.7 cm) tall; 6.25″ (15.9 cm) with the loop
- Skill level: Intermediate
- Terminology: US crochet terms
- Yarn weight: Size 3 mercerized cotton crochet thread
- Hook: 2.25 mm (B-1)
- Number of pieces: 1 (single continuous ornament)
- Layout: 5 stacked fan tiers plus a pointed tip, all in one vertical column
- Piece size before border: 2.25″ (5.7 cm) x 4.75″ (12.1 cm)
- Border depth: about 0.125″ (0.3 cm) per edge, plus picots
Materials
Pick a firm, mercerized cotton thread in size 3. Its crisp twist keeps the spokes straight and the arches clean. Avoid fuzzy or very soft threads, because the open lace needs some body to hold its shape.
- Aqua (main color): about 7 g (11 m)
- White (border and loop): about 3 g (5 m)
Tools:
- 2.25 mm (B-1) crochet hook
- Tapestry needle
- Scissors
- Rust-proof pins and a foam blocking mat
- Spray bottle; spray starch (optional)
The quantities above include a small safety margin.
Abbreviations (US Terms)
- ch – chain
- sl st – slip stitch
- sc – single crochet
- hdc – half double crochet
- dc – double crochet
- tr – treble crochet
- sp(s) – space(s)
- st(s) – stitch(es)
- [ ] – repeat the steps inside the brackets as many times as stated
Picot (p): ch 3, sl st in 3rd ch from hook.
Spoke: any hdc, dc, or tr in Row 2 of a tier, including the turning chain that counts as a stitch.
Anchor sc: the sc worked into the center spoke of a tier. The next tier up is built in that same spoke.
Gauge and Checkpoints
There’s no swatch for this pattern. Tier 5 and Tier 4 are your test. Measure across the flat edge from end spoke to end spoke after each Row 2:
- Tier 5, Row 2: 0.75″ (1.9 cm)
- Tier 4, Row 2: 1.25″ (3.2 cm)
- Tier 3, Row 2: 1.5″ (3.8 cm)
- Tier 2, Row 2: 1.75″ (4.4 cm)
- Tier 1, Row 2: 2″ (5.1 cm)
The corner loops add about 0.125″ (0.3 cm) on each side. That gives finished tier widths of 1″ (2.5 cm), 1.5″ (3.8 cm), 1.75″ (4.4 cm), 2″ (5.1 cm), and 2.25″ (5.7 cm).
Height checkpoint before the border: tip 0.5″ (1.3 cm), Tier 5 0.5″ (1.3 cm), Tier 4 0.75″ (1.9 cm), Tier 3 0.875″ (2.2 cm), Tier 2 1″ (2.5 cm), Tier 1 1.125″ (2.9 cm). Total: 4.75″ (12.1 cm).
If Tier 4 comes out larger than 1.25″ (3.2 cm), go down to a 2 mm hook. If it’s smaller than about 1.125″ (2.9 cm), or the fan cups, go up to a 2.5 mm hook. A fan that ruffles usually means your chain spaces are loose. Tighten your chains rather than changing the stitch counts.
Pattern
Each tier has three rows:
- Row 1: a small dc shell
- Row 2: spokes separated by chain spaces
- Row 3: chain arches and corner loops, worked in two halves
The first half of each Row 3 runs from corner A to the center spoke. The second half runs from the center spoke to corner B and is worked on the way back down.
Tip and Tier 5 (bottom)
With aqua, ch 10, then sl st in the 1st ch made to form a teardrop loop (the tip). The ch with the sl st is the tip base.
Row 1: Ch 3 (counts as dc), 2 dc in the tip base. (3 dc) Don’t turn. The shell fans upward, away from the loop.
Row 2: Turn. Ch 2 (counts as hdc), ch 2, hdc in next dc, ch 2, hdc in top of ch-3. (3 hdc spokes, 2 ch-2 sps)
Row 3, first half: Turn. Ch 1, (sc, ch 4, sc) in first hdc for corner loop A, ch 3, sc in center spoke (anchor sc). (1 corner loop, 1 ch-3 arch, 3 sc)
Tier 4
Row 1: Ch 3 (counts as dc), 4 dc in the same center spoke as the anchor sc. (5 dc)
Row 2: Turn. Ch 3 (counts as dc), [ch 2, dc in next dc] 3 times, ch 2, dc in top of ch-3. (5 dc spokes, 4 ch-2 sps)
Row 3, first half: Turn. Ch 1, (sc, ch 4, sc) in first spoke, [ch 3, sc in next spoke] twice. The last sc is the anchor sc in the center spoke. (1 corner loop, 2 ch-3 arches, 4 sc)
Tier 3
Row 1: Ch 3, 4 dc in the same center spoke. (5 dc)
Row 2: Turn. Ch 3 (counts as dc), [ch 3, dc in next dc] 3 times, ch 3, dc in top of ch-3. (5 dc spokes, 4 ch-3 sps)
Row 3, first half: Turn. Ch 1, (sc, ch 5, sc) in first spoke, [ch 4, sc in next spoke] twice. (1 corner loop, 2 ch-4 arches, 4 sc)
Tier 2
Row 1: Ch 3, 6 dc in the same center spoke. (7 dc)
Row 2: Turn. Ch 4 (counts as tr), [ch 2, tr in next dc] 5 times, ch 2, tr in top of ch-3. (7 tr spokes, 6 ch-2 sps)
Row 3, first half: Turn. Ch 1, (sc, ch 5, sc) in first spoke, [ch 4, sc in next spoke] 3 times. (1 corner loop, 3 ch-4 arches, 5 sc)
Tier 1 (top)
Row 1: Ch 3, 6 dc in the same center spoke. (7 dc)
Row 2: Turn. Ch 4 (counts as tr), [ch 3, tr in next dc] 5 times, ch 3, tr in top of ch-3. (7 tr spokes, 6 ch-3 sps)
Row 3 (complete): Turn. Ch 1, (sc, ch 5, sc) in first spoke, [ch 5, sc in next spoke] 6 times, ch 5, sc in the same last spoke (top of ch-4) for corner loop B. (2 corner loops, 6 ch-5 arches, 9 sc)
Tier 1 is the only tier you finish in one pass. Its 5th sc sits in the center spoke (spoke 4), and that’s where the hanging loop goes later.
Return Path: Second Halves
Tier 1 flat edge B: Sl st down the row ends: 3 sl st along the Row 2 ch-4, then 2 sl st along the end of Row 1. Sl st in the anchor sc of Tier 2. (6 sl st)
Tier 2, Row 3, second half: [Ch 4, sc in next spoke] 3 times, ch 5, sc in the same last spoke. (3 ch-4 arches, 1 corner loop) Tier 2 now has 6 arches.
Tier 2 flat edge B: 3 sl st along the tr row end, 2 sl st along the Row 1 end, then sl st in the anchor sc of Tier 3. (6 sl st)
Tier 3, second half: [Ch 4, sc in next spoke] twice, ch 5, sc in the same spoke. (4 arches in total)
Tier 3 flat edge B: 2 sl st along the dc row end, 2 sl st along the Row 1 end, then sl st in the anchor sc of Tier 4. (5 sl st)
Tier 4, second half: [Ch 3, sc in next spoke] twice, ch 4, sc in the same spoke. (4 arches in total)
Tier 4 flat edge B: 2 sl st, 2 sl st, then sl st in the anchor sc of Tier 5. (5 sl st)
Tier 5, second half: Ch 3, sc in last spoke, ch 4, sc in the same spoke. (2 arches in total)
Tier 5 flat edge B: 1 sl st along the hdc row end, 2 sl st along the Row 1 end, then sl st in the tip base. (4 sl st) Fasten off and weave in the end.
Each tier’s flat edge now sits across the top of the tier below, with its base on the center spoke of that lower tier.
Border
Border gauge: about 10 sc per 1″ (2.5 cm) along the outline.
The border is one round of white sc and picots worked around the whole outline, including the narrow gaps under each flat edge. You work into chain arches and loops by inserting the hook into the space under the chain, and into flat edges by working into the row ends.
Arch and loop counts:
- ch-3 and ch-4 arches: (2 sc, p, 2 sc)
- ch-5 arches: (3 sc, p, 3 sc)
- ch-4 corner loops: (2 sc, p, 2 sc)
- ch-5 corner loops: (3 sc, p, 3 sc)
Flat-edge counts: 1 sc per hdc row end, 2 sc per dc row end, and 3 sc per tr row end.
Round 1:
- Join white in the tip loop. Work (5 sc, p, 5 sc) in the loop. (10 sc, 1 p)
- Side A, going up. Work each tier in this order: flat edge A from base to corner, then corner loop A, then the A-side arches in toward the center. Go straight from each tier’s last A arch to the next tier’s flat edge.
- Tier 5: 3 + 4 + 4 = 11 sc, 2 p
- Tier 4: 4 + 4 + 8 = 16 sc, 3 p
- Tier 3: 4 + 6 + 8 = 18 sc, 3 p
- Tier 2: 5 + 6 + 12 = 23 sc, 4 p
- Tier 1: 5 + 6 + 18 = 29 sc, 4 p (arches 1–3)
- Side A total: 97 sc, 16 p
- Hanging loop. Sl st in the center sc of Tier 1. Ch 25, sl st in the same sc. Work 30 sc into the ch-25 loop, then sl st in the center sc again.
- Side B, going down. Mirror Side A: Tier 1 arches 4–6, corner loop B, flat edge B, then the B-side arches of Tier 2, and so on down the ornament. Side B total: 97 sc, 16 p
- Sl st in the first sc to join. Fasten off.
Round total: 10 + 97 + 97 = 204 sc and 33 picots, plus 30 sc on the hanging loop.
Why the math works:
- Every count comes from a fixed rule: one count per arch size, one per corner loop size, and one per row-end height.
- The two halves of every tier have the same arches, corner loops, and row ends, so Side A and Side B both come to exactly 97 sc.
- At 10 sc per inch, the flat edges get just enough stitches to lie flat.
- The border adds about 0.125″ (0.3 cm) on each edge. That takes 2.25″ (5.7 cm) to 2.5″ (6.4 cm) wide and 4.75″ (12.1 cm) to 5″ (12.7 cm) tall.
Final Blocking
- Soak the ornament in cool water for 5 minutes, then roll it in a towel to press out the water.
- Lay it flat on the blocking mat, right side up.
- Pin the tip, then pin the center of each tier in a straight vertical line.
- Pin each corner loop out to a sharp point. Check that each pair of corner points is level and that the tiers measure 1″ (2.5 cm), 1.5″ (3.8 cm), 1.75″ (4.4 cm), 2″ (5.1 cm), and 2.25″ (5.7 cm) wide.
- Pin the top of each arch so the spokes sit straight and evenly spaced.
- Pin each picot so it points outward.
- If you want a stiffer ornament, mist it with spray starch.
- Let it dry completely, at least 6 hours, then unpin.
Final Quality-Control Checklist
- Five tiers stacked in one straight column, each narrower than the tier above it
- Tier 1 has 7 spokes and 6 arches; Tier 2 has 7 spokes and 6 arches; Tiers 3 and 4 have 5 spokes and 4 arches each; Tier 5 has 3 spokes and 2 arches
- Every tier has two pointed corner loops
- Each tier is anchored on the center spoke of the tier below
- Side A and Side B each have 97 sc and 16 picots
- The hanging loop is centered and holds 30 sc
- The ornament measures 2.5″ (6.4 cm) x 5″ (12.7 cm)
- All ends are woven in securely
Troubleshooting
The fan cups instead of lying flat. Your chain spaces are too tight. Relax your chains or go up a hook size.
The fan ruffles. Your chains are too loose, or you added an extra spoke. Recount Row 2.
The ornament leans to one side. The next tier was started off center. Make sure you work Row 1 into the center spoke, the same one that holds the anchor sc.
The border pulls the flat edges inward. Add 1 sc on that flat edge on both sides, so Side A and Side B stay even.
The picots look flat. Pull each sl st snug and pin the picots out during blocking.
Care
Hand wash in cool water with mild soap and dry flat, re-pinning the corner points. Store the ornament flat in tissue paper so the arches don’t get crushed.
Final Notes
Here’s the measurement chain:
- Tier 4’s Row 2 should measure 1.25″ (3.2 cm).
- The finished tiers step down from 2.25″ (5.7 cm) to 1″ (2.5 cm) wide.
- The body measures 4.75″ (12.1 cm) tall before the border.
- The border adds 0.125″ (0.3 cm) to each edge, for a finished ornament of 2.5″ (6.4 cm) x 5″ (12.7 cm).
- The hanging loop brings the total length to 6.25″ (15.9 cm).
If each checkpoint matches, the finished size will too.
Happy crocheting!