

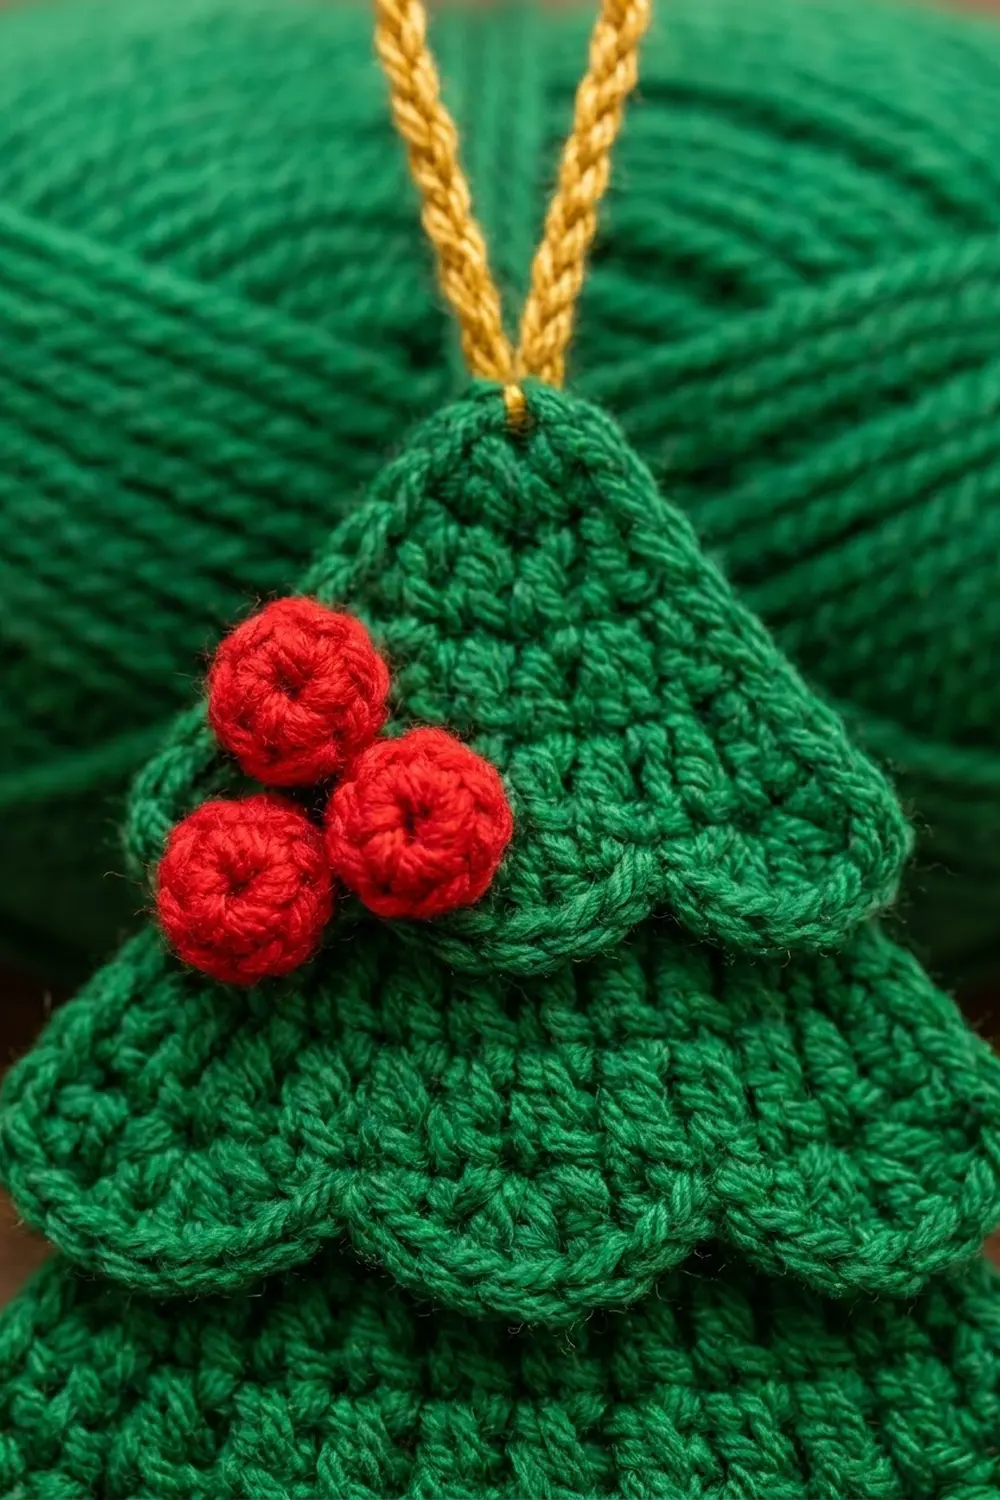
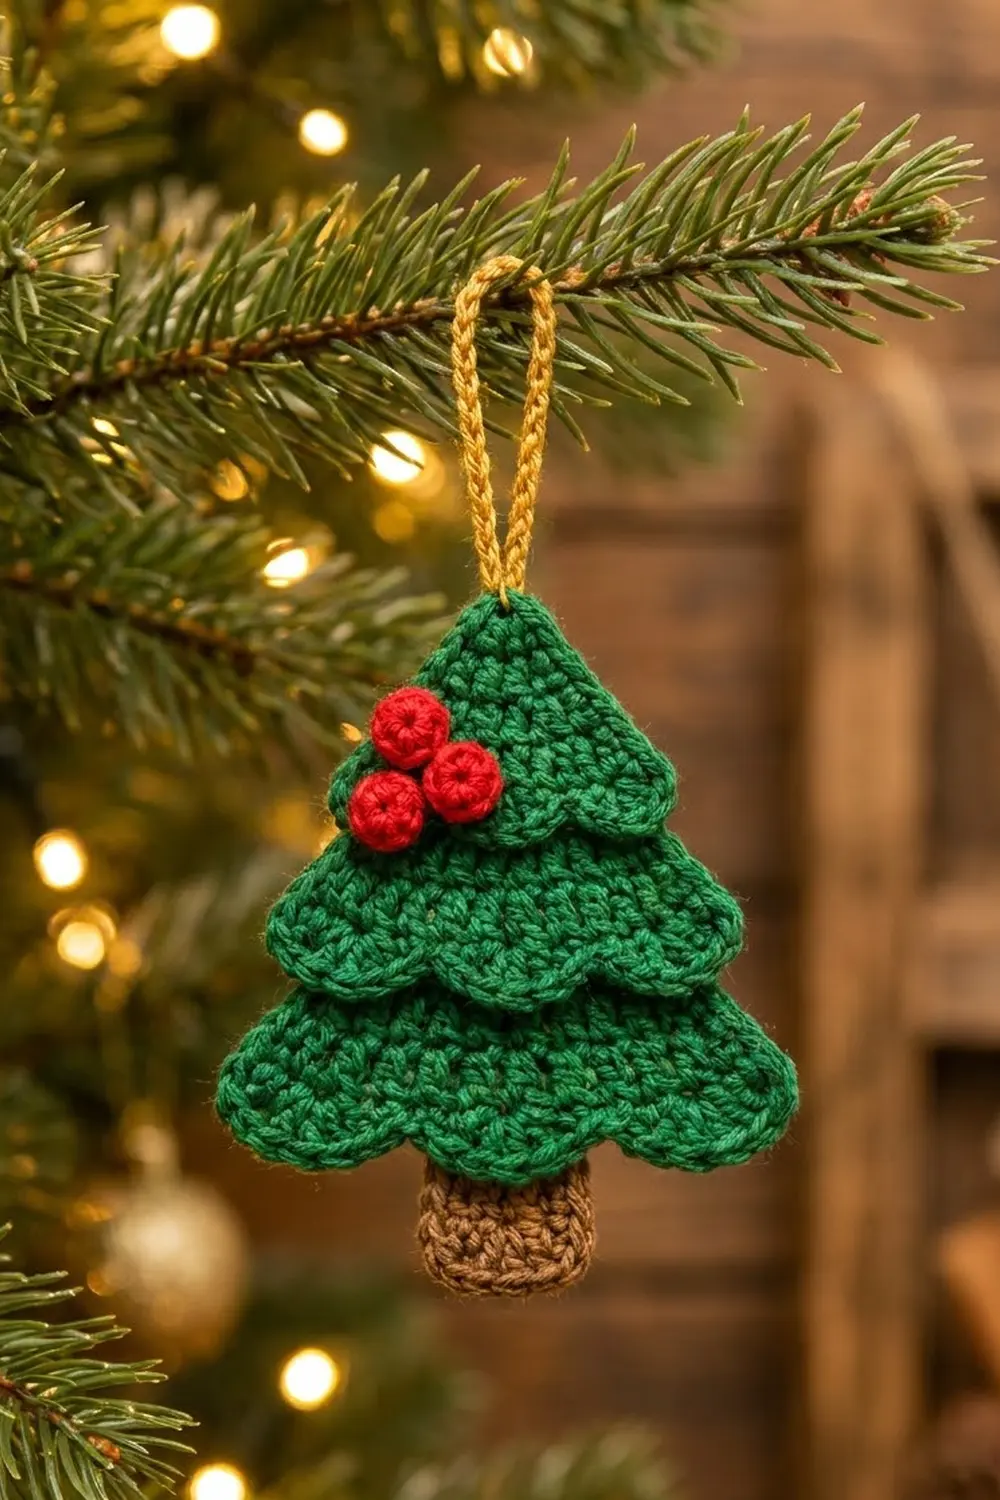
This little tree is built from three green tiers stacked on top of each other. Each tier has a soft scalloped hem. A tan trunk peeks out underneath, three round red berries sit near the top, and a golden chain loop makes it ready to hang.
The palette is classic Christmas: grass green, warm brown, berry red and mustard gold. The look is tidy and slightly dimensional. Because the tiers overlap like real branches, the tree has more depth than a flat appliqué.
This pattern uses US crochet terms. The finished ornament measures about 4.5 in (11.4 cm) wide and 6.3 in (16.0 cm) tall, not counting the loop.
Each tier is worked flat in rows of single crochet, decreasing up to a point. One edging round then adds the scallops along the bottom and a neat edge up the sides. You make a small trunk and three stuffed berries, stack and sew everything together, and add the loop last.
Finished Size and Construction
- Finished size: 4.5 in (11.4 cm) wide x 6.3 in (16.0 cm) tall, without the loop
- Skill level: Easy / Advanced Beginner
- Terminology: US crochet terms
- Yarn weight: DK (light, #3)
- Hook: 3.5 mm (E/4)
- Number of pieces: 1 finished ornament, made from 3 tiers, 1 trunk, 3 berries and 1 loop
- Layout: Tiers stacked vertically and centered, trunk centered below
- Bottom tier: 4.5 x 4.3 in (11.4 x 10.9 cm) after the border
- Middle tier: 3.7 x 3.6 in (9.4 x 9.1 cm) after the border
- Top tier: 2.9 x 2.9 in (7.4 x 7.4 cm) after the border
- Bottom tier before border: 4.2 x 3.8 in (10.7 x 9.7 cm)
- Border depth: scallops add about 0.4 in (1.0 cm) at the bottom; side edging adds about 0.15 in (0.4 cm) per side
Materials
Use a smooth DK cotton or cotton blend. Crisp, mercerized cotton shows the stitches clearly and keeps the scallops defined. Acrylic DK also works, but it may need a firmer blocking.
- Green (tiers): 10 g / 24 m
- Tan-brown (trunk): 3 g / 7 m
- Red (berries): 2 g / 5 m
- Gold or mustard (loop): 2 g / 5 m
All quantities include a margin of roughly 30% for your gauge swatch and yarn tails.
Tools
- 3.5 mm (E/4) crochet hook
- Tapestry needle
- Scissors
- Stitch marker
- Rust-proof pins and a blocking mat or folded towel
- Ruler or tape measure
- Optional: a pinch of fiberfill for the berries
Abbreviations (US Terms)
- ch – chain
- sl st – slip stitch
- sc – single crochet
- dc – double crochet
- sc2tog – single crochet 2 together (decrease)
- sc3tog – single crochet 3 together (decrease)
- MR – magic ring
- sk – skip
- st(s) – stitch(es)
- sp – space
- RS – right side
Special stitch – Scallop: sk 1 st, 5 dc in next st, sk 1 st, sc in next st. Each scallop uses exactly 4 stitches of the edge.
Gauge and Checkpoints
Gauge: 20 sc and 22 rows = 4 in (10.2 cm) in single crochet worked in rows.
In practice that is 5 sc per inch across and 5.5 rows per inch up. Make the bottom tier first and use it as your gauge test, because it is the largest piece and errors show up there first.
Checkpoints for the bottom tier:
- After Row 1: the row is 4.2 in (10.7 cm) wide.
- After Row 10: the piece is 1.8 in (4.6 cm) tall.
- After Row 21: the piece is 3.8 in (9.7 cm) tall.
- After the border: the tier is 4.5 in (11.4 cm) wide and 4.3 in (10.9 cm) tall.
If your tier is too big, go down to a 3.25 mm hook. If it is too small, go up to a 3.75 mm hook. A difference of 0.3 in (0.8 cm) across the base is fine for an ornament. Just keep the gauge the same for all three tiers so they stack evenly.
Tiers (Make 1 of Each in Green)
All three tiers use the same method. The base count is always a multiple of 4 plus 1, which keeps the scallop border exact. Use ch 1 at the start of each row; it does not count as a stitch. Turn at the end of every row.
Bottom Tier (Base 21 sts, 21 rows)
Row 1: Ch 22, sc in 2nd ch from hook and in each ch across. (21 sts)
Row 2: Ch 1, sc in each st across. (21 sts)
Row 3: Ch 1, sc2tog, sc in each st to last 2 sts, sc2tog. (19 sts)
Row 4: Ch 1, sc in each st across. (19 sts)
Rows 3 and 4 make the decrease pattern. Repeat them to keep shaping the triangle:
- Rows 5–6: 17 sts each row
- Rows 7–8: 15 sts each row
- Rows 9–10: 13 sts each row
- Rows 11–12: 11 sts each row
- Rows 13–14: 9 sts each row
- Rows 15–16: 7 sts each row
- Rows 17–18: 5 sts each row
- Rows 19–20: 3 sts each row
Row 21: Ch 1, sc3tog. (1 st)
Do not fasten off. Go straight to the border (see the Border section). The piece now measures 4.2 in (10.7 cm) across the base and 3.8 in (9.7 cm) tall.
Middle Tier (Base 17 sts, 17 rows)
Row 1: Ch 18, sc in 2nd ch from hook and in each ch across. (17 sts)
Row 2: Ch 1, sc across. (17 sts)
Repeat Rows 3–4 of the bottom tier:
- Rows 3–4: 15 sts each row
- Rows 5–6: 13 sts each row
- Rows 7–8: 11 sts each row
- Rows 9–10: 9 sts each row
- Rows 11–12: 7 sts each row
- Rows 13–14: 5 sts each row
- Rows 15–16: 3 sts each row
Row 17: Ch 1, sc3tog. (1 st)
Do not fasten off. Before the border, the tier measures 3.4 in (8.6 cm) wide and 3.1 in (7.9 cm) tall.
Top Tier (Base 13 sts, 13 rows)
Row 1: Ch 14, sc in 2nd ch from hook and in each ch across. (13 sts)
Row 2: Ch 1, sc across. (13 sts)
Repeat Rows 3–4 of the bottom tier:
- Rows 3–4: 11 sts each row
- Rows 5–6: 9 sts each row
- Rows 7–8: 7 sts each row
- Rows 9–10: 5 sts each row
- Rows 11–12: 3 sts each row
Row 13: Ch 1, sc3tog. (1 st)
Do not fasten off. Before the border, the tier measures 2.6 in (6.6 cm) wide and 2.4 in (6.1 cm) tall.
Trunk (Make 1 in Tan-Brown)
Row 1: Ch 8, sc in 2nd ch from hook and in each ch across. (7 sts)
Rows 2–9: Ch 1, sc in each st across. (7 sts each row)
Fasten off and leave a 10 in (25.4 cm) tail for sewing. The trunk measures 1.4 in (3.6 cm) wide and 1.6 in (4.1 cm) tall.
Berries (Make 3 in Red)
Rnd 1: 6 sc in MR, then pull the ring closed. (6 sts)
Rnd 2: 2 sc in each st around. (12 sts)
Rnd 3: Sc2tog 6 times. (6 sts)
Before the opening closes, push the starting tail inside, adding a tiny pinch of fiberfill if you like. Fasten off and leave an 8 in (20.3 cm) tail. Thread the tail through the front loops of the last 6 sts and pull it tight. Each berry is a firm ball about 0.5 in (1.3 cm) across.
Border (Scalloped Tier Edging)
This border is worked once on each tier, straight after its last row, using the same green yarn. It gives each tier its signature scalloped hem and smooths the stepped edges of the slopes.
Border gauge: One sc per row end along the slopes keeps the sides flat at 5.5 rows per inch. Each scallop of 5 dc spans 4 base stitches, which is 0.8 in (2.0 cm), and stands about 0.4 in (1.0 cm) tall.
Bottom Tier Border
Rnd 1 (RS):
- Ch 1. Work (sc, ch 2, sc) in the tip st. (2 sc + ch-2 sp)
- Left slope: Working down the side, sc in the end of each row from Row 20 to Row 1. (20 sc)
- Bottom edge: Working into the free loops of the foundation chain, sc in the first st (corner). Then work [Scallop] 5 times, so the last sc of the 5th scallop lands in the 21st st (corner). (1 sc + 5 x 6 sts = 31 sts)
- Right slope: Working up the side, sc in the end of each row from Row 1 to Row 20. (20 sc)
- Sl st to the first sc. Fasten off and weave in the ends.
Total: 73 sts + 1 ch-2 sp, made up of 2 tip + 20 + 31 + 20.
Middle Tier Border
Work the same steps with these counts:
- Tip: (sc, ch 2, sc). (2 sc)
- Left slope: Rows 16 to 1. (16 sc)
- Bottom: sc in the first st, then 4 scallops. (1 + 24 = 25 sts)
- Right slope: Rows 1 to 16. (16 sc)
Total: 59 sts + 1 ch-2 sp.
Top Tier Border
- Tip: (sc, ch 2, sc). (2 sc)
- Left slope: Rows 12 to 1. (12 sc)
- Bottom: sc in the first st, then 3 scallops. (1 + 18 = 19 sts)
- Right slope: Rows 1 to 12. (12 sc)
Total: 45 sts + 1 ch-2 sp.
Leave a 12 in (30.5 cm) green tail on the middle and top tiers for sewing.
Why the Math Works
Every base row has 4n + 1 stitches: 21 = 4 x 5 + 1, 17 = 4 x 4 + 1 and 13 = 4 x 3 + 1. The first sc takes one corner. Each scallop then uses exactly 4 stitches and ends with an sc, so the final scallop always lands on the opposite corner. Nothing is skipped or crowded, and the scallops stay symmetrical.
The slopes get one sc per row end, excluding the tip row, which has its own (sc, ch 2, sc) group. The ch-2 keeps the point sharp instead of rounded.
Assembly and Hanging Loop
Measure every position from the top point of the finished tree.
- Lay out the bottom tier RS up.
- Place the middle tier. Center it on top so its scallop tips sit 1.2 in (3.0 cm) above the bottom tier’s scallop tips. The middle tier’s point will sit 0.5 in (1.3 cm) below the top tier’s point once that is placed, so it stays hidden.
- Sew the middle tier. Whipstitch through the back loops of its slope edging and along the row just above the scallops. Leave the scallops themselves free so they lift slightly.
- Place and sew the top tier. Center it so its scallop tips sit 1.2 in (3.0 cm) above the middle tier’s scallop tips, then sew it the same way.
- Check the tree. The green part is now 5.3 in (13.5 cm) tall, from the top point to the bottom scallops. The bottom tier’s point sits 1.0 in (2.5 cm) below the top point, covered by the upper tiers.
- Add the trunk. Center it behind the bottom tier with its top 0.6 in (1.5 cm) tucked under the tier, leaving 1.0 in (2.5 cm) showing. Sew it on from the back.
- Add the berries. Sew the three berries in a tight triangle on the top tier, just left of center, about 0.8 in (2.0 cm) below the point.
- Make the loop. Join gold yarn with a sl st in the ch-2 sp at the top point. Ch 24, then sl st in the same ch-2 sp. This makes a loop about 1.5 in (3.8 cm) tall. Fasten off and weave the ends into the back.
Final Blocking
- Lightly dampen the ornament with a spray bottle.
- Lay it RS up on a blocking mat or towel.
- Pin the tree to 4.5 in (11.4 cm) across the bottom tier, and pin the top point straight up.
- Pin each scallop’s center dc outward so the curves are even.
- Check that the green height is 5.3 in (13.5 cm) and the total height is 6.3 in (16.0 cm).
- Let it dry completely, or hover a steam iron above it without touching acrylic yarn.
- Unpin and gently fluff the berries.
Final Quality-Control Checklist
- The bottom, middle and top tiers have 5, 4 and 3 scallops.
- The border totals are 73, 59 and 45 sts, each plus a ch-2 sp.
- All three points are sharp and the tiers are centered on one vertical line.
- No upper tier point shows through the tier above it.
- About 1.0 in (2.5 cm) of trunk shows.
- The berries are firm, tight-closed and securely sewn.
- The loop is secure at the top ch-2 sp.
- The ornament measures 4.5 x 6.3 in (11.4 x 16.0 cm).
- All ends are woven in on the back.
Troubleshooting
The tier edges curl. Your sc rows are too tight. Go up a hook size, or block more firmly.
The scallops don’t end on the corner. Recount the base row. It must be 21, 17 or 13 sts, and each scallop must use exactly 4 sts.
The scallops ruffle. Use 4 dc instead of 5 in each scallop. The stitch math stays the same.
The slopes pucker after the border. You worked more than one sc per row end. Rework with exactly one in each.
The tier point looks blunt. Make sure you worked the ch 2 in the tip group.
A berry is lumpy. Pull the closing tail tighter and roll the berry between your palms.
The lower tier’s point peeks out. Lower the upper tier slightly, 0.1 in (0.3 cm) at a time.
Care
Spot clean with cool water and mild soap, then lay flat to dry. Store the ornament flat in tissue so the scallops and berries keep their shape.
Final Notes
The measurement chain is simple. A gauge of 20 sc and 22 rows per 4 in (10.2 cm) gives a bottom tier of 4.2 x 3.8 in (10.7 x 9.7 cm). The border brings it to 4.5 x 4.3 in (11.4 x 10.9 cm). The middle and top tiers follow at 3.7 x 3.6 in (9.4 x 9.1 cm) and 2.9 x 2.9 in (7.4 x 7.4 cm). Stacked with 1.2 in (3.0 cm) steps, the tiers make a tree 5.3 in (13.5 cm) tall, and the trunk brings the finished ornament to 6.3 in (16.0 cm).
Check each stage, and the finished tree will hang straight and even on any branch.
Happy crocheting!