

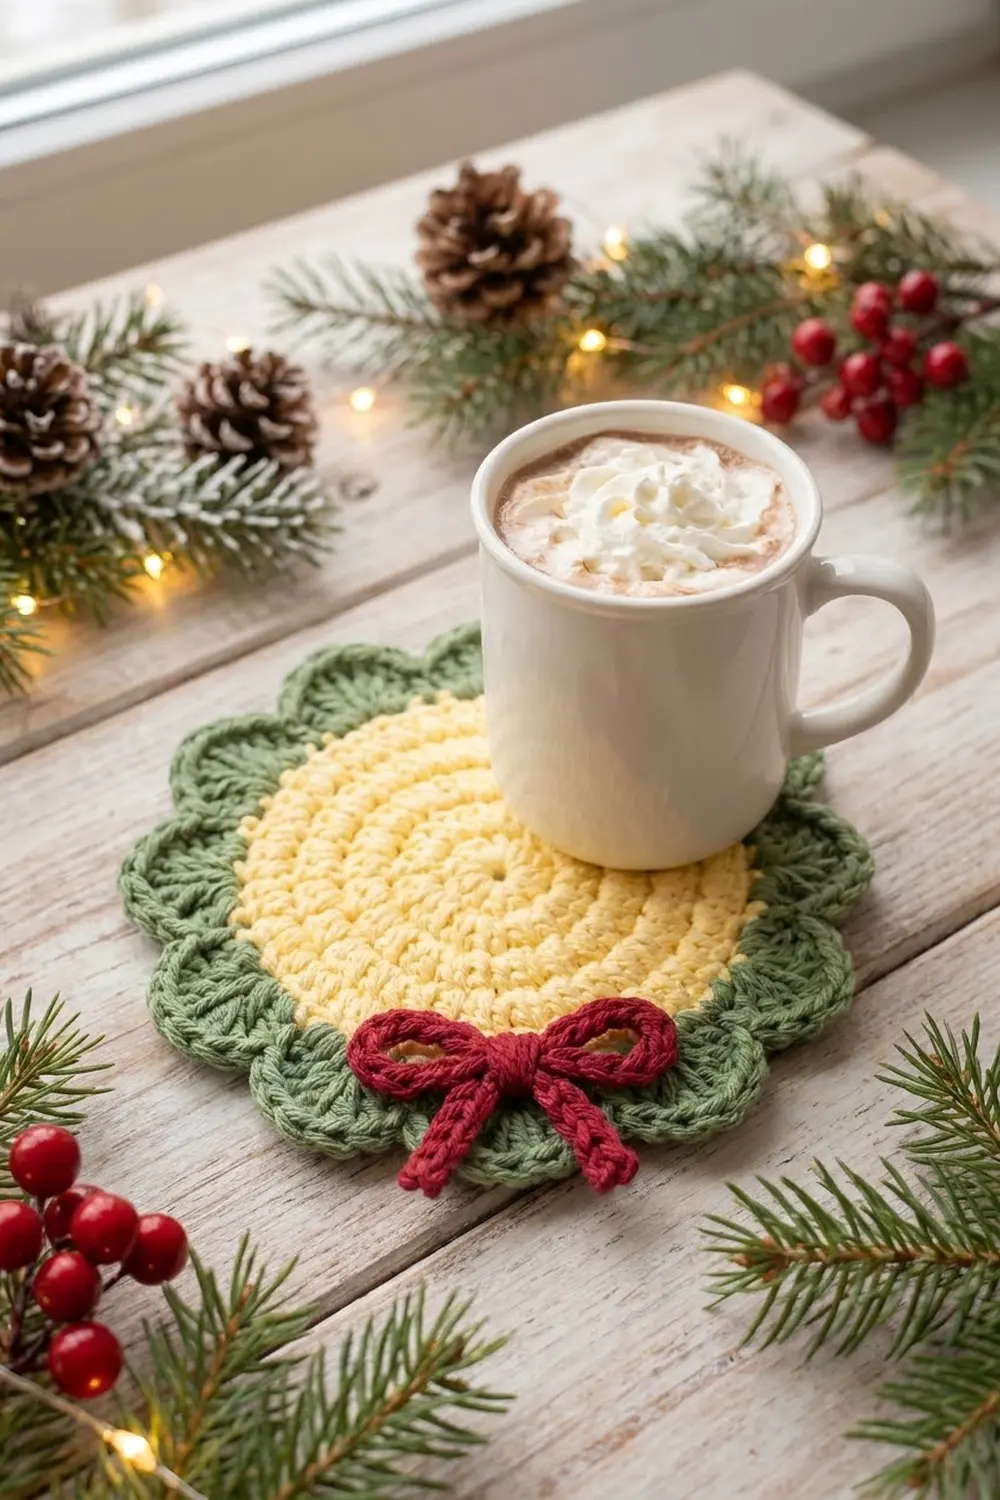
This little coaster looks like a holiday wreath with a warm glow in the middle. The center is a solid circle of butter-yellow single crochet. A sage-green border with 12 rounded shell scallops goes around it. A deep red chain-cord bow at the bottom finishes the wreath look.
The colors are soft and a little vintage, so the coaster fits a cozy, farmhouse-style Christmas table. It’s quick to make, which makes it a good last-minute gift, a stocking stuffer, or a set for your own cocoa nights.
This pattern uses US crochet terms. The finished coaster is about 5.1 in (13.0 cm) across from scallop tip to scallop tip. The yellow center alone is 3.75 in (9.5 cm) across.
How it’s made: You crochet the yellow center in joined rounds of single crochet. Next you switch to green for one increase round and one round of shell scallops. Last, you crochet a separate slip-stitch cord in red, tie it into a bow, and sew it to the bottom of the coaster.
Finished Size and Construction
- Finished size: 5.1 in (13.0 cm) across, scallop tip to scallop tip
- Skill level: Easy
- Terminology: US crochet terms
- Yarn weight: Worsted (#4), 100% cotton
- Hook: 4.0 mm (US G-6)
- Number of pieces: 1 coaster body and 1 bow appliqué
- Layout: single round motif with the bow centered at the bottom
- Yellow center size: 3.75 in (9.5 cm) across after Round 10
- Size before scallops: 4.1 in (10.4 cm) across after Round 11
- Border depth: about 0.7 in (1.8 cm) of green on each side
Materials
Yarn: Use 100% cotton worsted-weight yarn. Cotton soaks up drips, handles hot mugs, and holds the scallops crisp. Acrylic will work, but it can melt or go shiny under a very hot mug, and it doesn’t absorb liquid as well.
- Butter yellow (Color A): about 12 g / 19 m
- Sage green (Color B): about 10 g / 16 m
- Deep red (Color C): about 3 g / 5 m
These amounts already include a margin of about 15% for your gauge swatch and weaving in ends.
Tools:
– 4.0 mm (US G-6) crochet hook
– Tapestry needle
– Scissors
– 1 stitch marker
– Ruler or tape measure
– Blocking mat and rustproof pins
– Spray bottle with water
Abbreviations (US Terms)
- MR – magic ring
- ch – chain
- sl st – slip stitch
- sc – single crochet
- dc – double crochet
- inc – increase: work 2 sc in the same stitch
- sk – skip
- st(s) – stitch(es)
- ( ) x N – repeat the steps in parentheses N times
Special stitch – Shell: Work 7 dc in the same stitch.
Joined rounds: At the end of every round, sl st into the first sc to close the round. Then ch 1 to start the next round. The ch 1 does not count as a stitch. Work the first sc of the new round into the same stitch you just joined into.
Gauge and Checkpoints
Gauge is measured on the yellow center as a circle diameter:
- After Round 4: 1.5 in (3.8 cm) across
- After Round 7: 2.6 in (6.6 cm) across
- After Round 10: 3.75 in (9.5 cm) across
- After Round 11: 4.1 in (10.4 cm) across
- After Round 12 (finished): 5.1 in (13.0 cm) across
Each sc round adds about 0.1875 in (0.5 cm) to the radius. Before you commit, crochet Rounds 1–4 as a test piece and measure it flat without stretching.
- If your circle is too big: Go down to a 3.75 mm hook, or tighten how you pull up your loops.
- If your circle is too small: Go up to a 4.5 mm hook.
- If it ruffles or cups: See Troubleshooting before you continue. A flat circle is the base everything else depends on.
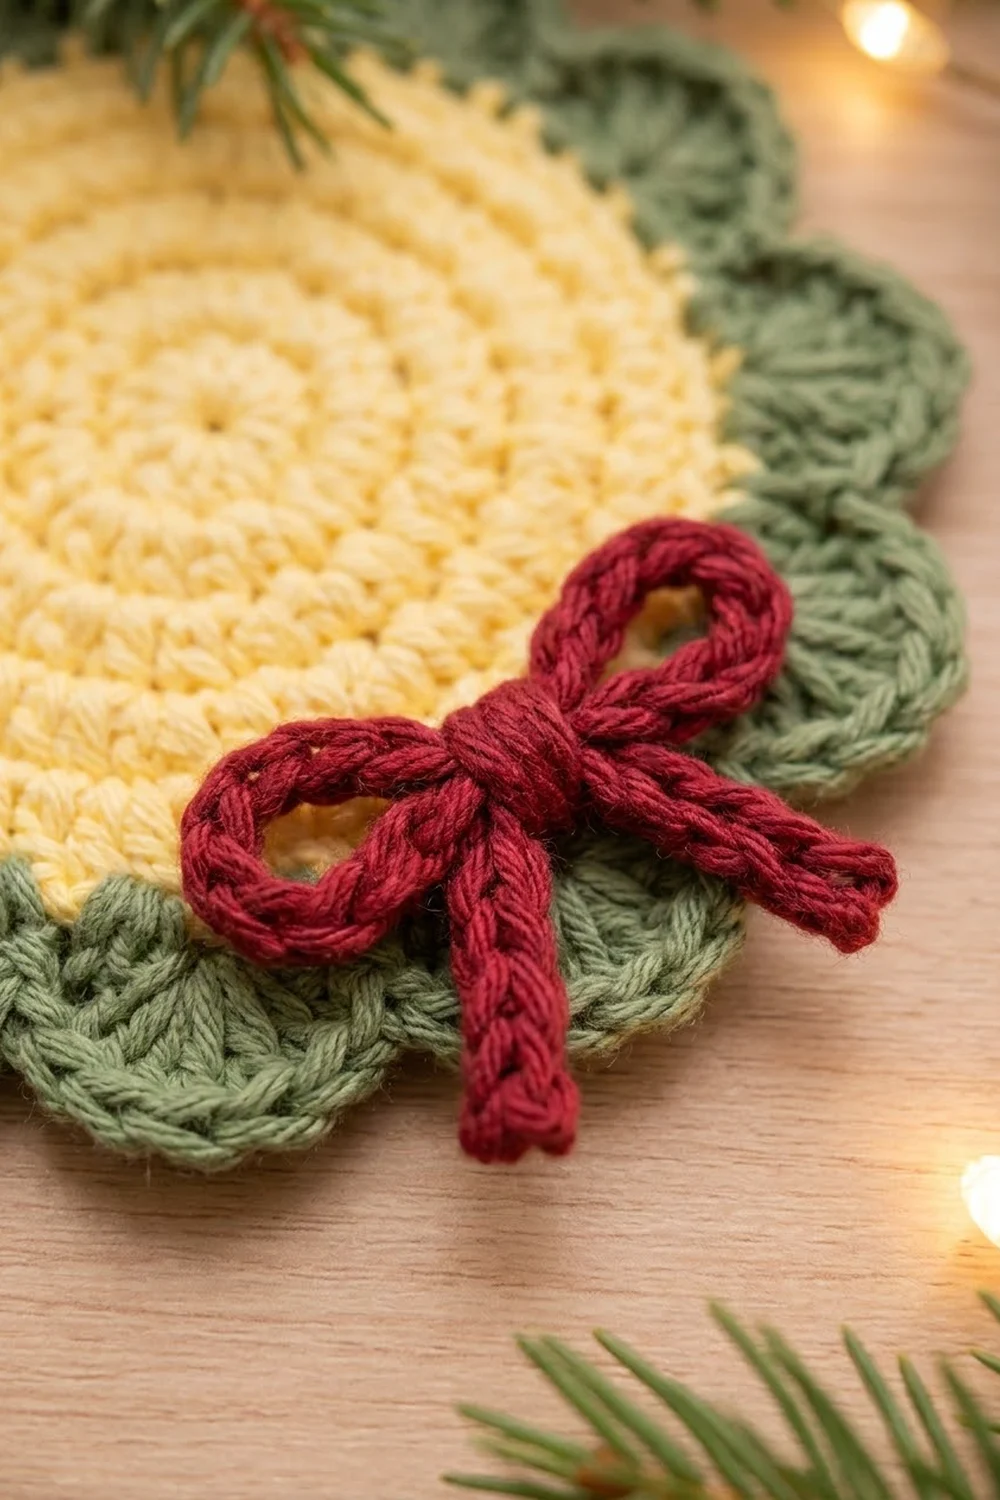
Yellow Center
Use Color A. The increases are staggered from round to round, so the circle stays round instead of turning into a hexagon.
Round 1: Make a MR. Ch 1, then work 6 sc into the ring. Join. (6 sts)
Round 2: Ch 1, inc in each st around. Join. (12 sts)
Round 3: Ch 1, (sc in next st, inc) x 6. Join. (18 sts)
Round 4: Ch 1, (sc in next st, inc, sc in next st) x 6. Join. (24 sts)
Checkpoint: 1.5 in (3.8 cm) across.
Round 5: Ch 1, (sc in next 3 sts, inc) x 6. Join. (30 sts)
Round 6: Ch 1, (sc in next 2 sts, inc, sc in next 2 sts) x 6. Join. (36 sts)
Round 7: Ch 1, (sc in next 5 sts, inc) x 6. Join. (42 sts)
Checkpoint: 2.6 in (6.6 cm) across.
Round 8: Ch 1, (sc in next 3 sts, inc, sc in next 3 sts) x 6. Join. (48 sts)
Round 9: Ch 1, (sc in next 7 sts, inc) x 6. Join. (54 sts)
Round 10: Ch 1, (sc in next 4 sts, inc, sc in next 4 sts) x 6. Join. (60 sts)
Checkpoint: 3.75 in (9.5 cm) across. The circle should lie completely flat.
Fasten off Color A and leave a 6 in (15.2 cm) tail. Pull the magic ring tight so only a small center hole is left, then weave in the starting tail securely.
Green Scalloped Border
This border is what makes the coaster look like a wreath. It has two rounds: a plain green base round and a scallop round.
Border gauge: One shell of 7 dc should be about 0.5 in (1.3 cm) tall and about 1.1 in (2.8 cm) wide at its widest point.
Round 11 – Base Round (Conversion Round)
Join Color B with a sl st in any stitch of Round 10.
Round 11: Ch 1, (sc in next 4 sts, 2 sc in next st) x 12. Join. (72 sts = 60 sts worked one per existing stitch + 12 extra)
Checkpoint: 4.1 in (10.4 cm) across, flat, with a clean color change.
These 12 extra stitches give the border the room it needs. The scallops have a bigger outer circumference than the yellow edge, and without the extra stitches the edge would pull tight and cup.
Round 12 – Shell Scallops
Round 12: Ch 1. Sc in the same stitch as the join. Sk 2 sts, Shell (7 dc) in the next st, sk 2 sts, sc in the next st. Repeat from * to * 10 more times. Then sk 2 sts, Shell in the next st, sk the last 2 sts, and join with a sl st to the first sc. (12 shells and 12 sc = 84 dc + 12 sc = 96 sts)
Fasten off and leave a 6 in (15.2 cm) tail.
Checkpoint: 5.1 in (13.0 cm) across from scallop tip to scallop tip, with exactly 12 even scallops.
Why the Math Works
Each scallop repeat takes 6 stitches from Round 11: 1 sc, 2 skipped, 1 shell stitch, and 2 skipped. Round 11 has 72 stitches, and 72 ÷ 6 = 12, so the 12 scallops fit exactly with no leftover stitches.
The sc between shells sits right on the base round. That pins the gap between scallops close to the yellow edge. The 7 dc fan out to form the rounded tip.
Round 11 adds about 0.2 in (0.5 cm) per side and the shells add about 0.5 in (1.3 cm) per side. Together that makes the 0.7 in (1.8 cm) border depth, which takes the coaster from 3.75 in (9.5 cm) to 5.1 in (13.0 cm) across.
Red Bow Appliqué
The bow is a thick slip-stitch cord tied into a real bow. That gives it the rounded, twisted look of a chain cord.
Cord: With Color C, ch 56. Sl st into the back bump of the 2nd ch from the hook, then into the back bump of each ch across. (55 sl sts)
Fasten off and leave an 8 in (20.3 cm) tail for sewing. The cord should measure about 12 in (30.5 cm). If it’s shorter, chain a few more next time. If it’s much longer, trim it after you tie the bow.
Tie the bow:
1. Fold the cord in half to find the center.
2. Make two loops, each about 0.75 in (1.9 cm) long, and tie them in an ordinary bow knot.
3. Adjust until the bow is about 2 in (5.1 cm) wide from loop tip to loop tip, with two tails about 1.25 in (3.2 cm) long.
4. Using the long tail, sew a few small stitches through the center knot so it can’t come loose.
5. Trim the short tail end and secure it with a tiny stitch on the back of the bow.
Attach the bow:
1. Lay the coaster flat with the join seam at the bottom, so it will be hidden.
2. Place the bow knot centered at the bottom, right over the line where yellow meets green.
3. Spread the loops sideways over the green base round.
4. Let the tails fall downward and slightly outward over the scallops.
5. With the sewing tail, tack the knot down with 4–5 stitches, then tack each loop tip and each tail end with 1–2 stitches.
6. Sew only through the top loops of the coaster, so nothing shows on the back.
Keep the bow low and flat. A mug should still sit level on the yellow center.
Final Blocking
- Weave in all remaining ends on the back, following the color they’re on.
- Lightly mist the coaster with water until it’s damp but not soaked.
- Lay it face up on the blocking mat.
- Smooth the yellow center into a true circle 3.75 in (9.5 cm) across.
- Pin the top of each of the 12 scallops out evenly so the whole piece measures 5.1 in (13.0 cm) across.
- Gently press the bow loops into a neat shape with your fingers. Don’t pin through the bow.
- Let it dry completely, usually 4–8 hours, before you unpin it.
Final Quality-Control Checklist
- [ ] The yellow center is 3.75 in (9.5 cm) across and lies flat.
- [ ] Round 10 has exactly 60 stitches.
- [ ] Round 11 has exactly 72 stitches.
- [ ] There are exactly 12 scallops, evenly spaced.
- [ ] The finished diameter is 5.1 in (13.0 cm).
- [ ] The color change from yellow to green is neat, with no gaps.
- [ ] The bow is centered at the bottom over the join seam.
- [ ] The bow is secure, flat, and about 2 in (5.1 cm) wide.
- [ ] There are no loose ends on the front or back.
Troubleshooting
The center cups like a bowl. You’re crocheting too tightly or skipping increases. Count each round and loosen your tension, or go up a hook size.
The center ruffles. You have extra stitches or your tension is too loose. Recount to make sure each round has its stated number, or go down a hook size.
The circle looks like a hexagon. You’ve stacked the increases in the same spot each round. Use the staggered rounds exactly as written.
The scallops cup inward. Round 11 may be missing its 12 extra stitches. Check that it has 72 stitches.
The scallops flare or ripple. Your dc are too loose. Work the shells more firmly, or use 6 dc per shell and block well.
You have leftover stitches at the end of Round 12. Round 11 doesn’t have 72 stitches. Frog back to Round 11 and recount it.
The bow keeps flopping. Add more tacking stitches at the loop tips, or tighten the center knot before you sew it down.
The join seam is visible. Hide it under the bow, or move the join slightly each round.
Care
Hand wash in cool water with mild soap, press out the water in a towel, and dry flat, reshaping the scallops while damp. Avoid tumble drying, which can distort the scallops and the bow.
Final Notes
Each stage builds on the one before. Round 4 measures 1.5 in (3.8 cm) and Round 7 measures 2.6 in (6.6 cm). The yellow center measures 3.75 in (9.5 cm) at 60 stitches, and the green base round brings it to 4.1 in (10.4 cm) at 72 stitches. The 12 shells finish the wreath at 5.1 in (13.0 cm). The 12 in (30.5 cm) red cord ties into a 2 in (5.1 cm) bow.
If each checkpoint matches, the finished coaster will match too. Make one for yourself, then a set of four to tie with ribbon as a gift.
Happy crocheting!