

These lacy curtain panels are made from round flower motifs. Each motif has a six-petal flower inside a solid ring, and the rings are joined into an open lattice. Small chain diamonds fill the spaces between the circles, and a straight band with fold-over tabs runs along the top so the panel slides onto a curtain rod.
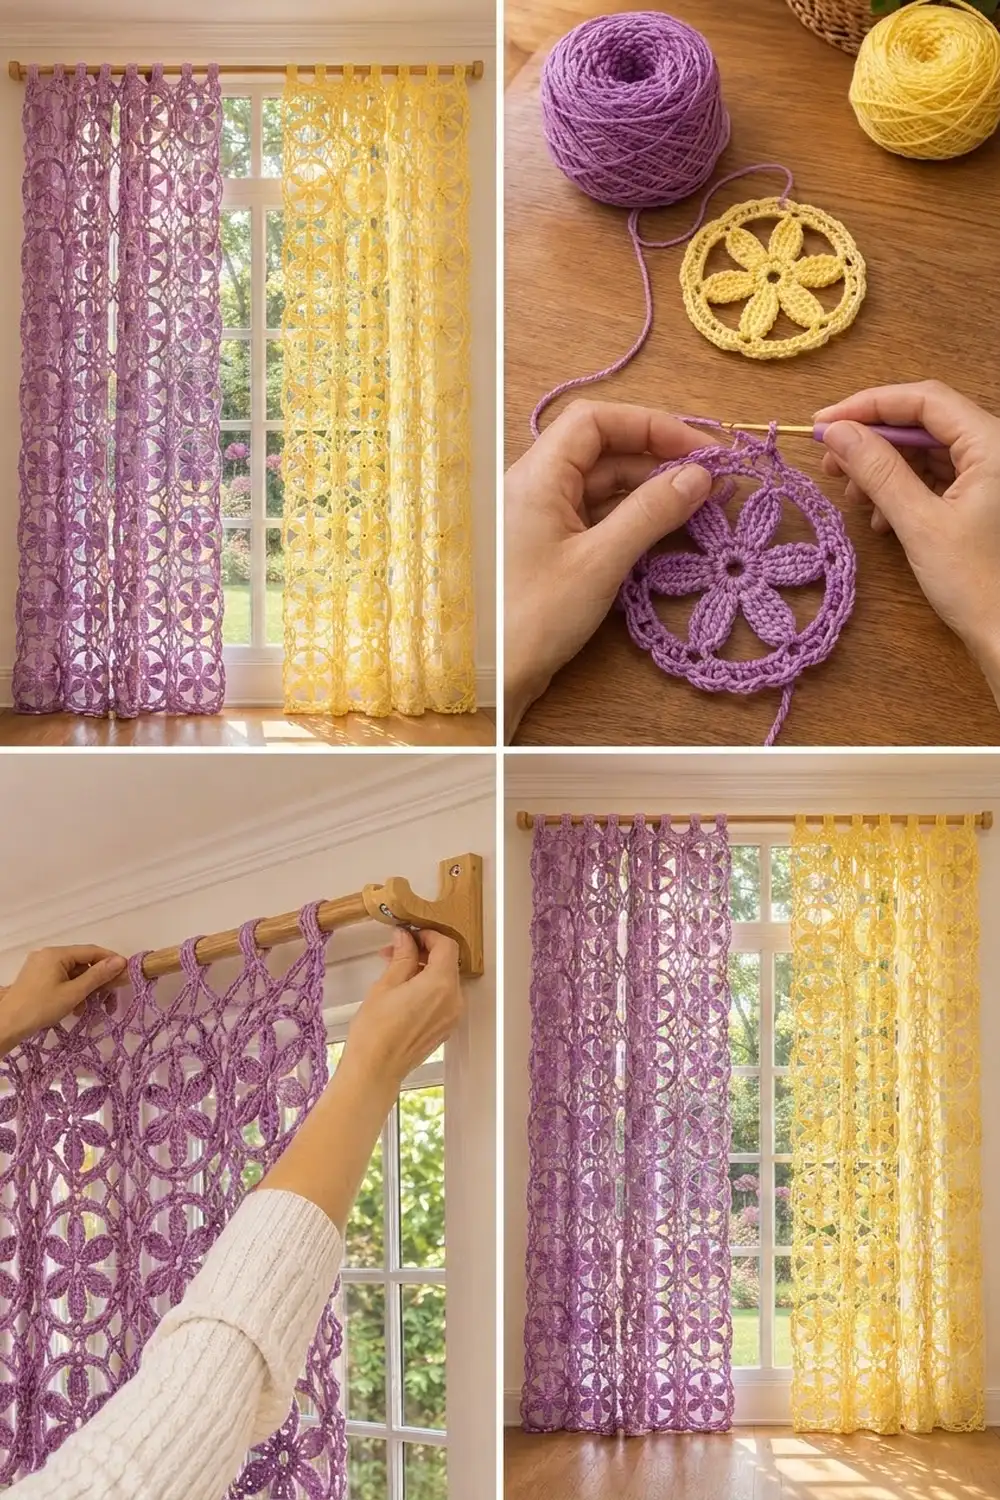
The pair is worked in two colors: one panel in soft lilac purple and one in buttery lemon yellow. Hung side by side, they filter light without blocking the view, and the flowers show up clearly against a bright window.
This pattern uses US crochet terms. Each panel measures 24 in (61.0 cm) wide across the motifs and 72 in (182.9 cm) long, plus a 1 in (2.5 cm) top band and tab loops that drop about 2.5 in (6.4 cm). That gives a total hanging length of about 75.5 in (191.8 cm).
The construction is simple to follow. You make each motif in five rounds and join it to its neighbors as you go on the last round. Then you add the diamond fillers in the gaps, work the top band, and finish with eight tabs.
Finished Size and Construction
- Finished panel size: 24 in x 72 in (61.0 x 182.9 cm) of motifs, about 75.5 in (191.8 cm) total hanging length
- Skill level: Intermediate
- Terminology: US crochet terms
- Yarn weight: Worsted (#4) cotton
- Hook: US H-8 (5.0 mm)
- Number of pieces: 2 separate panels (1 lilac, 1 lemon), each made from 48 motifs and 33 fillers
- Layout per panel: 4 motifs wide x 12 motifs tall
- Motif size: 6 in (15.2 cm) in diameter
- Size before border: 24 in x 72 in (61.0 x 182.9 cm)
- Border depth: a 1 in (2.5 cm) top band, plus tabs 5 in (12.7 cm) long before folding
Materials
Use a smooth, mercerized or combed worsted-weight cotton. Cotton holds the petal shapes crisply and hangs straight without stretching too much. Avoid acrylic for this pattern because it can droop over a long drop.
- Lilac purple: 600 g (about 960 m / 1,050 yd)
- Lemon yellow: 600 g (about 960 m / 1,050 yd)
These quantities are based on yarn that runs about 160 m per 100 g. They include a margin of about 20% for swatching and joining.
Tools:
– US H-8 (5.0 mm) crochet hook
– Tapestry needle
– Stitch markers
– Rustproof pins and blocking mats
– Spray bottle
– Measuring tape
– A curtain rod up to 1.25 in (3.2 cm) in diameter
Abbreviations (US Terms)
- ch – chain
- sl st – slip stitch
- sc – single crochet
- hdc – half double crochet
- dc – double crochet
- tr – treble crochet
- sp – space
- st(s) – stitch(es)
- RS – right side
Special technique – Join-as-you-go (JAYG) stitch: Remove the hook from the working loop. Insert the hook from front to back through the matching sc on the finished neighbor motif, pick up the dropped loop, and pull it through. Then sc in the next stitch of the current motif as normal. The pull-through does not count as a stitch, so the round still has 64 sc.
Gauge and Checkpoints
Gauge: 7 dc = 2 in (5.1 cm) in Round 4 of the motif.
Make one complete motif before you start the panel. Check it at each of these stages:
- After Round 1: 1.25 in (3.2 cm) across
- After Round 2: 4.5 in (11.4 cm) from petal tip to petal tip
- After Round 4: 5.5 in (14.0 cm) across
- After Round 5: 6 in (15.2 cm) across, lying flat
If your motif is more than 0.25 in (0.6 cm) too big, go down half a hook size. If it is too small, go up half a size. Even small errors add up fast: 12 motifs that are each 0.25 in (0.6 cm) too long make the panel 3 in (7.6 cm) too long.
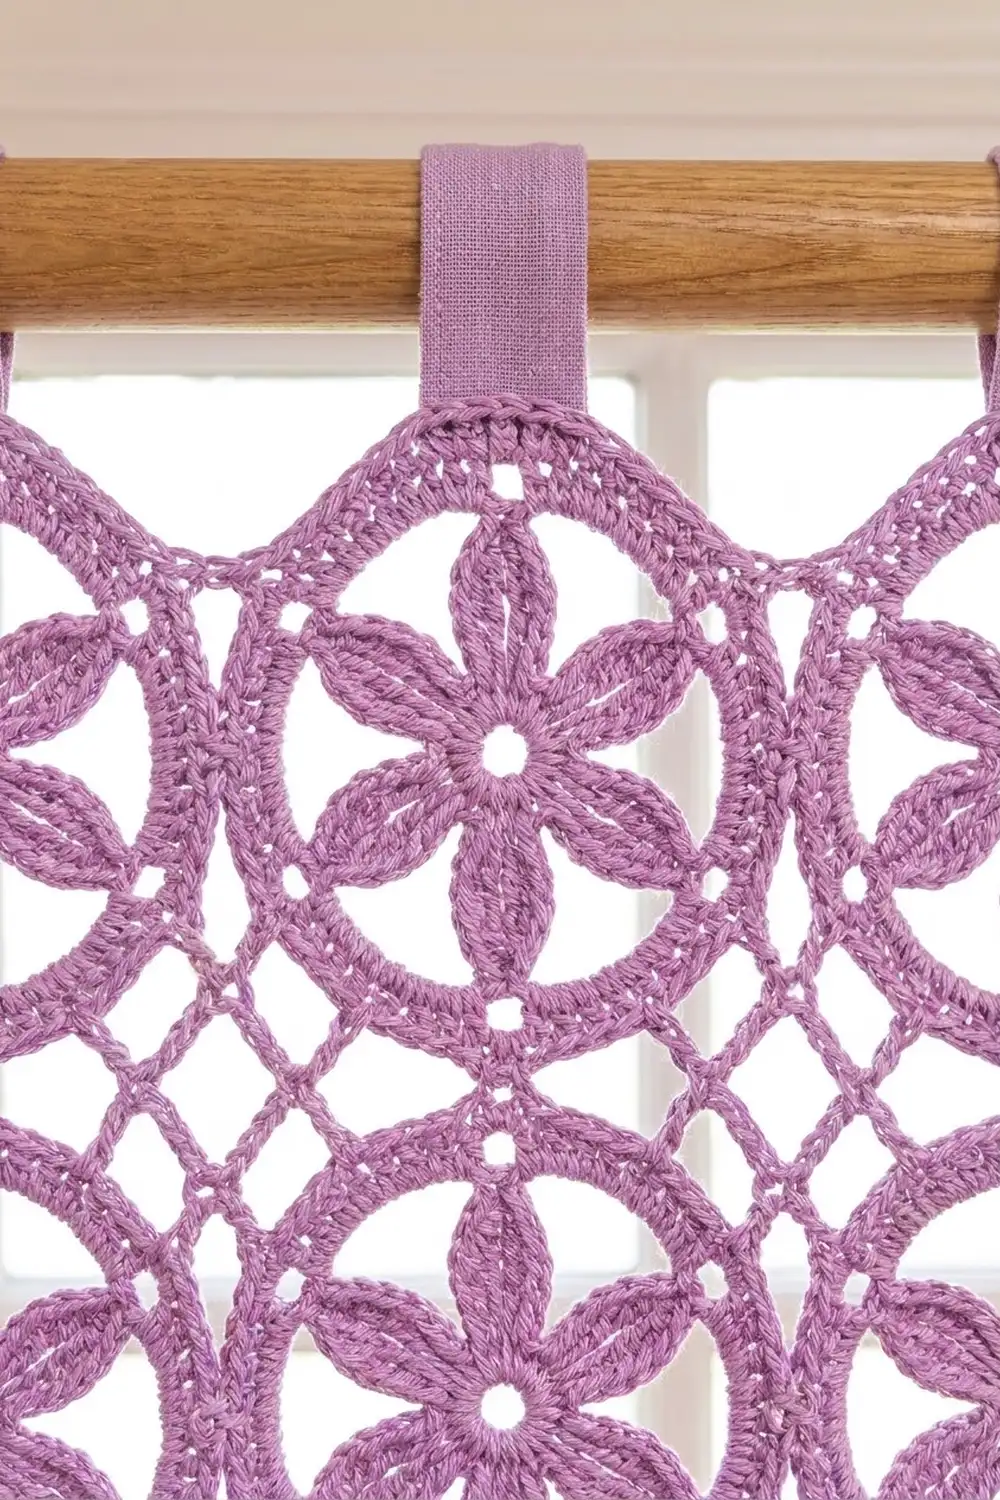
Motif (make 48 per panel)
Round 1: Make a magic ring. Ch 3 (counts as dc), then work 11 dc in the ring. Pull the ring closed and sl st to the top of the ch-3. (12 dc)
Round 2 (petals): Sl st in the next dc.
Ch 7. Working back down the chain, sc in the 2nd ch from the hook, then hdc in the next ch, dc in the next ch, tr in the next ch, dc in the next ch, and hdc in the last ch. Skip the next dc of Round 1 and sl st in the following dc.
Repeat from * to * 5 more times. The last sl st lands in the same dc where you started. Fasten off. (6 petals, 6 sts each, for 36 petal sts)
Each petal is a pointed leaf shape. It is widest at the tr and has a single skipped chain at the tip.
Round 3: Join the same color with a sc in the tip ch of any petal.
Ch 8, sc in the tip ch of the next petal.
Repeat from * to * 4 more times, then ch 8 and sl st to the first sc. (6 sc, 6 ch-8 sps)
Round 4: Ch 3 (counts as dc). Work 9 dc in the next ch-8 sp.
Dc in the next sc, 9 dc in the next ch-8 sp.
Repeat from * to * 4 more times, then sl st to the top of the ch-3. (60 dc: 6 sections of 10)
This round creates the solid outer ring, with the petal tips touching its inner edge.
Round 5 (trim round): Ch 1.
Sc in the next 14 sts, 2 sc in the next st.
Repeat from * to * 3 more times, then sl st to the first sc. (60 sc worked 1 per stitch + 4 extra = 64 sc)
Quarters and reference points: Round 5 splits into 4 quarters of 16 sc each. Turn the motif so that you work Round 5 counterclockwise starting at the upper right (northeast) point. That way:
- Quarter 1 (sts 1–16) is the top.
- Quarter 2 (sts 17–32) is the left side.
- Quarter 3 (sts 33–48) is the bottom.
- Quarter 4 (sts 49–64) is the right side.
The contact pair is the 8th and 9th sc of each quarter, which is the point where the motif touches its neighbor. The diagonal sts are the last sc of each quarter: st 16 (northwest), st 32 (southwest), st 48 (southeast), and st 64 (northeast).
For the first motif, fasten off after Round 5 and weave in the ends. For every other motif, follow the joining section below.
Make All Pieces
- Lilac panel: 48 motifs, 33 fillers
- Lemon panel: 48 motifs, 33 fillers
- Total: 96 motifs, 66 fillers
Here is the layout for one panel (C = column, R = row). The fillers (+) sit in the gaps where four circles meet.
     C1   C2   C3   C4
R1   O    O    O    O
        +    +    +
R2   O    O    O    O
        +    +    +
...   (repeat to R12)
R12  O    O    O    O
There are 3 fillers between each pair of motif rows. With 11 gaps between the 12 rows, that makes 3 x 11 = 33 fillers.
Joining
Method: Join as you go on Round 5. Work Rounds 1–4 of each new motif first. Then work Round 5, joining at the contact pairs where needed. Work row by row and from left to right across each row.
Stitch-to-stitch logic: The two motifs face each other in mirror image. So the 8th sc of the current motif’s quarter joins to the 9th sc of the neighbor’s quarter, and the 9th joins to the 8th. Each join uses 2 JAYG stitches.
- R1, C1: No joins.
- R1, C2–C4: Join Quarter 2 (left) to the neighbor’s Quarter 4 (right).
- R2–R12, C1: Join Quarter 1 (top) to the Quarter 3 (bottom) of the motif above.
- R2–R12, C2–C4: Join Quarter 1 to the motif above. Then join Quarter 2 to the motif on the left.
Tension: Pull each loop through snugly, but not tightly. If you pull it too tight, the circles will pucker toward each other. If it is too loose, the lattice will sag when it hangs.
Fillers (make 33 per panel): Ch 4 and sl st to form a ring.
Rnd 1: Ch 1. Sc in the ring, ch 3, sl st in the diagonal st of the next surrounding circle, ch 3.
Repeat from * to * 3 more times, then sl st to the first sc. (4 sc, 8 ch-3 legs, 4 sl st joins)
Join each filler to these four stitches, in order:
1. St 48 of the upper left circle
2. St 32 of the upper right circle
3. St 16 of the lower right circle
4. St 64 of the lower left circle
Size checkpoint: When you have 4 rows joined, lay them flat. They should measure 24 in x 24 in (61.0 x 61.0 cm).
Border (Top Band and Tabs)
Only the top edge gets a border. The sides and bottom are left as open circle scallops.
Border gauge: In Row 2, 82 hdc span about 22.25 in (56.5 cm).
Row 1 (RS): Hold the panel with the RS facing and the top row up. Join the yarn in st 1 of Quarter 1 on the R1, C4 motif.
For each top motif, work across Quarter 1 like this:
– Ch 4 (counts as tr) on the first motif only, or tr in st 1 on the other motifs
– Dc in the next 2 sts
– Hdc in the next 2 sts
– Sc in the next 6 sts
– Hdc in the next 2 sts
– Dc in the next 2 sts
– Tr in st 16
Between motifs, ch 6.
Repeat across C3, C2, and C1. (4 motifs x 16 sts + 3 bridges x 6 ch = 82 sts)
The graded stitches build up the dip at each side of the curve. Combined with the ch-6 bridges, they give you a level top edge.
Row 2: Ch 2 (does not count as a st) and turn. Hdc in each st and in each ch across. (82 hdc)
Row 3: Ch 1 and turn. Sc in each st across. (82 sc) Do not fasten off.
Tabs: Each tab is 5 sts wide. Leave 6 sts between tabs.
Row 4, first tab: Ch 1 and turn. Sc in the first 5 sts. Then work 19 more rows of 5 sc, turning with ch 1 each time. That gives 20 rows, or 5 in (12.7 cm). Fasten off.
For each of the 7 remaining tabs: Skip 6 sts of Row 3 and join in the next st. Work 20 rows of 5 sc the same way.
The tabs fall on these sts:
– 1–5
– 12–16
– 23–27
– 34–38
– 45–49
– 56–60
– 67–71
– 78–82
Why the math works: 8 tabs x 5 sts = 40, and 7 gaps x 6 sts = 42. Since 40 + 42 = 82, the last tab ends exactly at the last stitch.
Fold each tab to the back and whipstitch its last row along the base of Row 2. This makes a loop with a drop of about 2.5 in (6.4 cm). That fits a rod up to 1.25 in (3.2 cm) in diameter.
Final Blocking
- Weave in all the ends along the solid dc rings, where they won’t show.
- Soak the panel in cool water and press out the water in a towel. Don’t wring it.
- Lay it flat on the mats. If you need to, block it in two halves.
- Pin the top band straight, at 22.25 in (56.5 cm) wide.
- Pin each circle to 6 in (15.2 cm) across. Keep the columns at 24 in (61.0 cm).
- Open each petal and pin the tips to touch the dc ring.
- Pull each filler into a neat diamond.
- Let it dry completely before unpinning.
Final Quality-Control Checklist
- [ ] Every motif has 6 petals, 60 dc in Round 4, and 64 sc in Round 5.
- [ ] Every join uses 2 stitches at the contact pairs, with no twists.
- [ ] All 33 fillers are joined at 4 diagonal points each.
- [ ] Rows 1–3 of the band each have 82 sts.
- [ ] There are 8 tabs, evenly spaced and securely sewn.
- [ ] The panel measures 24 in x 72 in (61.0 x 182.9 cm) of motifs.
Troubleshooting
- Petals curl: Your ch 7 was too tight. Chain more loosely, or use a hook one size larger just for the chain.
- Round 4 ruffles: Your dc stitches are too tall or too loose. Use the smaller hook for Round 4.
- Round 4 cups: Check that you have exactly 9 dc in each ch-8 sp.
- The motif is not round after Round 5: Recount and make sure you have 4 increases, one at the end of each 15-st group.
- The lattice skews: Some joins went to the wrong quarter. Check that it’s always Quarter 1 to the motif above and Quarter 2 to the motif on the left.
- The band waves: Recount Row 1. The ch-6 bridges must be exactly 6 chains.
- The tabs twist: Sew the last tab row flat against the band without rotating it.
Care
Hand wash in cool water with a mild detergent, then dry flat and re-pin the circles if needed. Avoid hanging the panels to dry while wet, because the weight can stretch the lattice.
Final Notes
Each panel follows one measurement chain. A 1.25 in (3.2 cm) center grows into a 6 in (15.2 cm) motif. Four motifs make a 24 in (61.0 cm) width, and twelve rows make a 72 in (182.9 cm) length. The 82-stitch band and 8 tabs then bring the total hanging length to about 75.5 in (191.8 cm). If you check your first motif carefully, everything after it falls into place.
Happy crocheting!