

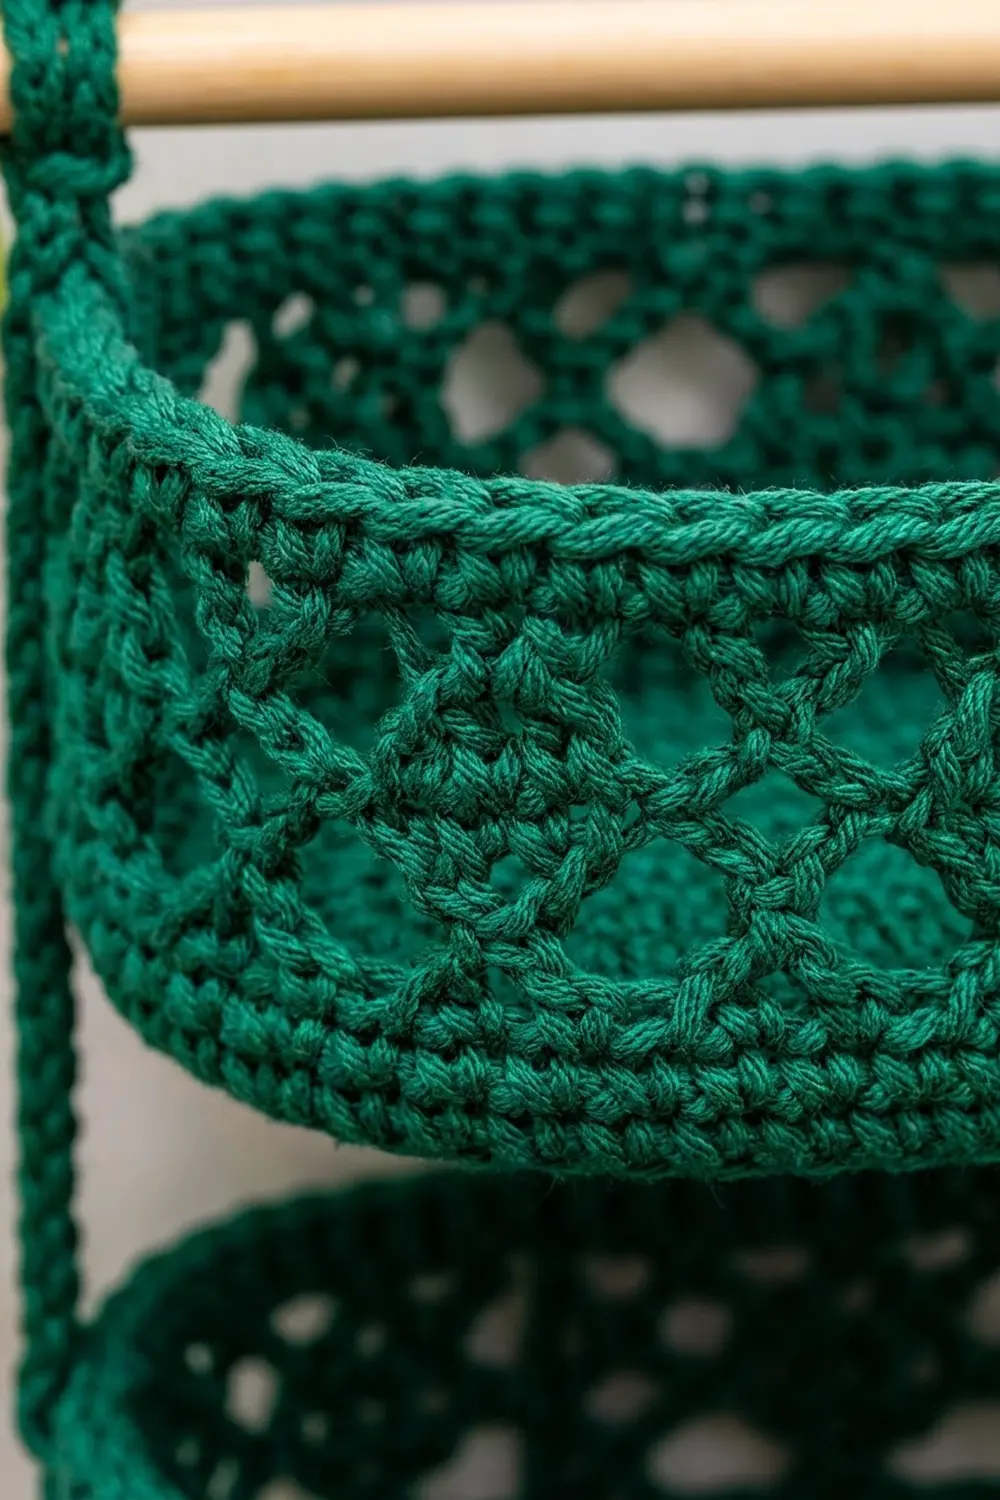
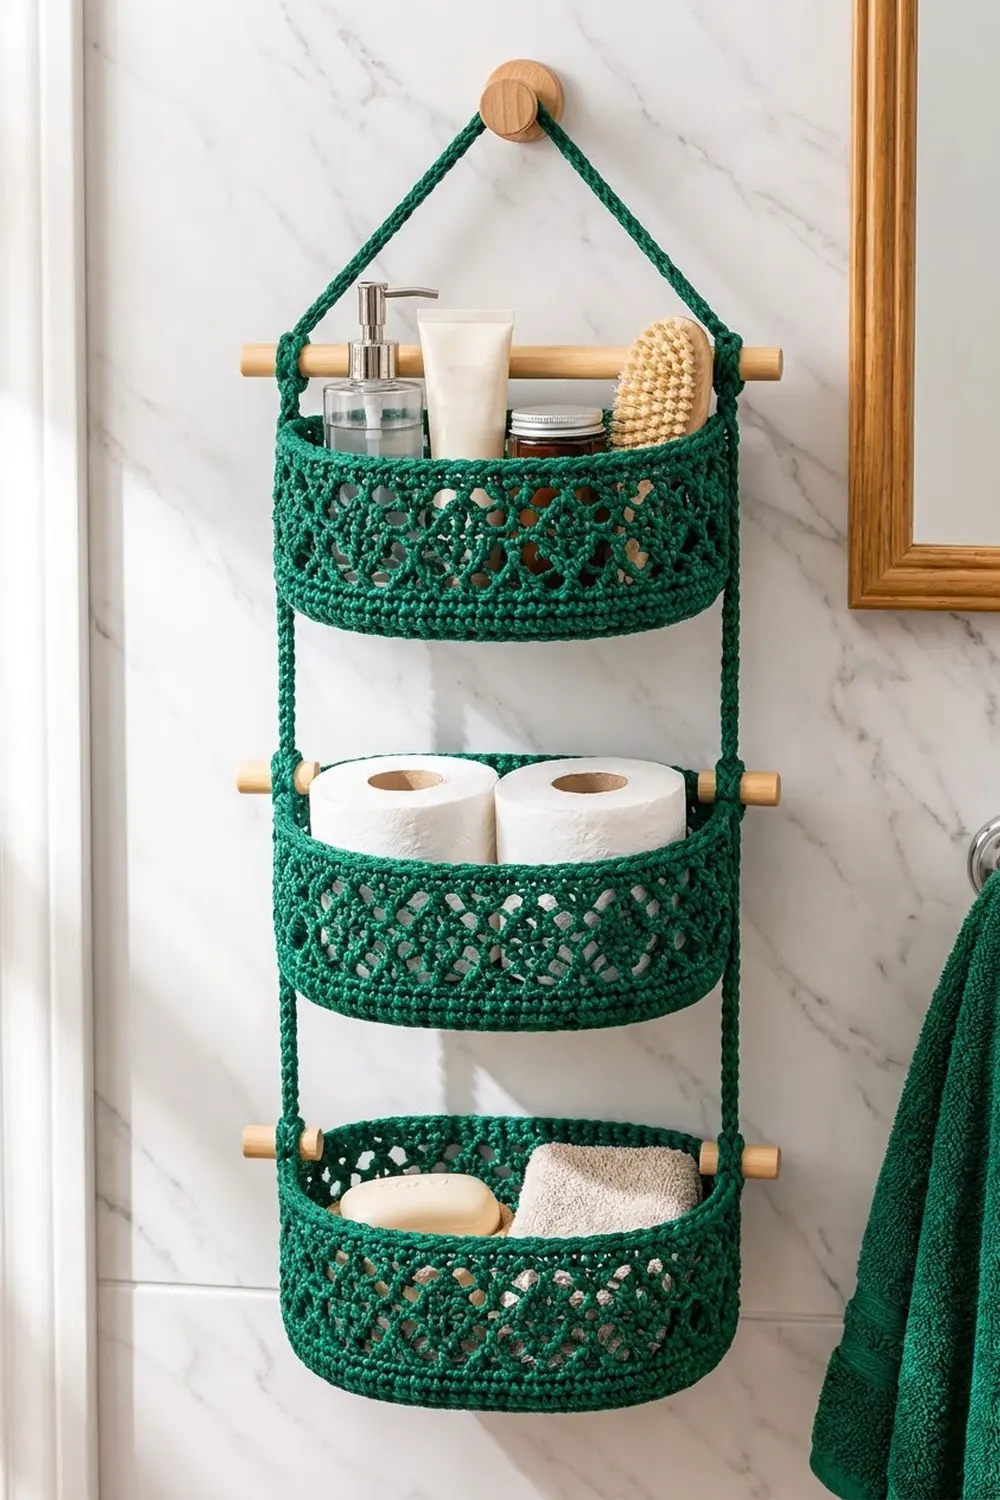
The Emerald Trellis Hanging Basket Organizer has three oval baskets stacked on two crocheted side straps. Pale wooden dowels hold the tiers apart. Each basket has a solid base, an open diamond-lattice wall and a firm corded rim. It is sturdy enough for toilet paper rolls and pretty enough to hang where people will see it.
The sample uses one deep emerald green cotton yarn. With one color there are no color changes or carried strands, so you can focus on even tension and neat shaping. The style is a mix of boho macramé and clean modern bathroom storage.
The pattern uses US crochet terms. The finished organizer is about 12 in (30.5 cm) wide and 26 in (66.0 cm) tall to the top point. Each basket is about 10 in (25.4 cm) long, 5 in (12.7 cm) deep and 4 in (10.2 cm) tall.
Construction is simple. You crochet each oval base in joined rounds. Then you turn up a straight wall, work a chain-loop trellis band, and convert back to solid stitches for the rim. Next you make two flat straps. Finally, you sew the baskets to the straps, tie on the dowels, and add a hanging loop.
Finished Size and Construction
- Finished size: 12 in (30.5 cm) wide x 26 in (66.0 cm) tall
- Skill level: Intermediate
- Terminology: US crochet terms
- Yarn weight: Bulky (#5) cotton or cotton-blend
- Hook: 6.0 mm (US J-10)
- Number of pieces: 5 crocheted pieces (3 baskets, 2 straps), plus 3 dowels
- Layout: 3 baskets stacked vertically between 2 straps, with 1 dowel above each basket
- Piece size (one basket): 10 x 5 in (25.4 x 12.7 cm) base, 4 in (10.2 cm) tall
- Size before border: walls about 3 in (7.6 cm) tall, measured from the base edge
- Border (rim) depth: about 1 in (2.5 cm)
Materials
Yarn: Use a firm, smooth bulky cotton or cotton-blend that holds its shape. Avoid soft acrylics and stretchy fibers, because the baskets will sag under weight. The amounts below assume about 120 m per 100 g.
- Emerald Green: 300 g (about 360 m / 394 yd)
That works out to about 60 m per basket, about 16 m per strap, and a few meters for the hanging loop and sewing. The amount includes a margin of roughly 20% for gauge swatching and differences in tension.
Tools:
– 6.0 mm (US J-10) crochet hook
– 3 wooden dowels, 12 in (30.5 cm) long and 1/2 in (1.3 cm) in diameter
– 4 stitch markers
– Tapestry needle
– Scissors and measuring tape
– Spray bottle and pins for blocking
– Optional: clear craft glue for the dowel ties
Abbreviations (US Terms)
- ch – chain
- sl st – slip stitch
- sc – single crochet
- dc – double crochet
- BLO – back loop only
- inc – 2 sc in the same stitch
- sk – skip
- st(s) – stitch(es)
- rev sc – reverse single crochet (crab stitch)
Reverse single crochet: Work from left to right (left-handers work from right to left). Insert the hook into the next stitch to the right, yarn over, and pull up a loop. Yarn over again and pull through both loops. This makes the twisted, corded edge on the rim.
Gauge and Checkpoints
Gauge: 12 sc x 13 rounds = 4 in (10.2 cm), worked firmly.
Test one basket base before you commit to all three, because every later measurement depends on it.
- After Rnd 4: the base is about 7.75 x 2.75 in (19.7 x 7.0 cm).
- After Rnd 8: the base is 10 x 5 in (25.4 x 12.7 cm), with a perimeter of about 26 in (66.0 cm).
- After Rnd 15: the wall is about 3 in (7.6 cm) tall.
- After Rnd 20: the basket is 4 in (10.2 cm) tall.
If your base is too big: go down to a 5.5 mm (US I-9) hook. If it’s too small: go up to a 6.5 mm (US K-10.5) hook. Change the hook, not the stitch counts, because the lattice repeat depends on exactly 78 stitches.
Basket (Make 3)
Work in joined rounds with the right side facing you. Don’t turn. The beginning ch 1 does not count as a stitch.
Base
Foundation: Ch 18.
Rnd 1: 3 sc in the 2nd ch from the hook (first end). Sc in each of the next 15 ch. Work 3 sc in the last ch (second end). Rotate the work. Working into the opposite side of the foundation chain, sc in each of the next 15 ch. Sl st to the first sc. (36 sts: 3 + 15 + 3 + 15)
Rnd 2: Ch 1. 2 sc in each of the first 3 sts, sc in the next 15. 2 sc in each of the next 3 sts, sc in the next 15. Sl st to join. (42 sts)
Rnd 3: Ch 1. [Sc in the next st, inc] 3 times, sc in the next 15. [Sc in the next st, inc] 3 times, sc in the next 15. Join. (48 sts)
Rnd 4: Ch 1. [Sc in the next 2, inc] 3 times, sc in the next 15. Repeat the bracketed section and the 15 sc once more. Join. (54 sts)
Rnd 5: Ch 1. [Sc in the next 3, inc] 3 times, sc in the next 15. Repeat once more. Join. (60 sts)
Rnd 6: Ch 1. [Sc in the next 4, inc] 3 times, sc in the next 15. Repeat once more. Join. (66 sts)
Rnd 7: Ch 1. [Sc in the next 5, inc] 3 times, sc in the next 15. Repeat once more. Join. (72 sts)
Rnd 8: Ch 1. [Sc in the next 6, inc] 3 times, sc in the next 15. Repeat once more. Join. (78 sts: 24 per end + 15 per long side)
Each round adds 3 stitches at each end, for 6 per round. Two half-circles make one full circle, and 6 increases per round is the standard rate for a flat circle in sc. That’s why the base lies flat. If the ends look a little pointed, move the increase to the middle of the bracket on alternate rounds. The count stays the same.
Checkpoint: 10 x 5 in (25.4 x 12.7 cm). Place markers at the center of each end and the center of each long side.
Wall
Rnd 9 (turning round): Ch 1. Sc in the BLO of each st around. Join. (78 sts) The unused front loops leave a crisp ridge where the base turns up into the wall.
Rnd 10: Ch 1. Sc in each st around. Join. (78 sts)
Trellis Band
Rnd 11: Ch 1. Sc in the first st. Ch 5, sk 2 sts, sc in the next st. Repeat from * 24 more times. Ch 2, sk the last 2 sts, then dc in the first sc. The ch 2 plus dc counts as the 26th loop and leaves your hook at the center of that loop. (26 loops)
Each loop spans 3 base stitches. That gives 5 loops along each long side (15 sts) and 8 loops around each end (24 sts).
Rnd 12: Ch 1. Sc around the post of the dc just made. Ch 5, sc in the next ch-5 loop. Repeat from * 24 more times. Ch 2, dc in the first sc. (26 loops)
Rnds 13–14: Repeat Rnd 12. (26 loops each)
Rnd 15: Ch 1. Sc around the post of the dc just made. Ch 5, sc in the next ch-5 loop. Repeat from * 24 more times. Ch 5, sl st in the first sc. (26 full ch-5 loops)
Each sc sits in the center of a loop from the round below, so the loops offset and form the diamond trellis.
Checkpoint: The wall is about 3 in (7.6 cm) tall. Stretch it gently and the diamonds should open evenly.
Rim (Border)
Rim gauge: Same as the base, 12 sc = 4 in (10.2 cm). Work firmly, because the rim carries the weight.
Rnd 16 (conversion round): Ch 1. Sc in the next sc, 2 sc in the next ch-5 loop. Repeat from * around. Join.
(26 sc worked 1 per existing sc + 52 sc added into loops = 78 sts)
Per side, that’s 15 sts along each long side (5 repeats) and 24 sts around each end (8 repeats).
Rnds 17–19: Ch 1. Sc in each st around. Join. (78 sts each; 15 per long side, 24 per end)
Rnd 20: Ch 1. Rev sc in each st around. Join. (78 sts) Fasten off and weave in the ends.
Why the math works: 78 stitches is exactly 26 lattice repeats of 3. The rim returns to the same 78 stitches as the base perimeter, so the wall rises straight. At 3 stitches per inch, 78 stitches equal 26 in (66.0 cm), which matches the base’s 26 in (66.0 cm) perimeter. No stitches are added or lost, so the rim won’t flare or pull in.
Checkpoint: The basket is 4 in (10.2 cm) tall and 10 x 5 in (25.4 x 12.7 cm) at the rim.
Strap (Make 2)
Foundation: Ch 82.
Row 1: Sc in the back bump of the 2nd ch from the hook and in each ch across. (81 sc)
Row 2: Ch 1, turn. Sl st in each st across. (81 sl sts) Fasten off and leave a 24 in (61.0 cm) tail.
Checkpoint: Each strap is 27 in (68.6 cm) long, which is 81 stitches at 3 per inch. Before you fasten off, mark these stitches with scrap yarn, counting from the starting end:
- Basket 3 (bottom): sts 1–12
- Dowel 3: st 15
- Basket 2: sts 19–30
- Dowel 2: st 33
- Basket 1 (top): sts 37–48
- Dowel 1: st 51
- Triangle: sts 52–81 (10 in / 25.4 cm)
Make All Pieces
- Baskets: 3, all Emerald Green, about 60 m each
- Straps: 2, all Emerald Green, about 16 m each
- Dowels: 3, 12 in (30.5 cm) long
Layout (front view):
              /\        <- hanging loop at apex
             /  \
            /    \      <- straps, sts 52–81
   ==|==============|==  <- Dowel 1 (st 51)
     |  [ Basket 1 ]|    <- sts 37–48
   ==|==============|==  <- Dowel 2 (st 33)
     |  [ Basket 2 ]|    <- sts 19–30
   ==|==============|==  <- Dowel 3 (st 15)
     |  [ Basket 3 ]|    <- sts 1–12
   Strap A        Strap B
Joining
Method: Whipstitch the baskets to the straps with the tapestry needle and matching yarn. Then tie on the dowels with tight wraps.
Stitch-to-stitch logic: Each basket is 4 in (10.2 cm) tall and covers 12 strap stitches (4 in x 3 sts/in). Lay a strap flat against the outside of a basket end, centered on the end marker.
- Line up strap st 1 with Rnd 9 of Basket 3, and strap st 12 with Rnd 20.
- Whipstitch through the strap edges and the basket wall, working 3 stitches per strap stitch along sts 1–3 (base and solid wall) and sts 9–12 (rim). Leave the trellis section between them free so it stays open.
- Repeat on the other end of Basket 3 with the second strap.
- Attach Basket 2 at sts 19–30 and Basket 1 at sts 37–48 the same way.
- At st 15, 33 and 51, lay a dowel across the back of both straps. Leave about 0.75 in (1.9 cm) of dowel past each strap. Wrap yarn 6 times around the strap and dowel, then knot it firmly. A dot of glue is optional.
- Bring the strap tops together. Sew st 81 of one strap to st 81 of the other.
- Hanging loop: Join yarn at the apex, ch 10 and sl st in the same spot. Work 14 sc into the loop and fasten off.
Tension advice: Pull the whipstitches snug but not tight. Overtightening puckers the rim. The baskets should hang level, with the straps lying flat against the ends.
Size checkpoint: The organizer is 12 in (30.5 cm) across the dowels and about 26 in (66.0 cm) to the apex. The gaps between the tiers are about 1 in (2.5 cm) to each dowel.
Final Blocking
- Spray each basket until it is damp but not soaked.
- Stuff each basket with a towel or a box sized 10 x 5 x 4 in (25.4 x 12.7 x 10.2 cm).
- Ease the trellis diamonds open with your fingers.
- Press the base flat and square up the rim edge.
- Pin the straps flat and straight to their full 27 in (68.6 cm) length.
- Let everything dry completely, usually 24 hours.
- Remove the forms and hang the organizer.
Final Quality-Control Checklist
- Each base measures 10 x 5 in (25.4 x 12.7 cm) and lies flat.
- Every basket has 78 stitches in Rnds 8–10 and 16–20.
- Each trellis round has exactly 26 loops.
- All three baskets are 4 in (10.2 cm) tall.
- Both straps are 27 in (68.6 cm) long and all markers line up.
- The dowels are level and tied tightly.
- The baskets hang straight with no tilt.
- All ends are woven in securely.
Troubleshooting
- The base cups: Your tension is too tight, or increases are missing. Recount Rnd 8 (78) and go up a hook size.
- The base ruffles: You have extra stitches, or your tension is loose. Recount and go down a hook size.
- The lattice loops are uneven: Keep all ch-5 lengths the same and check for 26 loops each round.
- The rim flares: Rnd 16 has too many stitches. It must be exactly 78.
- The baskets tilt: The strap attachments are off. Re-check the stitch marks on both straps.
- The dowels slip: Add more wraps and a dot of glue.
Care
Remove the dowels, then hand wash in cool water and lay flat to dry, re-shaping each basket over a form. Don’t put it in the dryer.
Final Notes
Every measurement depends on the one before. The gauge of 12 sc = 4 in (10.2 cm) gives a 78-stitch base of 10 x 5 in (25.4 x 12.7 cm). The 78 stitches divide into 26 trellis loops, then convert back to the same 78 rim stitches for a straight 4 in (10.2 cm) wall. The straps follow the same 3 stitches per inch, so the 12-stitch basket sections and the dowel positions line up exactly. If you check your gauge on the first base, the rest of the measurements will follow.
Happy crocheting!