

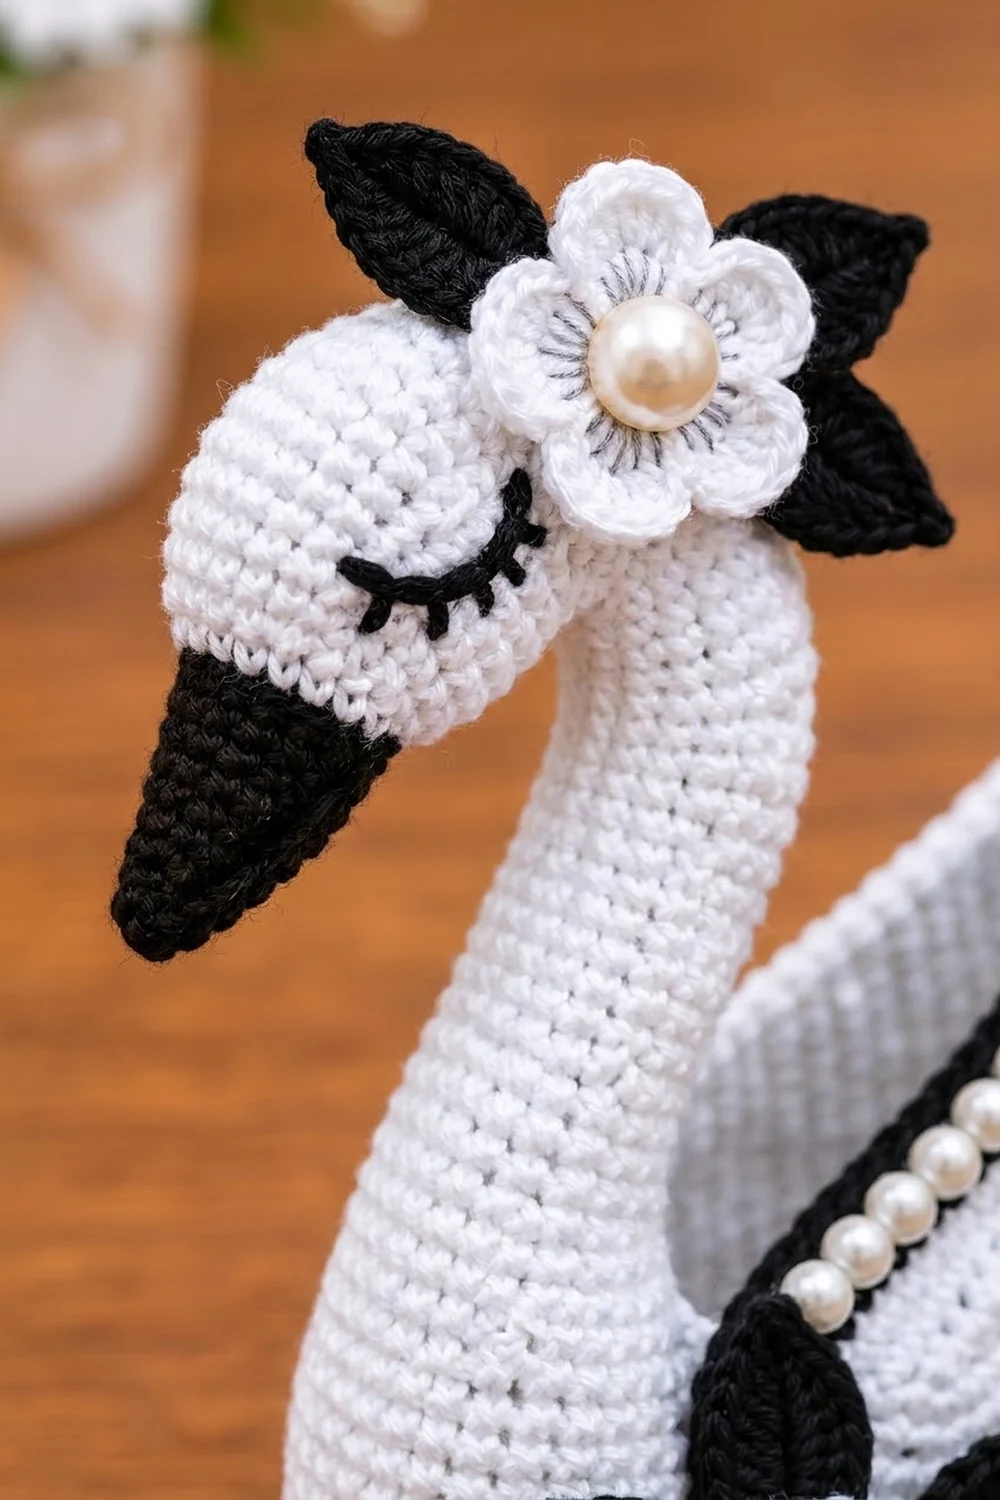
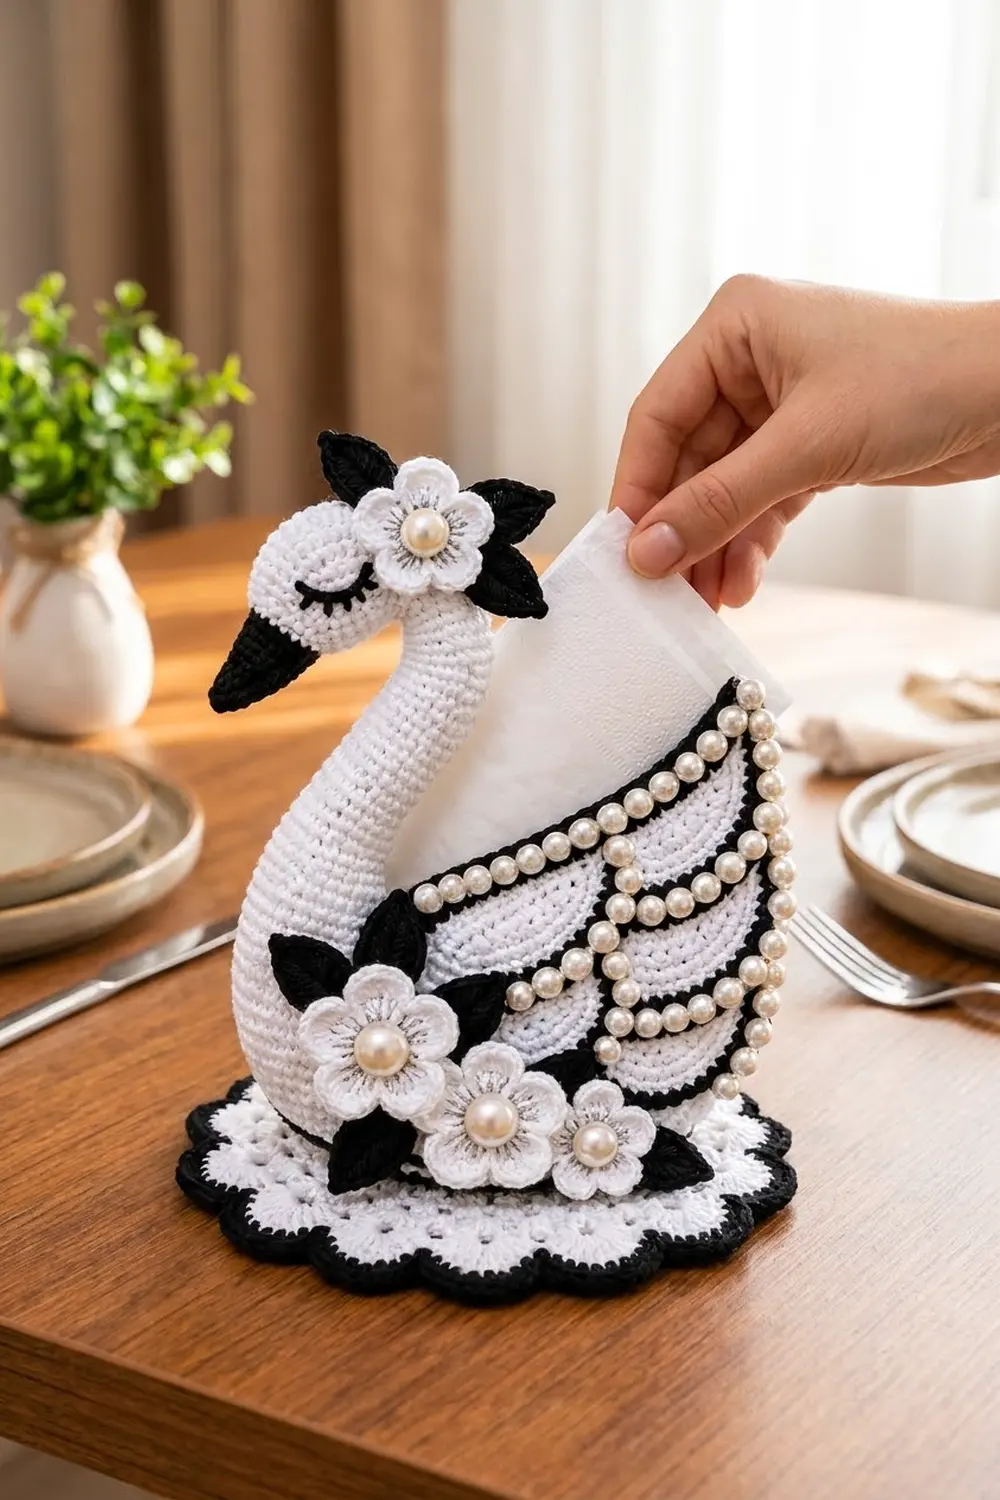
The Pearl Swan Napkin Holder is a small, elegant piece for the table. A white swan with a curved neck and closed, black-lashed eyes sits on a scalloped oval doily. An oval basket inside the body holds folded napkins upright.
The palette is crisp white and black. Black outlines the wings, draws the feather lines and edges the doily. Pearl-centered flowers, black leaves and pearl strands give it a vintage, wedding-table look.
This pattern uses US crochet terms. The base measures about 8.5 in x 5.75 in (21.6 cm x 14.6 cm), and the swan stands about 6.5 in (16.5 cm) tall.
You will crochet a single crochet oval basket, a matching lace doily, two flat wings, a stuffed head and neck, and the small trims. Then you sew them together stitch-to-stitch.
Finished Size and Construction
- Finished base: 8.5 in x 5.75 in (21.6 cm x 14.6 cm)
- Height: about 6.5 in (16.5 cm) at the head; 4 in (10.2 cm) at the back of the basket
- Skill level: Intermediate
- Terminology: US
- Yarn: DK / light worsted (weight 3) cotton
- Hook: 3.25 mm (US D/3)
- Pieces: 15 crocheted pieces (1 doily, 1 basket, 2 wings, 1 head/neck, 4 flowers, 6 leaves), plus 3 purchased pearl strands
- Layout: basket centered on the doily, wings on both long sides, neck at the front
- Basket bottom: 5.5 in x 2.75 in (14.0 cm x 7.0 cm)
- Doily before border: 8 in x 5.25 in (20.3 cm x 13.3 cm)
- Border depth: 0.25 in (0.6 cm)
Materials
Choose a smooth DK cotton. Cotton keeps the walls firm and shows the stitches clearly. These amounts assume about 115 m per 50 g.
- White: 100 g / 230 m
- Black: 30 g / 70 m
The quantities include a margin of about 20%.
Tools and notions:
- 3.25 mm (US D/3) hook and a tapestry needle
- 6 stitch markers, pins and a water-soluble pen
- Fiberfill
- One 12 in (30.5 cm) chenille stem
- 4 pearl half-beads, 10 mm
- 16 in (40.6 cm) of strung 6 mm pearls, cut into 7 in (17.8 cm), 5 in (12.7 cm) and 4 in (10.2 cm) lengths
- White sewing thread and a sewing needle
- Fabric stiffener
- Optional: plastic canvas cut 0.25 in (0.6 cm) smaller than the basket bottom
Abbreviations (US Terms)
ch – chain; sl st – slip stitch; sc – single crochet; hdc – half double crochet; dc – double crochet; inc – 2 sc in the same st; sc2tog / sc3tog – single crochet 2 / 3 together; BLO / FLO – back / front loop only; MR – magic ring; sp – space; st – stitch.
Fan: In the same stitch, work (dc, ch 1) 3 times, then dc. This makes 4 dc and 3 ch-1 sps.
Surface slip stitch: Hold the yarn behind the fabric. Pull up a loop through the fabric, then pull it through the loop on your hook.
Gauge and Checkpoints
Gauge: 22 sc x 24 rounds = 4 in (10.2 cm).
Make the basket bottom first as your test piece. Every other piece is sized against it.
- Basket after Rnd 8: 5.5 in x 2.75 in (14.0 cm x 7.0 cm)
- Basket wall at Rnd 26: 3 in (7.6 cm) tall
- Wing at Row 21: 3.5 in (8.9 cm) tall and 5.6 in (14.2 cm) at its widest
- Doily after Rnd 10: 6.25 in x 3.5 in (15.9 cm x 8.9 cm)
- Doily after Rnd 12: 8 in x 5.25 in (20.3 cm x 13.3 cm)
If your piece is too big, use a hook 0.25 mm smaller. If it is too small, use one 0.25 mm larger. The basket has to stand on its own, so slightly firm is better than loose.
Basket (Body)
With white, ch 18.
Rnd 1: Work 3 sc in the 2nd ch from the hook (End 1). Sc in the next 15 ch (Side A). Work 3 sc in the last ch (End 2). Then sc in the next 15 ch along the opposite side of the chain (Side B). Join. (36 sts)
Mark both end groups. On every round, start with a ch 1 that does not count as a stitch, and join to the first sc at the end. The sides always stay at 15 sts.
Rnd 2: 2 sc in each of the next 3 sts, sc in the next 15, 2 sc in each of the next 3 sts, sc in the next 15. (42 sts)
Rnd 3: [sc, inc] 3 times, sc in the next 15, [sc, inc] 3 times, sc in the next 15. (48 sts)
Rnds 4–8: Work the same as Rnd 3, but add 1 more sc before each inc on every round.
- Rnd 4: 54 sts
- Rnd 5: 60 sts
- Rnd 6: 66 sts
- Rnd 7: 72 sts
- Rnd 8: 78 sts, with 24 sts in each end group
Rnd 9: Working in BLO, sc in each st. (78 sts) The 78 front loops of Rnd 8 stay free for sewing later.
Rnds 10–26: Sc in each st. (78 sts) The wall is now 3 in (7.6 cm) tall.
Back rise: Work in rows over 36 sts at End 2: the 24 end stitches plus 6 side stitches on each side.
- Row 1: Ch 1, sc in each of the 36 sts, turn. (36 sts)
- Rows 2–6: Ch 1, sc2tog, sc to the last 2 sts, sc2tog, turn. These rows give 34, 32, 30, 28 and 26 sts.
The back is now 4 in (10.2 cm) tall.
Top trim round: Do not turn. Sc in each of the 42 front-wall sts. Then work 6 sc up the row-ends, sc in each of the 26 top sts, and 6 sc down the row-ends on the other side. Join. (68 sts worked 1-per-stitch + 12 row-end sts = 80 sts) Fasten off.
Base Doily
With white, work Rnds 1–8 exactly as for the basket. (78 sts)
Rnd 9: Working in FLO, work [7 sc, inc] 3 times at each end and sc in each side st. (84 sts) The 78 back loops of Rnd 8 stay free.
Rnd 10: Working in both loops, work [8 sc, inc] 3 times at each end and sc in each side st. (90 sts)
Rnd 11 (eyelets): Ch 4 (counts as dc + ch 1), sk the next st. Dc in the next st, ch 1, sk the next st, repeat around. Join to the 3rd ch of the beginning ch-4. (45 dc, 45 ch-1 sps)
Rnd 12 (scallops): Sl st into the first ch-1 sp. Sc in the ch-1 sp, sk the next dc and ch-1 sp, Fan in the next dc, sk the next ch-1 sp and dc. Repeat from * 15 times in total. Join and fasten off. (15 scallops: 15 sc, 60 dc, 45 ch-1 sps)
Wings (Make 2)
With white, ch 27.
Row 1: Sc in the 2nd ch from the hook and in each ch across, turn. (26 sts) The last stitch is the tail end.
Rows 2–6: Ch 1 and sc across, working 2 sc in the tail-end stitch, turn. These rows give 27, 28, 29, 30 and 31 sts.
Rows 7–21: Ch 1 and sc across, working sc3tog over the 3 front-end sts, turn. Each row loses 2 sts (29, 27, 25…) until Row 21 has 1 st. Fasten off.
The result is a teardrop. Its front edge is straight for 1 in (2.5 cm), and its top edge sweeps up to a point at the tail. Turn the second wing over so the two wings are mirror images.
Feather lines: With the pen, draw scallop arcs that each span about 6 sts and dip 2 rows: 5 arcs along Row 6, 4 along Row 12 and 3 along Row 17. With black, work loose surface slip stitches along every line.
Head and Neck
With black, make a MR and work in spirals.
- Rnd 1: 4 sc in the MR. (4 sts)
- Rnd 2: [sc, inc] twice. (6 sts)
- Rnd 3: [2 sc, inc] twice. (8 sts)
- Rnd 4: [3 sc, inc] twice. (10 sts)
- Rnd 5: Sc in each st. (10 sts) Change to white.
- Rnd 6: [sc, inc] 5 times. (15 sts)
- Rnd 7: [2 sc, inc] 5 times. (20 sts)
- Rnd 8: [3 sc, inc] 5 times. (25 sts)
- Rnds 9–14: Sc in each st. (25 sts)
- Rnd 15: [3 sc, sc2tog] 5 times. (20 sts)
- Rnd 16: [8 sc, sc2tog] twice. (18 sts) Stuff the beak and head firmly.
- Rnds 17–40: Sc in each st. (18 sts)
- Rnd 41: [5 sc, inc] 3 times. (21 sts)
- Rnd 42: [6 sc, inc] 3 times. (24 sts)
- Rnds 43–44: Sc in each st. (24 sts)
Fasten off, leaving a long tail. The tube is about 7.25 in (18.4 cm) long.
Fold the chenille stem in half and push it up into the head. Stuff the neck lightly around it and bend the neck into an S-curve.
With black, embroider a closed eye on each side of the head: a curved backstitch line with 3 short lashes below it.
Flowers and Leaves
Flower (make 4, white): Make a MR.
- Rnd 1: 10 sc in the MR. Join. (10 sts)
- Rnd 2: Sl st in the next st, (hdc, 3 dc, hdc) in the next st, repeat 5 times. Join. (5 petals, 30 sts)
Each flower is 1.5 in (3.8 cm) across. Attach a 10 mm pearl to the center.
Leaf (make 6, black): Ch 9. Starting in the 2nd ch from the hook, work sc, hdc, 3 dc, hdc, sc. Work 3 sc in the last ch. Working along the opposite side of the chain, work sc, hdc, 3 dc, hdc, sc. Join. (17 sts) Each leaf is 1.75 in (4.4 cm) long.
Make All Pieces
- White: 1 basket, 2 wings, 4 flowers
- White with a black edge: 1 doily
- Black and white: 1 head/neck
- Black: 6 leaves
        [ Wing (back side)              ]
[Neck]  [ Basket - napkins inside       ]  <- tail rise
        [ Wing (display) + pearls       ]
  Front of display wing: 3 flowers, 4 leaves
  Head: 1 flower, 2 leaves
  Everything sits on the oval doily
Joining (Assembly)
Basket to doily: Line up the basket’s Rnd 8 over the doily’s Rnd 8, matching end to end and side to side. With white, whipstitch each of the 78 free front loops on the basket to the matching free back loop on the doily. The join is exactly 1 to 1. Keep the stitches snug but not tight so the doily does not pucker.
Wings: Pin each wing with its bottom edge on the base ridge and its tip at the top of the back rise, at the tail center. Whipstitch through the black outline into the wall.
Neck: Whipstitch the 24-st neck base to the front of the basket and to the doily’s Rnd 9.
Checkpoint: The basket should stand upright and measure 4 in (10.2 cm) at the back.
Trims: Sew 1 flower and 2 leaves to the head, and 3 flowers and 4 leaves at the front of the display wing. With thread, tack the pearl strands every 0.5 in (1.3 cm):
- the 7 in (17.8 cm) strand along the top edge
- the 5 in (12.7 cm) strand along the Row 12 feather line
- the 4 in (10.2 cm) strand along the Row 17 feather line
Border
Border gauge: 5.5 sc per inch (2.5 cm) along curved edges. Use black for all border rounds.
Doily
- Rnd 13: Join black in any sc. Sc in the sc, sc in the dc, sc in the ch-1 sp, sc in the dc, 3 sc in the center ch-1 sp, sc in the dc, sc in the ch-1 sp, sc in the dc, repeat around. (10 sts per scallop, 150 sts)
- Rnd 14: Sl st loosely in each st. (150 sts) Fasten off.
Wings (each)
- Rnd 1: Join black at the bottom-front corner. Along the bottom, work 3 sc in the first ch, sc in the next 24 ch and 3 sc in the last ch (30 sts). Then work 21 sc up the tail edge, 3 sc in the tip, 30 sc down the slanted edge and 6 sc down the front edge. Join. (90 sts)
- Rnd 2: Sl st in each st. (90 sts)
Why the math works: Each scallop uses 6 stitches of Rnd 11, so 90 ÷ 6 = 15 scallops with nothing left over. At 10 border stitches per scallop, the doily edge has 15 x 10 = 150 sts. On the wings, the corner stitches are already counted in each side’s total and are never added twice: 30 + 21 + 3 + 30 + 6 = 90.
Final Blocking
- Before assembly, wet the doily and wings, then roll them in a towel.
- Pin the doily to 8.5 in x 5.75 in (21.6 cm x 14.6 cm), with a pin at every scallop tip.
- Pin each wing flat to 6 in x 4 in (15.2 cm x 10.2 cm).
- Brush stiffener over the doily and wings and let them dry.
- Stiffen the basket over a box about 5.5 in x 2.75 in (14.0 cm x 7.0 cm) and let it dry.
- Add the canvas insert if you are using one, then assemble.
Final Quality-Control Checklist
- The basket bottom measures 5.5 in x 2.75 in (14.0 cm x 7.0 cm), and the back rise is 4 in (10.2 cm)
- The doily has 15 even scallops
- The wings are mirror images, with 90 border sts each
- The feather lines lie flat
- The neck holds its curve, and the eyes match
- The pearls are secure
Troubleshooting
- Walls flop: Crochet tighter, add more stiffener, or use the canvas insert.
- Doily cups: Use a 3.5 mm hook for Rnds 11–12.
- Doily ruffles: Work the ch-1 sps more snugly.
- Wings curl: Your surface slip stitches are too tight. Redo them more loosely.
- Neck droops: Use a stiffer wire.
- Basket and doily don’t match: Check that Rnd 8 has 78 sts on both pieces.
Care
Spot clean with a damp cloth. If you need to wash it fully, remove the pearls first, then reshape it and stiffen it again.
Final Notes
Each measurement builds on the one before it:
- The basket bottom is 5.5 in x 2.75 in (14.0 cm x 7.0 cm), and it sets the doily center.
- The doily grows to 8 in x 5.25 in (20.3 cm x 13.3 cm) before the border and 8.5 in x 5.75 in (21.6 cm x 14.6 cm) after it.
- The 4 in (10.2 cm) wings match the 4 in (10.2 cm) back rise.
If you check each stage as you go, the swan comes together cleanly.
Happy crocheting!