

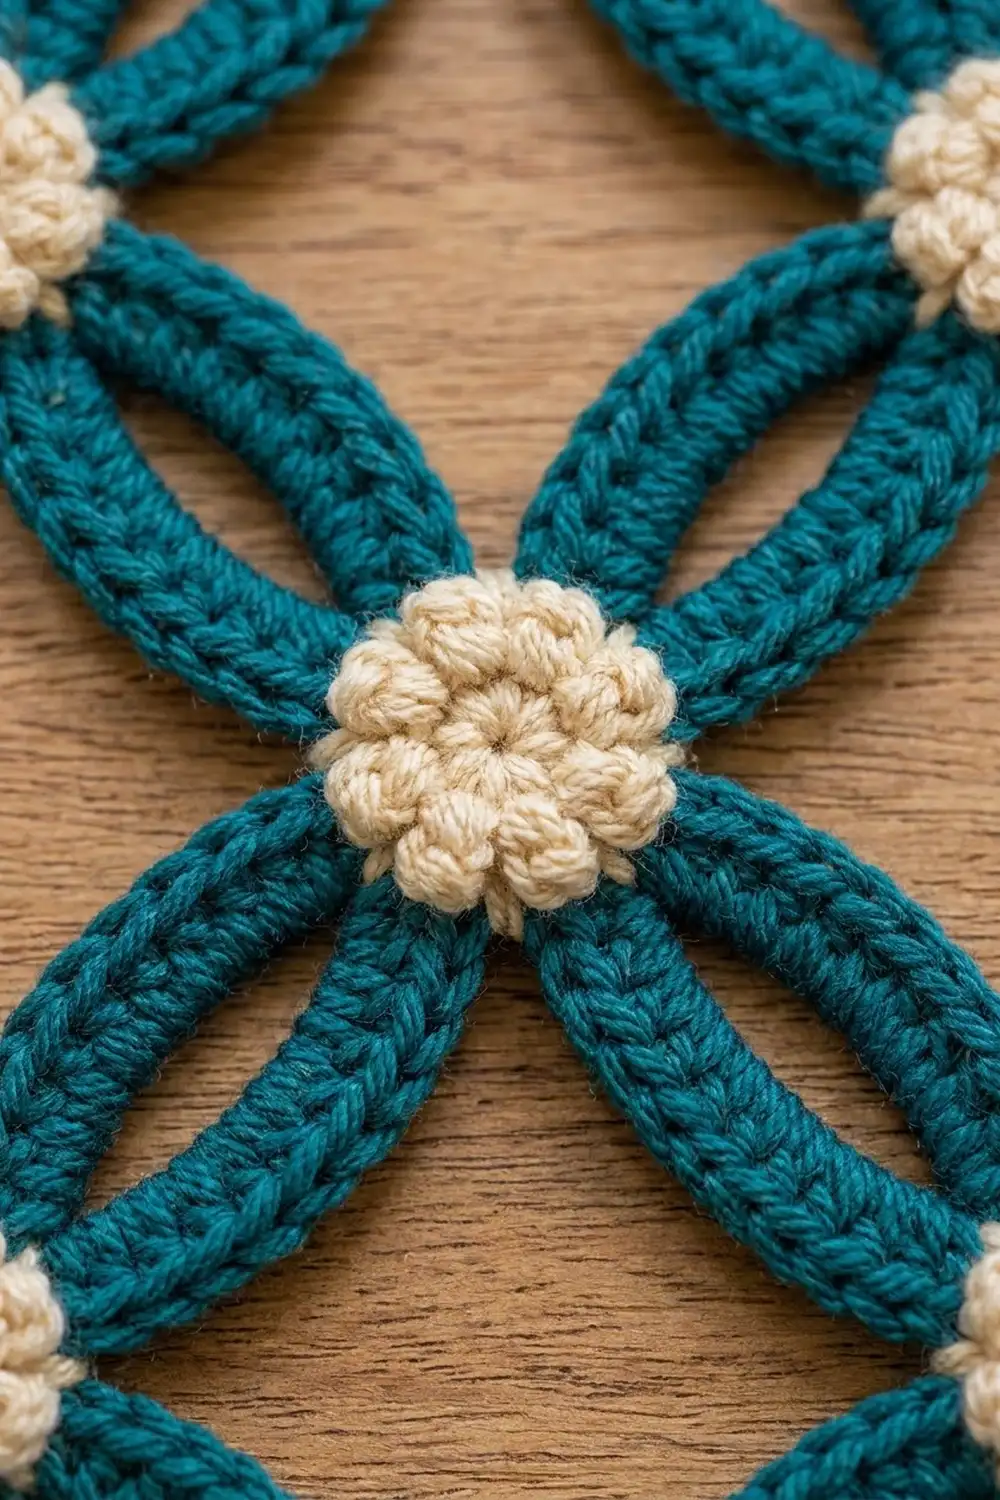
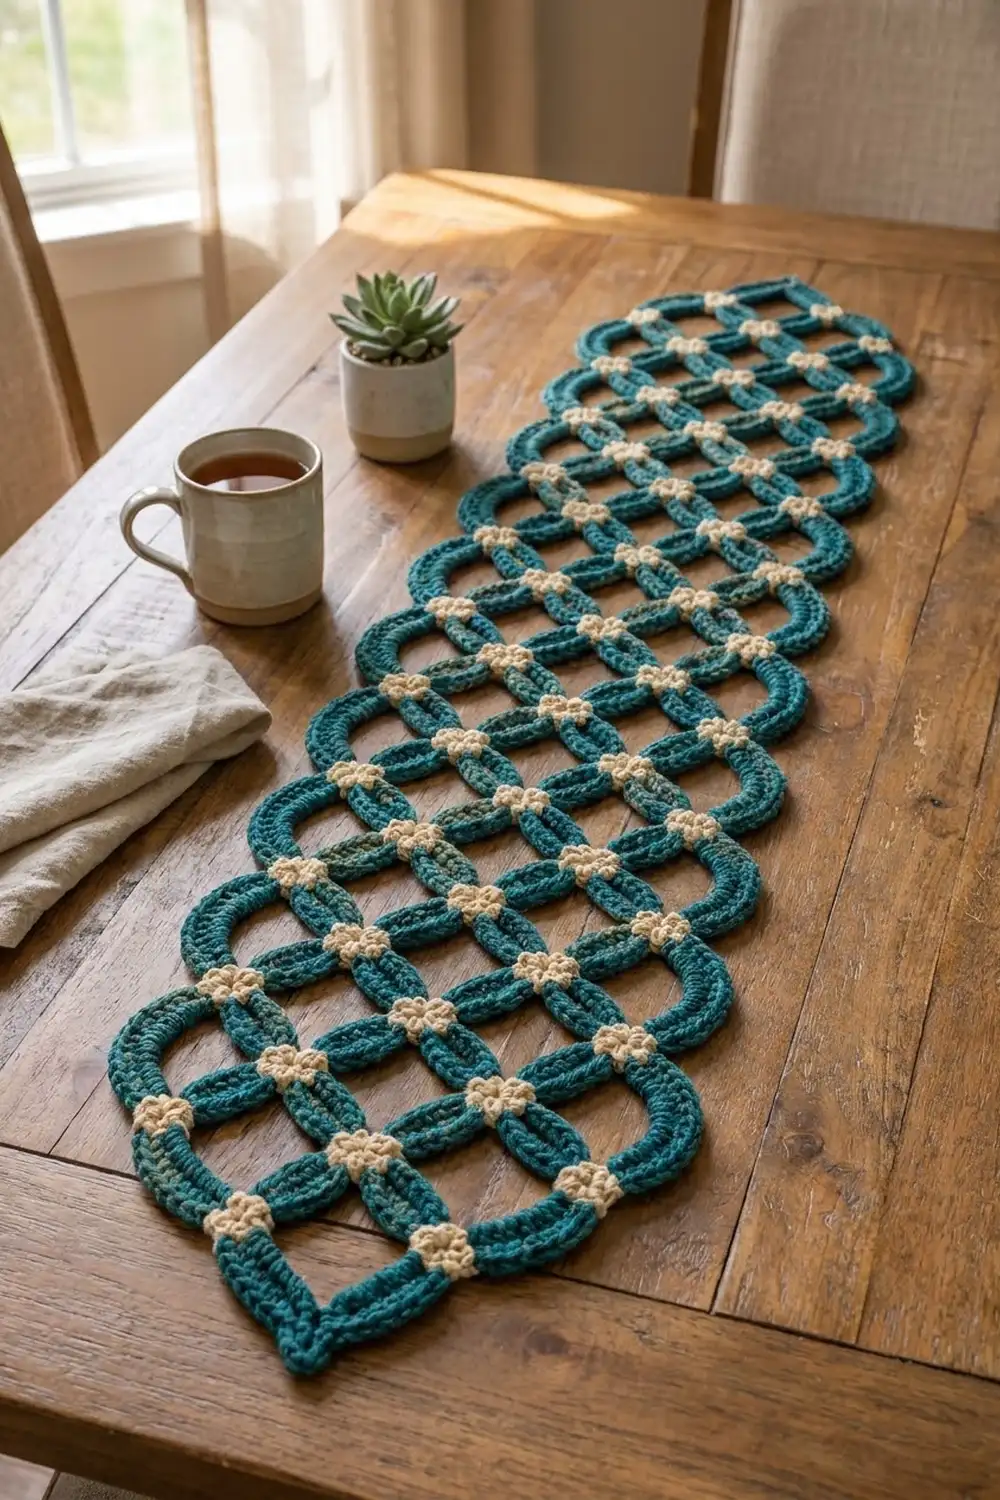
The Seaglass Lattice Panel is an openwork piece with a leaf-shaped outline and a pointed tip at each end. Thick teal arcs curve between the intersection points, so the openings turn into pointed ovals and curved diamonds. Each intersection is covered by a small cream puff flower, so a soft, textured dot sits at every crossing.
The color pairing is deep teal and warm cream. The look is somewhere between vintage filet lace and modern macramé: graphic, airy and calm. Use the panel as a table centerpiece, a dresser mat or a wall hanging.
This pattern uses US crochet terms. After blocking, the panel measures 8 in (20.3 cm) wide by 18 in (45.7 cm) long from tip to tip.
The lattice is made as one continuous piece, working down from the top tip in passes of foundation double crochet arcs. Each pass hangs new arcs from the intersection points of the pass before. Next you work one round of single crochet border around the scalloped outline. Last, you make 22 small cream flowers and sew one over each intersection.
Finished Size and Construction
- Finished size: 8 in (20.3 cm) wide x 18 in (45.7 cm) long
- Skill level: Intermediate
- Terminology: US crochet terms
- Yarn weight: Worsted (#4)
- Hook: 5.0 mm (H-8)
- Number of pieces: 1 lattice panel, plus 22 small appliqué flowers
- Layout: 9 staggered node rows (2-3-2-3-2-3-2-3-2), with a single tip above and below
- Piece size (lattice, before border): 7.25 in (18.4 cm) wide x 17.25 in (43.8 cm) long
- Border depth: 3/8 in (1.0 cm) per side
Materials
Use a smooth worsted-weight cotton or cotton blend. The arcs need crisp stitch definition and should stay firm, so avoid fuzzy or very stretchy yarns.
- Teal (Color A): 60 g / 110 m, for the lattice and border
- Cream (Color B): 20 g / 36 m, for 22 flowers
The quantities include a margin of about 20-25% for swatching and sewing tails.
Tools
- 5.0 mm (H-8) crochet hook
- Tapestry needle
- Scissors
- 6 locking stitch markers
- Blocking mat, rust-proof pins and a spray bottle
- Tape measure
Abbreviations (US Terms)
- ch – chain
- sl st – slip stitch
- sc – single crochet
- fdc – foundation double crochet
- st(s) – stitch(es)
- sp – space
- yo – yarn over
Foundation double crochet (fdc) arc. First fdc: ch 3, yo, insert hook in 3rd ch from hook, yo and pull up a loop, yo and draw through 1 loop (this makes the base chain), [yo and draw through 2 loops] twice. The skipped chains are not counted. Each following fdc: yo, insert hook under the 2 strands of the base chain of the previous fdc, yo and pull up a loop, yo and draw through 1 loop, [yo and draw through 2 loops] twice. Every arc in this pattern starts with a first fdc.
Puff: [yo, insert hook in st, yo and pull up a loop to 1/2 in (1.3 cm)] 3 times, yo and draw through all 7 loops.
Anchor sc: insert hook under the base chain of the stated center fdc (or into the ring), then complete a sc. The anchor sc is the node.
Loop types:
- I-loop (17 fdc): 8 fdc, 1 center fdc (9th), 8 fdc.
- Opening E-loop (23 fdc): 14 fdc edge arc, 1 center fdc (15th), 8 fdc.
- Closing E-loop (23 fdc): 8 fdc, 1 center fdc (9th), 14 fdc edge arc.
Gauge and Checkpoints
Fdc gauge: 10 fdc = 3.5 in (8.9 cm), measured along a relaxed strip.
So 8 fdc = 2.8 in (7.1 cm), 14 fdc = 4.9 in (12.4 cm) and one I-loop is about 6 in (15.2 cm).
Test piece first. Make one 17-fdc strip and one flower. The strip should measure about 6 in (15.2 cm) and the flower 0.75 in (1.9 cm) across.
Checkpoints (measure with the piece lightly spread on a table):
- After Pass 2: 3.5 in (8.9 cm) from tip to the Row 2 edge nodes; 6.25 in (15.9 cm) between the edge nodes
- After Pass 4: 7 in (17.8 cm) from the tip
- After Pass 6: 10.5 in (26.7 cm) from the tip
- After Pass 8: 14 in (35.6 cm) from the tip
- After Pass 10: 17.25 in (43.8 cm) from tip to tip, 7.25 in (18.4 cm) at the widest scallops
- After border and blocking: 8 x 18 in (20.3 x 45.7 cm)
If your strip is too long, change to a 4.5 mm hook. If it is too short, change to a 5.5 mm hook. Arc length controls everything in this pattern, so correct it before you start.
Lattice Panel
Work with Color A throughout. Keep each arc flat and untwisted. Before anchoring a loop, let it hang free and check that the ribbed fdc tops all face the same way.
Top tip: ch 4, sl st in 1st ch to form a ring. This ring is tip T.
Pass 1 (Node Row 1: 2 nodes)
Work 1 I-loop, anchor sc in ring. Work 1 I-loop, anchor sc in ring.
You now have 2 petals hanging from T. The center fdc of the first petal is node n1. The center fdc of the second petal is node n2. Mark both.
Pass 1 count: 34 fdc, 2 anchor sc.
Pass 2 (Node Row 2: 3 nodes)
- Opening E-loop: work 23 fdc, then anchor sc in n2. The 15th fdc is the new edge node E2.
- I-loop: work 17 fdc, then anchor sc in n1. The 9th fdc is the new center node C.
- Closing E-loop: work 23 fdc, then anchor sc in ring T. The 9th fdc is the new edge node E1.
- Return: sl st loosely in each of the last 14 fdc, then sl st in the 9th fdc (E1). That is 15 sl st.
Pass 2 count: 63 fdc, 3 anchor sc, 15 sl st. Running total: 97 fdc.
Pass 3 (2 nodes)
- Starting at E1, work an I-loop and anchor sc in C. The 9th fdc is the new node n1.
- Work an I-loop and anchor sc in E2. The 9th fdc is the new node n2.
Pass 3 count: 34 fdc, 2 anchor sc.
Pass 4 (3 nodes)
Work as for Pass 2, but replace ring T with the previous E1:
- Opening E-loop: work 23 fdc, then anchor sc in n2. The 15th fdc is the new E2.
- I-loop: work 17 fdc, then anchor sc in n1. The 9th fdc is the new C.
- Closing E-loop: work 23 fdc, then anchor sc in the old E1. The 9th fdc is the new E1.
- Return: work 15 sl st as before.
Pass 4 count: 63 fdc.
Passes 5–9
- Passes 5, 7 and 9: work as Pass 3 (34 fdc each).
- Passes 6 and 8: work as Pass 4 (63 fdc each).
Move your markers to the newest nodes after every pass. After Pass 9 you have 9 node rows: 2-3-2-3-2-3-2-3-2. That is 22 nodes in total. Your hook is at E2 of Row 8.
Pass 10 (Bottom Tip)
- Work 15 fdc. The 15th fdc is the bottom tip B.
- Work 8 fdc, anchor sc in n2. Work 8 fdc, sl st under the base chain of B.
- Work 8 fdc, anchor sc in n1. Work 8 fdc, sl st in B.
- Work 14 fdc, anchor sc in E1 of Row 8.
- Fasten off and weave in the ends.
Pass 10 count: 61 fdc, 3 anchor sc, 2 sl st.
Lattice total: 34 + (4 x 63) + (4 x 34) + 61 = 483 fdc.
Check: tips T and B carry no flower. Each side has 5 edge arcs of 14 fdc (tip to E, E to E three times, E to tip) and 4 edge nodes.
Cream Flowers (Make 22)
Work with Color B.
- Rnd 1: Make a magic ring, ch 1, work 5 sc in the ring, sl st to the first sc. Pull the ring tight. (5 sc)
- Rnd 2: Ch 1, work (puff, ch 1) in each sc around, sl st to the top of the first puff. (5 puffs, 5 ch-1 sps)
Fasten off and leave a 10 in (25.4 cm) tail. Each flower measures 0.75 in (1.9 cm).
Border
Work with Color A.
Border gauge: 11 sc = 3 in (7.6 cm), so 18 sc = 4.9 in (12.4 cm). Work into the outer edge of each fdc, along whichever strands lie on the outside of the arc.
Rnd 1:
- Join at ring T. Ch 1, work (sc, ch 2, sc) in the ring.
- Side 1: [Along the next edge arc of 14 fdc, work 1 sc in each fdc, plus 1 extra sc in the 3rd, 6th, 9th and 12th fdc (14 + 4 = 18 sc). Then sc in the edge node.] Repeat 4 times. Work the 5th edge arc the same way (18 sc).
- At B, work (sc, ch 2, sc).
- Side 2: Work as for Side 1.
- Sl st to the first sc and fasten off.
Per side: (5 x 18) + 4 = 94 sc.
Rnd 1 total: 94 + 94 + 4 tip sc = 192 sc, plus 2 ch-2 tip sps.
Why the math works: Each edge arc is 14 fdc, about 4.9 in (12.4 cm) long. At border gauge, 18 sc covers the same 4.9 in (12.4 cm), so the scallops lie flat without ruffling or cupping. The single sc at each edge node keeps the dips between the scallops sharp. The ch-2 tip corners let the points turn cleanly. The round adds 3/8 in (1.0 cm) on every side, so 7.25 in (18.4 cm) + 0.75 in (1.9 cm) = 8 in (20.3 cm) wide and 17.25 in (43.8 cm) + 0.75 in (1.9 cm) = 18 in (45.7 cm) long.
Attach flowers: Center one flower over each of the 22 nodes, including the 8 edge nodes. Use the tail to stitch down through the flower center and around the node 3–4 times. Then tack between the puffs at 2 opposite points and weave in the end on the back.
Final Blocking
- Soak the panel in cool water for 10 minutes, then press the water out in a towel. Do not wring it.
- Lay the panel right side up on the blocking mat.
- Pin tips T and B 18 in (45.7 cm) apart.
- Pin the 8 edge nodes so that the nodes on opposite sides sit 6.25 in (15.9 cm) apart, before the border width is added. Space the edge nodes evenly down the length.
- Pin the crest of each scallop so that the widest point measures 8 in (20.3 cm).
- Nudge the inner nodes into straight staggered rows. Let the diagonal arcs bow evenly so the ovals match.
- Mist the flowers and press them flat with your fingertips.
- Leave the panel to dry completely before unpinning.
Final Quality-Control Checklist
- 22 nodes in rows of 2-3-2-3-2-3-2-3-2, each covered by a flower
- No twisted arcs, and all fdc ribs facing the same way
- Each side has 5 scallops with 18 sc each and 4 edge-node sc
- The tips are sharp, with ch-2 points
- The panel measures 8 x 18 in (20.3 x 45.7 cm) and lies flat
- All ends are woven in invisibly on the back
Troubleshooting
- Arcs twist: Before each anchor sc, rotate the loop so the ribs face up.
- Lattice is pulling narrow: Your edge arcs are tight. Check the 14-fdc length, which should be 4.9 in (12.4 cm).
- Scallops ruffle: Drop 1 of the 4 extra sc per arc.
- Scallops cup: Add a 5th extra sc in the 7th fdc of each arc.
- The right edge looks thicker: This comes from the return sl sts. The border evens out both sides, and blocking does the rest.
- Flowers look flat: Pull the puff loops up taller, to 5/8 in (1.6 cm).
Care
Hand wash in cool water with mild soap, press dry in a towel, and lay flat to dry. Pin the panel back into shape if needed.
Final Notes
Everything in this pattern follows from one measurement chain. 10 fdc = 3.5 in (8.9 cm), which makes each 8-fdc diagonal 2.8 in (7.1 cm) and each 14-fdc edge arc 4.9 in (12.4 cm). Those arcs give a 7.25 x 17.25 in (18.4 x 43.8 cm) lattice. The 3/8 in (1.0 cm) border brings it to a finished 8 x 18 in (20.3 x 45.7 cm). If your test strip measures right, the rest of the panel will follow.
Happy crocheting!