

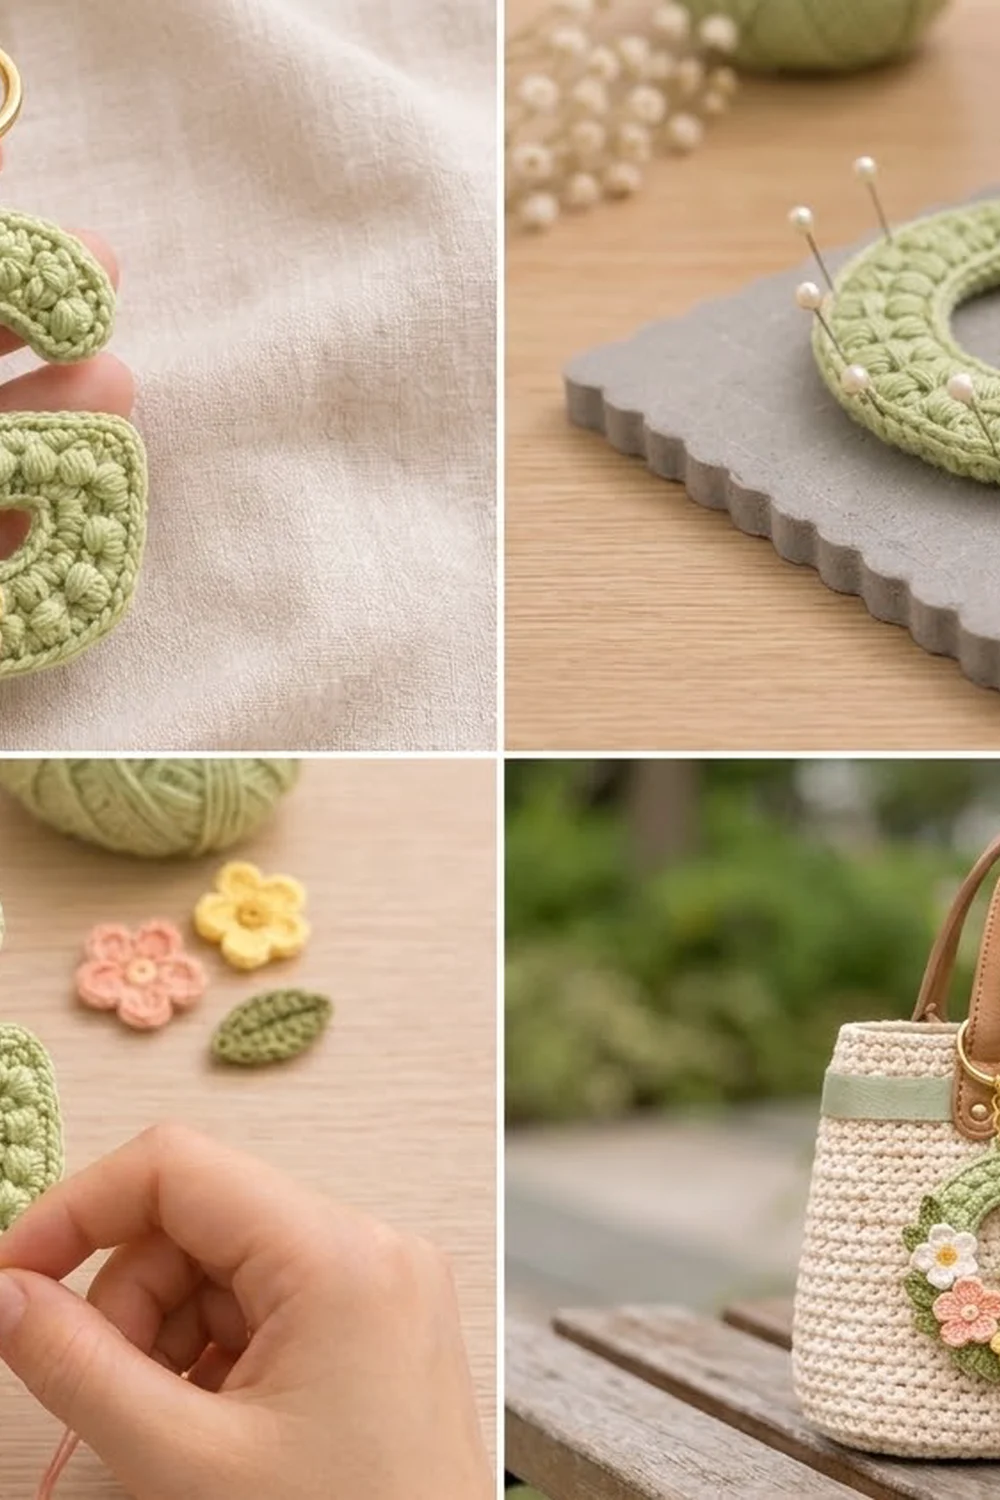
This is a chunky, textured letter G that you can hang from a key ring, a zipper pull, or a tote handle. The letter is worked in soft sage green. Two lines of puff stitches run down the middle of every stroke, and a smooth single crochet edge outlines the whole shape.
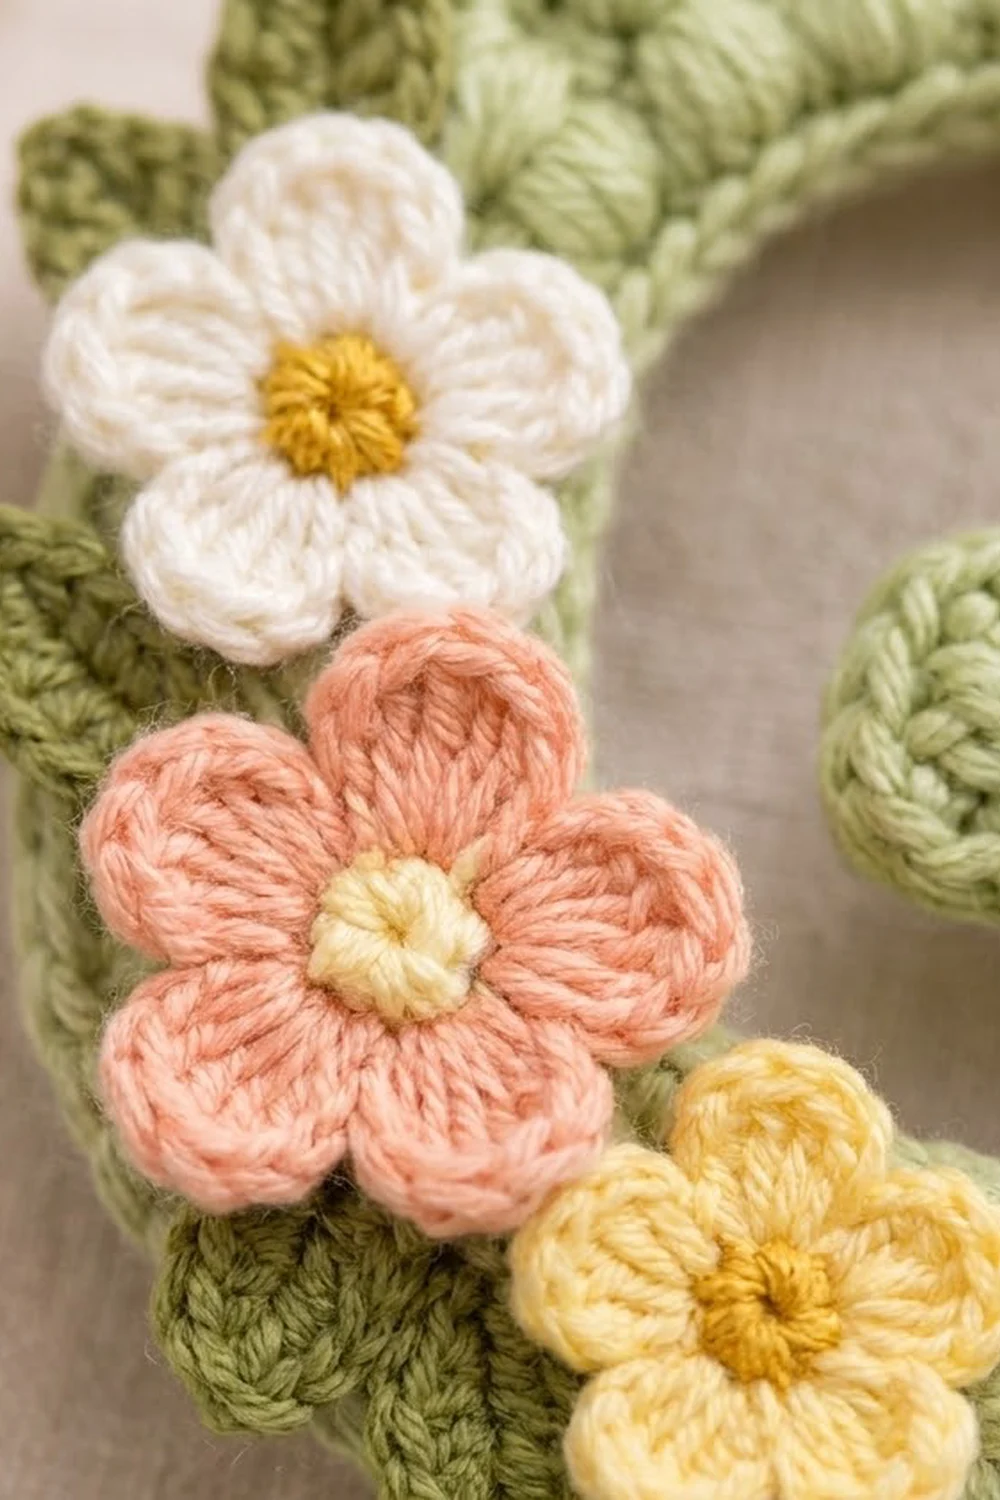
A small posy decorates the lower left curve. It has three five-petal flowers, one white, one peach, and one pale yellow, tucked into four olive green leaves. A short hanging loop at the top holds a gold key ring.
The pattern uses US crochet terms. The finished letter measures about 3.75 in (9.5 cm) wide and 4 in (10.2 cm) tall, plus a 0.5 in (1.3 cm) hanging loop.
The construction is simple to explain. You chain along the center line of the G, then work three rounds all the way around that chain: a single crochet round, a puff round, and a single crochet border. Increases on the outer edge and decreases on the inner edge bend the strip into the G’s curve. The flowers and leaves are made separately and sewn on.
Finished Size and Construction
- Finished size: about 3.75 in (9.5 cm) wide × 4 in (10.2 cm) tall, not counting the loop
- Skill level: Easy-Intermediate
- Terminology: US
- Yarn weight: Sport (2) cotton or cotton blend
- Hook: 3.0 mm (between US C-2 and D-3)
- Number of pieces: 1 letter, plus 3 flowers and 4 leaves sewn on as appliqués
- Layout: a single letter G, with the flowers clustered on the lower left outer curve
- Stroke width: about 1.1 in (2.8 cm) after the border
- Size before border: about 3.45 in (8.8 cm) × 3.7 in (9.4 cm), with a stroke width of 0.8 in (2.0 cm)
- Border depth: one round, about 0.15 in (0.4 cm) on each edge
Materials
Choose a smooth, mercerized sport-weight cotton. It shows the puff stitches clearly and holds its shape on a busy bag. Avoid fuzzy yarns, because they blur the outline.
- Sage green (letter): 10 g / 31 m
- Olive green (leaves): 2 g / 6 m
- White (flower): 2 g / 6 m
- Peach (flower): 2 g / 6 m
- Pale yellow (flower and one center): 2 g / 6 m
- Golden yellow (centers): 1 g / 3 m
Tools:
- 3.0 mm crochet hook
- Tapestry needle
- Gold key ring, 1 in (2.5 cm), with a short chain and jump ring
- Stitch markers (4 or more)
- Blocking mat, rustproof pins, and a spray bottle
- Scissors
All quantities include a small margin for swatching and sewing tails.
Abbreviations (US Terms)
- ch – chain
- sl st – slip stitch
- sc – single crochet
- hdc – half double crochet
- dc – double crochet
- sc2tog – single crochet 2 together
- st(s) – stitch(es)
- yo – yarn over
- rep – repeat
Puff stitch (puff): *Yo, insert the hook in the stitch, yo, and pull up a loop to about 0.25 in (0.6 cm). Rep from * 2 more times (7 loops on hook). Yo and draw through all 7 loops. Do not add a closing chain. Each puff counts as 1 stitch.
Gauge and Checkpoints
Gauge: 12 sc and 12 rows = 2 in (5.1 cm), which is 6 sc per 1 in (2.5 cm).
Work a small swatch first. The letter is a single piece, so the letter itself is your real test. Check it at each of these stages:
- Foundation chain: 55 ch, lying relaxed, measures about 9 in (22.9 cm).
- After Round 1: the strip is about 0.45 in (1.1 cm) wide, and it is already starting to curve.
- After Round 2: the stroke is 0.8 in (2.0 cm) wide, and the G measures about 3.45 in (8.8 cm) × 3.7 in (9.4 cm).
- After Round 3: the stroke is 1.1 in (2.8 cm) wide, and the G measures about 3.75 in (9.5 cm) × 4 in (10.2 cm).
If it is too big: go down to a 2.75 mm hook. If it is too small or stiff: go up to a 3.25 mm hook. If the curve looks ruffled, your increases are too loose, so tighten your tension on the outer edge. If the curve cups, you are working too tightly.
The Letter
Mapping the Chain
Ch 55. The 2nd ch from the hook is position P1, and the last ch (the first one you made) is P54. Each position has this job:
- P1: crossbar tip (the inner end of the G’s bar)
- P2–P6: crossbar (5)
- P7: corner 1, where the crossbar meets the spur
- P8–P10: spur (3)
- P11: corner 2, where the spur meets the arc
- P12–P47: arc (36)
- P48–P53: top arm (6)
- P54: top terminal
Side 1 (the top of the chain) becomes the inner edge. Side 2 (the free loops) becomes the outer edge. Worked right-handed, the G reads correctly from the front. Left-handed crocheters will get a mirror image, so display the back side instead. The puffs show on both faces.
Round 1 (Foundation Round)
Sc in P1 (tip, 1 st).
Inner edge (Side 1): Sc in P2–P5 (4). Sc2tog over P6–P7. Sc in P8–P9 (2). Sc2tog over P10–P11. Over the arc, work (sc in next 5, sc2tog) 5 times, then sc in next 1 (31 sts). Sc in P48–P53 (6). Inner total: 45 sts.
Terminal: 3 sc in P54 (3).
Outer edge (Side 2), working in the free loops: Sc in P53–P48 (6). Over the arc, work (sc in next 6, 2 sc in next) 5 times, then sc in next 1 (41 sts). 3 sc in P11. Sc in P10–P8 (3). 3 sc in P7. Sc in P6–P2 (5). Outer total: 61 sts.
Tip: 2 sc in P1. Join with a sl st to the first sc.
Round 1 total: 1 + 45 + 3 + 61 + 2 = 112 sts. Place a marker in the middle sc of each outer corner.
Round 2 (Puff Round)
Ch 1 (does not count). 2 sc in the first st (2).
Inner edge (45): Sc, puff, sc, sc2tog, puff, sc2tog (6 sts made from 8). Over the arc, work (puff, sc, puff, sc, sc2tog) 5 times, then puff (26 sts made from 31). Over the top arm, work (sc, puff) 3 times (6). Inner total: 38 sts.
Terminal: 2 sc in each of the next 3 sts (6).
Outer edge (61): Over the top arm, work (puff, sc) 3 times (6). Over the arc, work (puff, sc, puff, sc, puff, sc, puff, 2 sc in next) 5 times, then puff (46 sts made from 41). At corner 2, work sc, 3 sc in the marked st, sc (5). Over the spur, work puff, sc, puff (3). At corner 1, work sc, 3 sc in the marked st, sc (5). Over the crossbar, work sc, puff, sc, puff, sc (5). Outer total: 70 sts.
Tip: 2 sc in each of the last 2 sts (4). Join.
Round 2 total: 2 + 38 + 6 + 70 + 4 = 120 sts. Move the markers to the middle sc of each 3-sc corner group.
Push each puff gently toward the front as you go.
Border
Border gauge: 6 sc per 1 in (2.5 cm), the same as the body. Keep the tension even so the outline stays smooth.
Round 3 (Single Crochet Border)
Ch 1 (does not count). Sc in the first st, then 2 sc in the next st (3).
Inner edge (38): Sc in next 3, sc2tog, sc in next 1 (5 sts made from 6). Over the arc, work (sc in next 3, sc2tog) 5 times, then sc in next 1 (21 sts made from 26). Sc in next 6 (6). Inner total: 32 sts.
Terminal: (Sc, 2 sc in next) 3 times (9).
Outer edge (70): Sc in next 6 (6). Over the arc, work (sc in next 6, 2 sc in next) 6 times, then sc in next 4 (52 sts made from 46). At corner 2, work sc in next 2, 3 sc in the marked st, sc in next 2 (7). Sc in next 3 (3). At corner 1, work sc in next 2, 3 sc in the marked st, sc in next 2 (7). Sc in next 5 (5). Outer total: 80 sts.
Tip: (Sc, 2 sc in next) 2 times (6). Join with a sl st to the first sc.
Round 3 total: 3 + 32 + 9 + 80 + 6 = 130 sts. Fasten off and weave in the ends.
Hanging Loop
With the front facing, join sage green with a sl st in the 6th st of the outer top-arm edge, counting from the terminal. This puts the loop at the top of the G, where the arm meets the arc. Ch 8, then sl st in the same st. Work 12 sc into the ch-8 space and sl st at the base. Fasten off. The loop stands about 0.5 in (1.3 cm) tall.
Why the Math Works
Each round sits about 0.17 to 0.2 in (0.4 to 0.5 cm) farther from the center chain. That makes the outer arc longer every round and the inner arc shorter. The 36 arc positions grow to 41, 46, and then 52 stitches on the outside, and they shrink to 31, 26, and then 21 on the inside. That matches the circumference of the curve at each distance, so the G lies flat without cupping or ruffling.
The ends follow semicircle growth of 3, 6, and 9 stitches. The outer corners gain 2 stitches per round around a fixed center stitch, which keeps them crisp.
Flowers (Make 3)
Make one white flower with a golden yellow center, one peach flower with a pale yellow center, and one pale yellow flower with a golden yellow center.
Center: With the center color, make a magic ring and work 5 sc into it. Pull the ring closed and join with a sl st to the first sc. Fasten off (5 sts).
Petals: Join the petal color with a sl st in any sc. In that same st work (ch 2, 2 dc, ch 2, sl st). *Work (sl st, ch 2, 2 dc, ch 2, sl st) in the next sc. Rep from * 3 more times (5 petals). Join and fasten off, leaving an 8 in (20.3 cm) tail.
Each flower measures about 1 in (2.5 cm) across.
Leaves (Make 4)
With olive green, ch 6. Working from the 2nd ch from the hook: sc, hdc, dc, hdc, then (sc, ch 2, sc) in the last ch for the tip. Rotate and work along the other side of the chain: hdc, dc, hdc, sc. Sl st to the first sc. Fasten off, leaving an 8 in (20.3 cm) tail.
Each leaf is about 0.8 in (2.0 cm) long.
Assembly
Lay the G flat with the front up. Place the white flower on the left outer curve, about halfway down. Overlap the peach flower slightly below and to the right of it, then add the yellow flower at the bottom curve, just touching the peach one.
Tuck the leaves behind the flower edges. Put one above the white flower, one to its left, one below the peach flower, and one beside the yellow flower. Let the leaf tips stick out about 0.25 in (0.6 cm) past the border.
Sew the leaves on first, then the flowers. Use small stitches around each center and under the petal bases. Don’t let the stitches show on the back.
Open the jump ring, thread it through the hanging loop, and close it securely.
Final Blocking
- Before adding the hardware, mist the letter until it is damp but not soaked.
- Pin it flat on the mat, front up, and shape it to 3.75 in (9.5 cm) × 4 in (10.2 cm).
- Pin the outer curve every 0.5 in (1.3 cm) so it forms an even arc.
- Square the two outer corners and the end of the crossbar.
- Open up the inner curve without stretching the inner edge.
- Fluff the puffs with your fingertip.
- Let it dry completely, at least 6 hours.
- Steam the flowers lightly. Never press them flat.
Final Quality-Control Checklist
- Round totals are 112, 120, and 130.
- The outer edge has 80 border sts, and the inner edge has 32.
- The stroke is an even 1.1 in (2.8 cm) wide all the way around.
- The G reads correctly from the front.
- Both outer corners are sharp.
- Every puff is plump and leans to the front.
- The flowers and leaves are firmly attached, with no loose petals.
- The hanging loop is centered at the top and is secure.
- All ends are woven in invisibly.
Troubleshooting
The curve ruffles: Your outer increases are too loose. Rework Round 3 with tighter tension, or skip one increase.
The curve cups: Go up a hook size for Rounds 2 and 3.
The G is mirrored: Use the back as the front. This happens automatically for left-handed crocheters.
The puffs look flat: Pull the loops up a little taller, to 0.25 in (0.6 cm).
The corners are rounded: Check that each 3-sc group is centered on the marked st.
Gaps show at the inner corners: Sew them closed with a short tail.
Care
Hand wash in cool water, press out the water in a towel, and dry flat. Reshape the curve and fluff the puffs while the charm is still damp.
Final Notes
The measurement chain is short and easy to check. Gauge is 6 sc per 1 in (2.5 cm). The 55-ch foundation measures about 9 in (22.9 cm). After Round 1, the strip is 0.45 in (1.1 cm) wide. After Round 2, the G measures 3.45 in (8.8 cm) × 3.7 in (9.4 cm). After the border, it reaches 3.75 in (9.5 cm) × 4 in (10.2 cm), with a 1.1 in (2.8 cm) stroke.
If you check your stitch counts against 112, 120, and 130, the letter will lie flat and keep its shape. Once you know the method, you can chart other letters the same way.
Happy crocheting!