

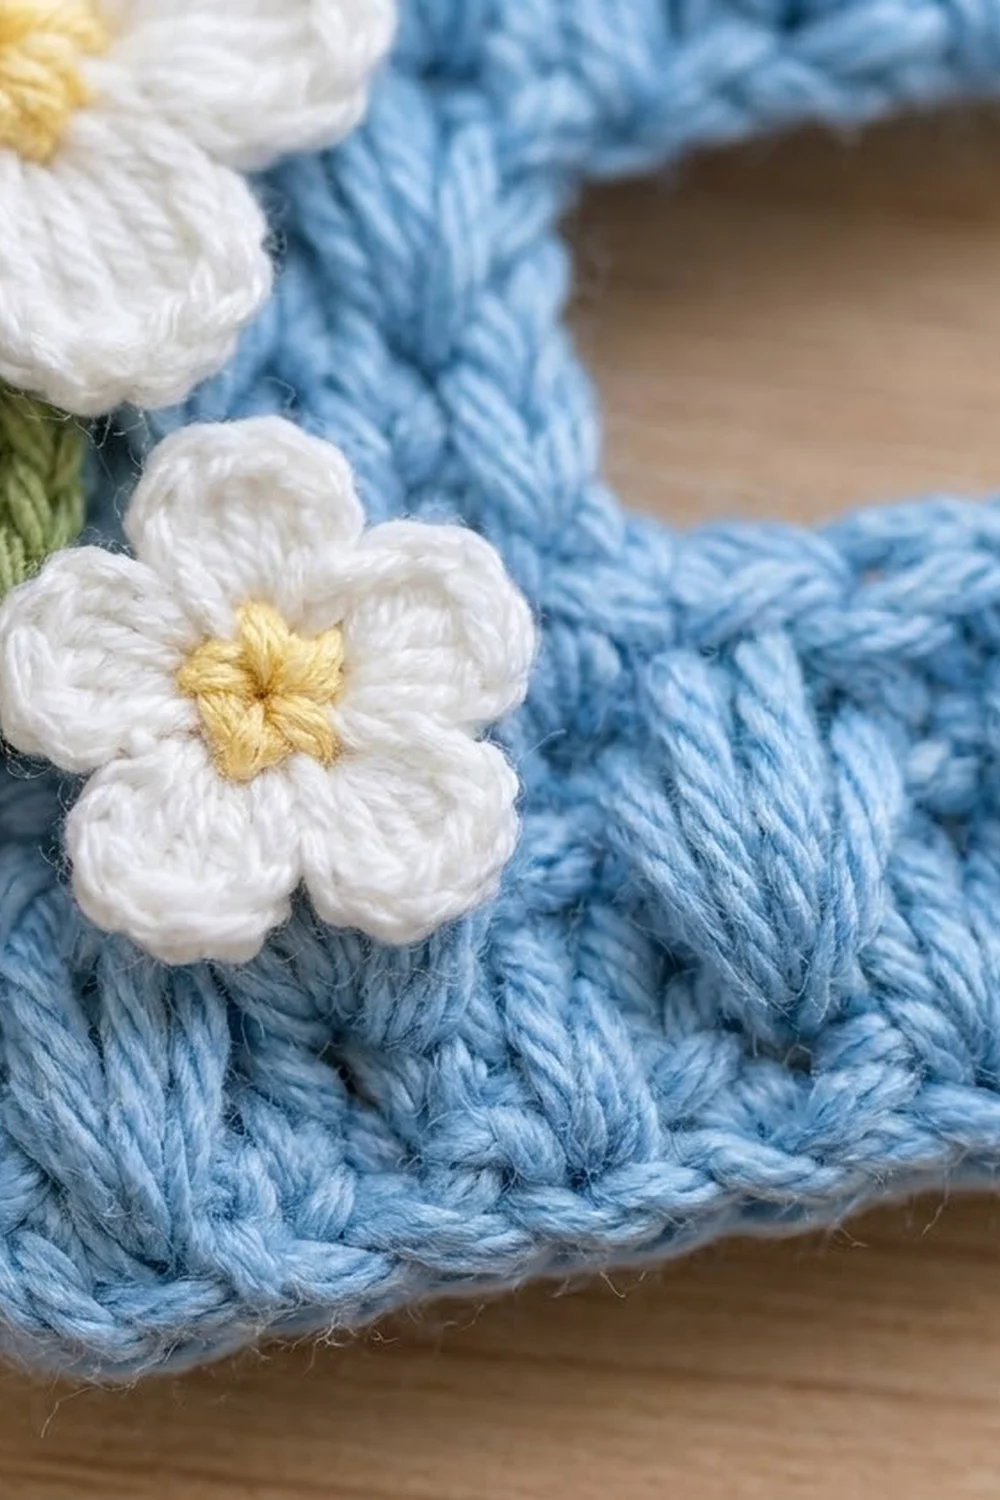
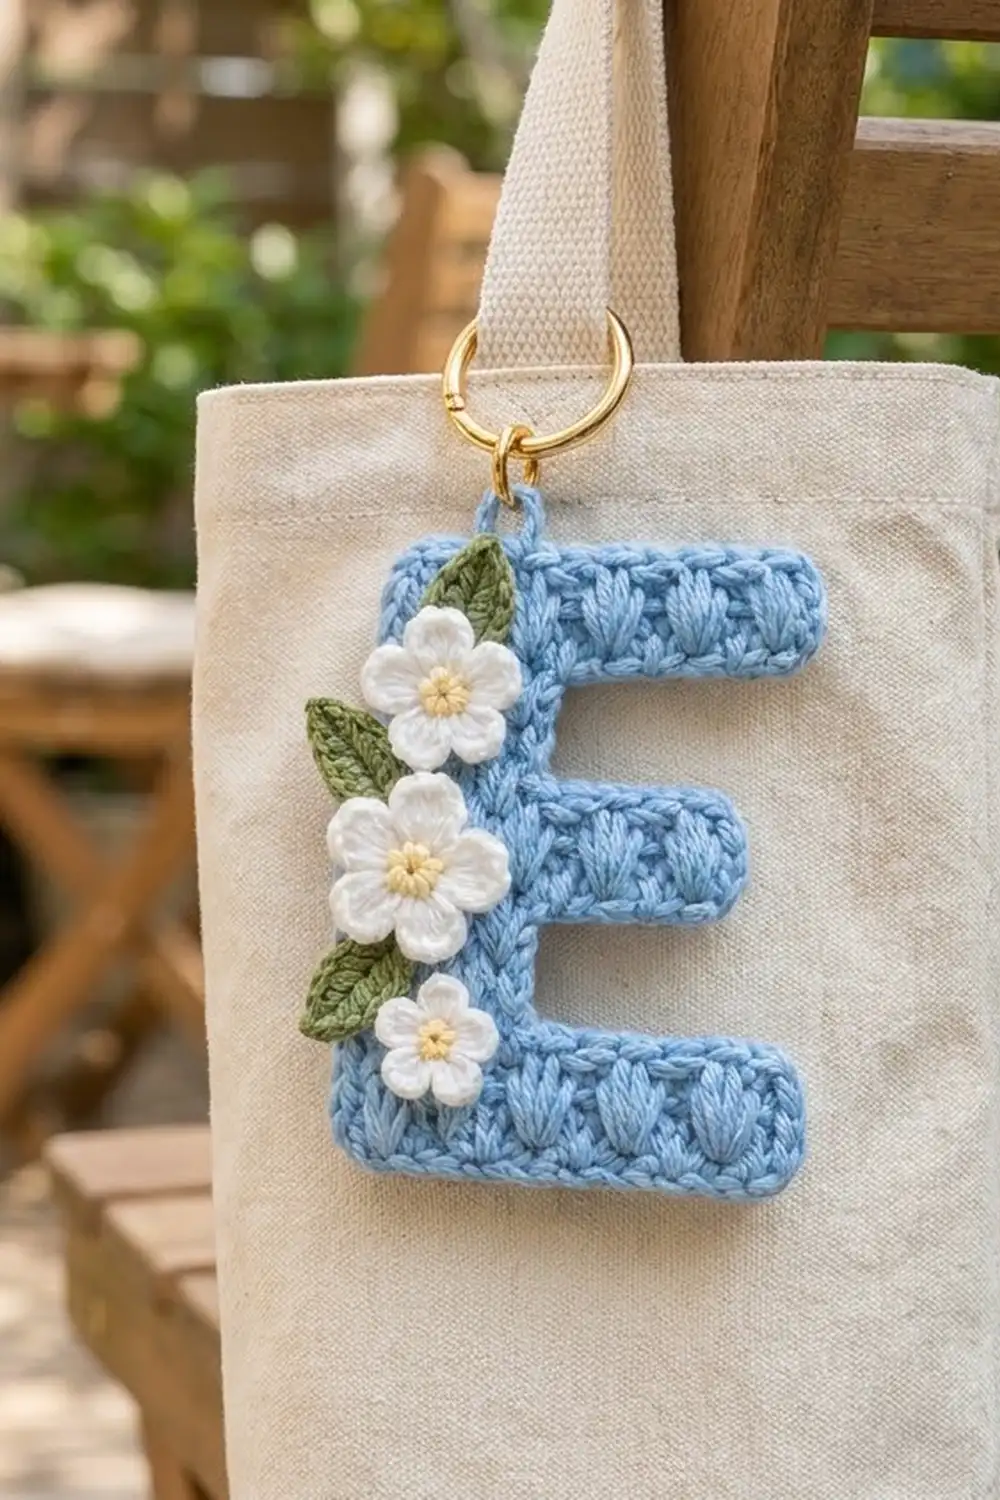
This keychain is a capital “E” with a puffy, textured surface. It’s worked in soft light blue and decorated with a cascade of white blossoms and green leaves. The puff stitches line up in neat vertical columns, so the letter looks almost woven, and one round of single crochet gives it a clean, rounded outline.
The palette is spring-like: sky blue for the letter, white petals, buttery yellow centers and leaf green. A gold ring clasp at the top lets you clip it to a tote bag, backpack or set of keys. It also makes a sweet personalized gift.
The pattern uses US crochet terms. The finished letter measures 3 in (7.6 cm) wide and 4.6 in (11.7 cm) tall, not counting the hanging loop.
You work the letter flat in rows from the bottom up. The spine is the only part worked between the arms, and you add chains to extend each new arm. A single border round smooths the outline. Then you make two large flowers, one small flower and three leaves, and sew them down the left side.
Finished Size and Construction
- Finished size: 3 in (7.6 cm) wide × 4.6 in (11.7 cm) tall
- Skill level: Advanced beginner
- Terminology: US crochet terms
- Yarn weight: DK (light worsted, #3) cotton
- Hook: 3.5 mm (E-4)
- Number of pieces: 1 letter, plus 6 small sewn-on appliqués (3 flowers, 3 leaves)
- Layout: Single piece; no joining
- Letter size before border: 2.6 in (6.6 cm) wide × 4.2 in (10.7 cm) tall
- Border depth: 0.2 in (0.5 cm) on every side
Materials
Use a smooth, mercerized or combed DK cotton. Cotton holds the puff texture crisply and stands up to everyday handling on a bag. Avoid fuzzy or very stretchy yarn, because the keychain needs to keep its shape.
- Light blue (letter, border, loop): 12 g, about 28 m
- White (petals): 4 g, about 9 m
- Yellow (flower centers): 1 g, about 3 m
- Green (leaves): 2 g, about 5 m
All quantities include a safety margin of roughly 25%.
Tools:
- 3.5 mm (E-4) crochet hook
- Gold spring ring clasp or split ring, 1 in (2.5 cm) across
- Tapestry needle
- 2 stitch markers
- Rust-proof pins and a blocking mat
- Scissors
- Spray bottle
Abbreviations (US Terms)
- ch – chain
- sl st – slip stitch
- sc – single crochet
- hdc – half double crochet
- dc – double crochet
- sc2tog – single crochet 2 together
- st(s) – stitch(es)
- RS / WS – right side / wrong side
Puff stitch (puff): (Yarn over, insert hook in stitch, yarn over and pull up a loop to sc height) 3 times; 7 loops on hook. Yarn over, draw through all 7 loops, then ch 1 to close. The closing ch-1 does not count as a stitch. On the next row, work into the top of the puff and skip the closing chain.
Gauge and Checkpoints
Gauge: 5 sts = 1 in (2.5 cm) across. One puff row plus one sc row = 0.5 in (1.3 cm) tall. A sc row alone is about 0.2 in (0.5 cm) and a puff row about 0.3 in (0.8 cm).
Rows 1–4 of the pattern (the bottom arm) double as your test piece. Make them first and measure before going on.
Checkpoints:
- After Row 4: 2.6 in (6.6 cm) wide × 1.0 in (2.5 cm) tall
- After Row 7: 1.7 in (4.3 cm) tall; spine 1.0 in (2.5 cm) wide
- After Row 10: 2.5 in (6.4 cm) tall; middle arm 2.2 in (5.6 cm) wide
- After Row 13: 3.2 in (8.1 cm) tall
- After Row 17: 4.2 in (10.7 cm) tall × 2.6 in (6.6 cm) wide
- After the border: 4.6 in (11.7 cm) tall × 3 in (7.6 cm) wide
If your piece is too big, go down to a 3.25 mm hook. If it’s too small, go up to a 3.75 mm hook. If only the height is off, adjust how tall you pull up the puff loops: they should sit at sc height, not hdc height.
The Letter
Use light blue. On RS rows you’re working right to left, and the spine sits at the left edge of the RS, so every WS row begins at the spine.
Bottom Arm
Row 1 (WS): Ch 14, sc in 2nd ch from hook and in each ch across, turn. (13 sc)
Row 2 (RS): Ch 1, sc in first st, puff in next st, sc in next st; repeat from * 5 more times, turn. (13 sts: 7 sc, 6 puffs)*
Row 3 (WS): Ch 1, sc in each st across, turn. (13 sc)
Row 4 (RS): Repeat Row 2. (13 sts: 7 sc, 6 puffs)
Checkpoint: 2.6 in (6.6 cm) × 1.0 in (2.5 cm).
Lower Spine Gap
Row 5 (WS): Ch 1, sc in first 5 sts, turn. Leave the remaining 8 sts unworked. (5 sc)
Row 6 (RS): Ch 1, sc in first st, puff in next st, sc in next st, puff in next st, sc in last st, turn. (5 sts: 3 sc, 2 puffs)
Row 7 (WS): Ch 1, sc in each st across, then ch 7 and turn. (5 sc + 7 ch)
The 2 puffs in Row 6 sit directly above the matching puffs of Row 4, so the vertical columns continue up the spine.
Middle Arm
Row 8 (RS): Sc in 2nd ch from hook, puff in next ch, sc in next ch, puff in next ch, sc in next ch, puff in next ch. Continuing across the spine: sc in next st, puff in next st, sc in next st, puff in next st, sc in last st, turn. (11 sts: 6 sc, 5 puffs; 6 sts in the chain + 5 in the spine)
Row 9 (WS): Ch 1, sc in each st across, turn. (11 sc)
Row 10 (RS): Ch 1, sc in first st, puff in next st, sc in next st; repeat from * 4 more times, turn. (11 sts: 6 sc, 5 puffs)*
Checkpoint: 2.5 in (6.4 cm) tall. The middle arm is 2.2 in (5.6 cm) wide, 0.4 in (1.0 cm) shorter than the bottom arm.
Upper Spine Gap
Row 11 (WS): Ch 1, sc in first 5 sts, turn. Leave the remaining 6 sts unworked. (5 sc)
Row 12 (RS): Repeat Row 6. (5 sts: 3 sc, 2 puffs)
Row 13 (WS): Ch 1, sc in each st across, then ch 9 and turn. (5 sc + 9 ch)
Top Arm
Row 14 (RS): Sc in 2nd ch from hook, puff in next ch, sc in next ch; repeat from * 2 more times, puff in last ch. Continuing across the spine: sc in next st, puff in next st, sc in next st, puff in next st, sc in last st, turn. (13 sts: 7 sc, 6 puffs; 8 sts in the chain + 5 in the spine)*
Row 15 (WS): Ch 1, sc in each st across, turn. (13 sc)
Row 16 (RS): Repeat Row 2. (13 sts: 7 sc, 6 puffs)
Row 17 (WS): Ch 1, sc in each st across. Do not fasten off. (13 sc)
Checkpoint: 4.2 in (10.7 cm) tall × 2.6 in (6.6 cm) wide.
Border
Border gauge:
- Along stitch tops and chain undersides, work 1 sc per stitch, which matches the body’s 5 sts per 1 in (2.5 cm).
- Along row ends, work 1 sc into each sc row and 2 sc into each puff row. That’s 3 sc per 0.5 in (1.3 cm) pair of rows, enough to keep the taller puff rows from pulling in.
- At outer (convex) corners, work 3 sc into the corner stitch.
- At inner (concave) corners, work an sc2tog across the corner.
Round 1 (RS): Ch 1 and turn so the RS faces you. You’re at the top-right corner.
- Top edge: 3 sc in first st, sc in next 11 sts, 3 sc in last st. (17 sc)
- Left side: Working down the row ends of Rows 16 to 1, sc in each sc-row end and 2 sc in each puff-row end. (8 sc rows + 8 puff rows = 24 sc)
- Bottom edge: Working into the underside of the foundation chain, 3 sc in first ch, sc in next 11 ch, 3 sc in last ch. (17 sc)
- Bottom arm, right end: Work into the row ends of Rows 1–3. (1 + 2 + 1 = 4 sc)
- Bottom arm top: 3 sc in the end st of Row 4 (corner), then sc in the next 6 sts of Row 4. Sc2tog, working the first loop in the 8th st of Row 4 and the second loop in the Row 5 row end. (3 + 6 + 1 = 10 sts)
- Lower gap: 2 sc in the Row 6 row end. Sc2tog, working the first loop in the Row 7 row end and the second in the chain nearest the spine on the Row 8 foundation. (3 sts)
- Middle arm underside: Sc in the next 4 ch, then 3 sc in the tip ch. (7 sts)
- Middle arm, right end: Work into the Row 8 and Row 9 row ends (2 + 1 = 3 sc), then 3 sc in the end st of Row 10. (6 sts)
- Middle arm top: Sc in the next 4 sts of Row 10. Sc2tog, working the first loop in the 6th st of Row 10 and the second in the Row 11 row end. (5 sts)
- Upper gap: 2 sc in the Row 12 row end. Sc2tog, working the first loop in the Row 13 row end and the second in the chain nearest the spine on the Row 14 foundation. (3 sts)
- Top arm underside: Sc in the next 6 ch, then 3 sc in the tip ch. (9 sts)
- Top arm, right end: Work into the Row 14, 15 and 16 row ends. (2 + 1 + 2 = 5 sc)
Sl st to the first sc. (110 sts total) Fasten off and weave in the end.
Why the math works: Adding up the edges gives 17 + 24 + 17 + 4 + 10 + 3 + 7 + 6 + 5 + 3 + 9 + 5 = 110. Each convex corner’s 3 sc include the corner stitch itself, so none is counted twice. Each concave sc2tog takes up one stitch on each side of the inner corner, so the notches stay sharp instead of puckering. The border adds 0.2 in (0.5 cm) on all sides, so 2.6 in becomes 3 in (7.6 cm) and 4.2 in becomes 4.6 in (11.7 cm).
Hanging loop: Find the border sc directly above the center column of the spine (above the 3rd stitch from the left of Row 17). Join light blue there with a sl st, ch 10, and sl st in the same st. Work 14 sc into the ch-10 space and sl st to the first sc. Fasten off. The loop stands about 0.5 in (1.3 cm) tall.
Flowers and Leaves
Large Flower (make 2)
- Round 1: With yellow, make a magic ring and work 5 sc in it. Sl st to the first sc. (5 sc) Fasten off yellow.
- Round 2: Join white in any sc. (Ch 2, 3 dc, ch 2, sl st) all in the same st, then move to the next st and repeat 4 more times. (5 petals)*
The finished flower is about 1 in (2.5 cm) across.
Small Flower (make 1)
- Round 1: Same as the large flower.
- Round 2: Join white. (Ch 1, 3 hdc, ch 1, sl st) all in the same st, then move to the next st and repeat 4 more times. (5 petals)*
The finished flower is about 0.75 in (1.9 cm) across.
Leaf (make 3)
With green, ch 6.
- Side 1: Sc in 2nd ch from hook, hdc in next ch, dc in next ch, hdc in next ch, sc in last ch. (5 sts)
- Tip: Ch 2, sl st in 2nd ch from hook.
- Side 2: Working along the other side of the chain, sc in the same ch, hdc in next ch, dc in next ch, hdc in next ch, sc in next ch. (5 sts)
Sl st at the base and fasten off, leaving an 8 in (20.3 cm) tail. The leaf is about 1 in (2.5 cm) long.
Assembly:
- Place the pieces down the left spine, top to bottom: one large flower over the top-left corner, the second large flower level with the middle arm, and the small flower just above the bottom arm.
- Let each flower overhang the left border by about 0.2 in (0.5 cm).
- Tuck one leaf behind the top flower so it points up toward the loop. Tuck the other two behind the left edges, between the flowers.
- Sew the leaves on first, then the flowers, using small stitches through the yellow centers and under the petal bases.
- Clip the gold clasp through the hanging loop.
Final Blocking
- Lightly mist the letter (before sewing on the appliqués, if you can).
- Pin it RS up on a grid mat at 3 in (7.6 cm) × 4.6 in (11.7 cm).
- Pin all 8 outer corners square, and press the 4 inner notches into crisp right angles.
- Check that the middle arm measures 2.6 in (6.6 cm) wide, border included.
- Leave it to dry completely, about 2–4 hours.
- Unpin it, then sew on the appliqués.
Final Quality-Control Checklist
- Letter measures 3 in (7.6 cm) × 4.6 in (11.7 cm).
- Puff columns run straight up the spine and line up across the arms.
- The border has 110 sts and lies flat, with no ruffling at the row ends.
- Inner corners are sharp; outer corners are softly rounded.
- The hanging loop sits centered over the spine.
- Flowers are firmly attached and no petal tips flip up.
- All ends are woven in on the WS.
Troubleshooting
- Puffs lean or slant: Work into the top of the puff, not the closing ch-1.
- Rows grow by a stitch: Skip the closing ch-1 of each puff, and count to 13, 5 or 11 stitches at every row end.
- Border ripples on the sides: Work 1 sc (not 2) into a few puff-row ends.
- Border cups: Go up half a hook size for the border only.
- Inner corners gape: Make sure you’re using the sc2tog at each notch, not 2 separate sc.
- Flowers droop: Add a tacking stitch under each petal.
Care
Hand wash in cool water, press out the moisture in a towel, and dry flat. Remove the metal clasp before washing.
Final Notes
Here is the full measurement chain:
- Gauge: 5 sts = 1 in (2.5 cm); each puff row + sc row pair = 0.5 in (1.3 cm)
- Bottom arm (Rows 1–4): 2.6 in (6.6 cm) wide × 1.0 in (2.5 cm) tall
- Full letter (Row 17): 4.2 in (10.7 cm) tall
- Border: 110 sts, adding 0.2 in (0.5 cm) all around
- Finished keychain: 3 in (7.6 cm) × 4.6 in (11.7 cm)
Check each stage against these numbers and your blossom letter will come out true to size.
Happy crocheting!