

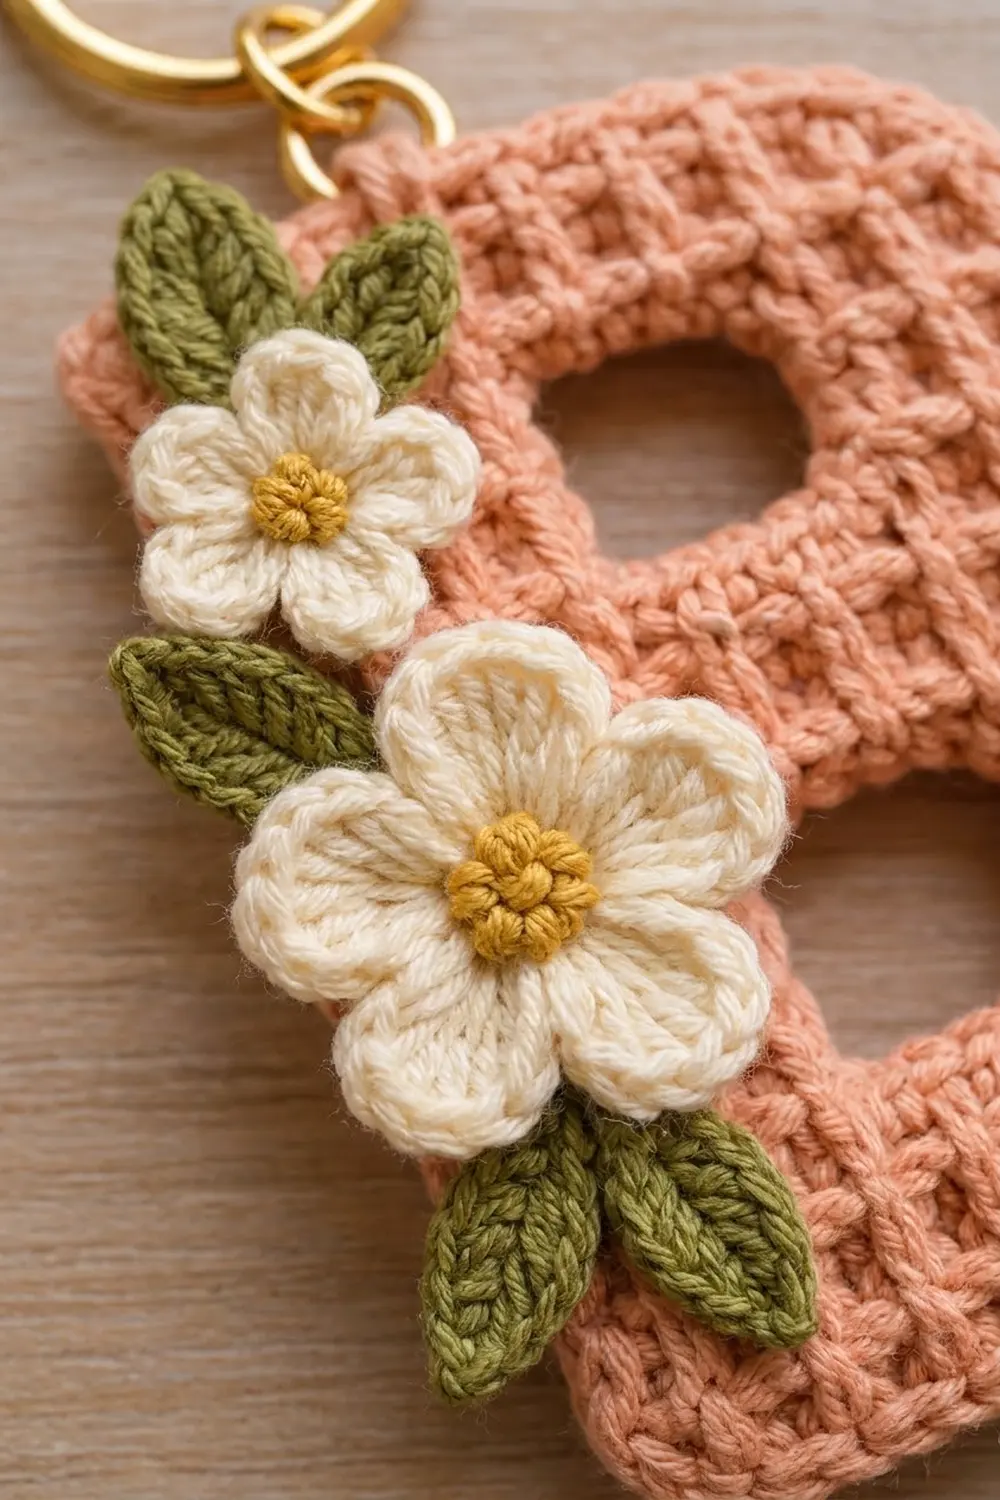
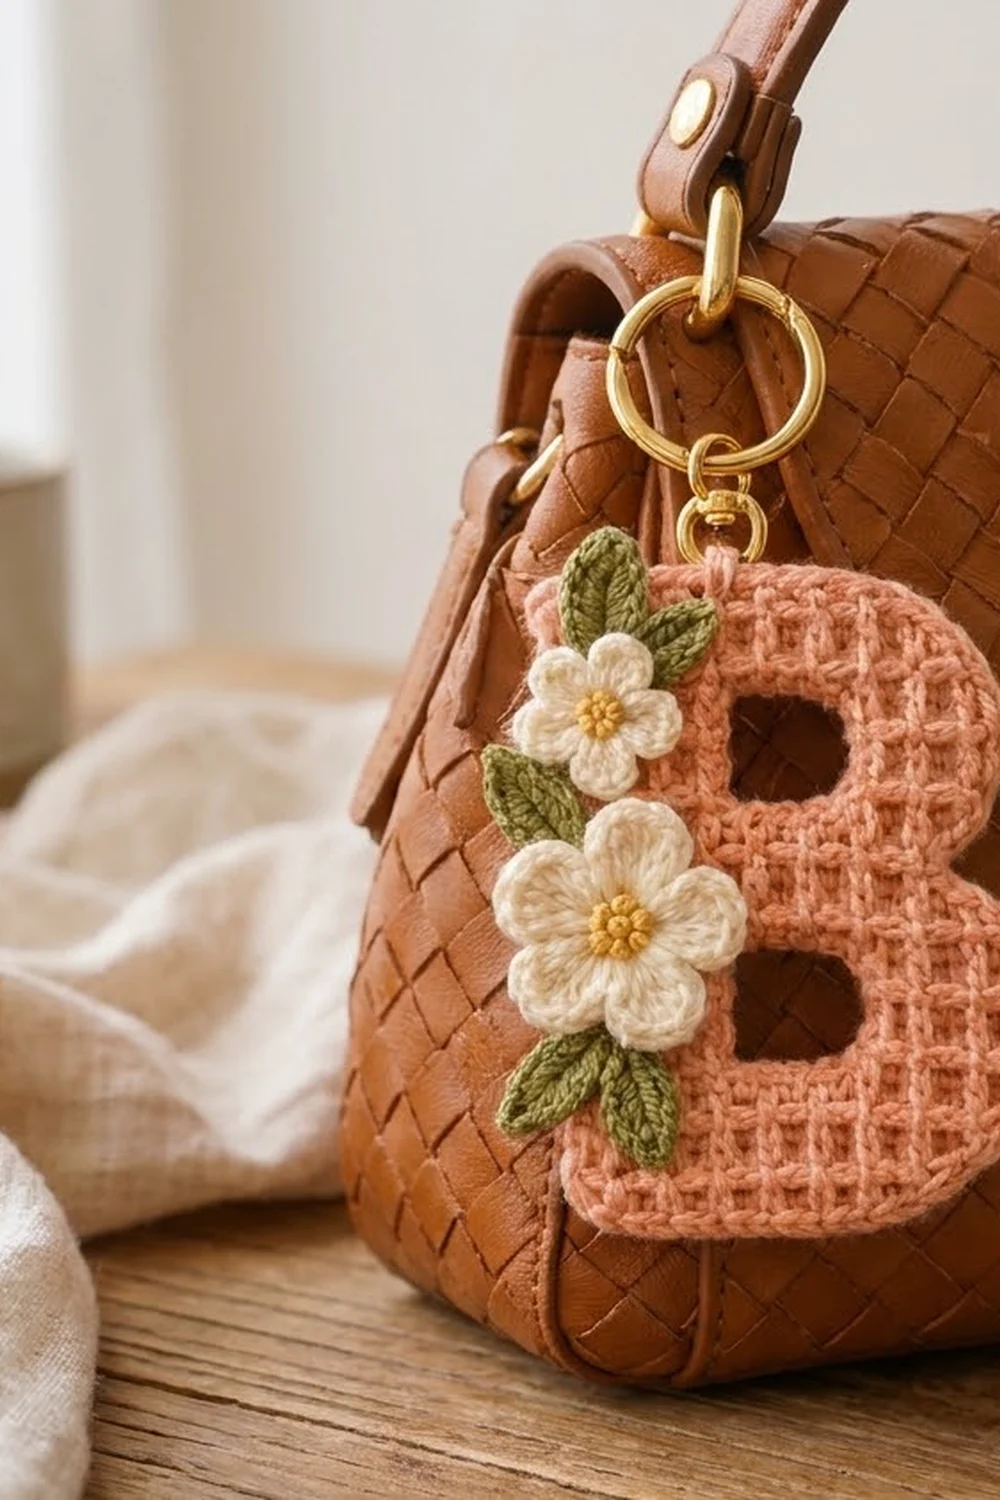
This letter B keychain combines a crisp square-grid texture with a small cluster of flowers. The letter is worked in warm peach cotton. Two cream blossoms with mustard centers sit on the stem, framed by five olive-green leaves.
The grid look comes from simple filet mesh: one double crochet and one chain, repeated. Every mesh square is the same size, so the letter shape is easy to count and the edges stay straight. One round of single crochet smooths the outside, and a slip stitch round tidies each counter hole.
The finished letter measures 3 in (7.6 cm) wide and 4.2 in (10.7 cm) tall. This pattern uses US crochet terms throughout.
You work the letter flat in rows from the bottom up. The rows split around the two counter holes, and a chain bridges over each one. After the border, you make two flowers and five leaves, sew them on, and attach the hardware.
Finished Size and Construction
- Finished size: 3 in (7.6 cm) wide x 4.2 in (10.7 cm) tall, without the key ring
- Skill level: Easy-intermediate
- Terminology: US terms
- Yarn weight: DK / light worsted (#3) cotton
- Hook: 3.0 mm
- Number of pieces: 1 letter panel, plus 2 flowers and 5 leaves sewn on as appliqués
- Layout: single letter, worked in rows from bottom to top
- Piece size: 9 meshes wide x 13 rows tall at its widest
- Size before border: 2.7 in (6.9 cm) wide x 3.9 in (9.9 cm) tall
- Border depth: 0.15 in (0.4 cm) on each side
Materials
Choose a smooth, mercerized or combed cotton in DK weight. Cotton shows the grid clearly, holds its shape on a keychain, and stays smooth with handling.
- Peach (MC): 10 g, about 24 m
- Cream (petals): 3 g, about 7 m
- Mustard yellow (centers): 1 g, about 2 m
- Olive green (leaves): 2 g, about 5 m
These quantities include extra yarn for testing gauge and for sewing tails.
Tools:
– 3.0 mm crochet hook
– Tapestry needle
– 8 mm gold jump ring and 1 in (2.5 cm) gold split key ring
– 2 pairs of jewelry pliers
– Rustproof pins and a blocking board with a grid
– Spray bottle
Abbreviations (US Terms)
- ch – chain
- sl st – slip stitch
- sc – single crochet
- sc2tog – single crochet 2 together
- hdc – half double crochet
- dc – double crochet
- tr – treble crochet
- sk – skip
- sp – space
- st(s) – stitch(es)
- MC – main color
Mesh: one dc post plus one ch-1 space. A row of n meshes has n + 1 dc posts and 2n + 1 stitches in total. A “ch 4” at the start of a row counts as the first dc plus ch 1.
Post numbering: posts are numbered from the stem edge, starting with post 1. Mesh 1 sits between posts 1 and 2.
Gauge and Checkpoints
Gauge: 10 meshes and 10 rows = 3 in (7.6 cm) in filet mesh. One mesh is 0.3 in (0.8 cm) square.
The letter itself is your test piece. Work Rows 1–2, then measure before going further.
- After Row 2: 2.7 in (6.9 cm) wide x 0.6 in (1.5 cm) tall
- After Row 6: 2.7 in (6.9 cm) wide x 1.8 in (4.6 cm) tall
- After Row 8: 2.4 in (6.1 cm) tall; Row 8 is 2.4 in (6.1 cm) wide
- After Row 13: 3.9 in (9.9 cm) tall; Row 13 is 2.1 in (5.3 cm) wide
- After border: 3 in (7.6 cm) x 4.2 in (10.7 cm)
If Row 2 is wider than 2.8 in (7.1 cm), switch to a 2.75 mm hook. If it is narrower than 2.6 in (6.6 cm), switch to a 3.25 mm hook. If the width is right but the rows are too tall, pull up the first loop of each dc a little less.
Letter Panel
The stem edge is the straight left side of the B. Odd rows run from the stem edge toward the bowl edge, and even rows run back toward the stem. When the stem is on your left, you are looking at the right side (RS). This is the side facing you on even rows.
Lower Section
With MC, ch 22.
Row 1: Dc in 6th ch from hook (the 5 skipped ch count as dc, ch 1 and a skipped base ch), ch 1, sk next ch, dc in next ch; repeat from * 7 more times. Turn. (9 meshes, 19 sts)*
Row 2: Ch 4, sk first ch-sp, dc in next dc, ch 1, dc in next dc; repeat from * across, working the last dc in the 4th of the 5 skipped beginning ch. Turn. (9 meshes, 19 sts)*
Lower Counter (Rows 3–5)
Stem section:
Row 3: Ch 4, sk first ch-sp, dc in next dc (post 2), [ch 1, dc in next dc] twice (posts 3 and 4). Turn. (3 meshes, 7 sts)
Row 4: Ch 4, sk first ch-sp, dc in next dc, ch 1, dc in next dc, ch 1, dc in 3rd ch of turning ch. Turn. (3 meshes)
Row 5: Repeat Row 4. Fasten off. (3 meshes)
Bowl section: Leave posts 5 and 6 of Row 2 unworked. The 3 meshes between posts 4 and 7 form the counter.
Row 3: With the same side facing you as for the stem section’s Row 3, join MC with sl st in post 7 of Row 2. Ch 4, sk ch-sp, dc in next dc, ch 1, dc in next dc, ch 1, dc in 3rd ch of Row 2’s turning ch (post 10). Turn. (3 meshes, 7 sts)
Rows 4–5: Work as for stem section Rows 4–5. Do not fasten off. (3 meshes each)
Lower Bridge and Waist
Row 6: Ch 4, sk ch-sp, dc in next dc, ch 1, dc in next dc, ch 1, dc in 3rd ch of turning ch (post 7). Ch 5 for the bridge. Dc in the last dc of the stem section’s Row 5 (post 4), [ch 1, dc in next dc] twice, ch 1, dc in 3rd ch of turning ch (post 1). Turn. (9 meshes: 7 + 5 + 7 = 19 sts)
Row 7: Ch 4, sk ch-sp, dc in next dc, [ch 1, dc in next dc] twice (post 4). Across the bridge: [ch 1, sk 1 ch, dc in next ch] twice (posts 5 and 6), ch 1, sk last ch, dc in next dc (post 7). [Ch 1, dc in next dc] twice (posts 8 and 9). Leave the last mesh unworked to form the waist notch. Turn. (8 meshes, 17 sts)
Row 8: Ch 4, sk ch-sp, dc in next dc, ch 1, dc in next dc; repeat from * across, working the last dc in 3rd ch of turning ch. Turn. (8 meshes, 17 sts)*
Upper Counter (Rows 9–11)
Stem section, Rows 9–11: Work as for lower stem section Rows 3–5 over posts 1–4. Fasten off. (3 meshes each)
Bowl section: Leave post 5 of Row 8 unworked. The 2 meshes between posts 4 and 6 form the upper counter.
Row 9: Join MC with sl st in post 6 of Row 8. Ch 4, sk ch-sp, dc in next dc, ch 1, dc in next dc, ch 1, dc in 3rd ch of Row 8’s turning ch (post 9). Turn. (3 meshes)
Rows 10–11: Work as for lower stem section Rows 4–5. Do not fasten off. (3 meshes each)
Upper Bridge and Top
Row 12: Ch 4, sk ch-sp, dc in next dc, ch 1, dc in next dc, ch 1, dc in 3rd ch of turning ch (post 6). Ch 3 for the bridge. Dc in the last dc of the stem section’s Row 11 (post 4), [ch 1, dc in next dc] twice, ch 1, dc in 3rd ch of turning ch. Turn. (8 meshes: 7 + 3 + 7 = 17 sts)
Row 13: Ch 4, sk ch-sp, dc in next dc, [ch 1, dc in next dc] twice (post 4). Ch 1, sk 1 ch, dc in next ch (post 5), ch 1, sk last ch, dc in next dc (post 6). [Ch 1, dc in next dc] twice (posts 7 and 8). Leave the last mesh unworked. Fasten off. (7 meshes, 15 sts)
Checkpoint: The letter should be 3.9 in (9.9 cm) tall. The lower counter is 0.9 in (2.3 cm) square, and the upper counter is 0.6 in x 0.9 in (1.5 cm x 2.3 cm).
Border
Work the border with the RS facing (stem on the left). It is one round of sc around the outside, then a slip stitch round inside each counter.
Border gauge: 2 sc per mesh along horizontal edges and 2 sc per row-end along vertical edges. Each sc covers 0.15 in (0.4 cm). Along tops and bottoms, work 1 sc in each ch-sp (or skipped ch) and 1 sc in or at the base of each dc. Along the sides, work 2 sc around each dc post.
Outer Round
The segment counts below are edge stitches only. Corner extras and decreases are listed separately.
Rnd 1: Join MC with sl st at the bottom-left corner, ch 1, then work:
- Bottom edge (9 meshes): 18 sc, ending at the bottom-right corner; 1 extra sc in the same place.
- Bowl edge, Rows 1–6 (6 row-ends): 12 sc; 1 extra sc at the top corner of Row 6.
- Top of the exposed Row 6 mesh: 2 sc. Work the 2nd sc together with the first sc of the next segment as sc2tog at the inside corner.
- Bowl edge, Rows 7–12 (6 row-ends): 12 sc, where the first is part of the sc2tog; 1 extra sc at the top corner of Row 12.
- Top of the exposed Row 12 mesh: 2 sc, working the 2nd sc together with the next sc as sc2tog.
- Row 13 end (1 row-end): 2 sc, where the first is part of the sc2tog; 1 extra sc at the corner.
- Top edge (7 meshes): 14 sc; 1 extra sc at the top-left corner.
- Stem edge (13 row-ends): 26 sc; 1 extra sc in the bottom-left corner. Sl st to first sc.
Count: 18 + 12 + 2 + 12 + 2 + 2 + 14 + 26 = 88 edge sc, + 6 corner extras − 2 for the sc2tog = 92 sc. Fasten off.
Why the math works: Every edge unit, whether a mesh width or a row height, is 0.3 in (0.8 cm), and 2 sc cover exactly that. The outline totals 44 units, so 88 sc lie flat. Each of the 6 outer corners needs 1 extra sc to turn without pulling. The 2 inside corners each lose 1 sc so they don’t ruffle. After blocking, the small stepped corners on the bowl side soften into rounded curves.
Counter Rounds
Lower counter: Join MC with sl st in the bottom-left corner of the opening. Loosely sl st around: 6 along the bottom, 6 up the side (2 per row-end), 6 along the ch-5 bridge and 6 down the other side. Sl st to first sl st and fasten off. (24 sl st)
Upper counter: Work the same way: 4 along the bottom, 6 up, 4 along the ch-3 bridge and 6 down. (20 sl st)
Flowers (Make 2)
Rnd 1 (both flowers): With mustard, make a magic ring, ch 1, 10 sc in ring, sl st to first sc. Fasten off. (10 sc) The center is 0.4 in (1.0 cm) across.
Small flower, Rnd 2: Join cream in any sc. [Hdc, 2 dc, hdc] in next st, sl st in next st; repeat from * 4 more times. Fasten off. (5 petals, 25 sts: 5 x 4 petal sts + 5 sl st)* The flower is about 1 in (2.5 cm) across.
Large flower, Rnd 2: Join cream in any sc. [Hdc, dc, tr, dc, hdc] in next st, sl st in next st; repeat from * 4 more times. Fasten off. (5 petals, 30 sts: 5 x 5 petal sts + 5 sl st)* The flower is about 1.25 in (3.2 cm) across.
Leave a 10 in (25.4 cm) cream tail on each flower for sewing.
Leaves (Make 5)
With olive green, ch 7.
Leaf: Sc in 2nd ch from hook, hdc in next ch, dc in next 2 ch, hdc in next ch, [sc, ch 2, sc] in last ch for the tip. Working along the other side of the chain: hdc in next ch, dc in next 2 ch, hdc in next ch, sc in last ch, sl st to first sc. Fasten off, leaving an 8 in (20.3 cm) tail. (12 sts + ch-2 tip)
Each leaf is about 0.9 in (2.3 cm) long with a pointed tip.
Final Blocking
- Lightly mist the bordered letter until it is damp, not soaked.
- Lay it RS up on the grid board.
- Pin the stem edge straight to 4.2 in (10.7 cm).
- Pin the bottom edge straight to 3 in (7.6 cm).
- Shape the bowls into smooth curves, pinning only at the corners.
- Straighten the grid lines with your fingertips, and open each counter evenly.
- Let it dry completely, then unpin.
- Pin the small flower near the top of the stem and the large flower just below the waist, both overlapping the left edge. Place the leaves as follows: one pointing up above the small flower, one to its right, one on the left between the flowers, and two fanning down below the large flower.
- Sew each leaf along its base and center. Sew each flower around its center ring and at each petal sl st. Weave in the ends on the wrong side.
- Open the jump ring and pass it through 2 sc at the top-left corner. Add the key ring and close the jump ring securely.
Final Quality-Control Checklist
- Letter measures 3 in (7.6 cm) x 4.2 in (10.7 cm)
- Rows 1, 2 and 6 have 9 meshes; Rows 7, 8 and 12 have 8; Row 13 has 7
- Each split-row section has 3 meshes
- Both counters are open, and neither bridge sags
- The outer border has 92 sc and lies flat
- Each flower has 5 even petals
- All 5 leaves are pointed and sewn down securely
- The jump ring is fully closed, and all tails are hidden
Troubleshooting
The bridge chain sags. Chain more tightly, or make the bridge with a hook one size smaller.
The grid slants. Always finish the row in the 3rd ch of the turning chain.
The border ruffles. Check that both sc2tog are in place at the inside corners.
The border cups. Make sure you added all 6 corner extras, or go up half a hook size for the border only.
The petals curl forward. Steam the flowers flat before sewing.
Care
Hand wash in cool water with mild soap, roll the keychain in a towel to remove the water, and dry it flat. Don’t soak the metal hardware.
Final Notes
The whole letter depends on one measurement: a 0.3 in (0.8 cm) mesh. Nine meshes give 2.7 in (6.9 cm) of width, and thirteen rows give 3.9 in (9.9 cm) of height. A 0.15 in (0.4 cm) border on every side brings the letter to 3 in (7.6 cm) x 4.2 in (10.7 cm). If your Row 2 width is right, everything after it will come out the right size.
Happy crocheting!