

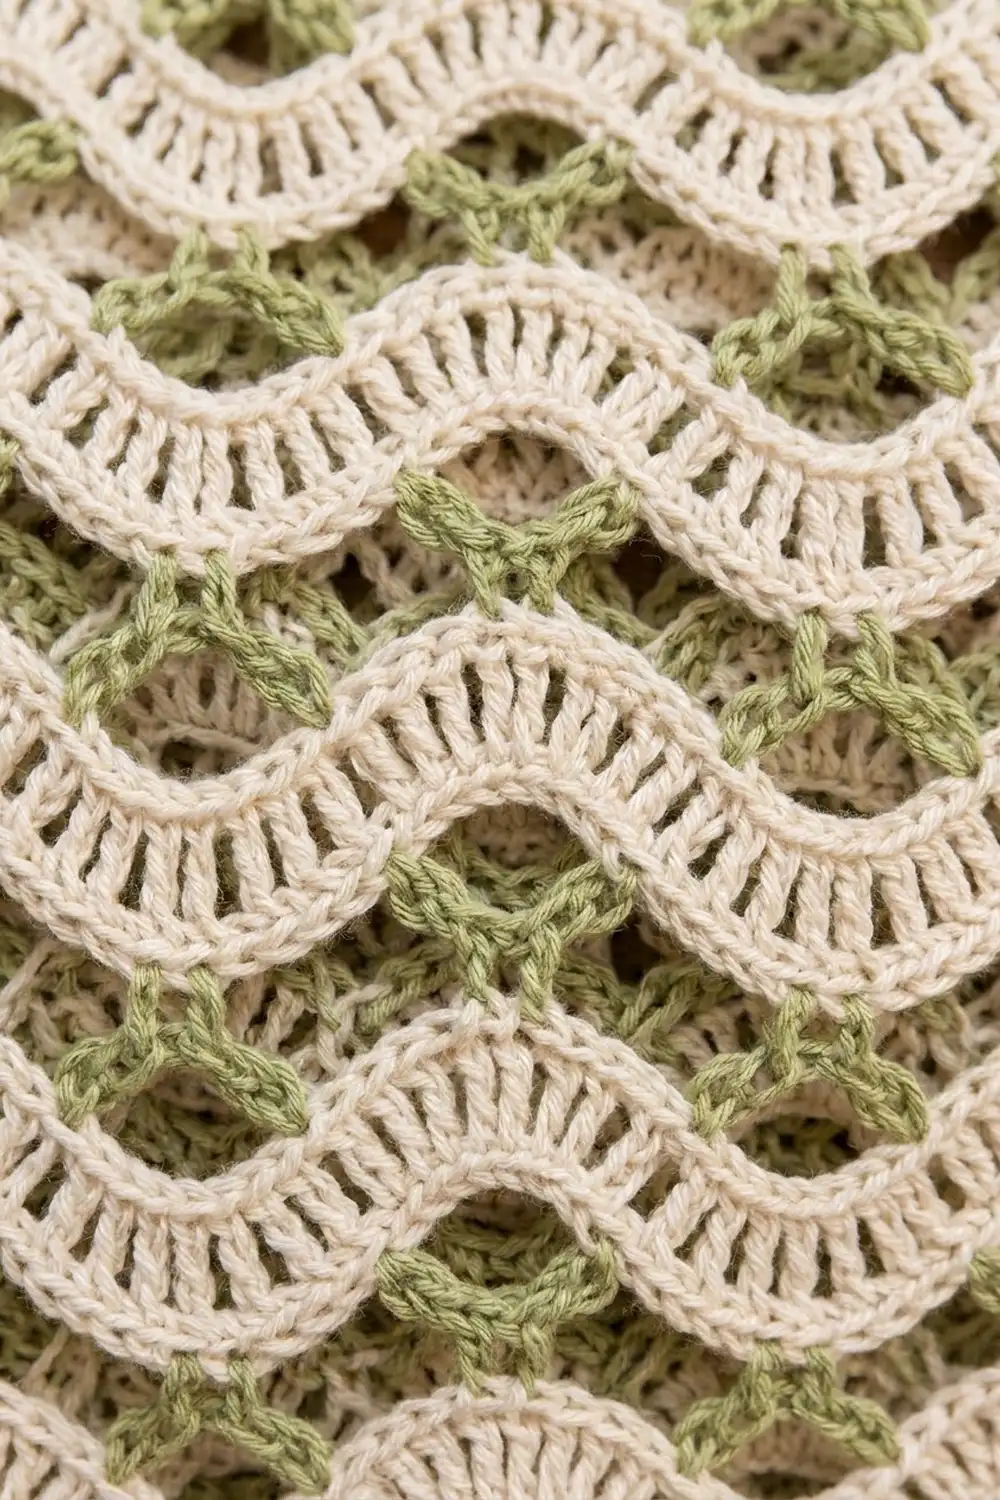
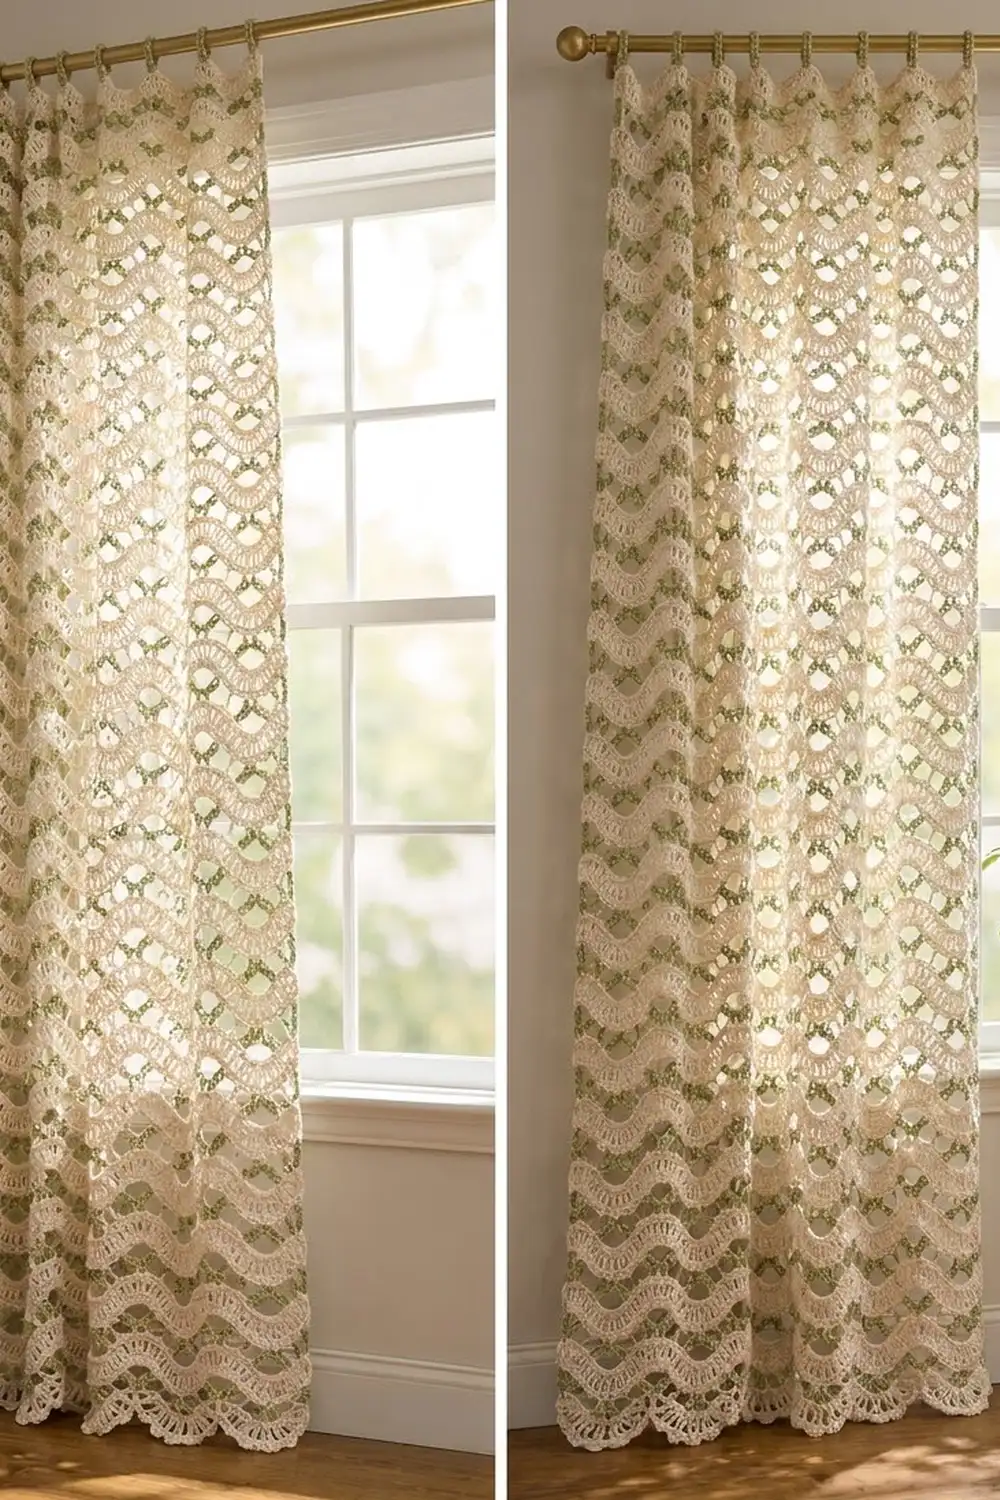
This curtain panel is all gentle motion. Cream bands of graduated tall stitches rise and fall across the fabric. Between them sit two rows of sage green chain loops that stack into small open rings. When light comes through the window, the rings glow and the waves stand out from across the room.
The colors are calm and natural. Warm cream is used for the waves, the borders and the hanging tabs, and sage green only for the mesh rows. It suits farmhouse, cottage and modern neutral rooms alike.
The pattern uses US crochet terms. One finished panel measures 39.5 in (100.3 cm) wide by 79.25 in (201.3 cm) long from the top edge to the scallop tips. With the rod tabs it is 81.25 in (206.4 cm) long. To dress a window as shown, make two identical panels.
The panel is worked in one piece from the bottom up in a 4-row repeat: a cream wave row, a cream single crochet row, a green filler row and a green ring row. A single crochet edge goes around the panel. Then the bottom gets shell scallops and the top gets 7 loop tabs.
Finished Size and Construction
- Finished size: 39.5 in x 79.25 in (100.3 cm x 201.3 cm), plus 2 in (5.1 cm) tabs
- Skill level: Intermediate
- Terminology: US
- Yarn weight: DK (#3 light), cotton or cotton blend
- Hook: 4.5 mm (US 7)
- Number of pieces: 1 panel (make 2 for a pair)
- Layout: one rectangle worked bottom to top in rows
- Piece size (body): 39 in x 78 in (99.1 cm x 198.1 cm)
- Size before border: 39 in x 78 in (99.1 cm x 198.1 cm)
- Border depth: sides 0.25 in (0.6 cm); top 0.25 in (0.6 cm) plus tabs; bottom 1 in (2.5 cm) including scallops
Materials
Choose a smooth DK cotton or cotton blend. Cotton holds the wave shape, keeps the stitches crisp, and handles sunlight and washing well. Avoid fuzzy yarns, which blur the rings.
Amounts for one panel (using 50 g / 115 m balls):
- Color A, Cream: 600 g, approx. 1,380 m (12 balls)
- Color B, Sage Green: 300 g, approx. 690 m (6 balls)
Double these amounts for a pair. The quantities include a margin of about 10-15% to allow for gauge differences and swatching.
Tools:
- 4.5 mm (US 7) crochet hook
- 5.0 mm (US H-8) hook for the foundation chain (optional)
- Stitch markers
- Tapestry needle
- Scissors
- Tape measure
- Blocking mats or a clean floor area, rust-proof pins
Abbreviations (US Terms)
- ch – chain
- sl st – slip stitch
- sc – single crochet
- hdc – half double crochet
- dc – double crochet
- tr – treble crochet
- sk – skip
- sp – space
- st(s) – stitch(es)
- rep – repeat
Special stitch – Shell: work 5 dc in the same stitch.
Note: in the green rows, each chain counts as 1 stitch, so every row of the panel totals 156.
Gauge and Checkpoints
Gauge: 16 sts = 4 in (10.2 cm) in pattern, so one 12-st wave repeat = 3 in (7.6 cm). One 4-row repeat (Rows 1-4) = 2 in (5.1 cm) tall, measured after light blocking.
Test swatch: ch 37 and work Rows 1-8 with 3 wave repeats (36 sts). Block it. It should measure 9 in (22.9 cm) wide and 4 in (10.2 cm) tall. Testing one small piece first means you won’t have to rip out a very large panel later.
Checkpoints (body, before border):
- After Row 4: 39 in (99.1 cm) wide, 2 in (5.1 cm) tall
- After Row 40: 20 in (50.8 cm) tall
- After Row 80: 40 in (101.6 cm) tall
- After Row 120: 60 in (152.4 cm) tall
- After Row 152: 76 in (193.0 cm) tall
- After Row 156: 78 in (198.1 cm) tall
If your swatch is too big, go down a hook size. If it is too small, go up a hook size. If only the height is off, check your trebles: pulling them tight shortens every repeat. You can fix small height differences by adding or removing 4-row repeats, which are 2 in (5.1 cm) each.
Pattern: Curtain Body
With Color A, ch 157 (use the larger hook if you have one). Switch to the 4.5 mm hook.
Row 1 (Cream, wave row): sc in 2nd ch from hook, hdc in next ch, dc in next 2 ch, tr in next 4 ch, dc in next 2 ch, hdc in next ch, sc in next ch, sc in next ch, hdc in next ch, dc in next 2 ch, tr in next 4 ch, dc in next 2 ch, hdc in next ch, sc in next ch; rep from * 11 more times. Turn. (156 sts: 26 sc, 26 hdc, 52 dc, 52 tr; 13 repeats)*
The trebles form the crests and the paired sc form the valleys. The top edge is now wavy.
Row 2 (Cream, ridge row): ch 1 (does not count), sc in each st across. Turn. (156 sc)
Drop Color A at the edge but don’t cut it. Join Color B in the last st.
Row 3 (Green, filler row): ch 4 (counts as tr), ch 3, sk next 3 sts, sc in next st, ch 2, sk next 2 sts, sc in next st, ch 3, sk next 3 sts, tr in next st, tr in next st; rep from * across, ending the last rep at . Turn. (156 sts: 26 tr, 26 sc, 104 ch; 26 ch-3 sps, 13 ch-2 sps)*
The trebles land on the valleys and the sc land on the crests, so this row fills the dips and leaves a level top.
Row 4 (Green, ring row): ch 1, sc in first tr, ch 3, sc in next sc, ch 2, sc in next sc, ch 3, sc in next tr, sc in next tr; rep from * across, ending the last rep at ** with the final sc in the top of the beginning ch-4. Turn. (156 sts: 52 sc, 104 ch)*
Do not work into the spaces below. The new chains sit over the Row 3 chains to form the green rings.
Drop Color B. Pick up Color A, carrying it loosely up the side edge.
Row 5 (Cream, wave row): ch 1, sc in first sc, (hdc, dc, dc) in next ch-3 sp, tr in next sc, 2 tr in next ch-2 sp, tr in next sc, (dc, dc, hdc) in next ch-3 sp, sc in next sc, sc in next sc; rep from * across, ending the last rep at . Turn. (156 sts: 26 sc, 26 hdc, 52 dc, 52 tr)*
Row 6 (Cream): Rep Row 2. (156 sc)
Row 7 (Green): Rep Row 3. (156 sts)
Row 8 (Green): Rep Row 4. (156 sts)
Rows 9-152: Rep Rows 5-8 thirty-six more times. You now have 38 full 4-row repeats (Rows 1-4 plus Rows 5-8 worked 37 times in total). Cut Color B after Row 152.
Row 153 (Cream): Rep Row 5. (156 sts)
Row 154 (Cream): Rep Row 2. (156 sc)
Row 155 (Cream, top leveling row): ch 4 (counts as tr), tr in next st, dc in next st, hdc in next st, sc in next 4 sts, hdc in next st, dc in next st, tr in next st, tr in next st; rep from * across, ending the last rep at . Turn. (156 sts: 52 tr, 26 dc, 26 hdc, 52 sc)*
The tall stitches fill the valleys and the sc sit on the crests, which gives a straight top edge.
Row 156 (Cream): ch 1, sc in each st across, working the last sc in the top of the ch-4. (156 sc) Do not fasten off.
The body should now measure 39 in x 78 in (99.1 cm x 198.1 cm).
Border
Border gauge: along the top and bottom edges, 4 sc per inch (1 sc per stitch). Along the side edges, 3.5 sc per inch (7 sc per 4-row repeat, which is 2 in / 5.1 cm tall).
Side edge rule: work 1 sc in the end of each sc row and each wave row (wave rows begin and end with an sc). Work 4 sc around the post at the end of each treble row (Rows 3, 7, 11 and so on, plus Row 155). That gives 7 sc per 4-row repeat.
Round 1 (Cream): ch 1, turn, sc in each st across the top (156 sc), ch 2 for the corner. Work down the side following the side edge rule (273 sc), ch 2. Sc in each free loop of the foundation chain (156 sc), ch 2. Work up the second side (273 sc), ch 2, sl st to the first sc. Fasten off. (858 sc and 4 corner ch-2 sps)
As you work the side stitches, hide the carried yarn strands inside them.
Why the math works: each side has 39 groups of 4 rows (Rows 1-152 make 38, Rows 153-156 make 1), and 39 x 7 = 273. The top and bottom match the body’s 156 stitches exactly, so nothing is added or lost at the edges. The corner ch-2 spaces are spaces, not stitches, so no side count includes them.
Bottom Scallop Row (Cream): with the right side facing, join A with a sc in the bottom right corner ch-2 sp, sk next 2 sts, Shell in next st, sk next 2 sts, sc in next st; rep from * 25 more times (the last sc lands in the final bottom st), sc in the next corner ch-2 sp. Fasten off. (26 shells, 28 sc; 158 sts)*
Each scallop uses 6 stitches, and 156 / 6 = 26, so the scallops fit the bottom edge exactly. Each scallop is 1.5 in (3.8 cm) wide and adds about 0.75 in (1.9 cm) of depth.
Top Tab Row 1 (Cream): with the right side facing, join A with a sc in the first top st, ch 16, sk next 4 sts, sc in next st, sc in next 19 sts, sc in next st, ch 16, sk next 4 sts, sc in next st; rep from * 5 more times. Turn. (128 sc and 7 ch-16 loops)*
Each tab covers 6 stitches, 1.5 in (3.8 cm), and each gap is 19 stitches, 4.75 in (12.1 cm). The math is 7 x 6 + 6 x 19 = 42 + 114 = 156, so the end tabs sit exactly at both corners.
Top Tab Row 2: ch 1, sc in each sc, and work 24 sc into each ch-16 loop. Fasten off. (296 sc: 128 + 7 x 24)
The finished tabs stand about 2 in (5.1 cm) tall and fit rods up to 1.25 in (3.2 cm) in diameter.
Final Blocking
- Weave in all ends along the side border and inside the cream ridges, not through the green rings.
- Soak the panel in cool water with a little wool wash or mild detergent for 15 minutes.
- Gently press out the water and roll the panel in towels. Do not wring it.
- Lay the panel flat on mats or a clean sheet on the floor.
- Pin the sides straight to 39.5 in (100.3 cm) wide.
- Pin the length to 79.25 in (201.3 cm), not counting the tabs, and check the width every 12 in (30.5 cm).
- Gently open each green ring with a fingertip and pin each scallop tip.
- Let it dry completely, usually 24-48 hours.
Final Quality-Control Checklist
- Every row totals 156 stitches, counting chains in the green rows.
- 13 wave crests run across every cream band, stacked straight above each other.
- The trebles in Row 3 and every other green filler row sit on the valleys, never the crests.
- Each side edge has 273 sc with no puckers or ripples.
- 26 scallops along the bottom, 7 tabs along the top.
- The panel measures 39.5 in x 79.25 in (100.3 cm x 201.3 cm) after blocking.
- If you make a pair, both panels match within 0.5 in (1.3 cm) in length.
Troubleshooting
Waves drift sideways: a stitch was missed or doubled. Count 12 stitches per repeat and place a marker at the start of every repeat.
Fabric bows upward at the crests: the trebles in the green filler rows are too short. Loosen them and pull up a taller first loop at the valleys.
Side edge puckers: the carried yarn is too tight. Leave a little slack when you pick up the next color.
Side edge ripples: you worked too many border stitches. Check that you used 4 sc per treble-row end and 1 sc per other row.
Rings collapse: the Row 4 chains were worked into the spaces below. They must float over the Row 3 chains.
Panel too short: add 4-row repeats before Row 153. Each one adds 2 in (5.1 cm) and 7 sc per side in Round 1.
Tabs too tight on the rod: use ch 20 loops with 30 sc in each. The count in Tab Row 2 becomes 128 + 7 x 30 = 338.
Care
Machine wash cold on a gentle cycle in a mesh laundry bag, then reshape and dry flat. Avoid hot drying, which can shrink cotton and distort the waves.
Final Notes
Here is how the measurements build up. Each 12-stitch wave repeat is 3 in (7.6 cm), and 13 repeats give 156 stitches and 39 in (99.1 cm). Each 4-row repeat is 2 in (5.1 cm), and 39 groups of 4 rows give 156 rows and 78 in (198.1 cm). The border adds 0.25 in (0.6 cm) to each side and to the top. At the bottom it adds 1 in (2.5 cm) including the scallops. That gives a finished panel of 39.5 in x 79.25 in (100.3 cm x 201.3 cm), plus 2 in (5.1 cm) tabs. Check your gauge first and count every row, and the panel will hang straight and even.
Happy crocheting!