

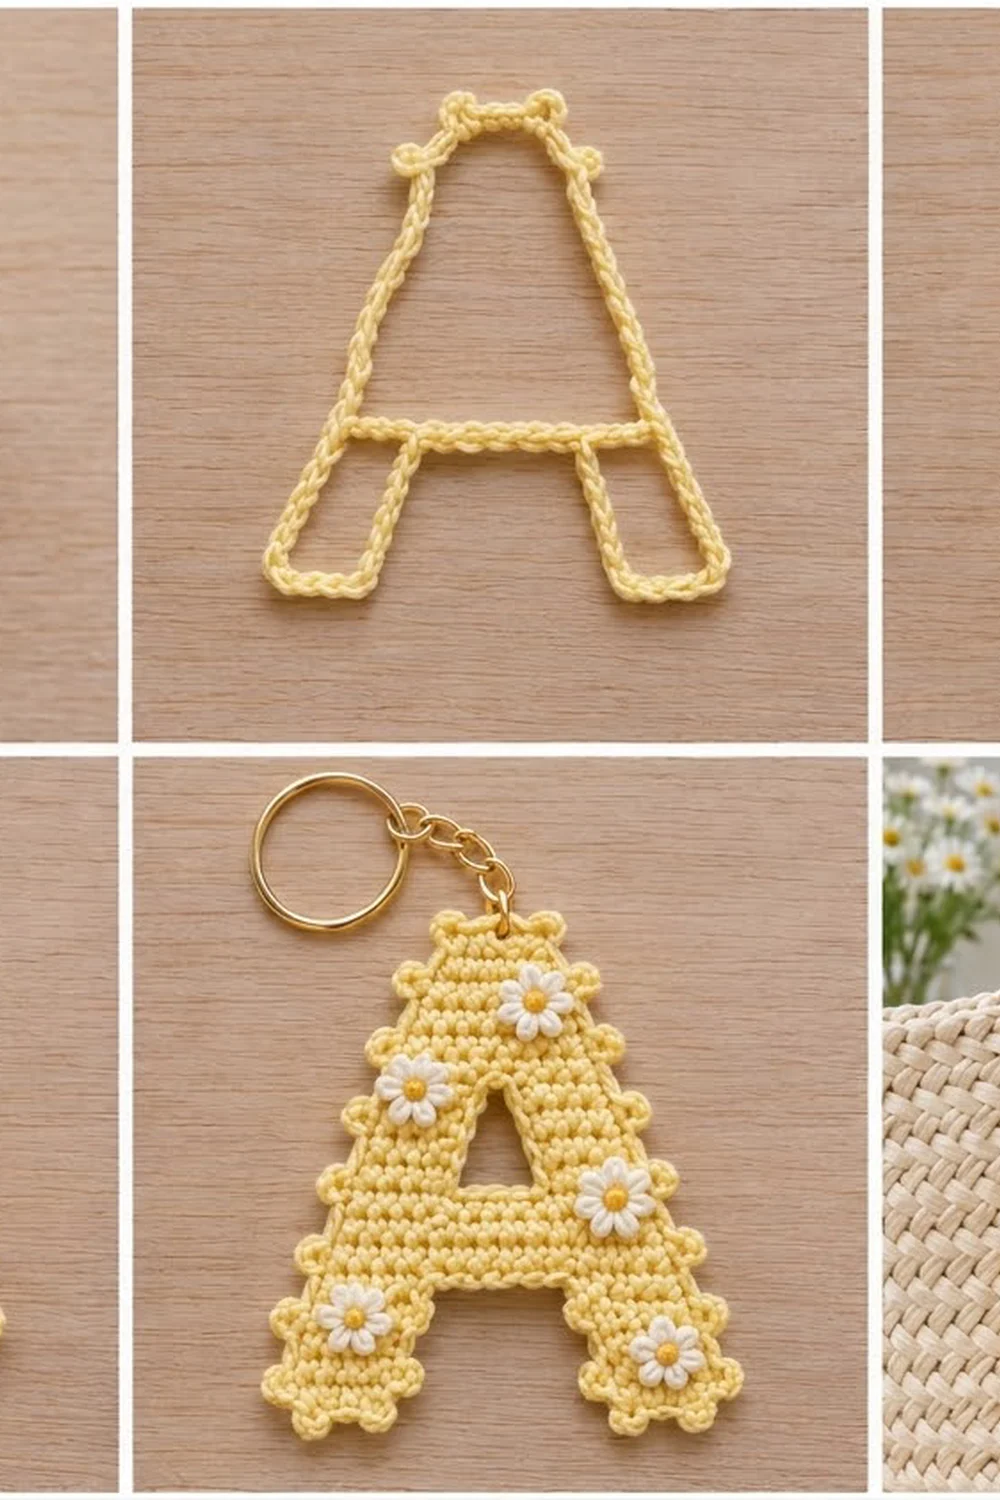
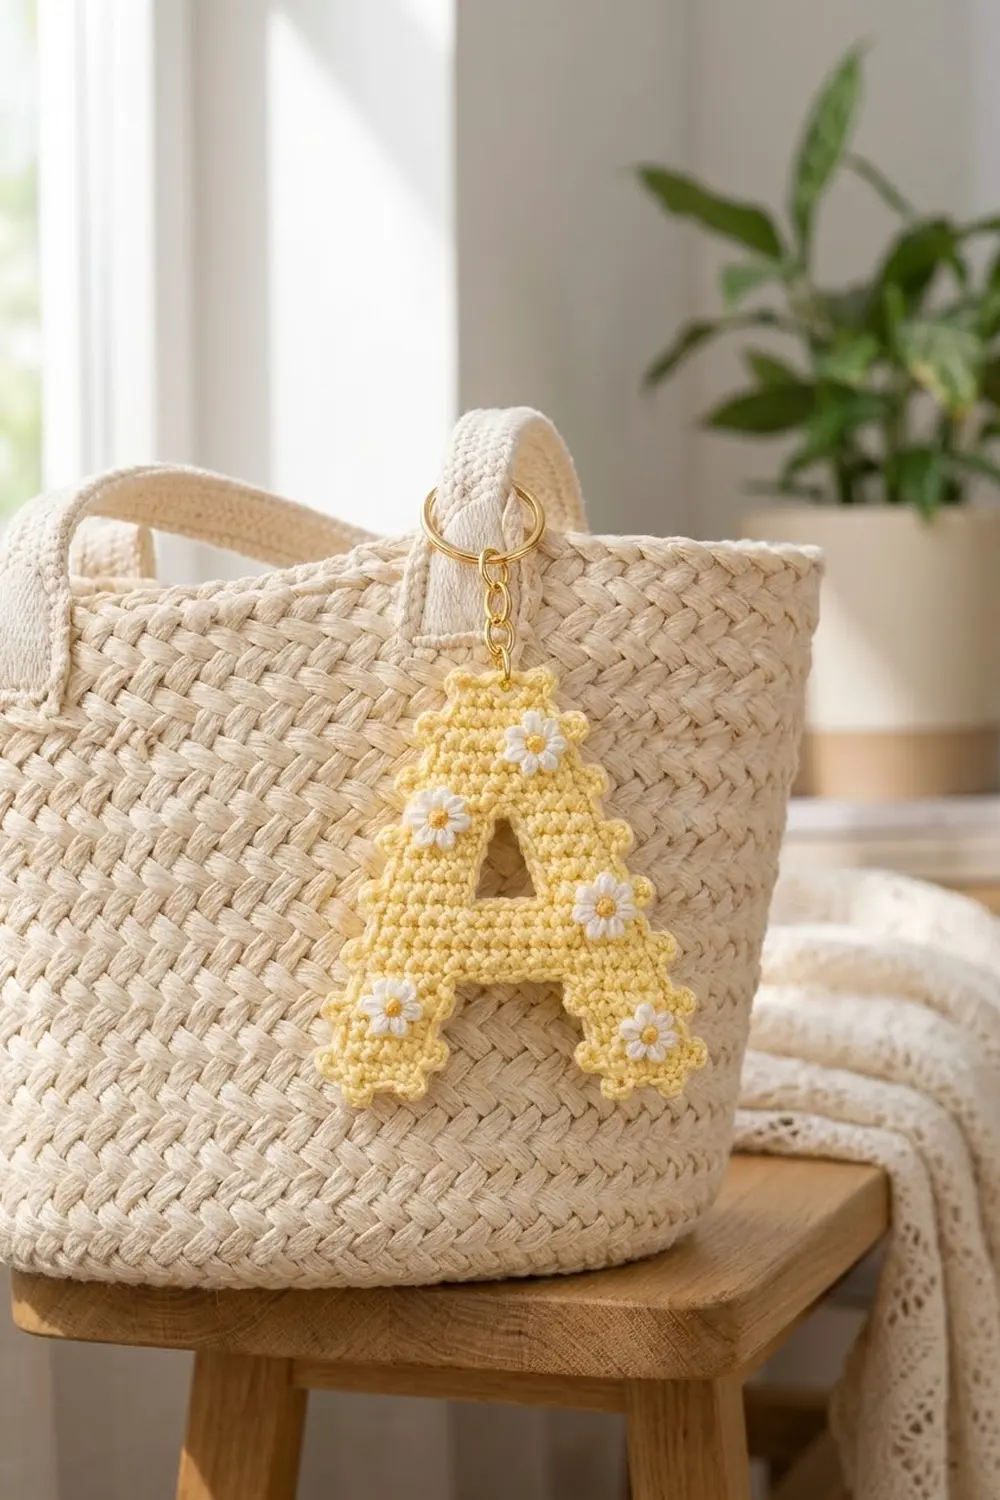
This little letter A is a cheerful, personal accessory. It is worked in soft butter-yellow cotton with dense single crochet, so it holds its shape well. A row of small picot bumps runs around the outer edge, and five tiny white daisies with golden centers are sewn on top. A gold split ring and a short chain turn it into a bag charm or keychain.
The style is sweet and simple: one solid letter, a scalloped outline and a few flowers. It looks great clipped to a woven tote, a backpack or a set of keys, and it makes a lovely initial gift.
All instructions use US crochet terms. The finished letter measures about 4.1 in (10.4 cm) wide at the base and 4.5 in (11.4 cm) tall, not counting picots or hardware.
The letter is worked flat in rows from the bottom up. You make two slanted legs, join them with a crossbar row, split again around the triangular opening, join once more and decrease to a flat top. Then you add a sc edging around the opening, a two-round picot border, five appliqué daisies and the keyring.
Finished Size and Construction
- Finished size: 4.1 in (10.4 cm) wide x 4.5 in (11.4 cm) tall, excluding picots
- Skill level: Advanced beginner
- Terminology: US crochet terms
- Yarn weight: DK (#3) cotton for the letter; fingering (#1) cotton for the daisies
- Hook: 3.25 mm (US D/3) for the letter; 2.0 mm for the daisies
- Number of pieces: 1 letter plus 5 small daisy appliqués sewn on
- Layout: single letter A with a triangular opening and an open gap between the legs
- Letter size before border: 3.6 in (9.1 cm) wide at the base x 4 in (10.2 cm) tall
- Border depth: about 0.25 in (0.6 cm) per side, plus picots of about ⅛ in (0.3 cm)
Materials
Choose a smooth, mercerized or combed cotton. It shows stitch definition, holds the letter’s angles and stands up to being handled on a bag.
- Butter yellow DK cotton (main color): 10 g / 22 m (24 yd)
- White fingering cotton (petals): 3 g / 10 m (11 yd)
- Golden yellow fingering cotton (centers): 2 g / 7 m (8 yd)
Tools:
- 3.25 mm (US D/3) crochet hook
- 2.0 mm crochet hook
- Tapestry needle
- 2 stitch markers
- Gold 25 mm (1 in) split keyring with a 1 in (2.5 cm) chain and a 6 mm jump ring
- Two pairs of flat-nose pliers
- Pins and a blocking mat
The quantities include a small margin for a gauge swatch and weaving in ends.
Abbreviations (US Terms)
- ch – chain
- sc – single crochet
- sc2tog – single crochet 2 together (1 stitch decreased)
- sl st – slip stitch
- st(s) – stitch(es)
- rep – repeat
Special stitch – Picot: ch 3, sl st in the 3rd ch from the hook.
Shift row: this keeps a section the same width while moving it 1 st toward the center. You work sc2tog at the outer edge and 2 sc in the stitch at the inner edge.
Gauge and Checkpoints
Gauge: 20 sc x 24 rows = 4 in (10.2 cm) in sc rows with the 3.25 mm hook. That is 5 sts and 6 rows per 1 in (2.5 cm).
Make one leg first and treat it as your gauge swatch. After Row 8, it should measure 1.2 in (3.0 cm) across and about 1⅓ in (3.4 cm) tall.
Checkpoints:
- After Row 8, each leg: 1.2 in (3.0 cm) wide, about 1⅓ in (3.4 cm) tall
- After Row 10: 2.8 in (7.1 cm) wide
- After Row 16: about 2⅔ in (6.8 cm) tall
- After Row 24: 3.6 in (9.1 cm) wide at the base, 4 in (10.2 cm) tall, 1.2 in (3.0 cm) across the top
If your leg is too wide, go down a hook size. If it is too narrow, go up a hook size. If only the height is off, check your tension rather than changing hooks. Pulling up tall loops makes rows taller.
Pattern
Leg 1
The edge where the beginning tail hangs is the inner edge of the leg. The opposite edge is the outer edge.
With butter yellow and the 3.25 mm hook, ch 7.
Row 1: Sc in the 2nd ch from the hook and in each ch across. (6 sc) You finish at the inner edge.
Row 2: Ch 1, turn, sc in each st across. (6 sc)
Row 3 (shift row, begins at the outer edge): Ch 1, turn, sc2tog, sc 3, 2 sc in the last st. (6 sts)
Rows 4–6: Ch 1, turn, sc in each st across. (6 sc)
Row 7 (shift row, begins at the outer edge): Ch 1, turn, sc2tog, sc 3, 2 sc in the last st. (6 sts)
Row 8: Ch 1, turn, sc in each st across. (6 sc) You finish at the outer edge.
Fasten off with a 4 in (10.2 cm) tail.
The leg is now a slanted parallelogram that leans 2 sts toward its inner edge.
Leg 2
Work Rows 1–8 exactly as for Leg 1, but do not fasten off. The working yarn sits at the outer edge.
Lay both legs flat so they lean toward each other like an upside-down V, with both beginning tails at the inner edges. Leg 2 is on the side where your yarn is. Flip Leg 1 over if needed; it mirrors Leg 2 perfectly.
Joining and Crossbar
Row 9 (joining row): Ch 1, turn, sc 6 across Leg 2, ending at its inner edge. Ch 2. Starting at the inner edge of Leg 1, sc 6 across Leg 1. (12 sc + 2 ch = 14 sts)
The 2 ch form the top of the open gap between the legs. At the base, the gap measures 1.2 in (3.0 cm).
Row 10: Ch 1, turn, sc in each sc and in each ch across. (14 sc)
Row 11 (outer decrease): Ch 1, turn, sc2tog, sc 10, sc2tog. (12 sc)
Rows 9–11 form the solid crossbar.
Sides of the Opening
The 12 sts of Row 11 split into Side B (first 4 sts), the base of the opening (middle 4 sts) and Side A (last 4 sts).
Side B, Row 12: Ch 1, turn, sc 4. (4 sc) Leave the remaining sts unworked. This row begins at the outer edge.
Side B, Rows 13–14: Ch 1, turn, sc 4. (4 sc)
Side B, Row 15 (shift row, begins at the inner edge): Ch 1, turn, 2 sc in the first st, sc 1, sc2tog. (4 sts)
Side B, Row 16: Ch 1, turn, sc 4. (4 sc) Fasten off.
Side A, Row 12: On Row 11, skip the 4 sts after Side B. Join butter yellow in the next st, which is the inner edge of Side A. Ch 1, sc in the same st and the next 3 sts. (4 sc) Row 12 now totals 8 sc across both sides.
Side A, Rows 13–14: Ch 1, turn, sc 4. (4 sc)
Side A, Row 15 (shift row, begins at the outer edge): Ch 1, turn, sc2tog, sc 1, 2 sc in the last st. (4 sts)
Side A, Row 16: Ch 1, turn, sc 4. (4 sc) You finish at the outer edge. Do not fasten off.
The opening is now 0.8 in (2.0 cm) wide at its base. It narrows to 2 sts after Row 15.
Top
Row 17 (joining row): Ch 1, turn, sc 4 across Side A. Ch 2. Starting at the inner edge of Side B, sc 4 across Side B. (8 sc + 2 ch = 10 sts)
Row 18: Ch 1, turn, sc in each sc and each ch. (10 sc)
Row 19: Ch 1, turn, sc2tog, sc 6, sc2tog. (8 sc)
Rows 20–22: Ch 1, turn, sc 8. (8 sc)
Row 23: Ch 1, turn, sc2tog, sc 4, sc2tog. (6 sc)
Row 24: Ch 1, turn, sc 6. (6 sc) Fasten off.
The outer edges lose 1 st every 4 rows (Rows 3, 7, 11, 15, 19 and 23). That gives a steady, straight slant from 18 sts wide at the base (6 + 6 gap + 6) to 6 sts at the top. Weave in the ends at the joins and pull the joins snug.
Opening Edging
Join butter yellow at any corner of the triangular opening.
Round 1: Ch 1. Work 4 sc into the skipped base sts, 5 sc up the row ends of one side, 2 sc into the free loops of the Row 17 ch and 5 sc down the other side. Sl st to the first sc. (16 sc) Fasten off.
Border
Border gauge: 1 sc per stitch along stitch edges, which is 5 per in (2.5 cm). Along row-end edges, work 1 sc per row end, which is 6 per in (2.5 cm). The slanted edges are longer than their height, so this ratio lies flat.
There are 6 convex corners: 2 at the top and 4 at the bottom of the legs. Each corner stitch gets 3 sc. The middle sc of each group is the corner sc. The counts below are the sc between corner sc’s, so no corner is counted twice.
Round 1: Join butter yellow in the first st of Row 24. Ch 1, 3 sc in the same st. Work these counts between corner sc’s:
- Top: 6 sc
- Each outer slanted side: 26 sc (1 from the corner group + 24 row ends + 1 from the next corner group)
- Each leg bottom: 6 sc, into the foundation ch loops
- Inner edge from leg to leg: 20 sc (1 from the corner group + 8 row ends + 2 sc in the Row 9 ch free loops + 8 row ends + 1 from the corner group)
Sl st to the first sc.
Round 1 total: 6 corner sc + 6 + 26 + 26 + 6 + 6 + 20 = 96 sc.
Round 2: Ch 1. Work [sc, picot] in the top-left corner sc. Then:
- Top: sc 6, then [sc, picot] in the corner sc
- Outer side: sc 3, picot, (sc 5, picot) 4 times, sc 3, then [sc, picot] in the corner sc
- Leg bottom: sc 3, picot, sc 3, then [sc, picot] in the corner sc
- Inner edge: sc 20, then [sc, picot] in the corner sc
- Second leg bottom: sc 3, picot, sc 3, then [sc, picot] in the corner sc
- Second outer side: sc 3, picot, (sc 5, picot) 4 times, sc 3
Sl st to the first sc. (96 sc + 18 picots) Fasten off.
Why the math works: Round 2 places 1 sc in each Round 1 sc, so the outline never ruffles or pulls. Each outer side has 3 + (4 x 5) + 3 = 26 sc, so its 5 picots sit symmetrically. The 20 inner sc have no picots, which keeps the gap clean. The 18 picots are 6 on corners, 5 on each outer side and 1 on each leg bottom.
Daisies (make 5)
With golden yellow and the 2.0 mm hook, make a magic ring.
Round 1: 8 sc in the ring. Pull the ring closed and sl st to the first sc. (8 sc) Fasten off.
Round 2: Join white in any sc. *(Sl st, ch 3, sl st) in the same st, move to the next st; rep from * 7 more times. Sl st to the join. (8 petals) Fasten off, leaving an 8 in (20.3 cm) tail.
Each daisy measures about 0.6 in (1.5 cm) across.
Placement: Sew with the white tail, tacking between petals.
- 1 near the top on the right slanted side
- 1 on the left side, level with the opening
- 1 on the right side, just above the crossbar
- 1 near the base of each leg
Final Blocking
- Spray the letter lightly with water until it is damp but not soaking.
- Pin it to the size before the border plus the border: 4.1 in (10.4 cm) across the base and 4.5 in (11.4 cm) tall.
- Pin each slanted side as a straight line, then pin each leg bottom square.
- Pull each picot outward and give it a small pin.
- Pin the opening and the leg gap open so they stay crisp.
- Let it dry completely.
- Sew on the daisies after blocking so the petals keep their shape.
- Open the jump ring with two pliers and slip it through the center of the top edge, between the 3rd and 4th sts of Row 24, catching both border rounds. Attach the chain and close the ring fully.
Final Quality-Control Checklist
- Base 4.1 in (10.4 cm), height 4.5 in (11.4 cm), excluding picots
- Both slanted sides are straight and mirror each other
- The opening is triangular and centered above the crossbar
- Round 1 has 96 sc; Round 2 has 18 evenly spaced picots
- There are no picots on the inner leg edges or around the opening
- 5 daisies are firmly sewn, with no loose petals
- All ends are woven in and hidden on the back
- The jump ring is fully closed and passes through both border rounds
Troubleshooting
Legs lean the wrong way: The shift row began at the wrong edge. Check that the tail hangs at the inner edge, then rework Rows 3 and 7.
Gap or opening looks crooked: Count Row 11. You should have 4 sts, 4 skipped, 4 sts. Rejoin Side A in the correct stitch.
Border ruffles: You worked extra sc on the slanted sides. Recount to 26 between corner sc’s.
Border cups or pulls in: Your tension is too tight. Go up a hook size for the border only.
Daisies curl: Pull the magic ring tight and press the daisy flat before sewing.
Letter stretches on the keyring: Move the jump ring so it catches both border rounds and the top row.
Care
Hand wash in cool water with mild soap, press out the water in a towel and dry flat. Do not tumble dry, because the picots and daisies can lose their shape.
Final Notes
Everything rests on a simple measurement chain. With 5 sts and 6 rows per inch, each 6-st leg is 1.2 in (3.0 cm) wide. The 18-st base is 3.6 in (9.1 cm) and the 24 rows are 4 in (10.2 cm). The 96-st border adds 0.25 in (0.6 cm) on each side, for a finished letter of 4.1 in (10.4 cm) x 4.5 in (11.4 cm). Check each step as you go and your A will come out crisp, straight and ready to clip onto your favorite bag.
Happy crocheting!