
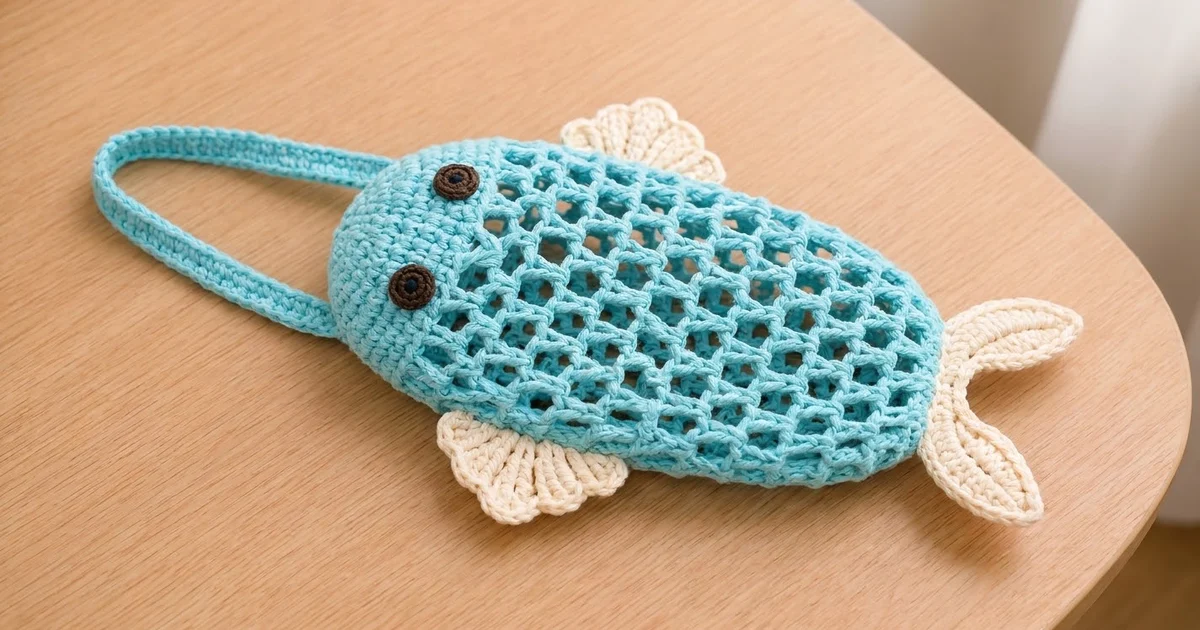
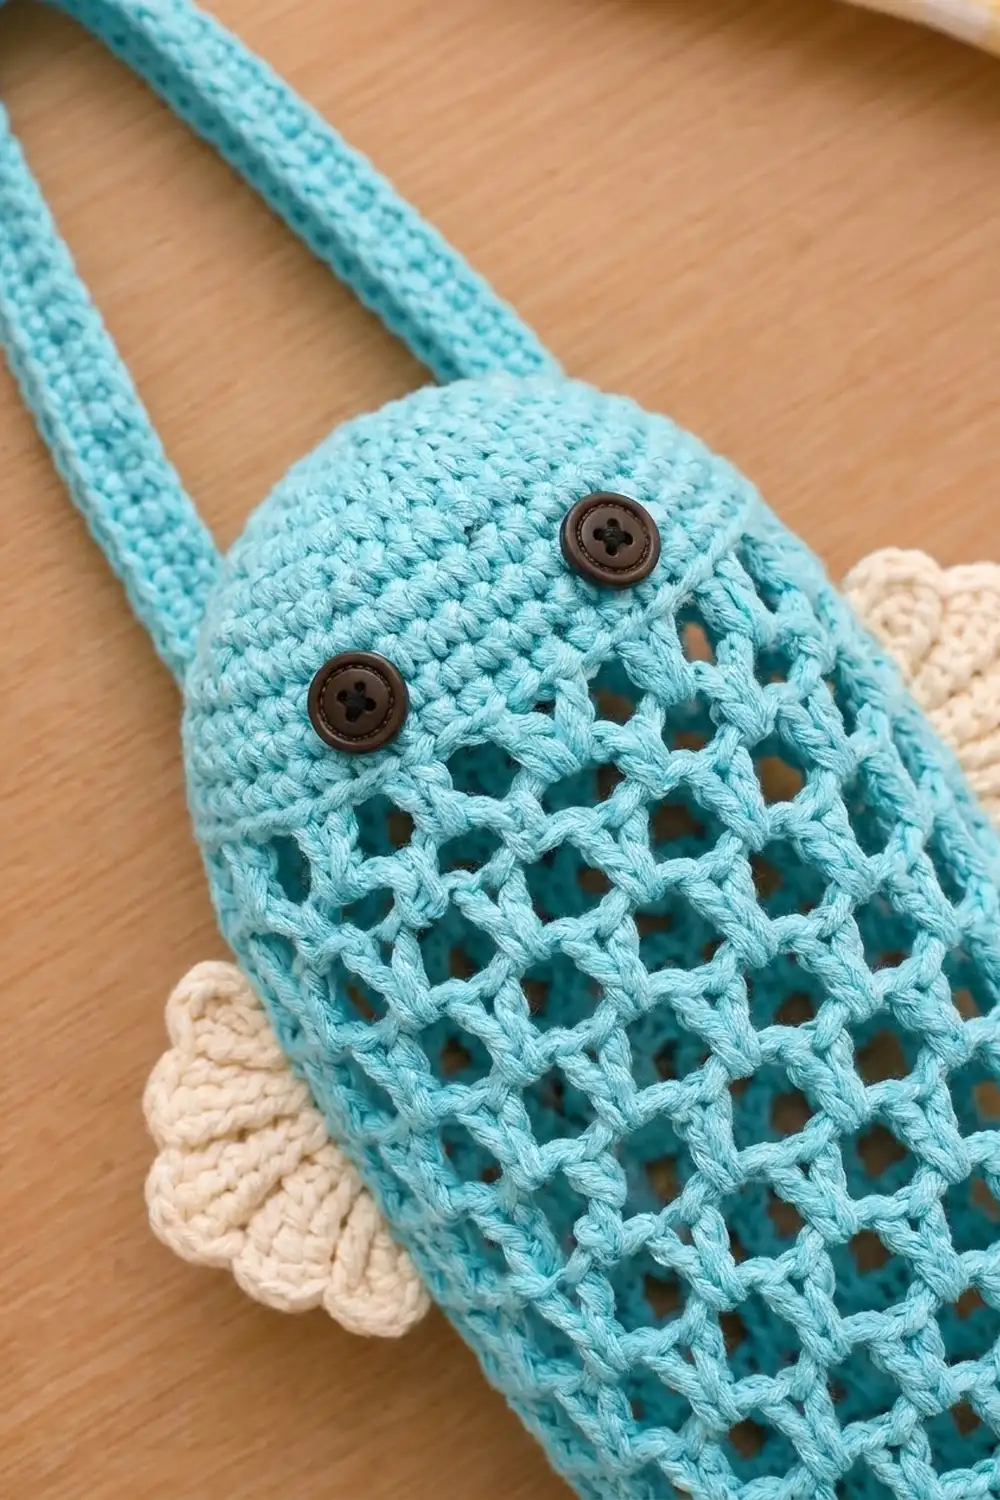
Bubbles is a cheerful fish-shaped plastic bag holder that hangs from a cabinet knob or hook and keeps your grocery bags tidy. The body is an open honeycomb mesh in light aqua, so you can see how many bags are left. A solid dome forms the head, and a flat strap lets it hang neatly.
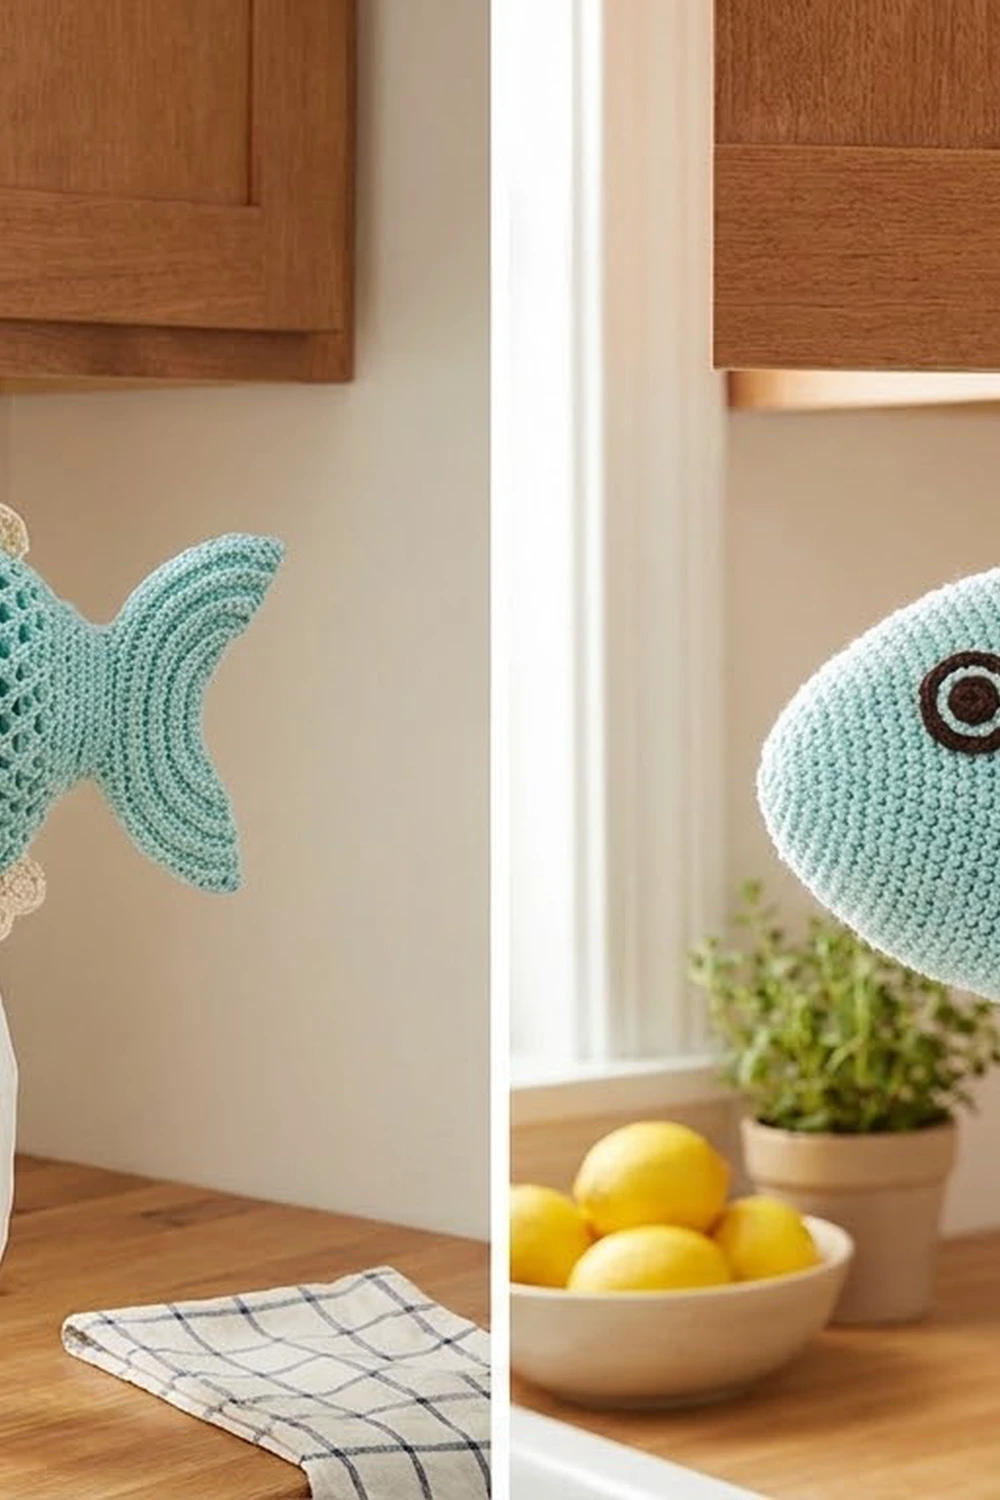
Cream scalloped fins and a two-lobed crescent tail give the fish its personality, and two dark brown eyes finish the face. The style is simple, clean and a little playful, which suits a kitchen, laundry room or pantry door.
This pattern uses US crochet terms. The finished body measures 6.4 in (16.3 cm) wide and 12.5 in (31.8 cm) tall when flattened. With the fins and tail added, the whole fish measures about 9.4 in (23.9 cm) wide and 14.25 in (36.2 cm) tall, not counting the strap.
Construction is straightforward. You work the body in one piece in joined rounds, starting at the tip of the head: a solid single-crochet dome, then 15 rounds of V-stitch mesh, then a short solid border around the open bottom. You crochet the fins, tail, eyes and strap separately and sew them on.
Finished Size and Construction
- Finished body size: 6.4 in (16.3 cm) wide × 12.5 in (31.8 cm) tall, flattened
- Overall with fins and tail: about 9.4 in (23.9 cm) × 14.25 in (36.2 cm)
- Skill level: Easy / Advanced Beginner
- Terminology: US crochet terms
- Yarn weight: Worsted (#4) cotton
- Hook: 4.5 mm (US 7)
- Number of pieces: 1 body + 1 strap + 2 fins + 1 tail + 2 eyes, assembled into one holder
- Layout: fins on the upper sides, eyes on the head, strap at the head sides, tail sewn below the bottom opening
- Body width: 48 stitches around (24 per flattened side)
- Size before border: 6.4 in (16.3 cm) × 12 in (30.5 cm)
- Border depth: 0.5 in (1.3 cm)
Materials
Use a smooth worsted-weight cotton or cotton blend. Cotton holds the mesh shape well and won’t stretch out under the weight of the bags. Acrylic also works, but the mesh will be softer and may lengthen a little more.
Yarn (worsted cotton, about 85 m per 50 g):
– Light aqua (A): 50 g / 85 m – body and strap
– Cream (B): 15 g / 25 m – fins and tail
– Dark brown (C): 5 g / 8 m – eyes
All quantities include a margin of roughly 20% for your gauge swatch and small differences in tension.
Tools:
– 4.5 mm (US 7) crochet hook
– Tapestry needle
– 4 locking stitch markers
– Scissors
– Measuring tape
– Pins (rustproof) for blocking and placing parts
Abbreviations (US Terms)
- ch – chain
- sl st – slip stitch
- sc – single crochet
- hdc – half double crochet
- dc – double crochet
- tr – treble crochet
- inc – 2 sc in the same stitch
- MR – magic ring
- BLO – back loop only
- sp – space
- st(s) – stitch(es)
Special stitches:
– V-st (V-stitch): (dc, ch 2, dc) in the same stitch or space.
– V-sp: the ch-2 space inside a V-st.
– Gap: the ch-2 space between two V-sts. The joining hdc at the end of each mesh round counts as one gap.
– Hdc join: instead of working ch 2 and a sl st at the end of a round, work 1 hdc into the 3rd ch of the beginning ch-5. This closes the round and leaves your hook sitting over a gap, ready for the next round.
Gauge and Checkpoints
Gauge: 15 sc × 16 rounds = 4 in (10.2 cm). One mesh round = 0.6 in (1.5 cm) tall.
Make the head first and use it as your gauge test. It is small, quick, and tells you everything you need.
Checkpoints:
– After Round 8: the flat circle measures 4 in (10.2 cm) across.
– After Round 12: the head tube, flattened, measures 6.4 in (16.3 cm) wide and 3 in (7.6 cm) from tip to last round.
– After Round 27: the body measures 12 in (30.5 cm) from tip to the last mesh round, still 6.4 in (16.3 cm) wide.
– After the border: total length is 12.5 in (31.8 cm).
If your piece is too big, go down 0.5 mm in hook size. If it is too small, go up 0.5 mm. If only the mesh flares wider than the head, use a hook 0.5 mm smaller for the mesh rounds alone.
Body
Work with light aqua (A). Join each round with a sl st to the first st unless told otherwise. Do not turn.
Head (Solid Dome)
Round 1: Make a MR, ch 1, 6 sc in ring. (6)
Round 2: inc in each st around. (12)
Round 3: (sc, inc) 6 times. (18)
Round 4: (2 sc, inc) 6 times. (24)
Round 5: (3 sc, inc) 6 times. (30)
Round 6: (4 sc, inc) 6 times. (36)
Round 7: (5 sc, inc) 6 times. (42)
Round 8: (6 sc, inc) 6 times. (48)
Check: the circle is 4 in (10.2 cm) across and lies flat.
Rounds 9–12: ch 1, sc in each st around. (48)
The sides now turn down to form the dome. Flatten the tube so the join sits at one side fold. Place a marker at that fold (st 1) and another at st 25 (the opposite fold). These markers will guide placement of the strap and fins later.
Mesh Body
Round 13 (setup): ch 5 (counts as dc + ch 2), dc in same st as join (first V-st made), skip 3 sts, ch 2, V-st in next st; repeat from * 10 more times, skip last 3 sts, hdc join in 3rd ch of beginning ch-5. (12 V-sts, 12 gaps)
Stitch check: 1 st for the first V + (11 × 4 sts) + 3 skipped sts = 48 sts used.
Round 14: ch 5 (counts as dc + ch 2), dc around the post of the joining hdc (first V-st made in the gap), ch 2, skip next V-sp, V-st in next gap; repeat from * 10 more times, hdc join in 3rd ch of beginning ch-5. (12 V-sts, 12 gaps)
Each new V-st sits in a gap of the previous round, so the holes are staggered. This gives the honeycomb look.
Rounds 15–27: Repeat Round 14. (12 V-sts, 12 gaps each round)
You now have 15 mesh rounds, which is 9 in (22.9 cm) at 0.6 in (1.5 cm) each. Check: the body is 12 in (30.5 cm) long and 6.4 in (16.3 cm) wide when flattened.
Strap
With light aqua (A):
Foundation: ch 51.
Row 1: sc in 2nd ch from hook and in each ch across. (50)
Rows 2–3: ch 1, turn, sc in each st across. (50)
Fasten off and leave a 12 in (30.5 cm) tail for sewing. The strap measures 13.3 in (33.8 cm) long × 0.75 in (1.9 cm) wide.
Fins (Make 2)
With cream (B). Work in rows.
Row 1: MR, ch 3 (counts as dc), 6 dc in ring, pull the ring closed. (7)
Row 2: ch 3 (counts as dc), turn, dc in same st, 2 dc in each of next 5 sts, dc in top of turning ch. (13)
Row 3 (scallop edge): ch 1, turn, sc in first st, skip 1 st, 5 dc in next st, skip 1 st, sc in next st; repeat from * 2 more times. (3 shells, 4 sc)
Stitch check: 1 + (3 × 4) = 13 sts used.
Fasten off and leave a 10 in (25.4 cm) tail. Each fin is a fan shape about 2.75 in (7.0 cm) wide × 2 in (5.1 cm) tall, with the ring end forming the narrow base.
Tail
With cream (B). The tail is worked around both sides of a foundation chain. This makes two leaf-shaped lobes that meet at a pinched center.
Foundation: ch 19.
Round 1: Working along one side of the chain and starting in the 2nd ch from hook: sl st, sc, hdc, dc, tr, dc, hdc, sc, sl st (first lobe), then sl st, sc, hdc, dc, tr, dc, hdc, sc, sl st (second lobe). That is 18 sts. Ch 1, rotate, and work along the underside of the foundation chain with the same 18-st sequence. Ch 1 and join with sl st to the first sl st. (36 sts + 2 ch-1 end spaces)
Round 2 (ridged outline): ch 1, working in BLO, sc in each st around, with 3 sc in each ch-1 end space. Join. (36 + 6 = 42 sc)
Fasten off and leave a 12 in (30.5 cm) tail. The tail measures about 5 in (12.7 cm) long × 1.75 in (4.4 cm) at its widest. The two lobe tips are at the ends, and the pinched center is where the sl sts meet.
Eyes (Make 2)
With dark brown (C):
Round 1: MR, ch 1, 6 sc in ring. (6)
Round 2: working in BLO, inc in each st around. (12)
Join, fasten off and leave an 8 in (20.3 cm) tail. Each eye is about 0.75 in (1.9 cm) across, and the BLO round gives the ringed button look.
Border
The border closes the bottom edge of the mesh into a firm, neat opening for pulling bags out.
Border gauge: same as the head, 15 sc = 4 in (10.2 cm). Two sc rounds = 0.5 in (1.3 cm).
Continue with light aqua (A) from Round 27.
Border Round 1 (conversion): ch 1, 2 sc around the joining hdc (gap), 2 sc in next V-sp, 2 sc in next gap; repeat from * 10 more times, 2 sc in last V-sp. Join.
Count: (12 gaps × 2 sc) + (12 V-sps × 2 sc) = 24 + 24 = 48 sc. That is 24 sc per flattened side.
Border Round 2: ch 1, sc in each st around. (48; 24 per side)
Border Round 3: sl st loosely in each st around. (48; 24 per side)
Fasten off and weave in the end.
Why the math works: The mesh was set up from 48 sts at 4 sts per repeat, so 12 repeats return exactly 4 sc each (2 per V-sp + 2 per gap). That gives 48 sts, the same count as the head. At 15 sc per 4 in, 24 sc per side = 6.4 in (16.3 cm), so the opening matches the head width. The tube has no corners, so there are no corner stitches to add.
Assembly
Lay the body flat with the stitch markers at the side folds. Choose the side without the join as the front.
- Eyes: On the front, center the eyes between Rounds 9 and 11, with 8 sts between their centers. That is about 2.1 in (5.3 cm) apart. Sew around the outer edge of each eye.
- Strap: Overlap each strap end 0.75 in (1.9 cm) onto a side fold over Rounds 7–10. Sew through all layers with a box shape. The loop rises about 5.9 in (15.0 cm) above the head.
- Fins: Place one fin at each side fold over mesh Rounds 14–17. The narrow ring end should sit against the body, and the scallop edge should point outward and slightly up. Sew the base and the first 0.5 in (1.3 cm) of the lower straight edge, anchoring into the dc posts. Each fin extends about 1.5 in (3.8 cm) beyond the body.
- Tail: Fold the tail slightly at its pinched center so the lobes angle downward into a shallow V. Pin the center to the back of the border over the middle 8 sts of the back side. Sew across those 8 sts through Border Rounds 1–2. The lobes hang about 1.75 in (4.4 cm) below the rim, and bags pull out in front of the tail.
Weave in all ends and hide them inside the solid areas.
Final Blocking
- Lightly mist the body with water until it is damp, not soaked.
- Slide a rolled towel or a cardboard tube about 4 in (10.2 cm) across inside the body to open out the mesh evenly.
- Gently tug the mesh lengthwise until the body measures 12.5 in (31.8 cm). Check that the width is 6.4 in (16.3 cm) when flattened.
- Pin the fins flat on a towel and open out each scallop.
- Pin the tail lobes into their curved crescent shape.
- Let everything dry completely, about 12–24 hours, before hanging.
Final Quality-Control Checklist
- Head dome is round and smooth, with no ripples.
- Every mesh round has exactly 12 V-sts.
- The V-sts are staggered, not stacked in straight columns.
- Border Round 1 has 48 sc (24 per side).
- Body is 6.4 in (16.3 cm) wide × 12.5 in (31.8 cm) tall.
- Eyes are level and the same height.
- Fins sit at the same height on both sides.
- Strap ends are secure and the loop hangs centered.
- Tail is centered on the back rim with even lobes.
- All ends are woven in and hidden.
Troubleshooting
Head ruffles at Round 8: Your tension is loose. Go down a hook size and work Rounds 1–8 again.
Head cups too early: Your tension is tight. Go up a hook size.
Mesh flares wider than the head: Use a hook 0.5 mm smaller for Rounds 13–27, or work ch 1 instead of ch 2 in the gaps.
Mesh is narrower than the head: Work the gaps with slightly looser chains, or go up 0.5 mm for the mesh only.
V-sts stack instead of staggering: Make sure each new V-st goes into a gap, not a V-sp. Also start every round around the post of the joining hdc.
Border pulls in: Work Border Round 3 more loosely, or replace it with a second plain sc round.
Holder droops when full: Use cotton, not acrylic, and avoid overfilling. About 15–20 bags is plenty.
Care
Hand wash in cool water with mild soap, press out the water in a towel, and lay flat to dry in shape. Don’t tumble dry, because heat can shrink cotton and distort the mesh.
Final Notes
The whole fish depends on one number: 48 stitches. The head grows from 6 to 48 sts by Round 8 and measures 4 in (10.2 cm) across. The mesh splits those 48 sts into 12 V-st repeats over 15 rounds and reaches 12 in (30.5 cm). The border converts them back into exactly 48 sc, keeping the body 6.4 in (16.3 cm) wide and bringing it to 12.5 in (31.8 cm). If you check your gauge at the head, everything after it follows.
Happy crocheting!